|
A1-H Skyraider
by
Rolando Raffaut
|
 |
|
Tornado GR.4 |

HyperScale is proudly supported by
Squadron.com
My first Internet model posting is my latest labour
of love, Tamiya’s 1/48 A-1H Skyraider with Cutting Edge wingfold
conversion, as well as numerous refinements and addititions.
I began this project 5 years ago as a “quickbuild”
after suffering a bout of AMS from a previous project. Thinking that
since it was a Tamiya kit, I’d have it together in no time at all,well……lets
just say the road to hell is paved with good intentions!!
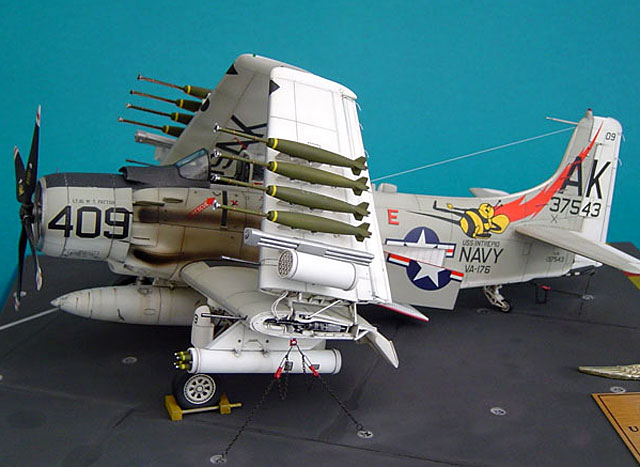
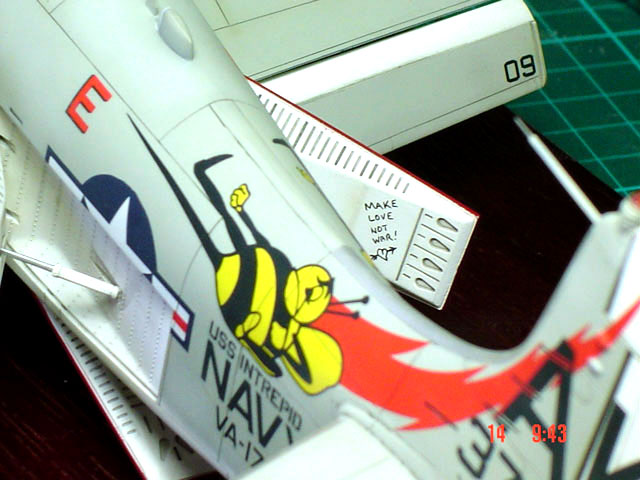
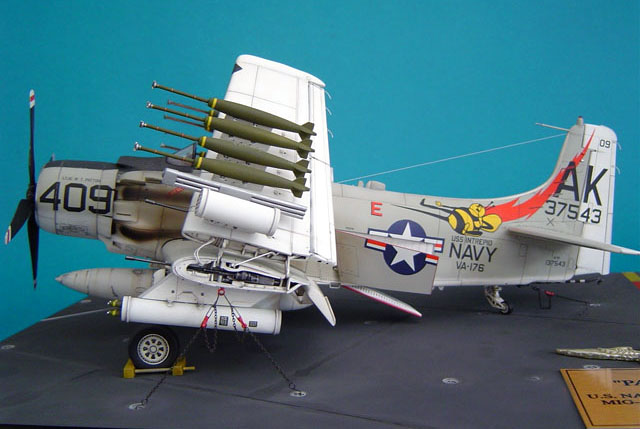
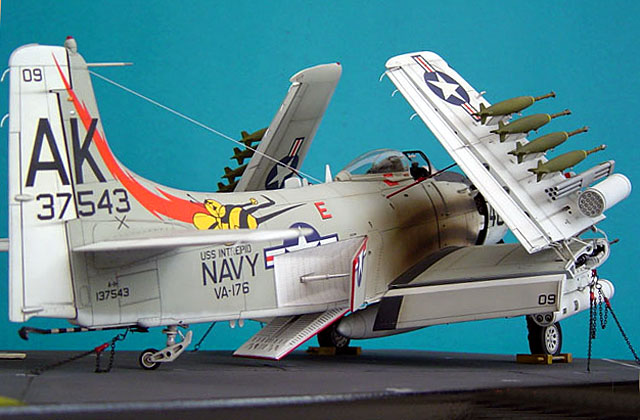
I knew that I wanted to depict the kit on a carrier deck with the wings
folded, and the aircraft chocked and tied down and using those great
VA-176 bumblebee markings. For those not familiar with these markings,
the kit depicts one of only a few Spads that engaged and successfully
shot down North Vietnamese Migs during the Vietnam war. The callsign for
this particular aircraft was “Papoose 09”.
So on to the kit.
I began by cutting the kit’s wings apart and was
well into scratchbuilding the wing fold details when I came across
Cutting edge’s resin conversion and nabbed it, consigning my own efforts
to the spares box.
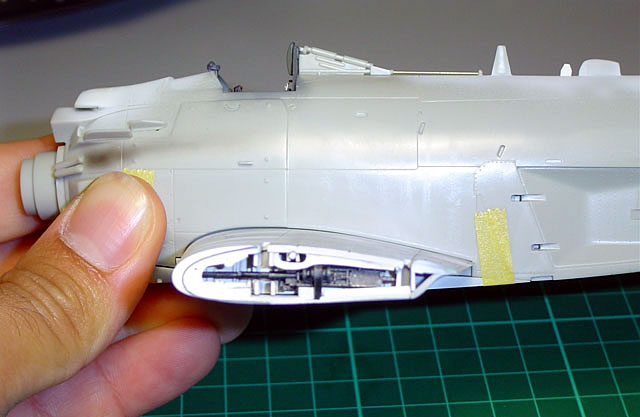
I modified the resin wings by grinding the ailerons off and cutting the
plastic ailerons off the kit’s wings which I added to the resin ones in
a drooped attitude via delicate scratchbuilt hinges.
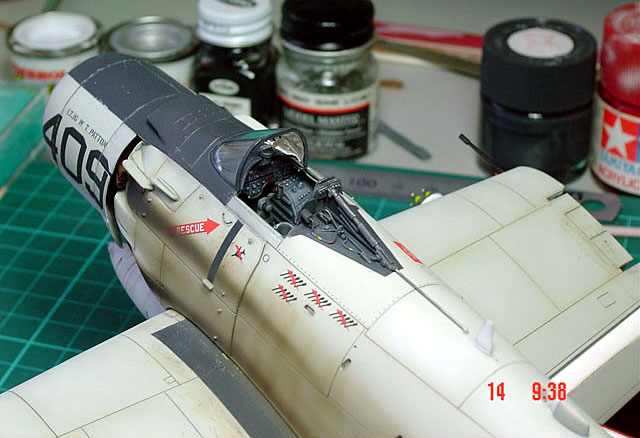
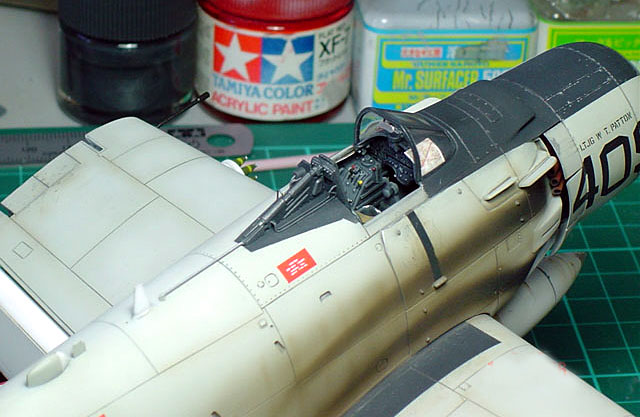
I then began construction of the kit via the normal
way, i.e starting with the cockpit. This was used from the kit, save for
a few minor mods: I shaved off the “lumps” on the L/H console and added
my own throttle, prop condition, mixture and boost levers made from
scrap brass and stretched sprue. Lead foil seatbelts were adorned with
P/E buckles as well as adding a canteen and its mounting bracket to the
right of the pilot’s seat. I puched the kit instruments from the decal
sheet and added them to the instrument panel. The area behind the
pilot’s headrest was “busied up” by adding details from copper wire and
styrene bits and pieces. I painted the cockpit in oils, which was a
first for me. A Verlinden map was added to the coaming under the
windscreen and the kits gunsight was modified by adding a disc from
punched clear styrene for the combiner glass, and a P/E mirror added to
the windscreen frame.
The canopy had handles added either
side of the frame from brass rod.
Next I moved onto the engine which was
detailed by adding copper wire from the magneto’s to the individual
cylinders.
Other engine additions included adding
P/E mesh to the intake below the engine, drilling out the exhausts and
adding a cowl position indicator from brass rod, the engine vent pipe
was removed from under the cowl and a stainless steel one from syringe
tubing added, then grinding it to the right elliptical shape.
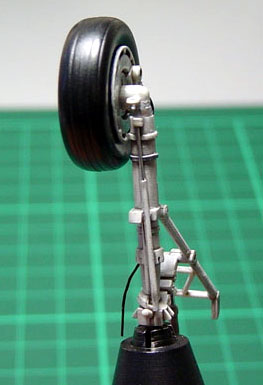 The
main undercarriage was detailed by adding telescoping steel tubing to
the front of the oleos as well as a tie down eye bolt from Grandt Line
and brake lines from copper wire. I like to reinforce my models as I
build them to stop breakages so I drilled and inserted brass rod down
the oleos and the axles for the wheels. The
main undercarriage was detailed by adding telescoping steel tubing to
the front of the oleos as well as a tie down eye bolt from Grandt Line
and brake lines from copper wire. I like to reinforce my models as I
build them to stop breakages so I drilled and inserted brass rod down
the oleos and the axles for the wheels.
The tail was cut and repositioned to give a more candid appearance as
well as having a brass rod brace added. I detailed the wheel well
interiors with sheet brass,copper wire and styrene bits but since the
kit is mounted on a base this was a wasted exercise,….oh well!!.
For the fuselage I added static dischargers to the ailerons, rudder and
elevators from brass rod curled to simulate droop and added brass rod
boarding steps either side of the ventral airbrake. The arrestor hook
also had molded on detail removed and replaced with brass rod. The wing
guns and pitot tube were replaced with telescoping stainless steel and
brass tube from Minimecca. I had Eduard’s original P/E set for this kit
but didn’t use any of it as I thought I’d add my own scratchbuilt
details.
Moving to the weapons, I wanted to depict a “bombed up” Spad so I raided
Hasegawa’s weapons set for the ordnance. For the Zuni pods I drilled out
the little bumps which were Hasegawa’s attempt at representing rockets
and added my own made from 72nd scale Hellfire missiles reprofiled to
fit the pods, I added tiny fuses to the tips by adding slices of
stretched sprue.
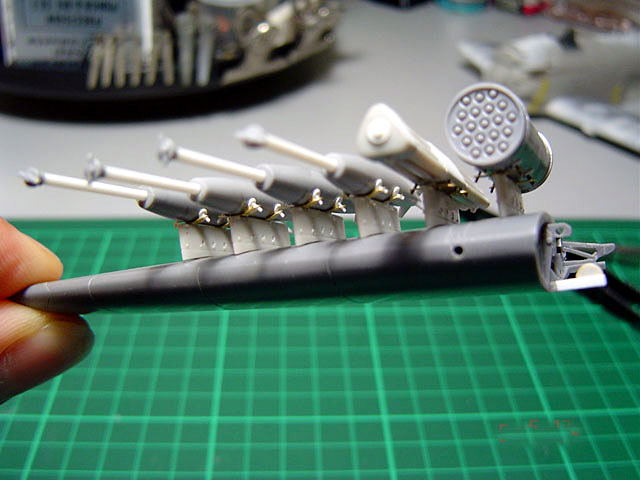
The bombs had the fuses removed and
Daisy Cutter extensions added from Evergreen styrene rod before
refitting the fuses to the ends of the extensions. Copper wire was added
for the arming wires. The sub-munition dispensers had their electrical
wires and canon plugs added also from copper wire and styrene, which are
barely visible when painted. I added all the sway braces to the
pylons,these were made from the True Details P/E set as well as my own
punched styrene discs. Again I pinned all the stores with brass rod to
prevent inadvertent weapons releases!
Painting,
Markings and Weathering
|
By now all the sub-assemblies were complete and
painted so it was time to paint the model itself.
I preshaded with Tamiya Black and used Humbrol
super enamel airframe white for the undersides and model Master Gull
Grey for the rest. Panel lines were picked out with Tamiya Smoke heavily
thinned as well as a 2B pencil. Then I faded some of the upper wing and
fuselage panels with lightened Gull Grey. I mixed Tamiya Smoke and
Tamiya Red Brown and lightly post shaded some of the engine panel lines
as well as some of the wing /fuselage panels that would see more
scuffing and maintenance. The wing gun panels were scuffed up more as
well as adding tiny drops and smears from the grungy brown mix,
unfortunately with the wings folded this can barely be seen……DOH!!.
The exhaust stains were sprayed the same dirty
brown colour. I used a black colour pencil to simulate the pilot/crew
boot scuff marks.
The overly thick kit decals were used by firstly
applying a pool of Future where the decals would go, then adding the
decal and then adding Gunze Mr Mark Softer which successfully snuggled
the decals down, when dry I generously oversprayed with a couple of
coates of Future and when that was dry I hit it with a shot of Testors
Dullcoate from a bottle over a decade old!.
I tried to add some small “human” touches to the model, I recalled my
days back in the RAAF as an aircraft engineer when at the completion of
a servicing we would add our own graffiti to the aircraft in not so
obvious places, so armed with a micron pen I added some little touches
to the speed-brake and undercarriage wells.
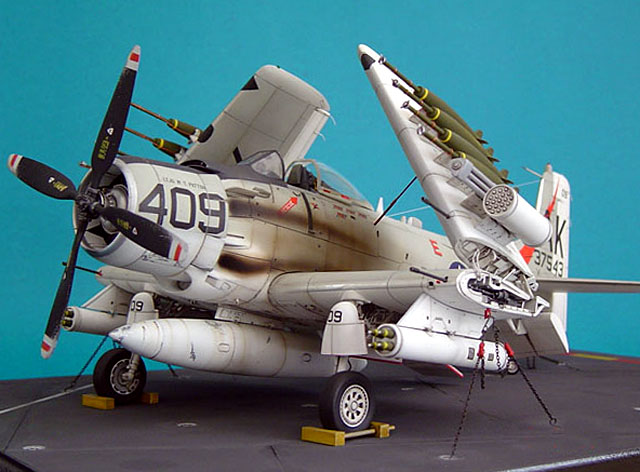
I experimented and developed a technique to depict
the chipped and eroded paint on the prop tips. I’m not overly satisfied
with using a silver Prismacolour pencil alone for this as I feel it
doesn’t do a realistic job in my opinion. So I sprayed the props and
other high-wear areas with Floquil bright silver as this laquer based
paint eats into the plastic, next apply whatever colour needs to go over
the top. For the prop blades I used a well worn, fine grade Flexi-File
strip and gently dragged it across the surface until it removed the
paint and exposed the silver in a nicely feathered edge exactly the same
way the airflow does, the tiny chips and scratches were achieved by
taking a syringe needle and grinding it even piontier with a Dremel
tool, then using it to actually scrape and pick away at the paint, this
leaves perfectly “In scale” scratches that little silver blobs of paint
just can’t do.
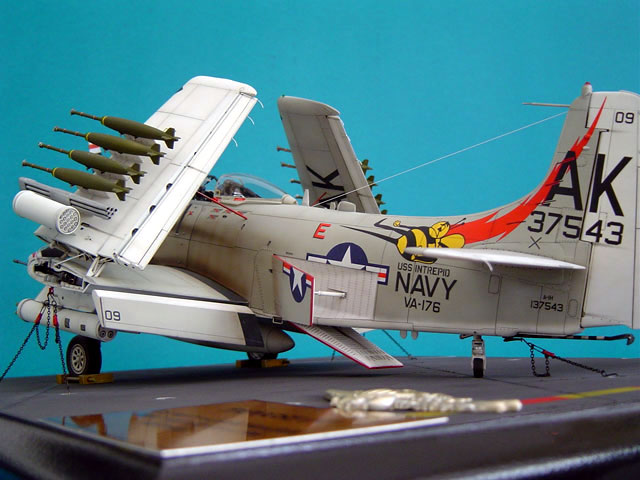
Lastly came the fitting of the folded wings. In
order to get the angle right I measured the wing fold angle from
Squadron’s Skyraider Walkaround. There a couple of sets of drawings in
the book so I used a protractor, then I cut wedges from stiff cardboard
corresponding to those angles and lay them on the wing, I delicately
placed the folded wing portion against these cardboard templates and
after much tweaking and cussing ( I think I invented my own language!!)
I flooded the joints with super glue. I used my airbrush to gently blow
the super glue into all the nooks and crannies of the wing fold to
ensure a good bond. After it had cured I delicately removed the wing
templates and low and behold I had folded wings!, then I took a couple
of aspirin and lay down for a week….WHEW!. Now with solid resin wings
and a full ordnance load the model was painfully fragile so I braced the
wings with struts made from telescoping stainless steel tubing, once
fitted and glued they made the whole assembly quite robust.
Now I needed a base to display the model on so I went to a local trophy
shop and had one made from MDF, as well as a little plaque to go with
it. The much coveted Naval Aviator wings were cast from an original set
and I made resin copies. The carrier deck was made from a sheet of wet &
dry paper with panel lines carved into it with a razor saw, effectively
blunting it in the process!, The tie downs are P/E from Toms Model
Works. Their places were marked and drilled and then glued in with Super
Glue.
I arranged all deck stripes and panel lines so as
to be asymmetric to the base and the model. The model was mounted to the
base with brass pins and I made a set of chocks from Evergreen square
and rod stock. Lastly the tie downs were made from model railway chain
and the ratchet mechanisms from styrene, the hooks themselves from bent
brass rod.
So there you have it, a Skyraider in 5 years!,( OK I was actually
overseas for 3 of them). Anyway modeling’s supposed to be fun right?,
that’s what my therapist keeps telling me!
Click on the thumbnails
below to view larger images:
Model, Images and Text Copyright ©
2003 by Rolando Raffaut
Page Created 09 December, 2003
Last Updated 17 March, 2004
Back to HyperScale
Main Page
|
 Home |
What's New |
Features |
Gallery |
Reviews |
Reference |
Forum |
Search
Home |
What's New |
Features |
Gallery |
Reviews |
Reference |
Forum |
Search