|
A6M2b Zero Type 21
by Roger Fabrocini
|
|
|
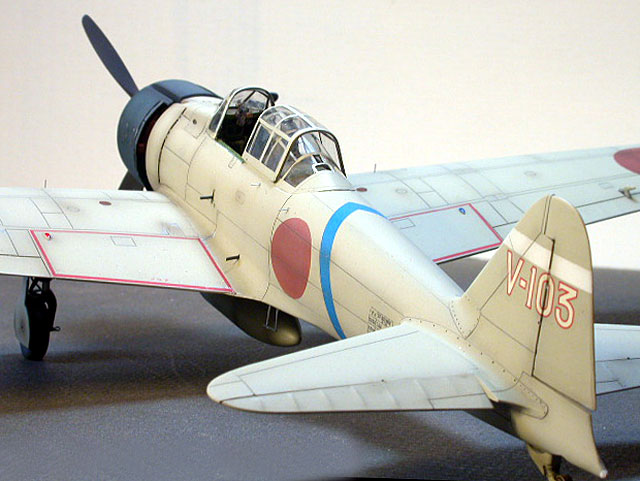
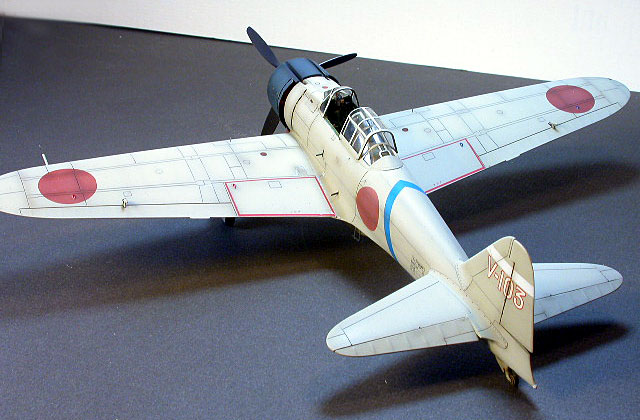
Mitsubishi A6M2b Zero
Type 21 |

Hasegawa's
1/48 A6M2 Zero Type 21 is available online from
Squadron.com
On 7 August, 1942 PO1c Sakai Saburo, with the
Tainan Air Group from Rabaul, while flying escort for 27 Type 1 land
attack aircraft (BETTY) engaged in an 'epic' air-battle with Lt. James
J."Pug" Southerland of VF-5. Having already modeled "Pug's" F4F-4 Wildcat
I decided to turn my attention to the other protagonist's aircraft,
Sakai's a6m2b type O, model 21 carrier fighter.
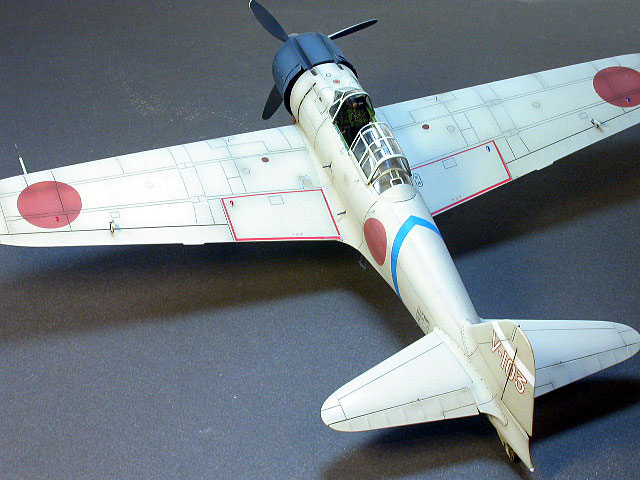
I used Hasegawa's 1/48 kit #jT131, 'Tainan
Flying Group' which conveniently included markings for Sakai's Zero as
well as markings to replicate most of the aircraft for the 'Tainan' Group.
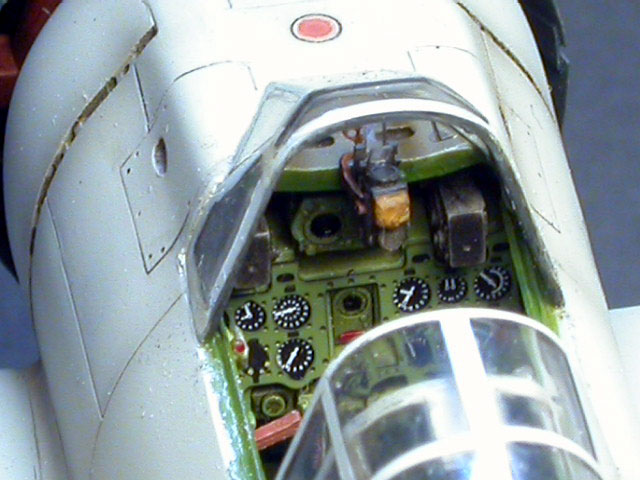
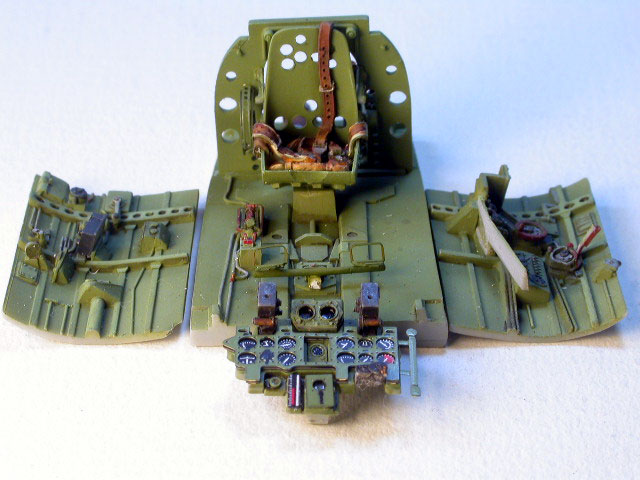
I am an unabashed after-market accessory 'junkie' and have bought most
resin and photo-etched sets for this project. Of the three or four resin
cockpits I chose the Cutting Edge resin cockpit set #ce48361, the fit and
detail being far superior to all others.
The following detail sets, whole or in part,
were used in this project.
-
Verlinden Productions #1289 a6m2b type 21
ZERO Detail set
-
Eduard #48-306 Zero type 21 photo-etched
detail set
-
Eduard #FE218 a6m3 colored 'zoom' detail set
-
Tally-Ho! #P48-014 IJAAF Hinomaru masks
As expected the Hasegawa kit went together
without a hitch.
Cutting Edges' resin cockpit fit with a
minimum of fuss.
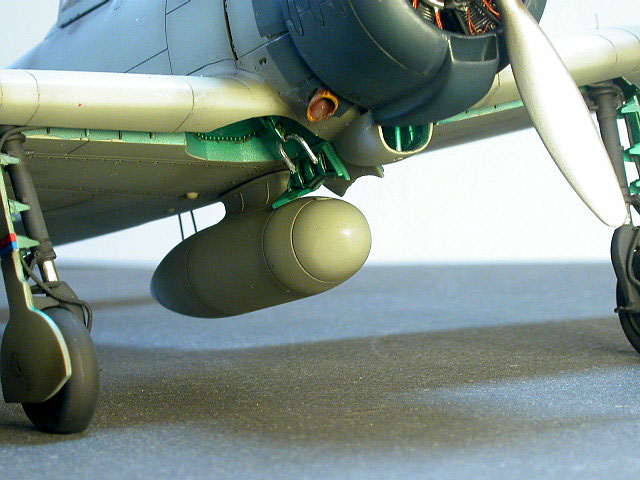
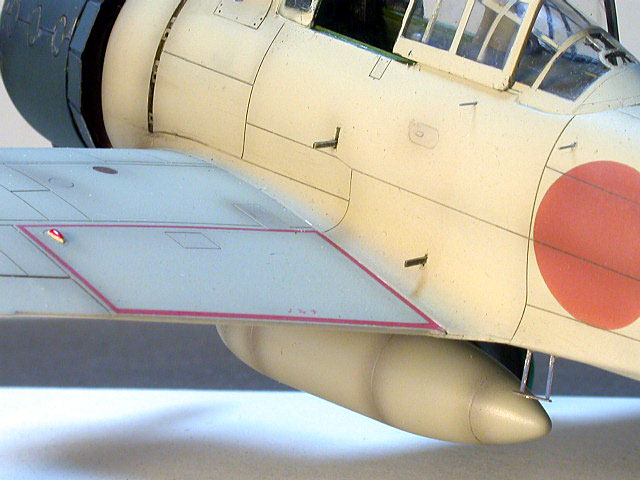
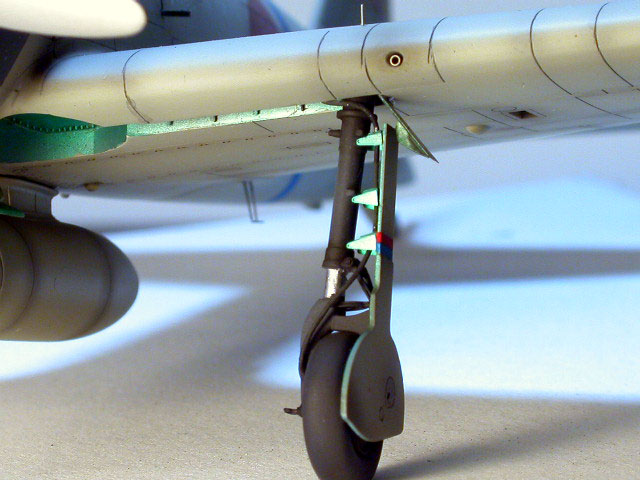
Eduard's photo etched parts added greatly to
the intricate complexity of the landing gear and their accompanying
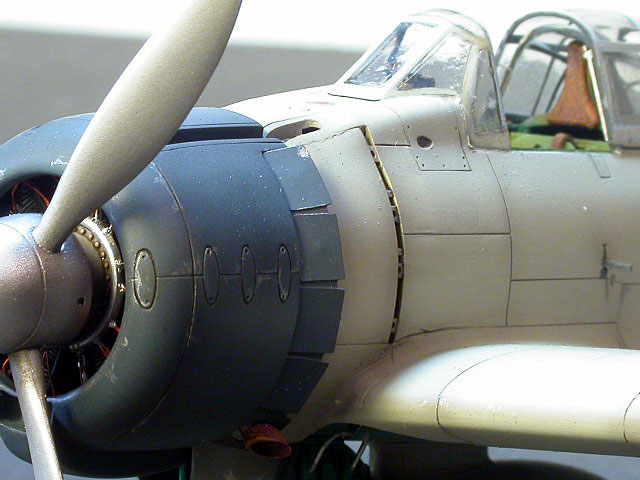
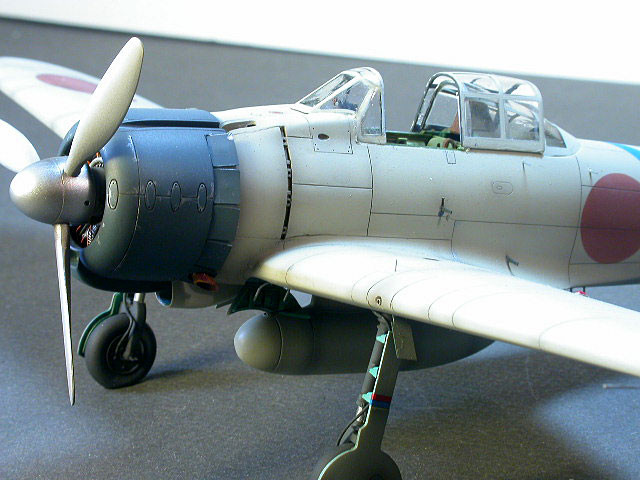
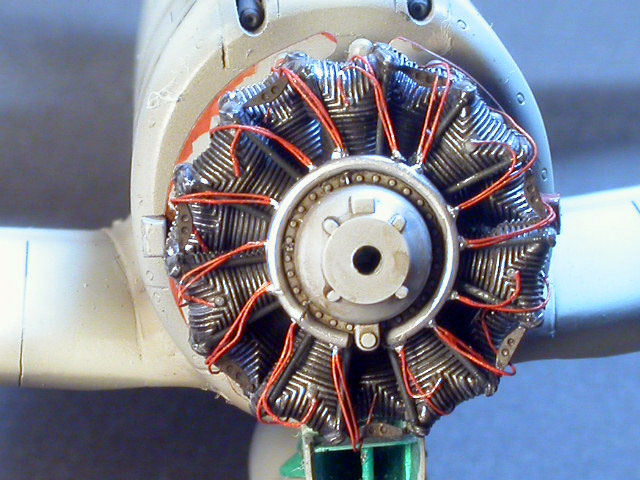
covers. Lead wire was used for the brake lines, fuse wire for the engine
ignition leads, hypodermic needles for the wing mounted 20mm cannon and
pitot tube base. The engine cowling was detailed with the Verlinden set
flaps and exhaust stubs. Bits of plastic rod and stock was used for the
ZERO'S boarding aids and gear indicators.
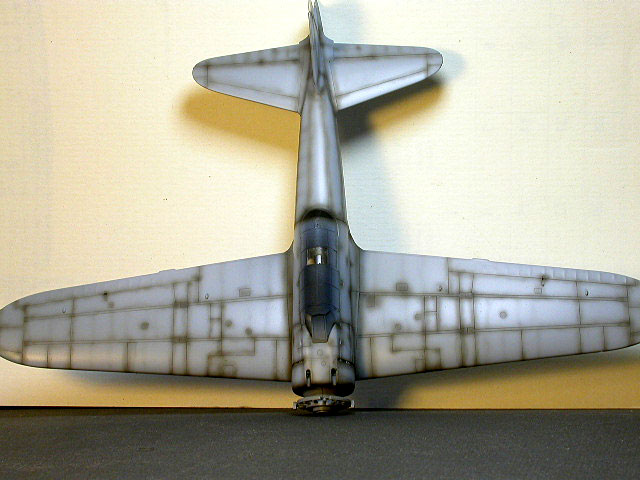
I remember reading the famous aviation artist
Keith Ferris describe painting the cover for Sakai's book SAMURAI! saying
that he wanted to replicate the structure of the Zero then paint over it
to impact the feel of the aircraft, it's very thin skin and light, but
strong structure. I thought I would adopt this approach in my rendition.
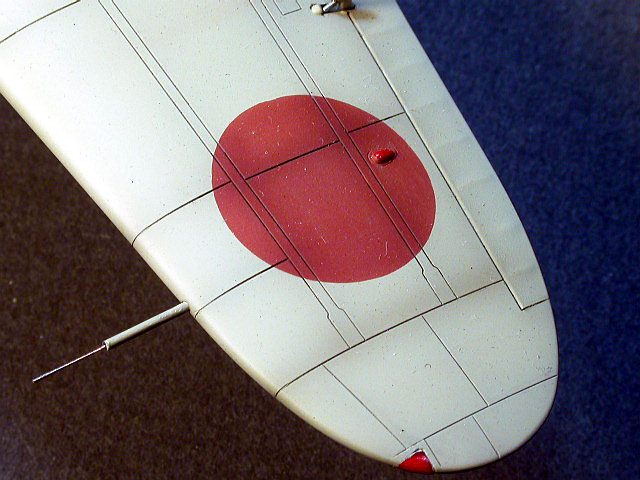
After priming the airframe with 'Mr.
Surfacer' 1000, I pre shaded with a brown-black mix, not only following
the panel lines, but also painting in ribs and spars.
My color coat is then applied in a very thin
mix first over the pre shading then moving into the panel interiors. The
very thin mix allows me to slowly add color and still let the pre shading
show through. Successive color coats are applied using lighter and thinner
paint working into the panel interior. I find it very important to keep
the paint very thin or a distinct separation will be detectable between
the color coats making the effect look unnatural.
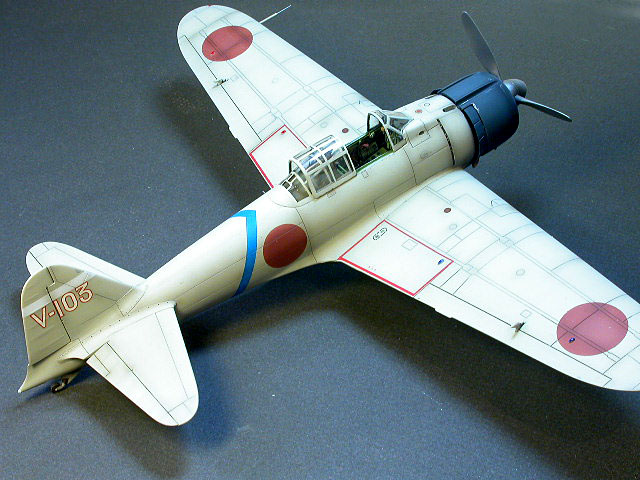
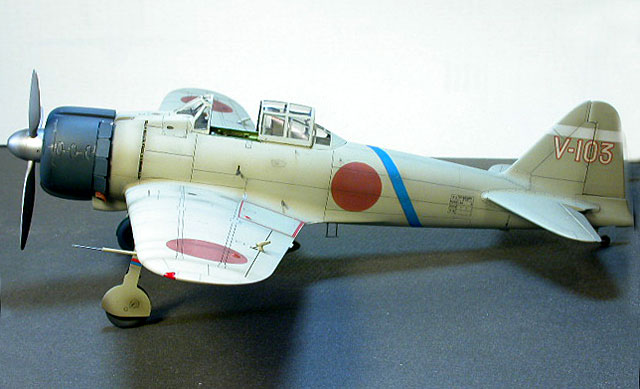
A Note on Color
Japanese aircraft color deciphering is a real
quagmire, as Stuart Hurley pointed out in his superb Rufe article.
Researching all the sites and articles I fell upon using FS#16350 as the
color for Sakai's ZERO.
I mixed Gunze paints 50% Hemp, 50% JIN Grey
and one drop of rlm #81 brown- violet. To further enhance the "carmel"
color I was seeking I used Floquil Hi-Gloss for my gloss coats. It has a
distinct brown tint in the bottle. Hinomarus were painted on using a mix
of Vallejo mahogany brown/black red/red leather.
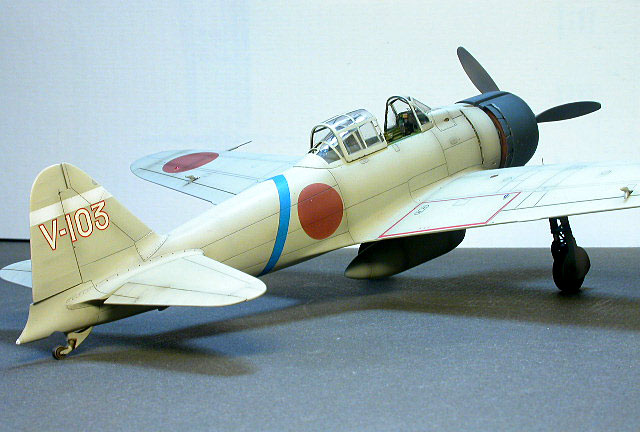
Engine cowling is Mr. Color Lacquer #125
"cowling Color". Polly-S thinner works great with Vallejo acrylics. Final
flat coat is 'Poly-S' flat. I've been lucky lately (maybe blessed?) and
have had no problems mixing layers of acrylics and lacquers together.
Decals
Kit decals were used for tail number,
fuselage strip, flap warning strips and data. they worked very well with
Mr. Mark Softener.
We all build for very personal and diverse
reasons. This build brought together many of my inspirations, brilliant
pilot, favorite time and place in the history of the second world war,
epic confrontation between two seasoned professionals and in my opinion,
one of the worlds most beautiful aircraft.
Thank you all for your help on the forum and
taking the time to read this article.
Click the
thumbnails below to view larger images:
Model, Images and Text Copyright © 2003
by Roger Fabrocini
Page Created 29 August, 2003
Last Updated
17 March, 2004
Back to
HyperScale Main Page |
 Home |
What's New |
Features |
Gallery |
Reviews |
Reference |
Forum |
Search
Home |
What's New |
Features |
Gallery |
Reviews |
Reference |
Forum |
Search