|
Mitsubishi A6M2 Zero
by Tom Baldwin
|
 |
|
Mitsubishi A6M2 |

Hasegawa's
1/48 scale A6M2 Zero is available online from
Squadron
June 6, 1942. Halfway across the ocean, the “turning
point in the Pacific” has reached its pivotal ebb. Four Japanese carriers
are sinking, the pride of the fleet in ruins
On this particular day however, another battle is being fought, this one
in the colder climes of the American northwest, in Alaska. A flight of
Zeros takes off from the carrier
Ruyjo, its mission, to escort B5N “Kates” on a bombing run. At the
controls of one of the Zeros is 19 yr old NAP 1C Koga, Tadayoshi, in
aircraft marked DI-108.
Coming off a strafing run, Koga’s Zero is hit in a oil cooler line, and
begins a powered down descent. Finding a suitable spot to put his crippled
fighter down, Koga makes the mistake of landing in a marshy bog, with his
landing gear digging in on landing, flipping the fighter on its back,
killing its young occupant, and setting into motion the single greatest
windfall of technical information to date on the much feared “Zeke”.
The subsequent retrieval and restoration of the Koga Zero helped define
American tactics against the Zero in future combat. It was “lost” again in
an accident, this time with an American pilot at the controls. I recommend
the book “Koga’s Zero” to anyone interested in the story.
The basis of the kit is Hasegawa’s series of 48th
scale Zero’s. The kit features recessed panel lines, a decent out of the
box cockpit, a nicely represented Sakae 12 engine (although later molds
are beginning to show some signs of age, I had to rummage through a couple
of kits to secure the engine pieces, some of the cylinders were badly
misaligned) and overall accurate dimensions, a good starting point for my
first “real” attempt at scratch building.
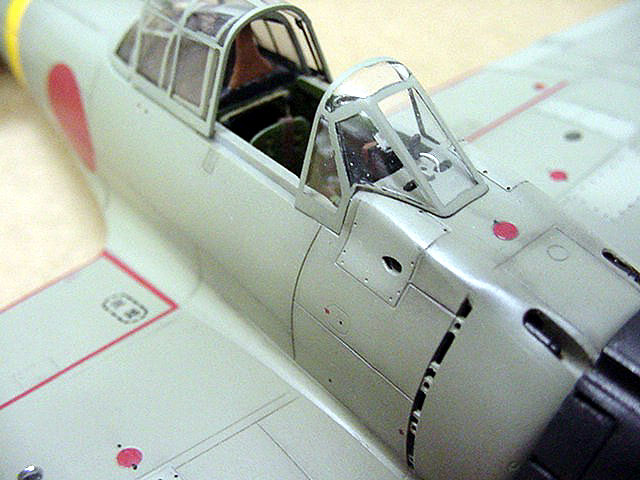
Cockpit
I started in the cockpit, with the excellent Hawkeye
Designs A6M interior set. The set is intended for A6M3 variants, but the
differences between the A6M2 and 3 models are slight, and no major
modifications to the set are needed.
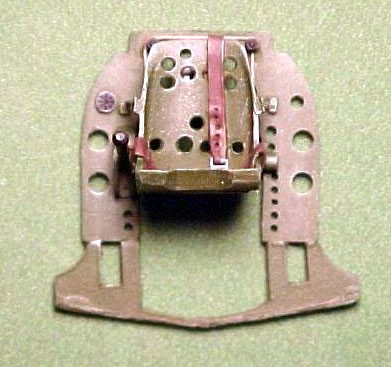
First was the cockpit “floor” which is actually the
top of the wing. I cut the Hawkeye floor in half, at the recessed area for
the rear bulkhead. I added the rudder and elevator bell crank assembly at
the rear of the floor, using sheet styrene and some pieces from the spares
box. I added a voltage regulator, and some various boxes with lead solder
hyd lines.
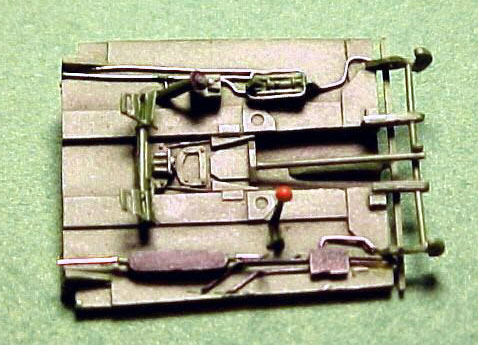
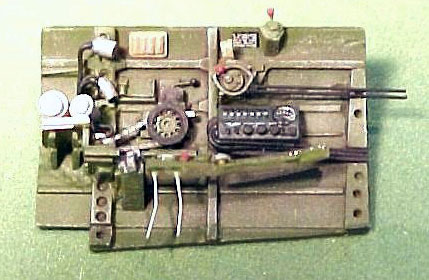 Next
was the cockpit sidewalls. On the original, the cockpit “floor’ actually
slants down towards the rear. To simulate this, I added 1mm shims to the
cockpit sidewalls, to give the impression of the floor/wing top slant. The
left sidewall received scratch built Dyanmotor assemblies (to provide
power for the radio receiver transmitter on the opposite side), I removed
the molded on trim wheel and chain and added pieces from an Eduard set,
and added the various linkages from the throttle quadrant to the firewall.
I added the throttle lever from a piece of a toothpick (to simulate its
wooden predecessor). The instrument panel is from the kit piece, with kit
decals with epoxy faces. The right side cockpit features a scratch built
radio/receiver transmitter, cockpit vent tube from solder, and all the
flap and landing gear hyds plumbed in (see photos). The rear bulkhead was
extended to the floor of the fuselage, and the seat elevation mechanism
was added from pieces from an Eduard set again, with a Cutting Edge Zero
seat. Next
was the cockpit sidewalls. On the original, the cockpit “floor’ actually
slants down towards the rear. To simulate this, I added 1mm shims to the
cockpit sidewalls, to give the impression of the floor/wing top slant. The
left sidewall received scratch built Dyanmotor assemblies (to provide
power for the radio receiver transmitter on the opposite side), I removed
the molded on trim wheel and chain and added pieces from an Eduard set,
and added the various linkages from the throttle quadrant to the firewall.
I added the throttle lever from a piece of a toothpick (to simulate its
wooden predecessor). The instrument panel is from the kit piece, with kit
decals with epoxy faces. The right side cockpit features a scratch built
radio/receiver transmitter, cockpit vent tube from solder, and all the
flap and landing gear hyds plumbed in (see photos). The rear bulkhead was
extended to the floor of the fuselage, and the seat elevation mechanism
was added from pieces from an Eduard set again, with a Cutting Edge Zero
seat.
The cockpit interior was painted with MM Field Green with a drop or two of
MM Flat Black, lightly drybrushed and weathered with pastel chalk. Total
building time on the cockpit took about 3 months (I’m slow).
Click the
thumbnails below to view larger images:
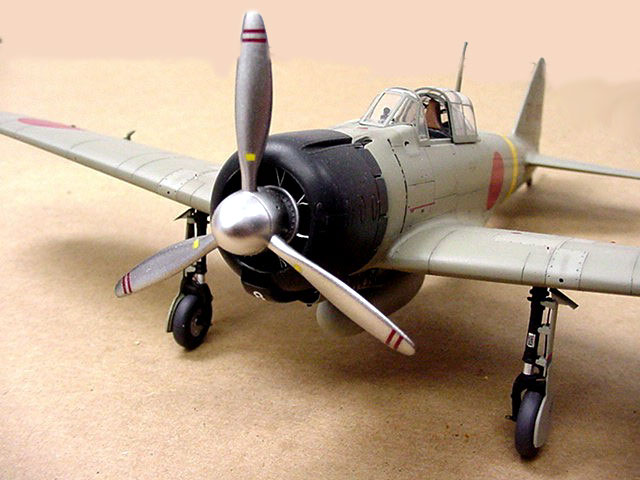
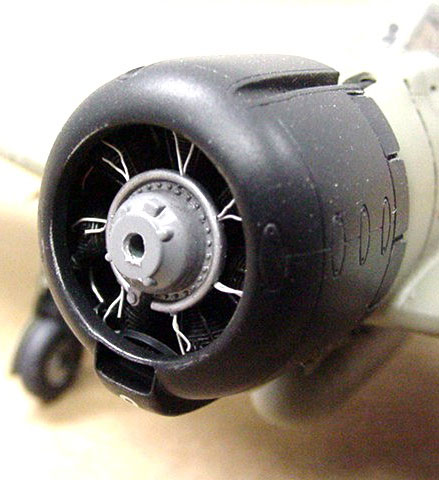 Engine
and Fuselage Engine
and Fuselage
The engine vent louvers on the fuselage sides were
thinned out and opened, I added an oil tank from sandwiched sheet plastic
to the engine firewall, which was made again from styrene, along with
engine bearing struts (all of which is invisible when the fuselage was
assembled).
The engine received scale push rod assemblies,
ignition wiring added to the ignition ring and cylinders, and I also
scratch built the cowling mount ring (again, invisible in the cowling).
The engine was painted in Floquil Weathered Black, with gloss black push
rods and a medium gray case.
The kit fuselage is shared with its Rufe cousin, and a small mold line
exists at the rear of the fuselage, just forward of the vertical stab. A
couple of quick passes with a sanding stick took care of the problem.
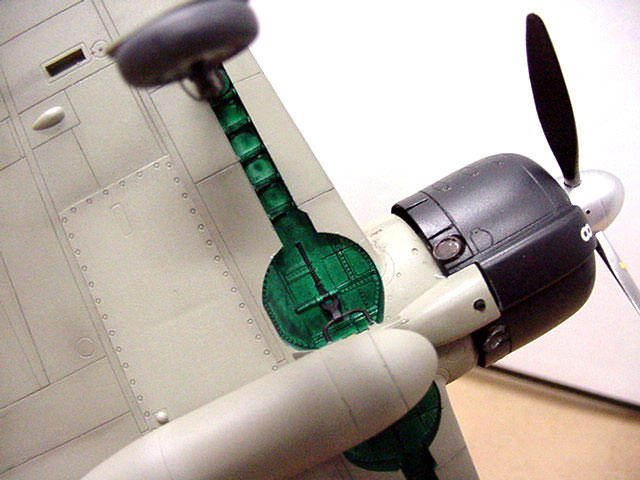
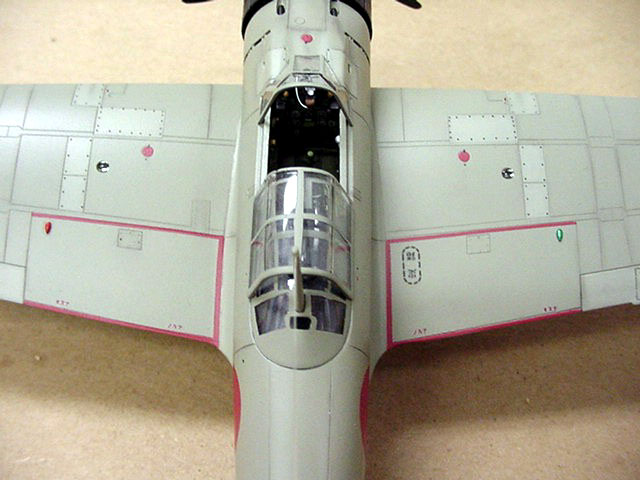
Wings
The wings were assembled per kit
instructions; I do however attach the top portion of the wings to the
fuselage first, to ensure no gaps. I added the fresh air vent on the
starboard wing, and detailed the wheel wells with PE pieces from the
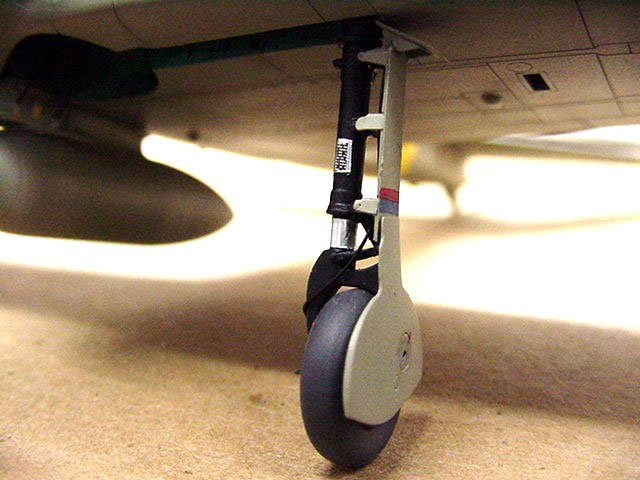
Eduard set again. The kit landing gear struts were used, but I modified
the landing gear doors. On the original, the upper and lower doors are
separate units, I used sheet styrene to fabricate the upper assembly,
again with Eduard PE for the attachment lugs, and thinned the lower assy
and added to the gear legs. The blue/red weight indicator marking was
painted on at this time, wire brake lines added at the end.
The rest of the kit was assembled per
instructions.
There has been much debate on the latest color
schemes of early Zero’s. I recommend anyone interested go over to j-aircraft.com
and look at the various research articles on finishes.
 The basic overall color of my Zero is a 50/50 mix of Floquil Enamel
Concrete and Aeromaster RLM02. The wheel wells were painted in Old Silver
first, followed by a Clear Green/Blue mix. Notice that the landing gear
doors are also the fuselage color, Mitsubishi made Zeros had this feature,
while later Nakajima built Zeros had Aotake applied to the gear doors as
well as the wheel bays. The basic overall color of my Zero is a 50/50 mix of Floquil Enamel
Concrete and Aeromaster RLM02. The wheel wells were painted in Old Silver
first, followed by a Clear Green/Blue mix. Notice that the landing gear
doors are also the fuselage color, Mitsubishi made Zeros had this feature,
while later Nakajima built Zeros had Aotake applied to the gear doors as
well as the wheel bays.
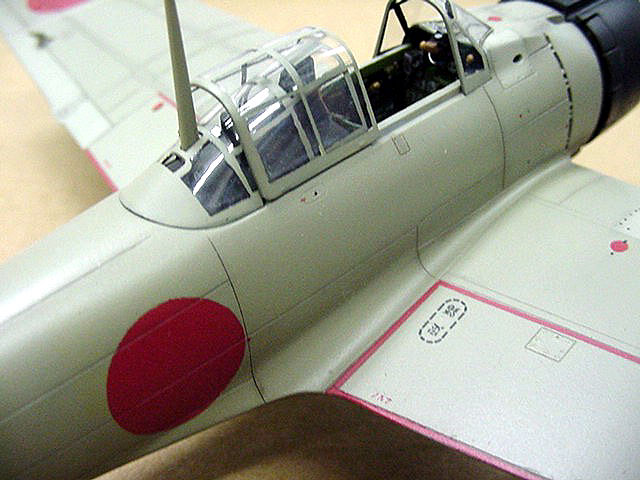
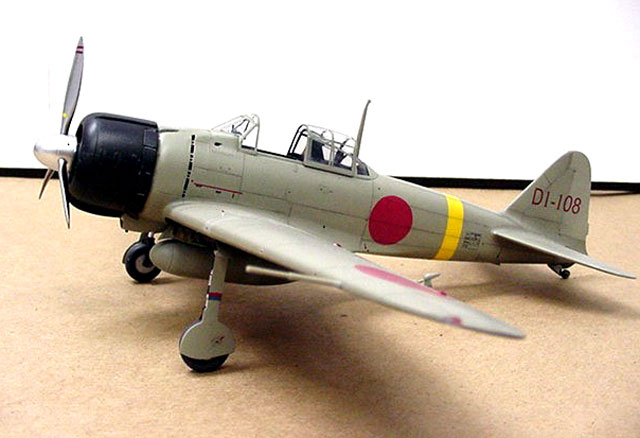
The wing and fuselage Hinomaru’s were painted using Eduard masks, wing
walks were also painted and masked, and the yellow tail band was
airbrushed also. A coat of Polly Scale Clear Gloss followed.
The tail codes were provided by Dave Pluth, the fuselage CG markings and
the aileron balance markings were provided by Mike Grant decals. They all
worked out great, and I highly recommend Mike’s decals.
Weathering is pastel chalk, applied with a fine paintbrush, with the
excess removed immediately. A coat of Polly Scale clear flat finished
everything off.
I would like to thank Greg Springer who continually
provides me with info I seem to miss, Ryan Toews who provided an absolute
treasure trove of Zero stenciling data as well as painting info, John
Greiner for taking the photos of the finished product, and last but never
least, Josh Bowling and Scott Brown for having to endure all my neurosis’
and disappointing 2 and ½ hour car ride back from a show.
Click the
thumbnails below to view larger images:
Model, Images and Text Copyright © 2003
by Tom Baldwin
Page Created 28 April, 2003
Last Updated
17 March, 2004
Back to
HyperScale Main Page |
 Home |
What's New |
Features |
Gallery |
Reviews |
Reference |
Forum |
Search
Home |
What's New |
Features |
Gallery |
Reviews |
Reference |
Forum |
Search