|
AH-1W "Whiskey Cobra"
by
Rolando Raffaut
|
 |
|
AH-1W "Whiskey Cobra" |

HyperScale is proudly supported by
Squadron.com
Here’s a project that nearly sent me over the edge.
It is Italeri’s 1/48 scale AH-1W Super Cobra, more affectionately known
as the “Whiskey Cobra”.
At the time I built this kit around 1994 I believe,
there was precious little info available as far as reference so I had to
scrounge every little bit I could find in order to do a respectable job
of it. As a former helicopter engineer (or mechanic depending where
you’re from) and current pilot, helicopters are a passion for me, so
when I found out a Whiskey was available in 1/48, I jumped at it.
Unfortunately upon opening the box I was a little
disappointed at Italeri’s offering. The kit was somewhat simplified but
seeing it was the only one in this scale I decided early on I would
attempt to super detail and correct it as per the reference I had
available at the time, little did I know what lay ahead.
My first priority was to re-scribe the entire
model, this was a first for me but looking back at the kit now I see
areas where I could have added more panel lines, what’s that saying
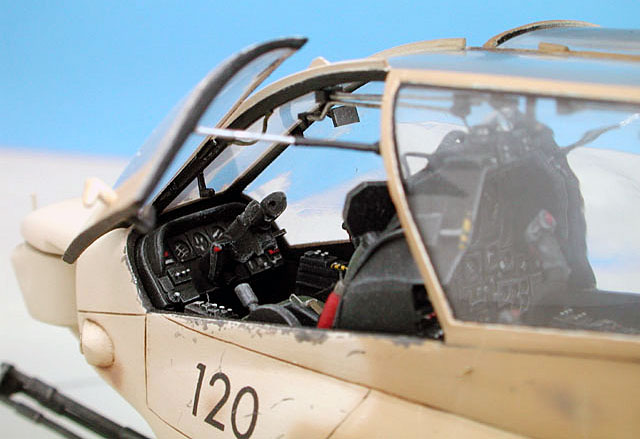
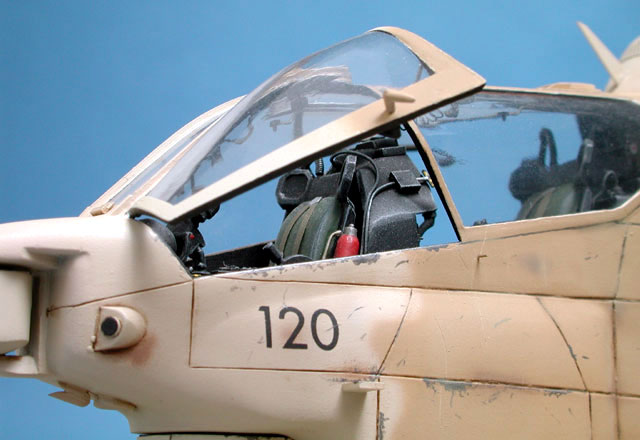
about hindsight?. Once that was done the next area was the cockpit. My
references showed the kit cockpit to be virtually science fiction in
it’s depiction of the real aircraft so I completely scratchbuilt the
entire assembly. I had just purchased the Waldron Punch and Die set so
this was put to good use. One feature I really wanted to model was the
Cobra’s Helmet Sight System (HSS).This is an electro-mechanical linkage
system that runs along the upper left hand side of the pilot,
co-pilot/gunner canopys and connects to the back of the crew’s helmets
thereby allowing their head movements to move the Telescopic Sight Unit
(TSU) and gun in azimuth and elevation via a monocle sight attached to
the front of the helmet.
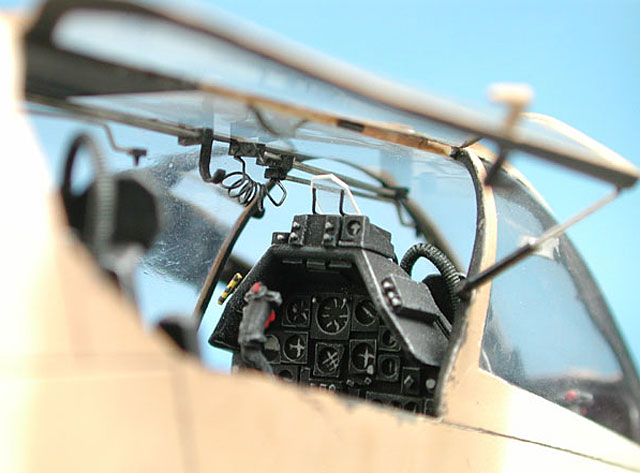
I simulated all these details with
bits of styrene and lengths of brass rod. Other prominent features added
include helmet hooks, rear vision mirrors, electrical leads, grab
handles, standby compass, air-con hoses( from guitar strings), seat
belts/buckles, fire extinguishers and anything else that was missing
from the cockpits. Next the gun turret and cannon was detailed with a
little copper wire and sheet styrene to make it look slightly more
convincing.
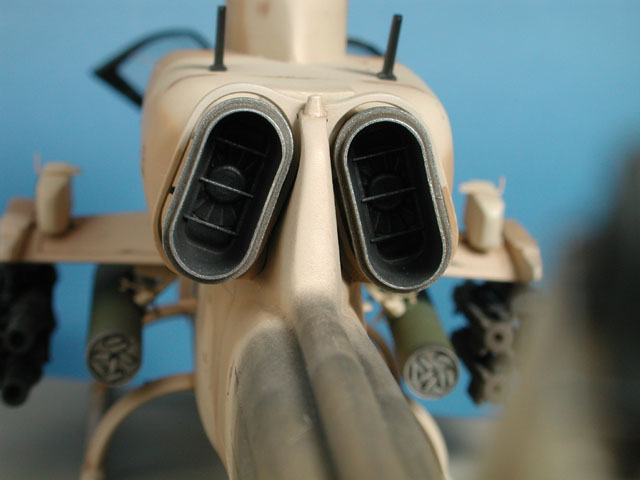
There were no photo-etched sets for this model so I added some for vent
screens on the fuselage sides and belly as well as the tail rotor and
the main rotor fairing (or “dog house” as it’s known).Cable cutters and
deflectors were added along the canopy frames and above as well as below
the nose.
Numerous antennae and various probes were added around the fuselage as
well as the optics to the sight in the nose turret, again all this was
done with simple styrene sheet and discs punched with the Waldron set.
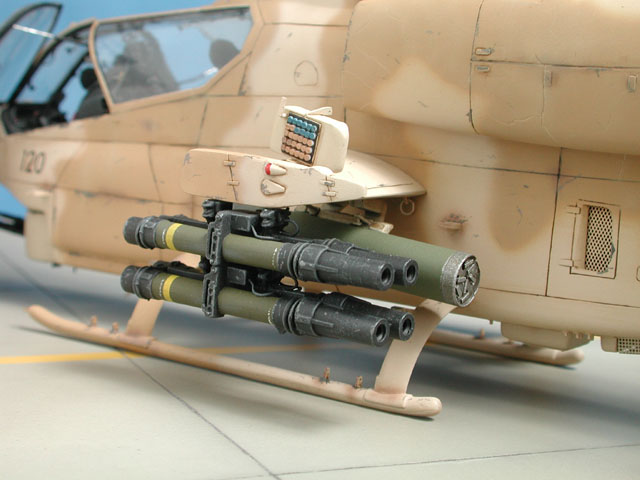
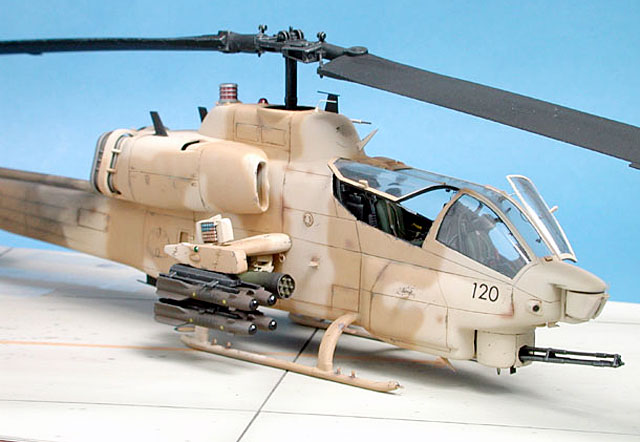
I have a few of the excellent Monogram
AH-1S(F) Cobra kits so I borrowed some parts from these, namely the TOW
missile launchers as well as the Infra-Red Counter- Measures turret (IRCM
or “Disco Ball”).
The stub wings were detailed with sway
braces added to the weapons pylons and tie down rings added from copper
wire. The Chaff/Flare pods were drilled out and individual canisters
added from Evergreen rod.
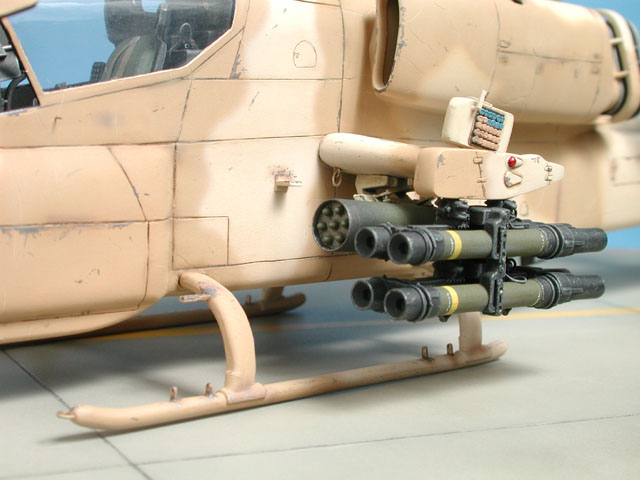
Rotor tie down loops and ground
handling wheel attachment points were added to the skids.
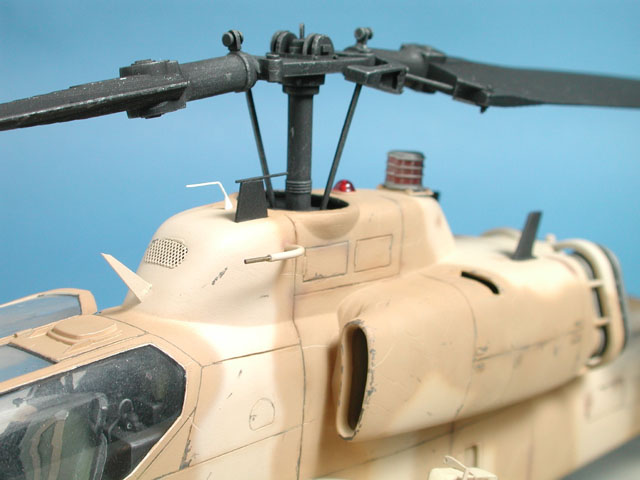
One major glaring inaccuracy of the kit was that
Italeri molded the rotors so that they rotated the wrong way!!, how they
got that wrong is unbelievable and I found out later that this was not
the only helicopter kit they had done this to. Since the rotor head was
simplified, I cut the rotors off and flipped them 180 degrees around
then detailed the teetering hinge mechanism and added drag braces as
well as a number of bolt heads, the tail rotor also received refinements
and additional detail in the way of scratchbuilt pushrods and bellcranks
as well as pitch change links.
The belly of the model had numerous vent lines
added from the transmission and engine.
Various other refinements and details were added to the kit but space
here precludes everything I added to it. Whilst glueing the fuselage
halves together I found I kept having recurrent problems with sanding,
re-puttying and re-scribing, so much so that it started losing it’s
shape, my patience finally ran out and it ended up against the wall in a
bazillion little pieces, AAAAARRRRGGGHHHHH!
Feeling heartbroken at having killed my creation I
gathered up the tiny pieces and put them all back in the box. At this
time I moved overseas to take up a contract pilot position so the kit
was unceremoniously buried at the bottom of the ‘to do’ pile.
Fast forward 4 years later and I found myself back
home with a hankerin’ to build something. I pulled the kit from it’s
cardboard sarcophagus and wondered about the possibility of resurrecting
it. In much the same way that the mythical Pheonix had risen from it’s
ashes, I decided to play Dr Frankenstein and once more breath life into
my creation. Luckily most of the parts had simply popped loose from
their original locations so it was merely a procedure of re-attaching
them, in the process I re-inforced all the major sub assemblies with
brass rod and continued the kit till it’s completion, YEAH !
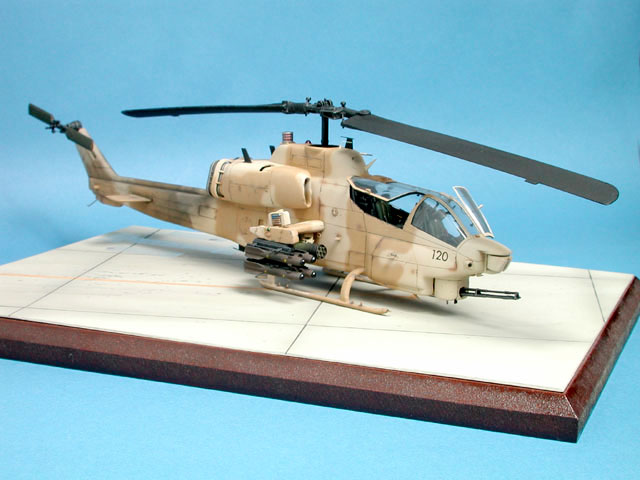
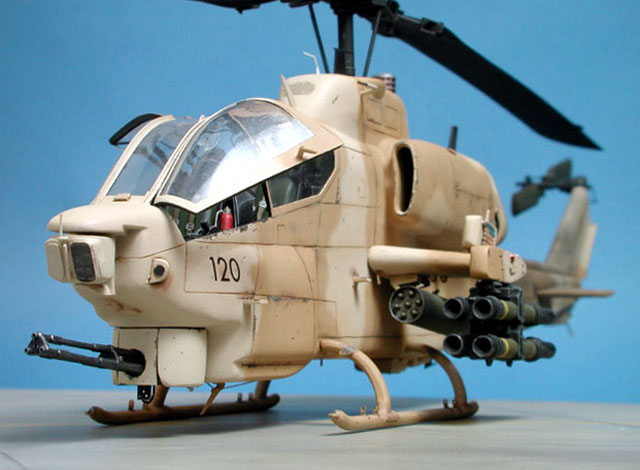
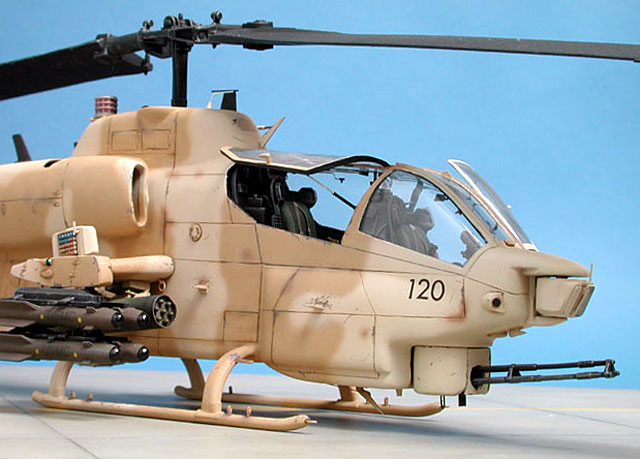
By this time quite a bit of information was now available about the real
aircraft so it was time to pick a colour scheme. I came across an
article in Soldier of Fortune magazine entitled “Cobra Cowboys” about
Marine Helicopter Squadron HMLA-367 and their exploits during ODS. Their
aircraft had been painted in a heavily weathered 2 tone desert scheme of
sand and brown, one look and I was hooked, so now I moved onto the
painting stage and this was done with Tamiya acrylics using the MK 1
eyeball to determine paint colours. Once painted the panel lines were
picked out with a 2b pencil as well as a wash of burnt sienna oil paint.
I miss-matched the paint to resemble field applied touch ups and used
silver paint dabs for scratched/worn paint. Pastels were used for the
heavy exhaust stains along the tail boom.
The aircraft exhibited very few markings so I used
dry transfers for these, unfortunately the font wasn’t exactly right but
by this stage I just wanted to finish the thing so I settled on what I
had.
So that was it, finally finished……or so I thought!, one day while moving
the kit off my shelf to dust it the entire main rotor assembly came off
in my hand and the whole model crashed to the floor quicker than you can
say “what the heck!!!!”. I was convinced the kit was jinxed after what
I’d been through with it but luckily there were few breakages, my brass
pins had held the thing together pretty well…..whew!
But wait, that’s not the end of this happy story!.
By now the kit had won a few “firsts” in model comps around the place so
I was feeling pretty chuffed with myself, one day whilst doting over my
award winning creation I noticed what appeared to be numerous spidery
cracks in the darker brown paint. AAARRRGGGHH!!, some form of chemical
reaction had caused the paint to crack and despite my repeated attempts
to continually touch them up like some kind of crazed alchemist, they
kept propagating. By now I was talking to the kit asking it what it was
trying to tell me!, in the end I gave up and left the thing alone.
Luckily the paint eventually stopped cracking but since then Two Bobs
has released a gorgeous decal sheet and I have an overwhelming desire to
start applying them. So what do you think, should I or should I not?
Stay tuned!
Click on the thumbnails
below to view larger images:
Model, Images and Text Copyright ©
2004 by Rolando Raffaut
Page Created 02 February, 2004
Last Updated 17 March, 2004
Back to HyperScale
Main Page
|
 Home |
What's New |
Features |
Gallery |
Reviews |
Reference |
Forum |
Search
Home |
What's New |
Features |
Gallery |
Reviews |
Reference |
Forum |
Search