|
AH-64A Apache
by
Ian Robertson
|
|
|
AH-64A Apache |

Hasegawa's 1/48 scale AH-64A is available online from Squadron.com
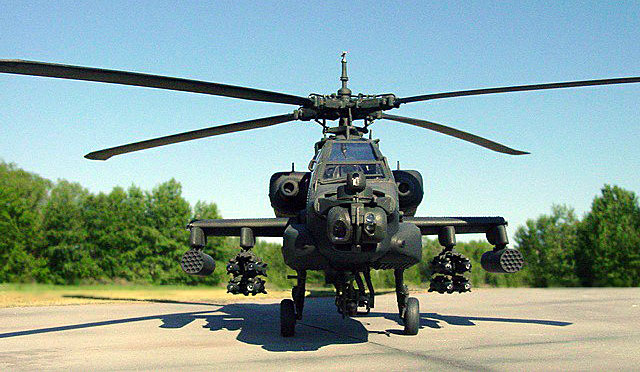
This is Hasegawa's 1/48 AH-64A Apache helicopter
built out of the box.
The kit is somewhat daunting at first glance due to
the large number of pieces involved (e.g., the main rotor assembly
consists of about 20 pieces). However, as is typical for Hasegawa, the
instructions and clear and the model is very well engineered, so the
average modeler will have no difficulty with this kit. It is not the
best choice for a beginner due to the number of small fiddly bits and
the large windows surrounding the tandem cockpit.
Hasegawa's
1/48 Scale Apache
|
Construction Tips
Overall the kit went together without much
difficulty.
However, there were a few trouble spots that
deserved special attention:
-
When the main struts were
inserted into the fuselage I noticed a distinct lean to the model when I
viewed it head-on. This occurred because one of the struts naturally
pulled to a position I did not want it to go. I resorted to CA glue to
attach the main landing gear securely in the correct position. Now the
helicopter sits evenly.
-
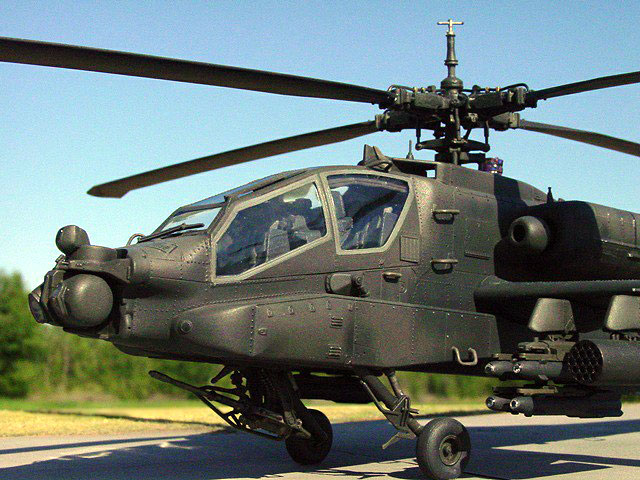
The fuselage sports a
large number of finely tooled raised rivets. Excellent detail, but a
pain to deal with when you get to the underside fuselage seam. Here's
the conundrum - if you work to make the seam invisible you will lose a
lot of rivet detail on the underside, but if you preserve the rivet
detail the seam will be obvious. Solutions? One possibility is to pick
your poison, seams or rivets. I opted for a different solution. I used
Hasegawa's rivet maker and rivet making template (available at Hobby
Link Japan in their tools section) to create new rivet detail where it
was lost due to sanding. These new rivets are recessed, not raised, yet
the effect goes a long way to restoring the detail on the underside.
Thanks to Kent Eckhart (Boise Kent) for the tip.
-
I had difficulty getting
Hasegawa's wing-walk decals to settle without wrinkling and silvering
around the edges. I should know better than to use Hasegawa decals given
the poor success I have with them. The solution is simple - use paint on
the wings rather than the kit's decals.
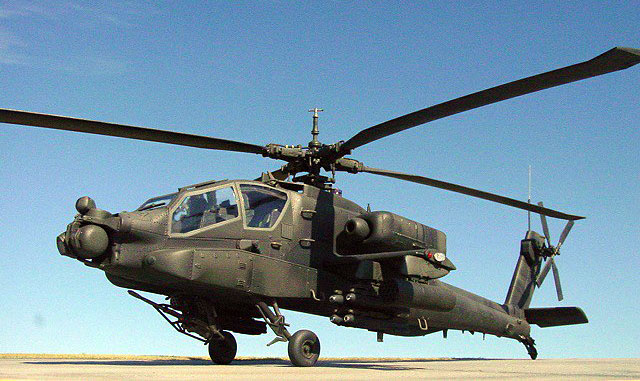
 The
model was painted in various shades of Army Helo Drab using both Model
Master acrylic and Model Master enamel (the two colors look quite
different oddly enough). The
model was painted in various shades of Army Helo Drab using both Model
Master acrylic and Model Master enamel (the two colors look quite
different oddly enough).
Once the basic coat of paint was added I lightened
some areas and darkened others, although in my photographs these
subtleties are largely invisible.
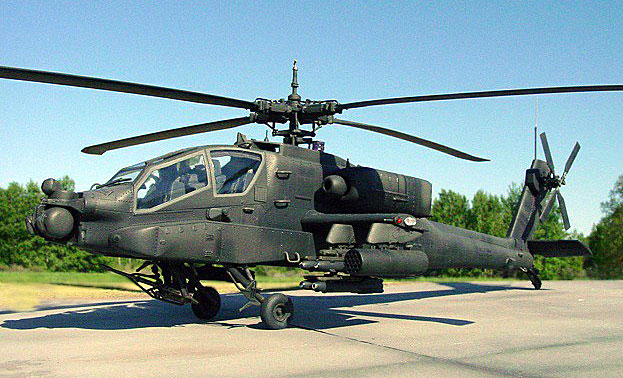
Wing tip lights were painted with Tamiya clear green and clear red.
Hellfire Missiles
The clear tips on the hellfire missiles were pieces
of clear plastic that came with the kit. I used CA glue to attach these
tips to the body of the missile. (Be sure to paint the end of the
missile black before adding the clear tip, otherwise the grey styrene
will show through.). The tip was then sanded and polished until it was
smoothly integrated to the body of the missile. A drop of Future was
added to give it a glossy appearance.
All images were taken outdoors with a SONY S-75
digital camera set at its highest picture resolution (2048 x 1536
pixels). Other camera settings were as follows: 200 ISO film speed,
1000th/sec shutter speed, F-stop 8.0, and fixed focus distance of either
20 or 30 cm.
Images were cleaned up using Adobe Photoshop 6.0
for the Macintosh. Specifically, the interface between the base and
background were merged using the software's "blur" tool, and edges in
some photographs were sharpened using the "sharpen edges" tool.
Sharpening images in such a way helps to restore some of the clarity
lost during image compression.
Click on the thumbnails
below to view larger images:
Model, Images and Text Copyright ©
2003 by Ian Robertson
Page Created 09 August, 2003
Last Updated 17 March, 2004
Back to HyperScale
Main Page
|
 Home |
What's New |
Features |
Gallery |
Reviews |
Reference |
Forum |
Search
Home |
What's New |
Features |
Gallery |
Reviews |
Reference |
Forum |
Search