|
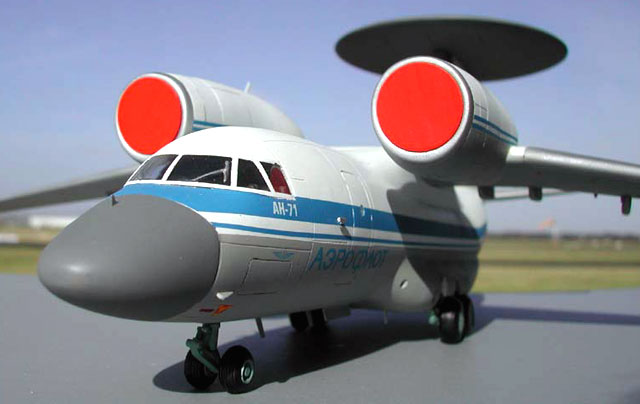
Antonov An-71 Madcap
by
Lukasz Kedzierski
|
|
|
Antonov An-71 Madcap |

Toko's
1/72 scale An-72 is available online from Squadron
The Antonov An-71 Madcap was built to
specifications issued in 1982 for a tactical early warning aircraft
to complement strategic aircraft such as the A-50 Mainstay and
Ilyushin Il-76PP.
OKB Antonov considered several
different possibilities as carriers for a new system ranging from
entirely new aircraft to already operational aircraft such as An-12,
An-32 or An-72. In 1983 a decision was made to use An-72 as a
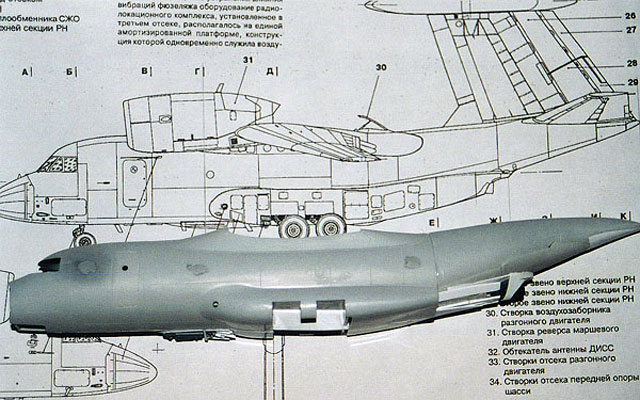
platform for a dish antenna mounted on the top of a modified fin,
which necessitated a complex redesign of the rear fuselage section.
New aircraft was equipped with stronger D-436K engines and an
auxiliary turbojet engine RD-38A installed in the rear fuselage to
provide sufficient power during take-off.

The first prototype (modified
prototype An-72-004) flew for the first time on 12 July 1985.
Subsequently two more prototypes were built, the second intended for
static tests (converted An-72-01, the first prototype of An-72) and
the third An-71-03 with standard production An-72 nose cone, which
flew on 28 February 1986.
The An-71 did not reach the production
stage due to the fall of the Soviet Union and lack of funding for
the air force. The intended roles for An-71 were observation of the
airspace, finding and tracking the enemy aircraft as well as
surveillance of the sea surface and detection of enemy ships.
Madcap in
Plastic
I am fascinated by this unusual as
well as Soviet/Russian aircraft and An-71 definitely fits both
categories. Unfortunately, An-71 has not been offered in 1:72 scale
by any of the manufacturers up until this year when it’s been
announced by A-Model and Russian Project.
The only way to build Madcap in 1:72
scale was to convert Toko’s An-72/74 kit. I learned about this
conversion a few years ago from Ken Duffey’s article published in
Scale Models International. At the time I thought it’s outside my
modelling skills and simply forgot about it. My interest was
rekindled when Ken published this article on his webpage (www.flankers.co.uk).
After reading it a few times I realised that I can probably do it.
So I got the second kit of An-74, did
my search on the subject and found out that I cannot get any scale
drawings. The easiest solution was to ask Ken, who kindly provided
me with a copy of scale drawings from Aviatsya i Vremya magazine.
His article served as a guide for the conversion.
Since An-71-03 is based on An-72 the
major part of the conversion is to rebuild the rear section of the
fuselage. I started with shortening the fuselage according to
drawings and some 3 cm needed to be removed from the fuselage
length.
The first cut was made just behind the
fuselage-wing joint (photo 1) and I removed the entire tail section,
which was then shortened. The fin was also removed at this stage.
Because Toko kit has raised panel
lines I engraved all of them using a scribing tool. \
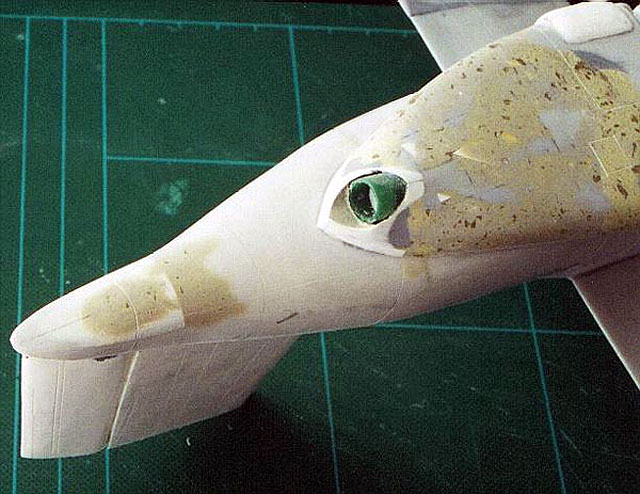
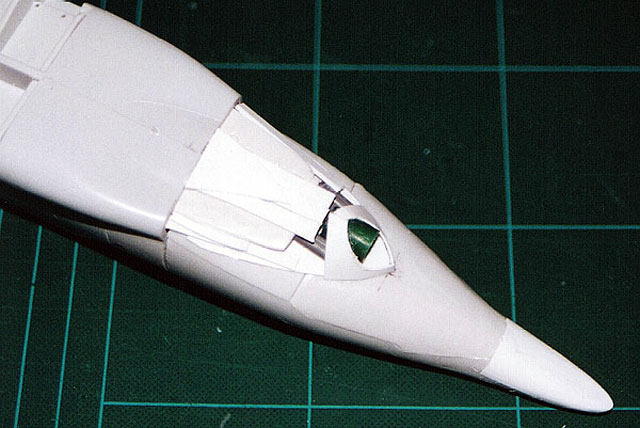
The cockpit was built as per
instructions and all side fuselage windows were glued in place and
sanded smooth since An-71 does not have any of the An-72 side
windows. Before I glued the fuselage halves together I filled up the
front section with lead and believe me a lot is needed to
counterbalance the weight of the rear fuselage and the dish antenna.
The shortened tail section was glued to the main fuselage and the
resulting gap filled with Milliput.
A modified rear ramp was used to close
cargo bay opening.
At this stage there is just a lot of
gaps and openings all over the fuselage and things do not look good.
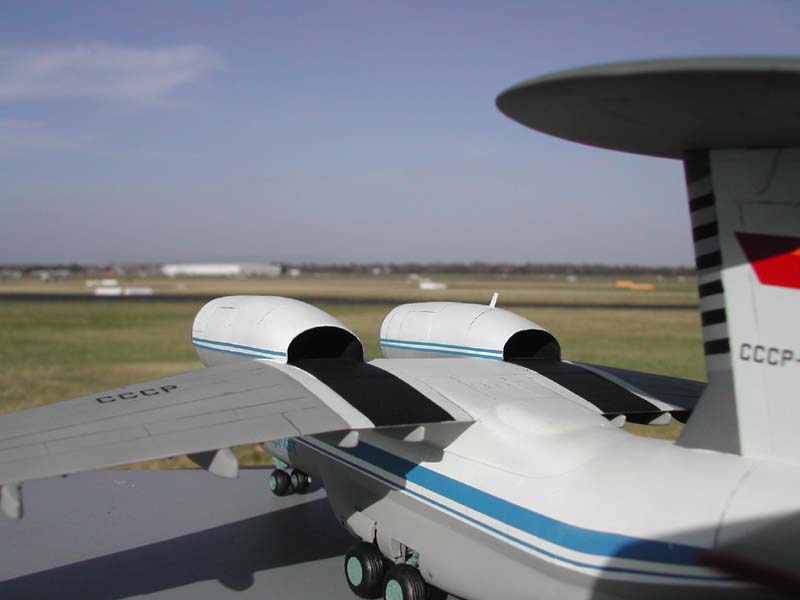
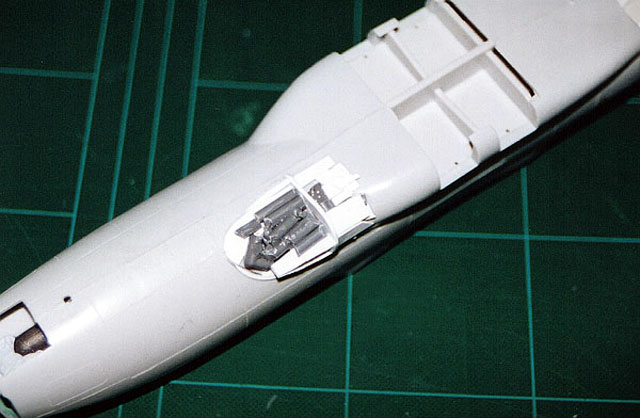
I moved on however, to build the auxiliary engine exhaust fairing,
which was made from plastic card cut to shape and the engine nozzle
was made from a short section of a pen.
These were then glued in place and the
remaining part of the extended bottom rear section was build up from
bits and pieces of sprue and plastic card glued to the outline cut
out from a thin plastic card according to drawings. The entire
section was filled with Milliput and sanded to shape.
A similar technique was employed to
build up an extension to the starboard sponson.
Click the thumbnails below to view larger images:
This completed the major fuselage
surgery.
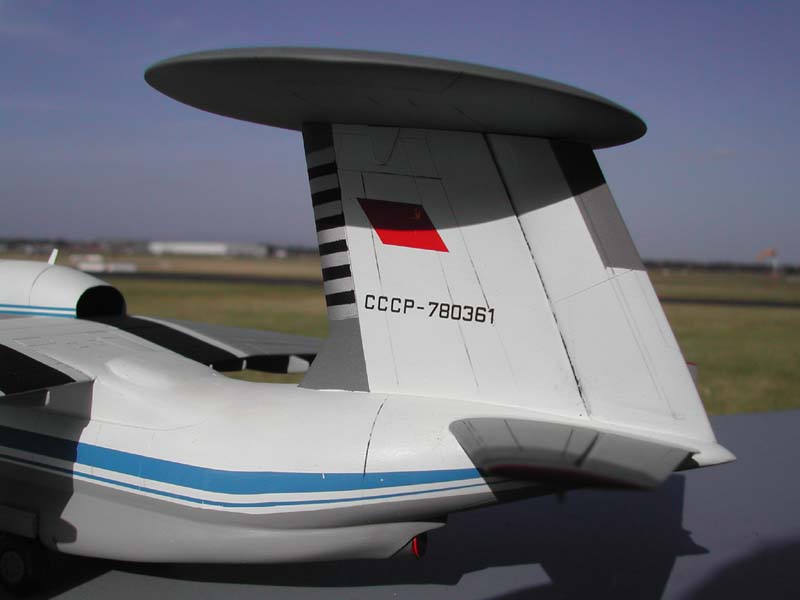
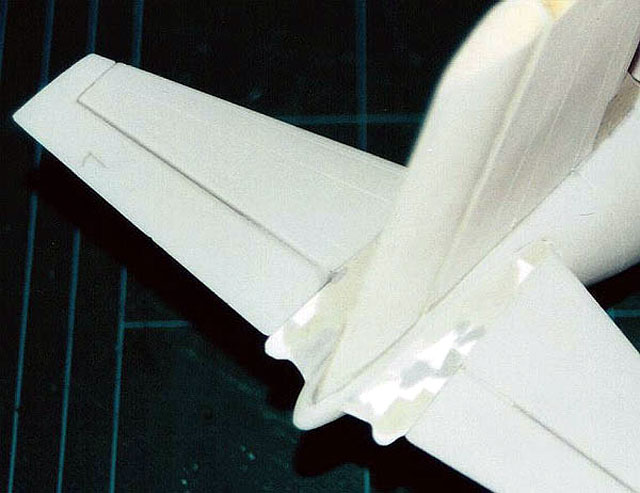
Next was the new vertical fin. I followed Ken here and build mine up
from balsa wood covered with thin plastic card. I did not have any
ideas how to glue the plastic to balsa wood, but decided to use
super glue. The balsa wood core of the fin and rudder was sanded to
airfoil shape according to drawings and saturated in superglue to
the point when the wood no longer absorbed any glue. Then both parts
were wrapped in a thin plastic card, let to dry for a few days and
the plastic was trimmed and sanded. All panel lines were engraved
and the entire fin was glued in place. All the gaps were filled with
Milliput and everything was sanded smooth.
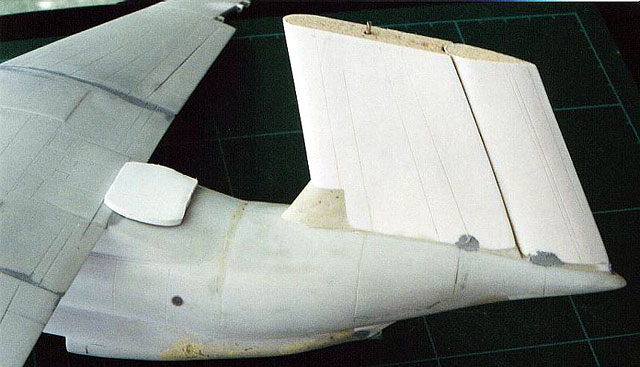
The horizontal stabilizers were made
from modified kit’s stabilizers and the new root sections were made
from plastic card.
Then more Milliput was used and I was
getting worried that one box if this excellent stuff may not be
enough for this project.
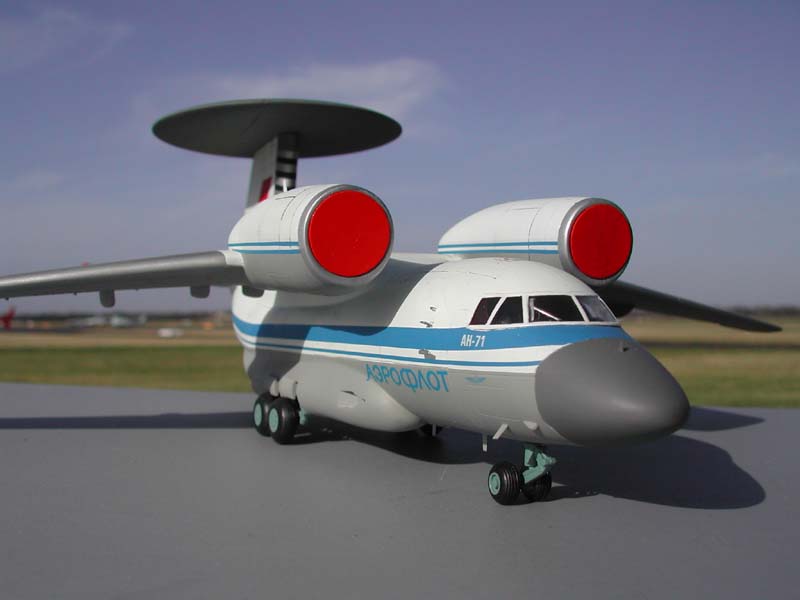
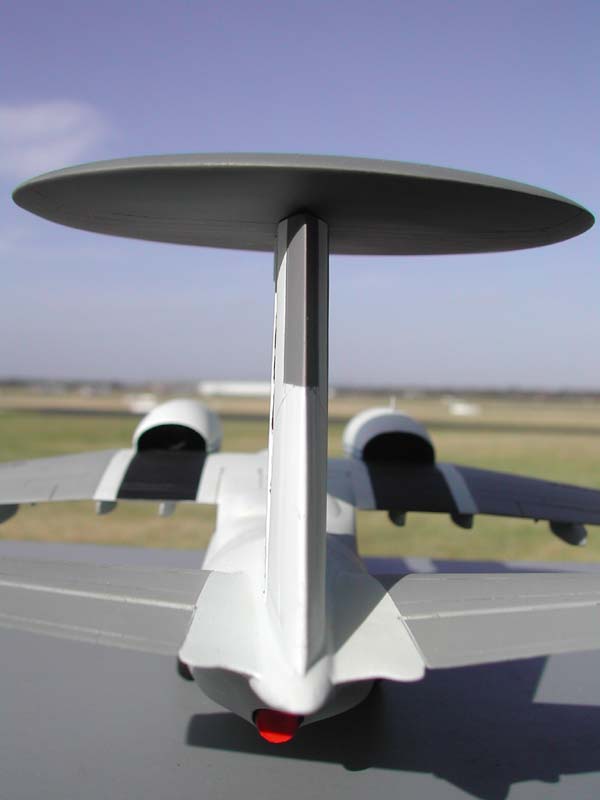
The last part to scratchbuild was the dish antenna. Unlike Ken, I
did not have any in my spares box (he modified Hawkeye’s dish) and
decided to build mine up from circular section of plastic card. I
cut out 5 circles of 3 different thicknesses, glued them together,
filled up the circumference of the dish with Milliput and sanded
everything to shape. The complete dish was then coated with an
automotive primer, all the imperfections filled in and sanded again
and finally panel lines were engraved on the antenna

.
The remainder of the kit, i.e. wings, engines and undercarriage were
built as per the kit instructions. The fit is rather poor,
especially the covers on the engine nacelles, which can be left
open, but are way too thick. I also decided to build engine intake
covers, which were based on available An-72. A thick piece of
plastic card cut to shape was glued immediately behind the
wing-fuselage rear top joint.
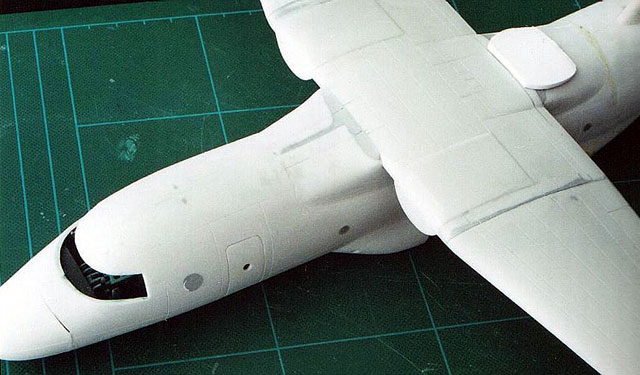
This is an air intake for the
auxiliary engine, which opens upwards during the take-off. The last
thing to do is to add a variety of antennae on the fuselage,
nacelles and horizontal stabilizers.
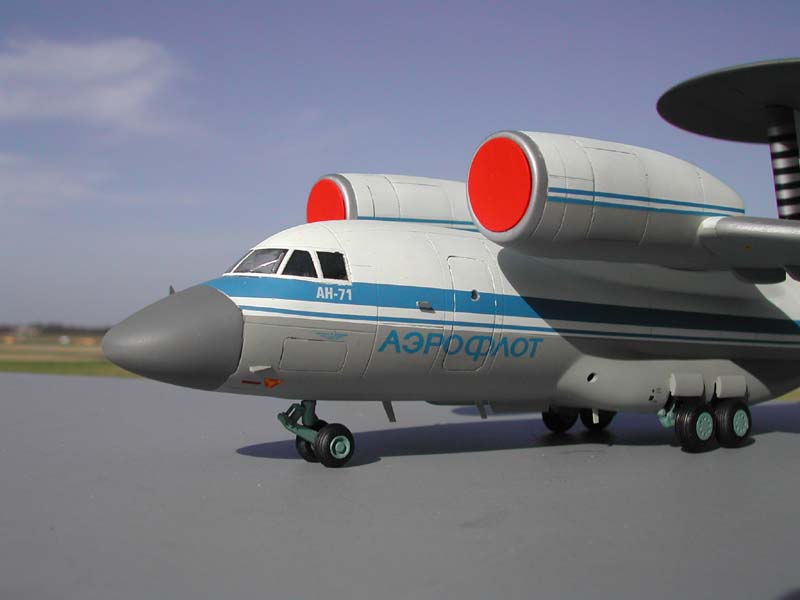
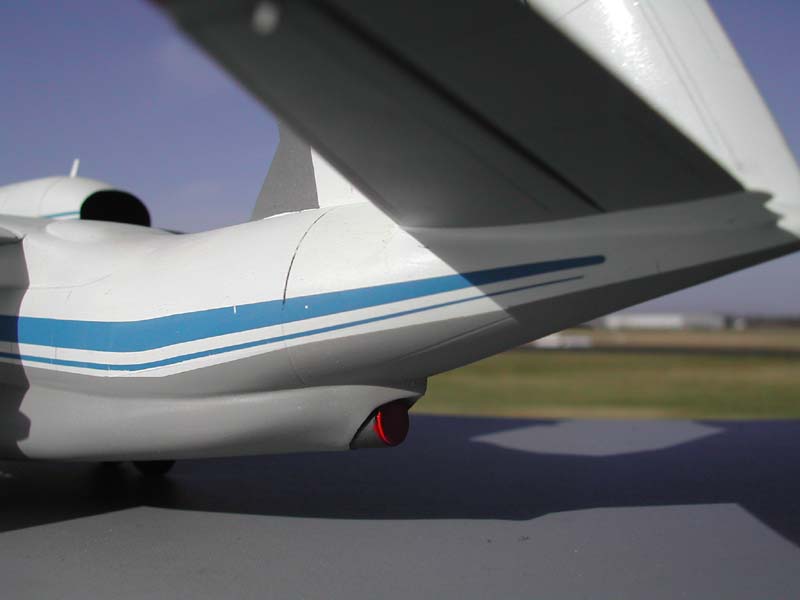
The colour scheme is straightforward
and rather boring – white/grey Aeroflot livery with blue cheat
lines. The decal sheet in the kit provides all the necessary
markings needed for An-71, which just need small modifications.
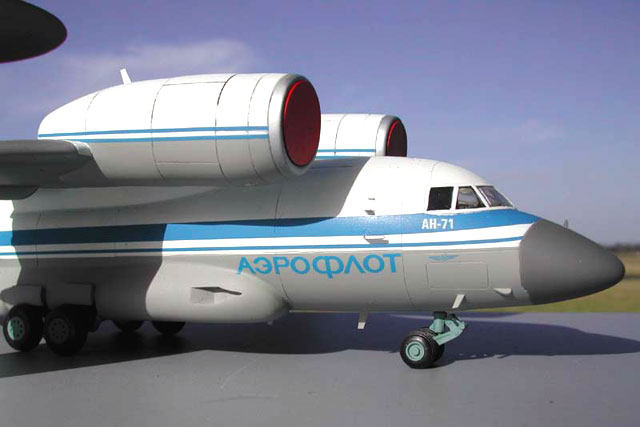
The An-74 kit also has the blue cheat
lines, which are not included in the An-72 patrol aircraft kit. I
weathered the model with watercolours applied into panel lines and I
also applied some discolouration to the white finish. The entire
model was sealed with semi gloss clear Humbrol.
This is a relatively easy conversion
and it still may be an alternative to the announced A-Model (price
wise) and Russian Project (their An-26 is of mediocre quality) kits.
Overall I enjoyed building this model a lot, but it took a few
months with some other kits made in between.
I would like to thank Ken Duffey for his help with obtaining scale
drawings. His webpage also contains a good selection of photos of
An-71 being kept in Kiev.
Click the thumbnails below to view
larger images:
Model, Images and Text
Copyright © 2003 by
Lukasz Kedzierski
Page Created 15 May, 2003
Last Updated
17 March, 2004
Back to
HyperScale Main Page |
 Home |
What's New |
Features |
Gallery |
Reviews |
Reference |
Forum |
Search
Home |
What's New |
Features |
Gallery |
Reviews |
Reference |
Forum |
Search