|
First Day on the Job
Aussie Abrams
by David Jenkins
|
 |
|
M1A1 Abrams in
Australian Colours |

Tamiya's
1/35 scale M1A1 Abrams is available online from Squadron.com
A little while ago there was a posting on the
Hyperscale Tank Talk Forum that raised the possibility of Australia’s
next MBT being the US Abrams. Over the past twenty five years Australia
has been served well by West German designed Leopard (AS1), but they are
defiantly nearing the end of their working life. All this got me to
thinking about current MBT’s that might make the short list to replace
the Leopard. I think there are three possibilities - M1A2 Abrams,
Challenger 1 Mk3 and Leopard 2 A5; with Abrams is probably the most
lightly choice.
All this is pure speculation, but the more I pondered the possibility
the more enticing building an Abrams painted up in the current Aussie
three colour camouflage became. There are no details of model or
configuration so what follows is a fun stab in the dark! It might be fun
to make all three just to see them in Aussie garb!
As there is no references to go by I chose Tamiya’s
M1A1 Abrams Kit (item no. 35158) for ease of construction and a
no-surprises quick build. As there are no clear modifications to make
the kit was built strait from the box with no extras added. Plans and
fit were as expected from a Tamiya kit and only took a few hours to
complete.
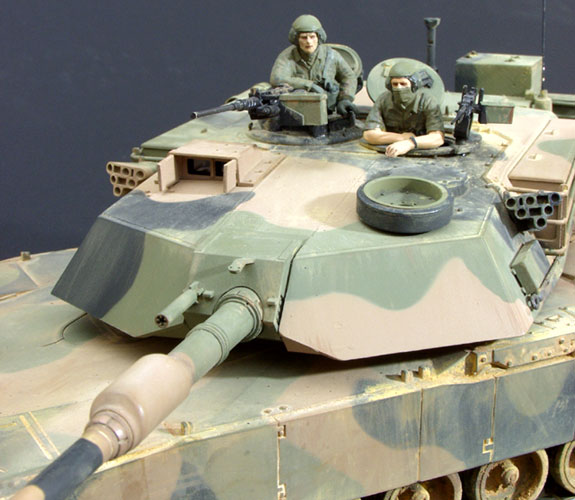
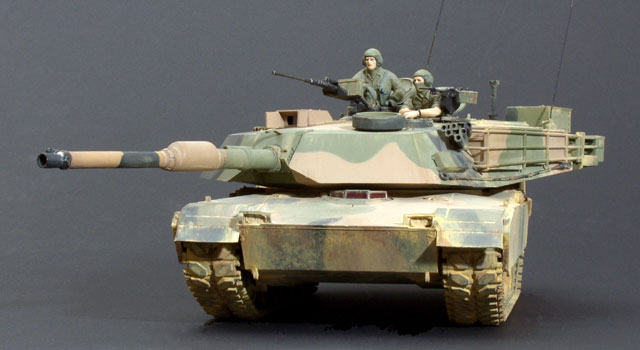
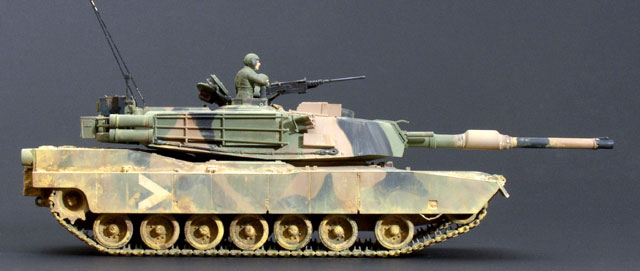
The only issue is placement of the Auxiliary Power
Unit (APU). On some US Army vehicles this large box is found hanging off
the right hand rear of the tank. The US Marines have placed theirs in
the storage basket on the turret rear significantly shorting the overall
length of the vehicle. I think the Australian Army will choose the
Marine option for the obvious vehicle handling advantages.
This raises a problem, the Tamiya kit only provides
you with the APU for the right rear option. I was stumped until a friend
came to the rescue by making me a resin replacement APU for the turret -
huge thanks Russ!
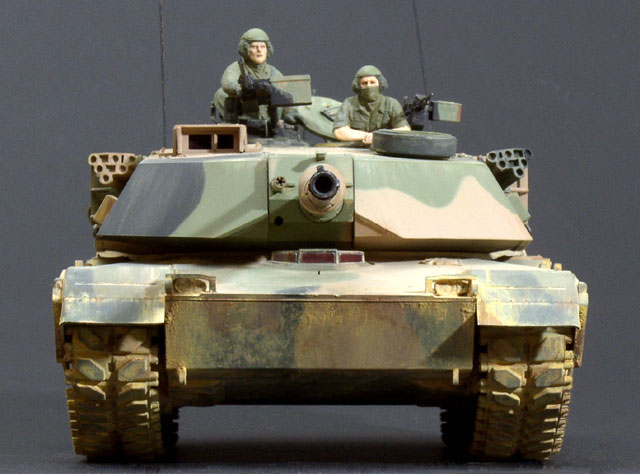
Australian Army vehicles are painted in a hard
edged three colour camouflage of green, tan and black. There are
extensive reference photos on the ANZAC Steel website (Link on the
Hyperscale home page) of Leopards and ASLAV’s in this pattern. Something
I learned along the way is that the ASLAV’s are delivered in a factory
applied base coat of tan. The green and black are then applied freehand
to a centimetre specific set pattern by the army, so there is only very
slight variation between vehicles. As General Dynamics makes both
vehicles I assume that the Abrams will also be delivered in the same tan
base coat.
The Leopards have an entirely different history arriving from Germany in
standard West German Army green. The tanks remained this colour for a
number of years before being repainted in a very flat green. Mud
camouflage was applied by each crew during operations. During the 90’s a
three colour camouflage was applied to combat vehicles and well just
about everything else that moves for that matter! Although each pattern
on the Leopards is simular in style there does seem to be quite a bit of
variation. The Abrams is also quite a different shape to the Leopard so
I adapted my favourite Leopard pattern to suit.
Colour choice became it’s only little journey. I believe that the same
colours are used throughout Australia yet there was great variation in
the reference photos of Leopards operating in southern and northern
Australia. The southern colours look very simular to Flat Earth (Tamiya
XF - 52 Flat Earth), NATO Green (Tamiya XF - 67 NATO Green) and Flat
Black (Tamiya XF - 1 Flat Black). Under the tropical light of the north
the colours became decidedly brighter and in some cases almost fluro. I
decided to meet somewhere in the middle and added some Tamiya XF - 15
Flesh to lighten the colours.
The Australian camouflage has quite a hard edge to it so I used the
tried and true Blue-Tac method. The only tank recognition marking that
was added was a white arrow head on the side. The mounting rails and
basket that run right around the rear half of the turret of the Abrams
will prove an interesting obstacle to the current tactical markings used
on the Leopards.
I highly recommend looking at the articles and photo galleries on the
ANZAC Steel Website (Link on the Hyperscale home page) as there are a
wealth of information on the Australian fighting vehicles.
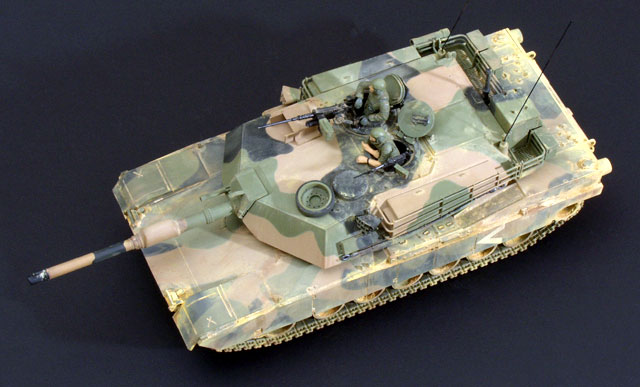
Weathering and Final Details
I chose to depict my Abrams as if it were on its
first training session or manoeuvres. As they would be a brand new
vehicle wear and tear was kept to a minimum.
A light dusting of Tamiya XF - 57 Buff was used to
simulate dust and then a mixture of pastels calks were used where mud
build up was heavier.
All in all this was a fun project. At least I can
be cheeky and say that this has been my most accurate model to date and
there are no references to prove me wrong just yet! Another interesting
project would be the Leopard A5 with its angular turret, as it would
look amazing in Aussie camouflage.
It will be interesting to see what eventually becomes Australia’s next
MBT.
Kit: Tamiya M1A1 Abrams - Kit (No. 35158)
Airbrush: Model Master 50601 airbrush
Paints: Flat Earth (Tamiya XF - 52 Flat Earth + Tamiya XF - 15 Flesh)
Olive Drab (Tamiya XF - 62 Olive Drab + Tamiya XF - 15 Flesh)
Flat Black (Tamiya XF - 1 Flat Black)
References: ANZAC Steel Website
Click on the thumbnails
below to view larger images:
Model, Images and Text Copyright ©
2003 by David Jenkins
Page Created 17 December, 2003
Last Updated
17 March, 2004
Back to
HyperScale Main Page
|
 Home |
What's New |
Features |
Gallery |
Reviews |
Reference |
Forum |
Search
Home |
What's New |
Features |
Gallery |
Reviews |
Reference |
Forum |
Search
