|
B-52H "Cajun Fear"
by Adrian Davies
|
 |
|
B-52H "Cajun Fear" |

HyperScale is proudly supported
by Squadron.com
For the 2002 IPMS (UK) National Championships at Telford, the USAF
SIG decided to celebrate the recent 50th anniversary of the first flight
of the B-52 and its subsequent long service. To do this we would build a
collection that represented as many variants and colour schemes as
possible.
My contribution would be a model to represent the Buff in an as up to
date configuration as possible. I intended to use the AMT kit which I
had in my collection, and to build it as “out of the box”. This would
soon prove to be impossible due to the crude nature of the kit and my
own inability to just build anything O.O.B. The photos below illustrate
how I tackled a few areas of this project.
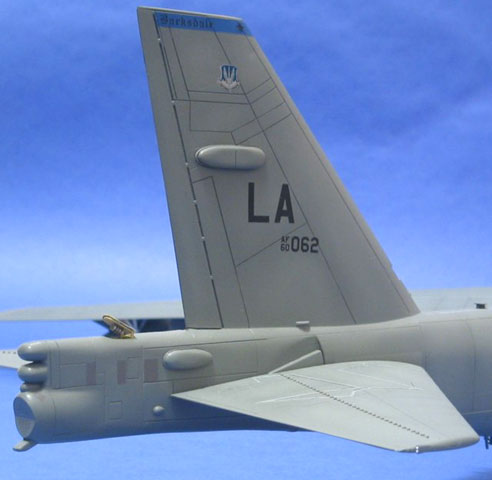
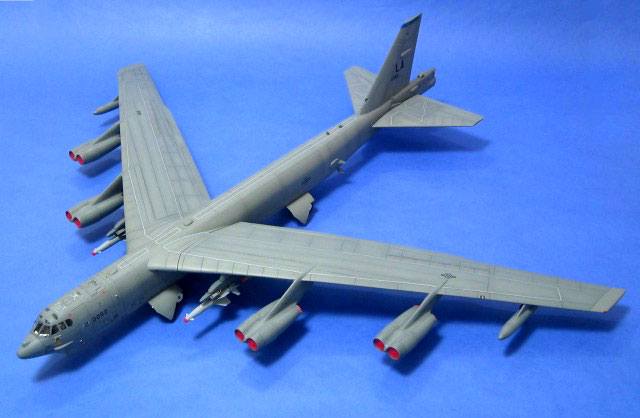
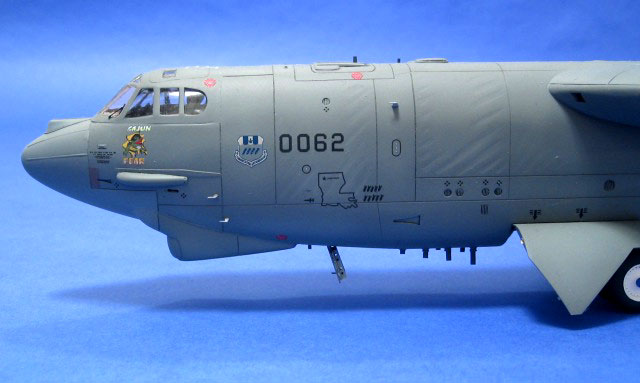
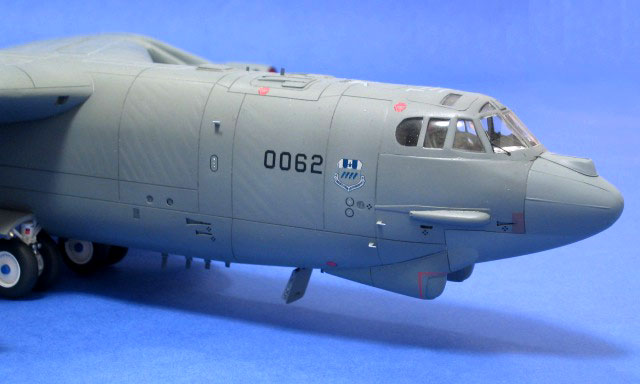
The airframe I chose to model was B-52H 60-0062 Cajun Fear, with the 2nd
Bomb Wing based at Barksdale in Louisiana. The period I wanted to
represent was when this particular aircraft was stationed at RAF
Fairford for Operation Allied Force. I was lucky to find the excellent
Sharpshooters website with two photos of my particular subject
(references listed below).
I didn’t bother to measure the kit so I don’t know how dimensionally
accurate it is. (I don’t care that much either-it looks like a Buff and
it’s big!)
The AMT kit’s shortfalls are well documented. My main concerns were
the soft detail and the lack of droop on the wings.

The latter was fixed using a technique suggested by Haydn Hughes of
the USAF SIG. He recommended that I glue the wings together, cut three
slots using a razor saw at 50mm intervals along the top of the wings,
and insert 0.75mm styrene into the slots to spread them and induce the
right droop, then fill the gaps with Cyno and Accelerator, sand, finish
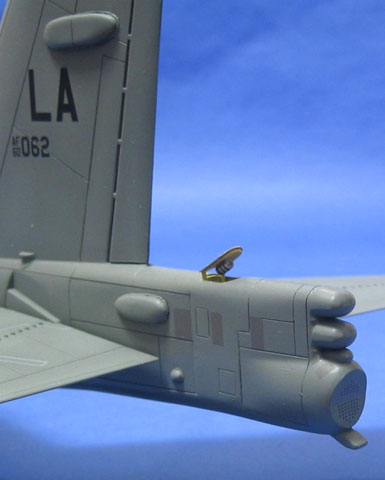
and you’re done. The other details I added to the wings were navigation
lights to the wingtips, landing lights to the leading edges, and new
doors to the outrigger wheels (the kit doors are far too thick).
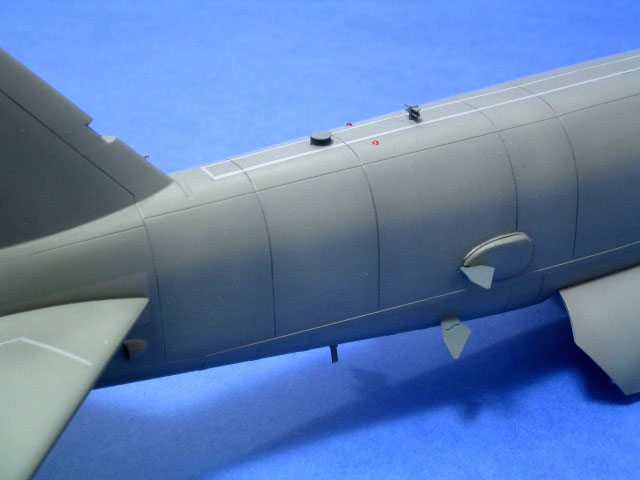
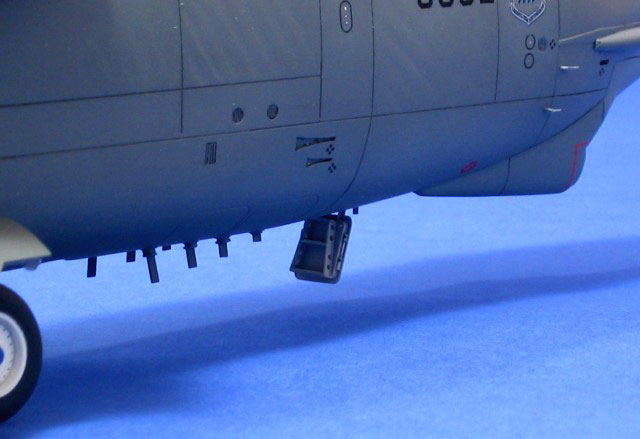
For me the biggest challenge was the detail, both the lack of it and
the softness of what was provided by AMT. The front fuselage was one
case in point. The B52 carries a lot of electronic equipment, which
needs a lot of cooling, and so the fuselage is covered with intakes and
exhaust vents. For the NACA style intakes, I decided to scratch-build
them as separate items, then cut a hole in the fuselage and mount them
in the hole, fill and sand. For the exhausts I scribed some styrene with
parallel lines; using a punch and die set, I made some disks out of the
material and set them into corresponding holes drilled into the
fuselage. Luckily, both these processes are, easy as there are quite a
few of both intakes and exhausts all over the aircraft. It took a couple
of evenings to do the entire aircraft.
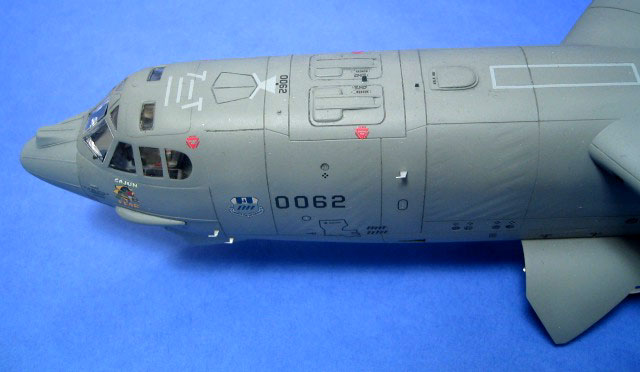
Also scratch-built are all the lumps and bumps on the aircraft, which
include hatches on the top and bottom of the fuselage, ECM bulges below
the cockpit canopies, lightning conductors on the nose cone, windscreen
wipers, and crew entrance hatch (the latter was the first thing I built
of the entire project).
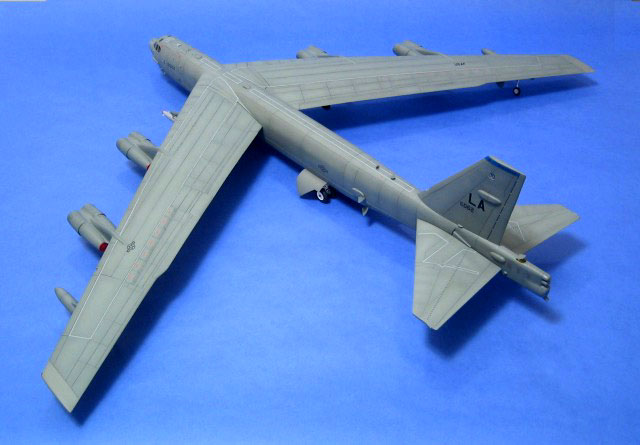
One of the most striking features of the B-52, and one that is rarely
represented in models, is the wrinkles in the fuselage, both forward of
the wingroot and aft of the trailing edge. It is easy to show these, I
simply scraped them in using a curved scalpel blade, and then sanded the
“troughs” to smooth them, the soft-nature of the kit’s plastic makes
this a very simple operation (from start to finish, it took me 15
minutes).
Click the thumbnails below
to view larger images:
The problems with a big aircraft model is that you have to include
little areas of detail all over the aircraft to make it as interesting
as possible. One such detail I added was the drag chute door which is
often shown open on the ground. I also updated the ECM antennas to how
they would look today.
One of the recent modifications is the deletion of the rear gun, and
the plating over the resulting hole. This was a simple modification to
make, to represent the tiny holes in the plate that equalise air
pressure, I used a decal of black dots, which to my eye is a lot neater
than trying to drill all those tiny holes.
Another improvement to an otherwise grey mass is the use of MV lenses
for the navigation lights.
The Buff’s role as a bomb truck is well known as is its
stand off cruise missile launcher. A newer capability is the ability to
use AGM 142 Have Naps. One of the photos I found of Cajun Fear show it
armed with these new missiles.
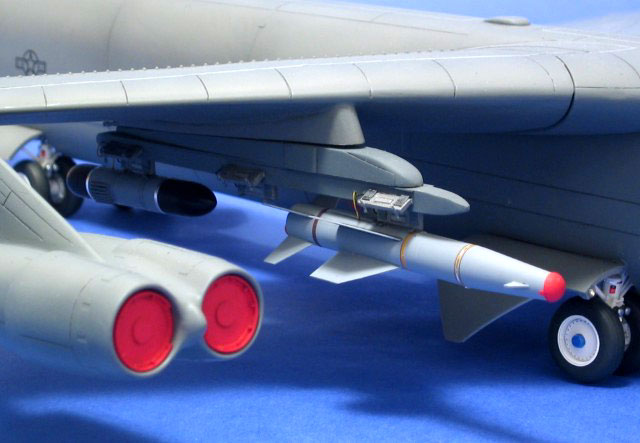
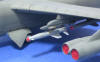 The
easy part are the missiles and data link pod (AN/ASW 55). Ron’s Resins
make excellent little kits of them, so I ordered 3 missiles and one pod.
The trickier part were the pylons to carry them. Luckily Don Logan’s
superb ACC Bomber Triad carries a scale drawing of the pylon, so I was
able to scratch-build them with little hassle, (I say that, though each
pylon has over 230 individual parts!!!! With all the bomb shackles it
soon adds up). The
easy part are the missiles and data link pod (AN/ASW 55). Ron’s Resins
make excellent little kits of them, so I ordered 3 missiles and one pod.
The trickier part were the pylons to carry them. Luckily Don Logan’s
superb ACC Bomber Triad carries a scale drawing of the pylon, so I was
able to scratch-build them with little hassle, (I say that, though each
pylon has over 230 individual parts!!!! With all the bomb shackles it
soon adds up).
Another way of adding colour to the model was building
the FOD guards for the engines. For this I made a master and cast
several, painted them and just attached them during final assembly.
My preferred paint for aircraft is Extracolor . Surprisingly it took
only three tinlets of their Gunship Grey to cover the model, and a
further tin lightened with white to weather it.
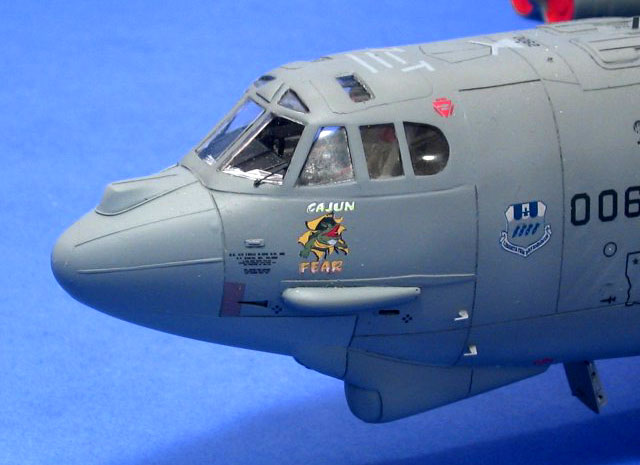
The kit-supplied decals were frankly disappointing. But using my
references I was able to draw up a complete set of decals for the model,
and was fortunate to have Mike Grant print them for me. I was amazed at
both the quality of service and printing that Mike produces. He printed
two sets not only of the nose art, wing badges, ACC crests , but also
all the stencilling. They went on with no problem.
With the decals complete, a final coat of Aeromaster matte varnish is
applied, the masking removed and final assembly complete. On the day I
finished the model the FSM with Paul Boyer’s article on how to build the
AMT B52 landed on my doorstep. Spooky.
All that was left to do was pack it and take it to the UK. (The sharp
eyed amongst you will notice that the wings are removable. One day I
hope to permanently fix them and fill the gap, but until then it lives
in a closet), I carried it as hand luggage and had no problems with
security.
This is the first model I’ve built in nearly five years, and I enjoyed
it immensely. But during the building I made a solemn vow that the next
plane I build will have a wingspan less than the span of the tail plane.
I must thanks to all of the members of the USAF SIG, especially Haydn
Hughes and Alex Hunger, also thanks to Mike Grant, Andrew Hill and
finally to my wife Julie for putting up with such a large model.
Thank you all.
-
D. Logan ACC Bomber Triad Schiffer
Publishing
-
A. Thornborough B-52H Aero Guide 28
Linewrights
-
D. Jenkins & B. Rogers B52 G/H Aerofax
-
L. Drendel B52 Walkaround Squadron
Publishing
-
A. T. lloyd B52 Stratofortress Detail and
Scale
-
R. F. Dorr Big Bombers Airlife
-
Combat Aircraft Feb 2000 (Vol 2 No 7)
-
World Air Power Journal Vol. 39
-
World Air Power Journal Vol. 27
The Sharpshooters website is at:
http://www.sbas.ndirect.co.uk/html/profil05.htm
Click on the thumbnails
below to view larger images:
Model, Images and Text Copyright © 2003 by
Adrian Davies
Page Created 06 March, 2003
Last Updated 17 March, 2004
Back to HyperScale
Main Page
|
 Home |
What's New |
Features |
Gallery |
Reviews |
Reference |
Forum |
Search
Home |
What's New |
Features |
Gallery |
Reviews |
Reference |
Forum |
Search