|
Beech Model 18
by
Fotios Rouch
|

|
|
Beech Model 18 |

Battle Axe's 1/48
scale Beech Model 18 is available online from
Squadron.com
Imagine this.
The Beech Model 18 first flew in 1937. The Army started using it in
1940. Beech made over 4,000 units for the U.S. Army Air Force and over
1,500 for the U.S. Navy. The C-45 version stayed in service with the
U.S.A.F. until 1963 and the civilian version of the Model 18 was
produced all the way up to 1969.
This plane's production run was 32 years!
I still see them flying around in one guise or another. While in
service with U.S.A.F. Navy or Marines it was called AT-7, AT-11, UC-45,
C-45, SNB-# or JRB-#, where # denotes the different variants.
It was used early during WWII as bombardier trainer and navigation
trainer. It was also used for reconnaissance, aerial mapping, VIP
transport, administrative and logistic duties.
There were also 309 Expeditors supplied to the RAF, RCAF and the
Royal Navy's Fleet Air Arm.
Battle Axe 1/48
Scale Beech Model 18
|
I had been frustrated for some years not being able to find a kit of
it in 1/48 scale. Some years ago I noticed that Collect-Aire had added
in the upcoming releases in their Advisor catalog that they were
planning to make one in resin. Boy, I have it made I thought. A few
months later Battle Axe came out with theirs and unfortunately Collect-Aire
never made one.
Why unfortunately?
Well, my Battle Axe C-45 copy is easily the worst injected kit I ever
purchased. I understand the concept of limited run kits and the level of
work required but this kit was something else. Every single piece had a
defect of some sort. Some were easy to fix and some took days to
correct.
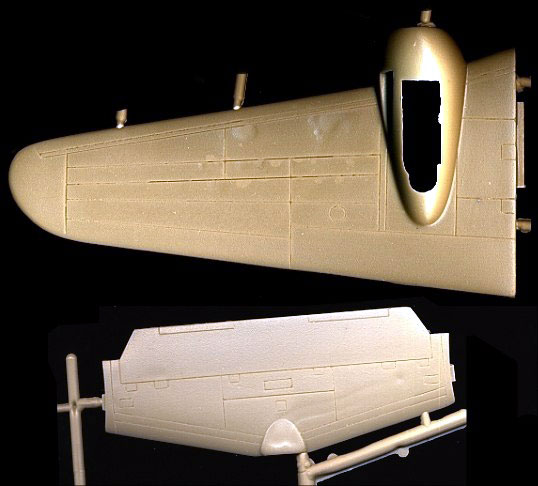
I have included some pictures of various kit parts to give you an
idea of what I am talking about. Personally I like the French, I admire
their engineering, their cuisine and I have certainly have had the
pleasure of owning some great injected kits from Heller. The C-45 I
purchased for over $50.00 did not look like any other limited run
injection kit I ever saw.
Click the thumbnails below
to view larger images:
Battle Axe took the meaning of limited run and redefined it for me! I
never thought that low pressure injection can be so low that the kit
parts would have depressions and valleys running through them. The wing
and fuselage surfaces were rough and the panel lines were of
inconsistent depth, width and alignment. The wing trailing edges were a
scale foot thick. Every where there was an ejection stub you were sure
to find a huge depression on the other side of the part.
In any case since I was pretty sure now that nobody else is going to
produce another Beech-18 variant I decided to put in the labor and
complete it for my collection. Initially I wanted to do a USAF C-45 in
white and natural metal. I thought that I would never be able to get
this model to such a good shape so that natural metal finish would look
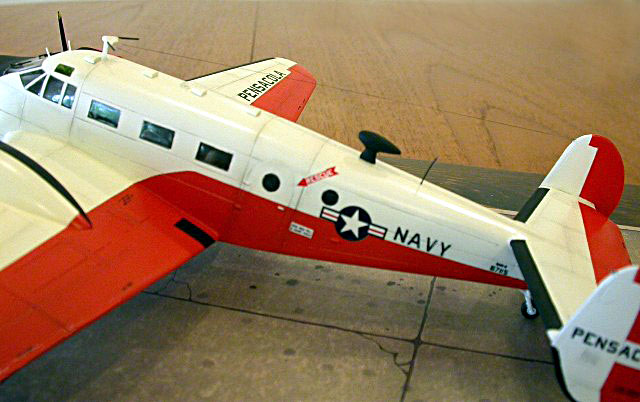
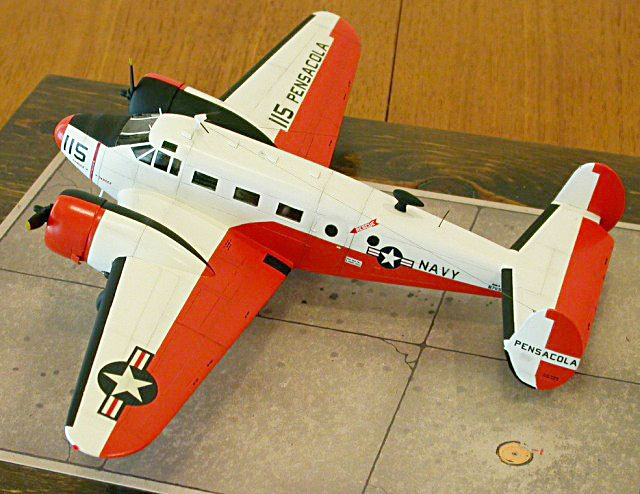
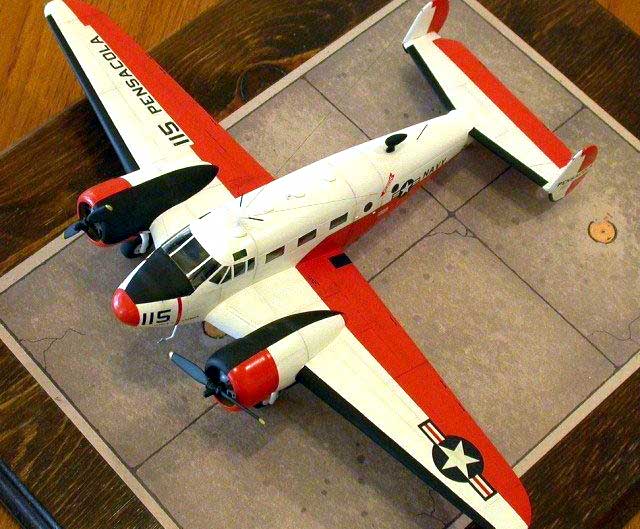
good on it. My second choice was to make a Navy SNB-2 variant in white
and international orange scheme. The Monogram Publications book came in
handy with many photos of this pretty variant.
The plastic parts were prepared one item at a time. I started with the
the tough ones. The tails and the wings were first.
I had to use Acryl Blue and automotive primer, lots of sanding paper
and water. Once the parts looked smooth and level I sprayed them with
Mr. Surfacer 500 and then re-scribed them. The fuselage was next. It was
cleaned up from the blobs of plastic that were present here and there
and then was lightly sanded down to remove the surface coarseness. I
noticed that the side windows, provided in vac plastic would not have
fitted well in the openings. I decided to use a little trick that Eli
Raphael told me about some time ago. He told me to go to Michael's (an
arts supply store) and buy their clear epoxy kit. It is really meant to
be used as a nice high gloss protective cover over table tops for
example. It dries clear and hard. I placed tape on the outer surface of
the fuselage parts over the window openings, mixed some clear epoxy and
poured it in small quantities on the inside of the fuselage making
little puddles over the window openings. After it dried I removed the
tape and polished the outside plastic and clear resin with various
grades of polishing cloths. This method gave me very smooth, perfectly
integrated and shiny side windows. Eli advised me to use a blow drier to
remove the possible air bubbles from the resin mix. I did not have many
at all in such small quantities. The little I had I removed with a
toothpick. In the end I had perfect fitting windows that I could have
never reproduced with regular vac plastic.
The next big thing to conquer was the big vac canopy piece. This part
had to be trimmed and adjusted so many times it's not even funny. The
good thing is that two canopies are provided. They are fairly clear and
hard.
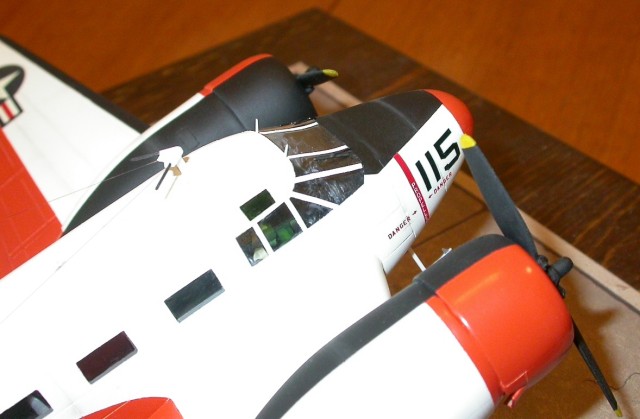
The way I went about trimming and adjusting the canopy was to tape
the fuselage parts together and try to get a rough idea of how the
canopy would fit. At that point I had left plenty of excess of vac
plastic so I would have plenty to trim. I like trimming better than
running short! I made sure to use tape as a guide and placed it over the
vac canopy as a guide for cutting. I kept sanding the canopy all around
until I got a satisfactory fit with the fuselage. It took me two
evenings to get the canopy right. I then dipped it in Future and set it
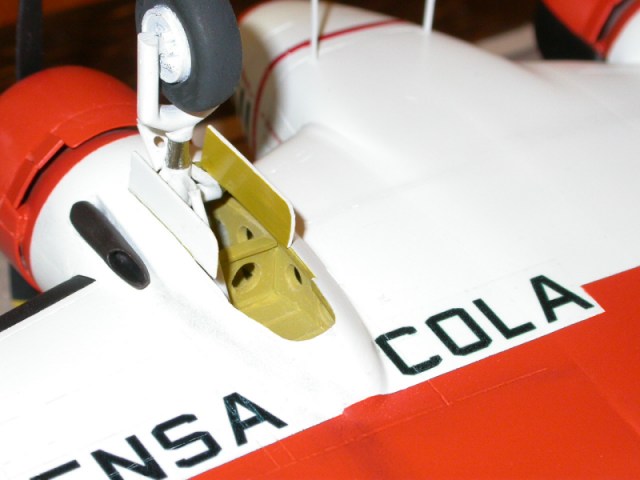
aside for later. I worked on the interior but did not do much since very
little would show at the end. After major parts cleanup the cockpit area
looked ok out of the box. The only thing I added was some seatbelts. I
spent some time on the engines, cleaning the blobs of plastic found
between the cylinders and adding some detail like the pushrods. Since I
wanted to do a later variant of the aircraft I had decided to use epoxy
putty to lengthen the engine nacelles.
My good buddy Boyd Waechter saved me a few days worth of work by
pointing me to Mike West. Apparently Lone Star Models had already
created the proper nacelles for the later Expeditors (like G and H,
etc). Soon afterwards I had a package coming from Mike loaded with a
bunch of goodies he markets (did you think that I was just going to
order only what I needed?).
After the airframe was together I sprayed many layers of automotive
primer, lots of sanding under water and finally I had something
respectable. The canopy went on next. I had already glued many strips of
styrene on the fuselage so the canopy would have good footing to rest
on. Then I masked it with Tamiya tape and applied more putty and primer
until I had a seamless joint. More parts were added to the airframe and
lastly a final coat of Mr.Surfacer 1000 primer was applied. Final
polishing was next. Last step was to re-scribe the model were it was
needed. The many layers of primer reduced the depth and width of the
panel lines a bit which was a good thing.
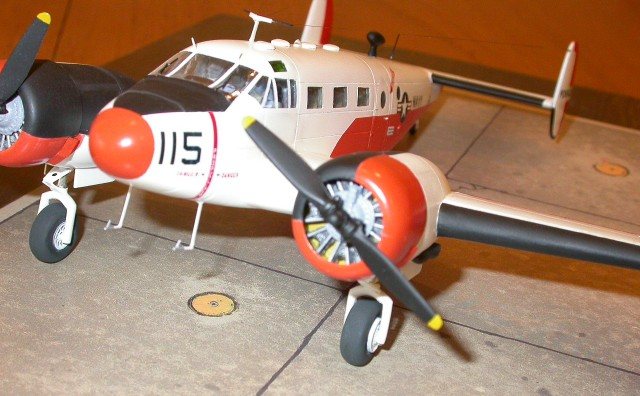
Every antenna was scratchbuilt since the items in the kit were of
gigantic thickness. Windshield wipers were made out of thin styrene
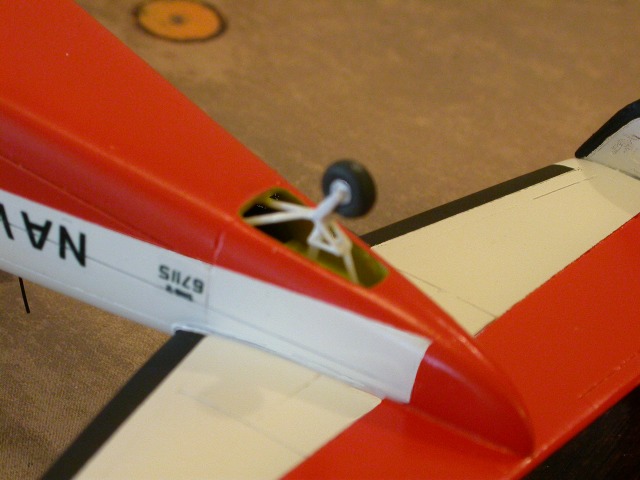
strips. The landing gear doors were scratchbuilt per photo references.
Check your info on this subject. Many variants had different types of
landing gear doors.
Some had the long ones some had short ones and some had none. The one
I built had the short main landing gear doors and none for the tail
gear.
This of course caused me some more trouble since the kit's tail wheel
is really bad. I scratchbuilt a new one and solved my problem in less
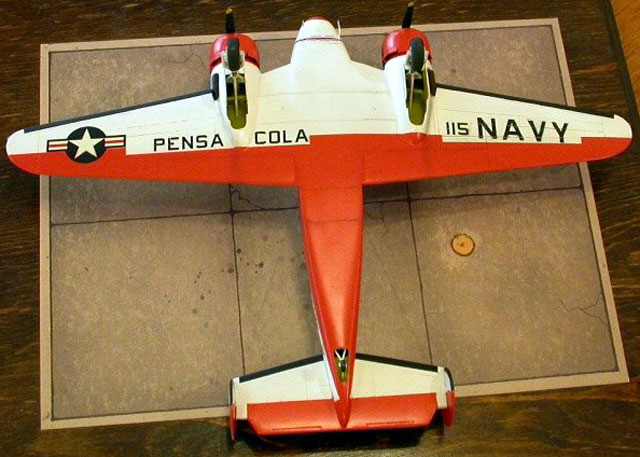
than an hour. I made my own decals, using my inkjet printer, which is
pretty good for black and white jobs. I chose to make a SNB stationed at
Pensacola in white/international orange style. As usual my good wife
supplied me with another long piece of her hair donated for the good
cause.
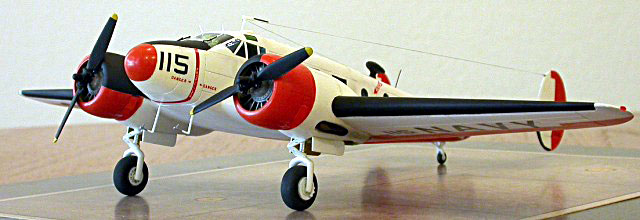
I am fairly happy with the results even though the model has many
mistakes (thick original landing gear, sharp corner side windows instead
of rounded, some antennas still missing, etc.).
I had to work unreasonably hard for such a small kit. I do not mind
the labor but this was ridiculous. There was no reason for the kit to be
so substandard. I wonder if there is a way for Battle Axe to fine-tune
their production methods.
Do I recommend this kit?
It depends on how bad you want a Beech 18 in your collection!
Artwork
Lastly, I want to include here a drawing my wife made of the plane as
she was keeping me company while I was trying to build it! I have to say
that she is turning to an aviation artist.
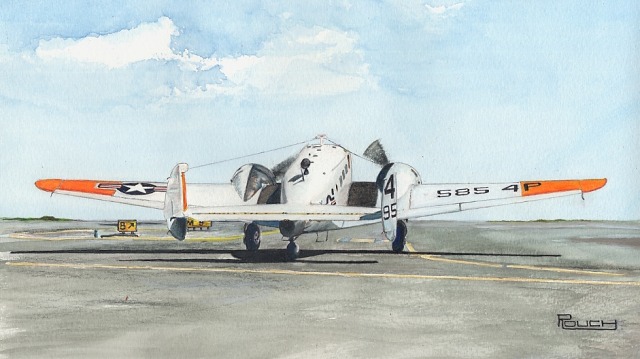
It is so much more fun watching her making drawings of my planes
instead of watching her painting landscapes!
To see more of my wife's airplane art go to
http://home.earthlink.net/~m.rouch/retail/aviation.html
Click on the thumbnails
below to view larger images:
Model, Images and Text Copyright © 2003 by
Fotios Rouch
Page Created 10 October, 2003
Last Updated 17 March, 2004
Back to HyperScale
Main Page
|
 Home |
What's New |
Features |
Gallery |
Reviews |
Reference |
Forum |
Search
Home |
What's New |
Features |
Gallery |
Reviews |
Reference |
Forum |
Search