|
Messerschmitt Bf 109G-10
by Scott Samo
 |
|
Messerschmitt Bf 109G-10 |

HyperScale is proudly supported by Squadron.com
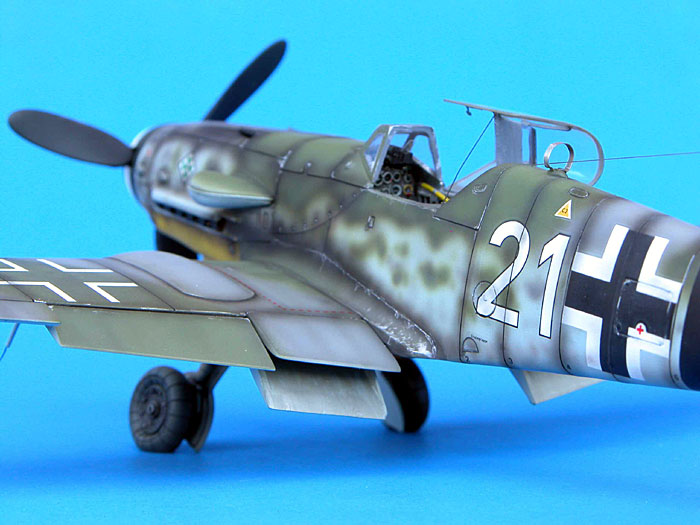
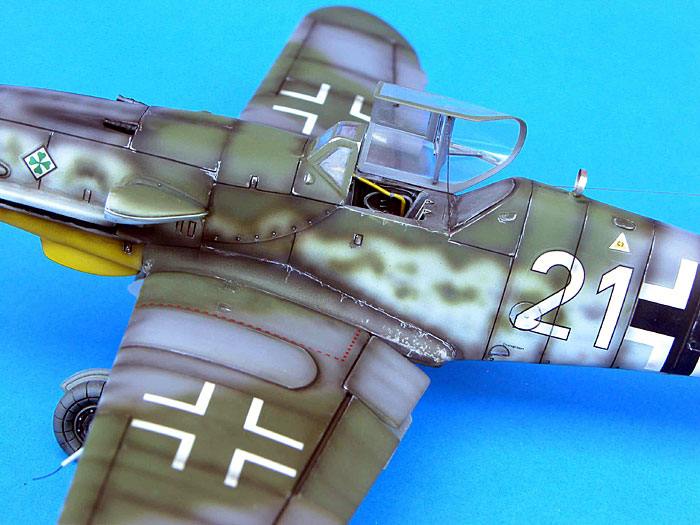
This is the Revell-Monogram's 1/48 scale Messerschmitt Bf 109G-10.
Despite its age, this is a great little 109 kit and until the recent
Hasegawa G-10, it was the one of the best G-10's available. The best thing
about this kit has to be the price. I picked up several of these kits at a
show in San Antonio, TX for about $2.00 each!
What a deal!
At first I just wanted to have a quick build, out of the box, built
G-10 on my shelf, but as I was browsing all the vendor tables at the show
I spied the Cooper interior detail set, Ultracast exhausts, Squadron
vacform canopy, True Details wheels, Aeromaster decals... oh well!! So
much for an out of the box model.
Anyway, this kit actually has great fit, excellent G-10 lines, nice
engraved panel lines and an absolutely unbeatable price. Those darn detail
sets... turned my $2.00 model into a $40.00 model. Unfortunately I built
this kit several years ago so I cannot remember every single detail of the
construction process. I do remember the kit fitted together very well and
I did not use any putty.
On to the model!
Cockpit and Fuselage
I first prepared the kit interior to accept the Cooper set. There was a
lot of sanding with the Dremel to get the sidewalls thin enough so the
detail set would fit properly. Once the sidewalls were sanded the fit was
perfect.
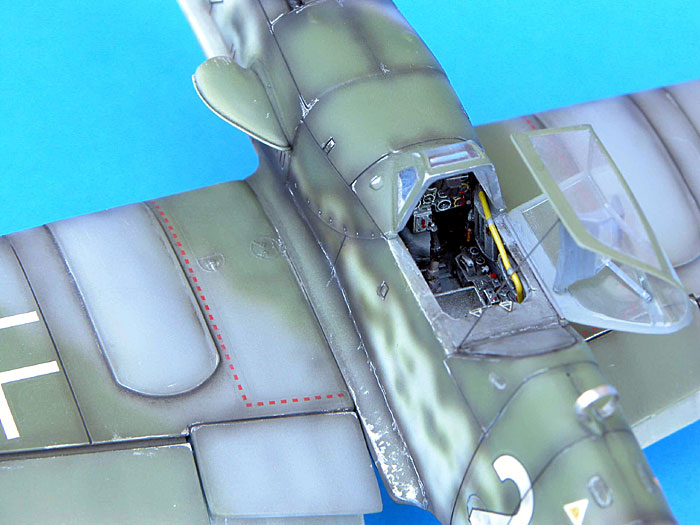
The interior was painted with Gunze RLM 66 and given my usual wash and
dry brush treatment. The fuselage fit well and I did not encounter any
problems. The panel lines matched up nicely and from there I moved onto
the wings.
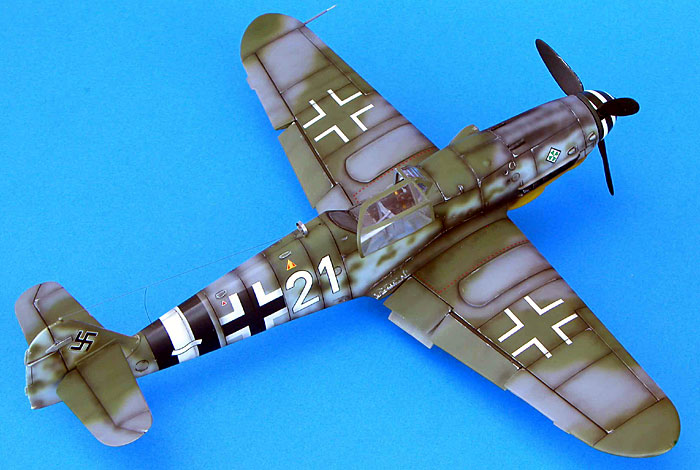
Wing Detail
Once the fuselage was together, I carefully dry fit the wings and I was
surprised to see a perfect wing root fit. I remember saying to myself,
“This can’t be an old Monogram kit. The wing root ACTUALLY fits? Cool!!”.
At the time there was not a flap detail set that I knew of, so I just
cut the flaps and posed them in the down position. The plastic was fairly
thin and it did not take too much effort to make a nice cut. The wheel
well area could use some work, but all in all the fuselage wing root fit
was excellent.
Next I moved onto my favorite thing... painting and weathering!
|
Painting, Decals and
Weathering |
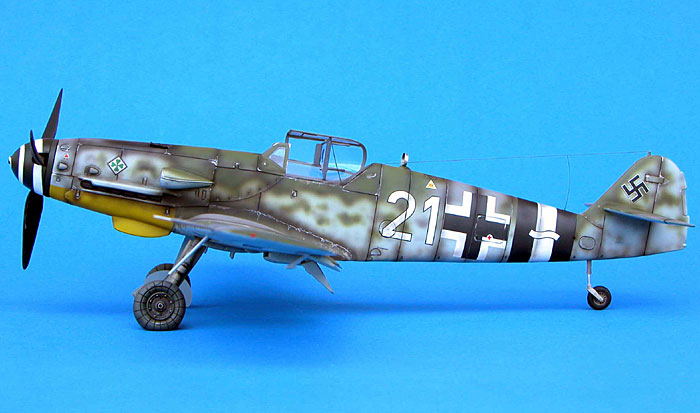
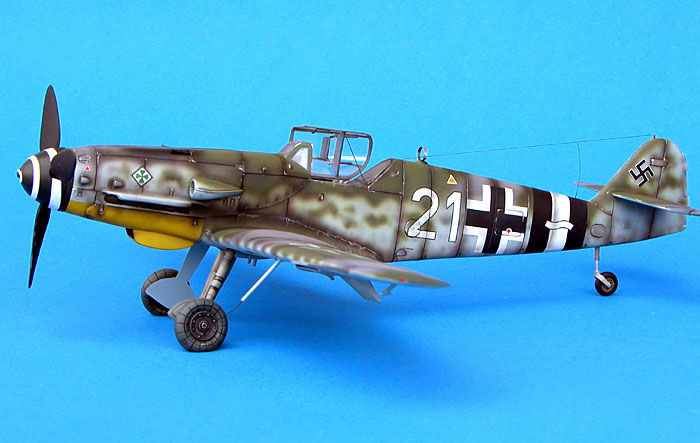
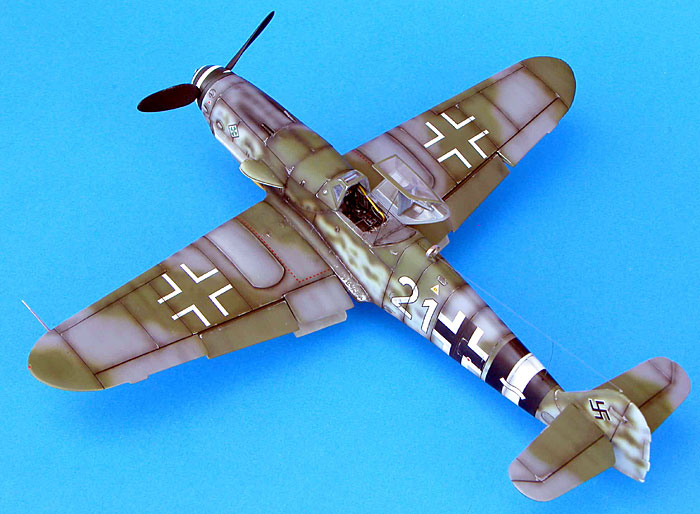
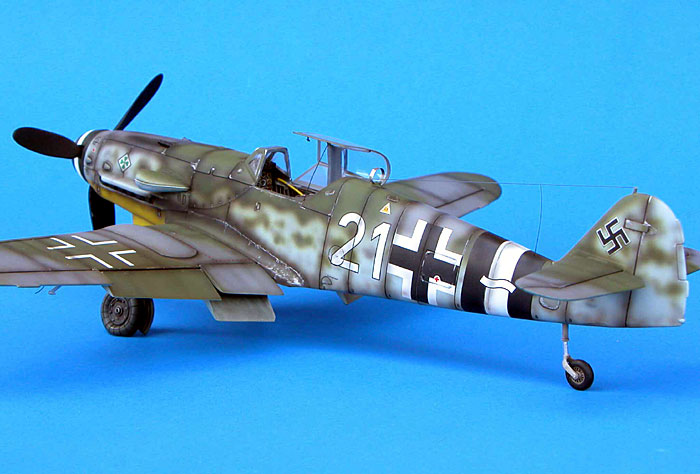
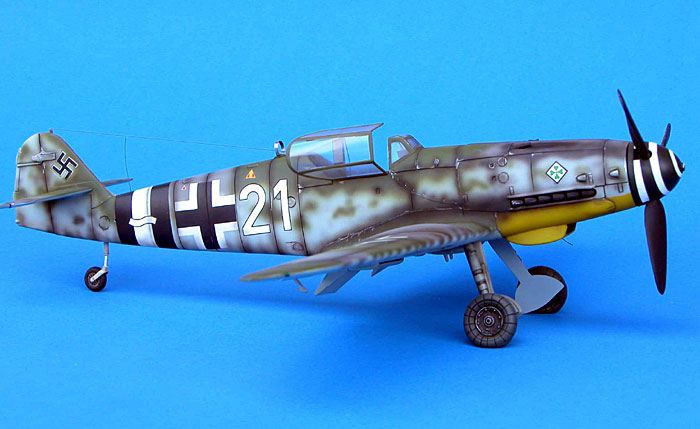
I painted the model according to the Aeromaster decal sheet # 48-385
“Augsburg Eagles Part VII” and I used Gunze RLM colors for the Luftwaffe
day fighter scheme. RLM 76, 75 and 82.
Once the model had the standard scheme applied, I shaded several panels
and applied the decals.
The decals were great!
They were thin and settled down nicely with a small amount of setting
solution. Before I applied the decals I tried something different from the
usual Future gloss coat. I began using (and still today I use) microscope
lens paper to polish the paint to a sheen and I did not need a gloss goat.
Gunze is really soft paint and the lens paper will make it shine like you
wouldn’t believe! My belief is the least amount of gloss and flat coats
you use, the better the finish will look. Try it! It takes a little longer
than a gloss coat, but the results are fantastic.
Once the model was painted and decaled, I used the airbrush to shade
and weather the panel lines, exhaust, etc. By the way, the spiral on the
nose went on great! Usually spirals are notoriously difficult and time
consuming to apply. This decal was awesome.
Once the weathering was completed, I moved to the final stages of
construction.
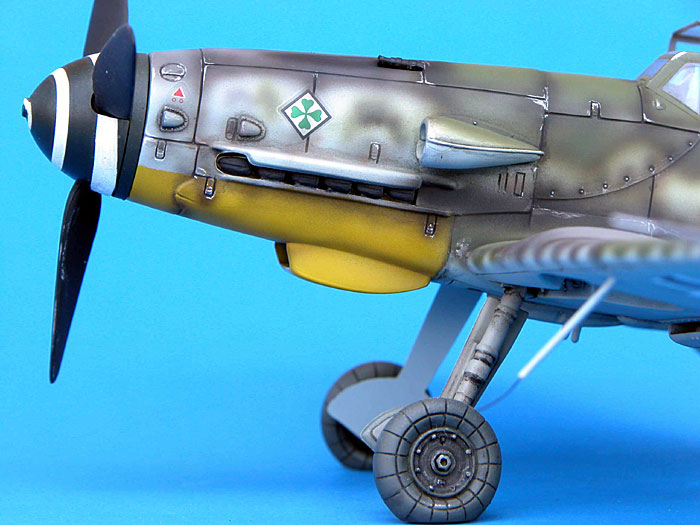
Some of the little extras were the nice tall tail wheel from Cooper,
Squadron Erla Haube canopy, True Details wheels, surgical suture antenna,
solder wire DF loop antenna, wire for other antennas and canopy brace,
robbed Galland Panzer headrest from a Hasegawa kit and a Prisma silver
color pencil for the chipping.
All of these extras fitted well and were easy to install.
Once the little items were added, I used Polly Scale Flat for a final
coat.
This was a great little kit.
I have not built the new Hasegawa G-10 but this one could give it a run
for it’s money, no pun intended! Anyway, with all the details added I
think this kit was a fun kit to build. The detail sets fit well and the
decals were superb. All in all I really enjoyed building this kit. I hope
you enjoy it.
PS..... like I said before... If only Hasegawa would build a 1/32 G-10!!
Happy modeling!
Click the
thumbnails below to view larger images:
Model, Images and
Article Copyright © 2003 by Scott Samo
Page Created 20 October, 2003
Last updated 17 March, 2004
Back to HyperScale Main Page
Back to Features Page |
 Home |
What's New |
Features |
Gallery |
Reviews |
Reference |
Forum |
Search
Home |
What's New |
Features |
Gallery |
Reviews |
Reference |
Forum |
Search