|
Messerschmitt
Bf 109G-10
"Type 110" Cowling
by
Floyd S. Werner Jr.
|
|
|
Messerschmitt Bf 109G-10
"Type 110" Cowling |

Hasegawa's 1/48
scale Messerschmitt Bf 109G-10 is available online from Squadron.com
The 1/48th Hasegawa G-10 has been reviewed by others and myself to
the Nth degree so I will not talk about the kit, but about the
simple conversion. I hope to spark some conversation about this
particular aircraft.
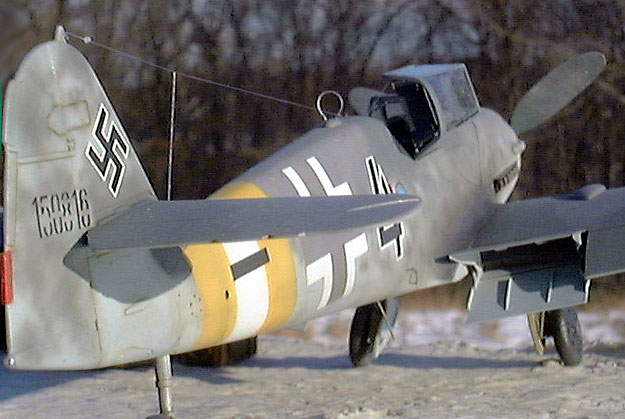
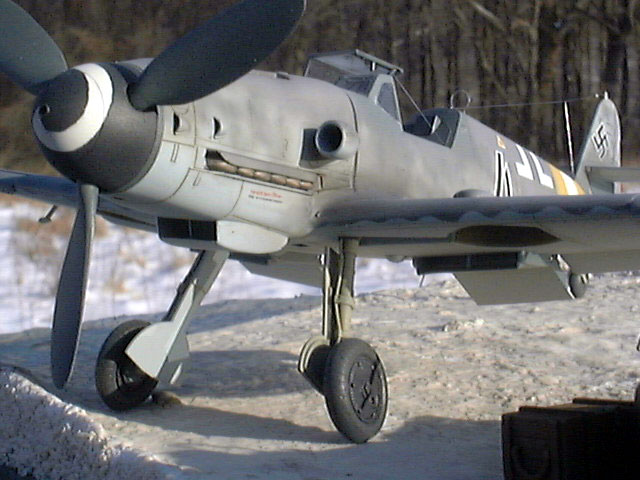
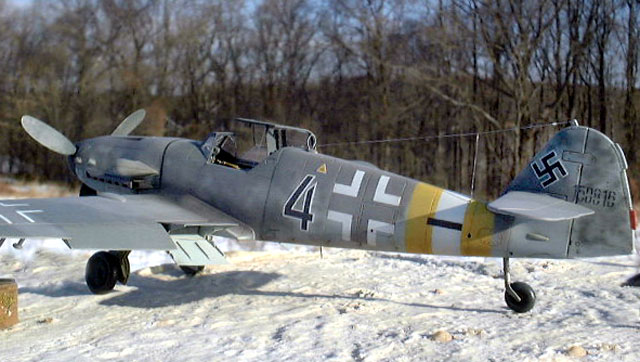
The "Type 110" Cowling Variant
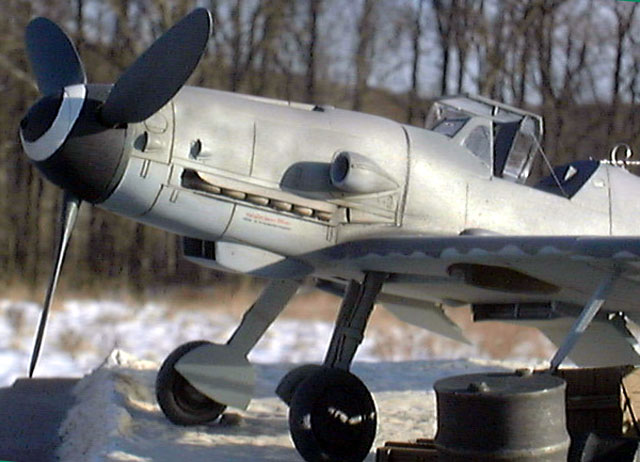
The most noticeable characteristic of “Type 110” cowlings is a flat
plate on the left side below the cockpit on some G-10s. The two most
famous examples are Erich Hartmann’s G-10 in which he scored his last
victories and the subject of my model, an enigma from JG2. Mermet states
that in conjunction with the flat plate the gun troughs were lengthened
at the front.
The oil cooler had a small side section, similar to a standard G-6,
but was in fact wider giving it more area. These aircraft usually have
small wing teardrop bulges due to smaller main wheels. These aircraft
were built in two werknummer blocks, 491XXX and 150XXX. Because
of the many similarities with the G-6-14/AS many experts call these
aircraft G-10/AS, but they in fact are just G-10s with earlier models of
the DB 605AS/ASM or DB605D engines.
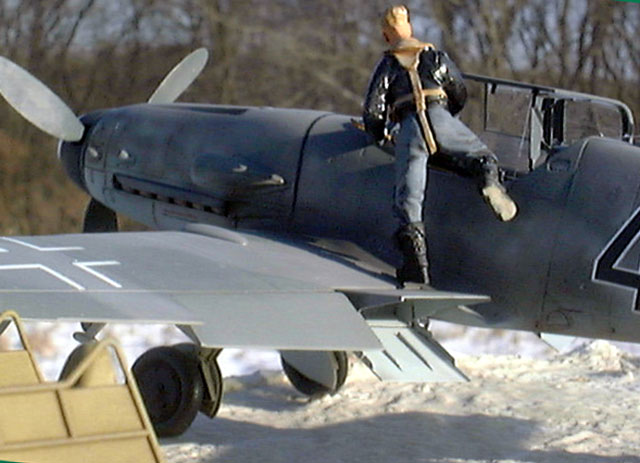
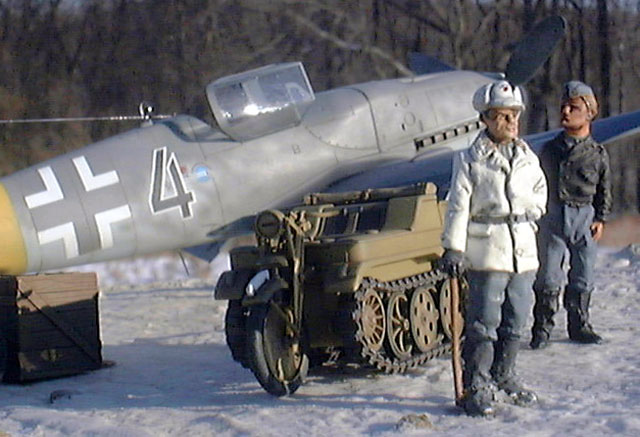
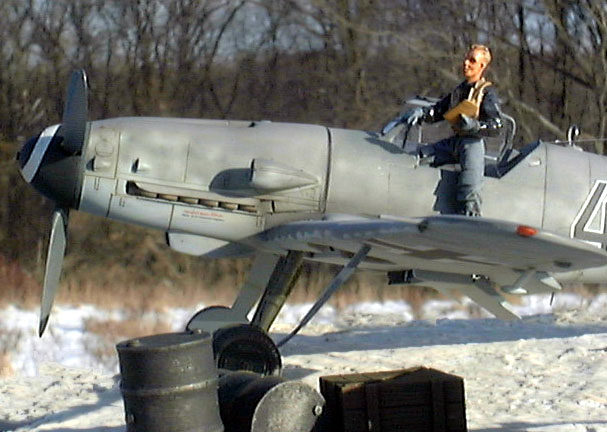
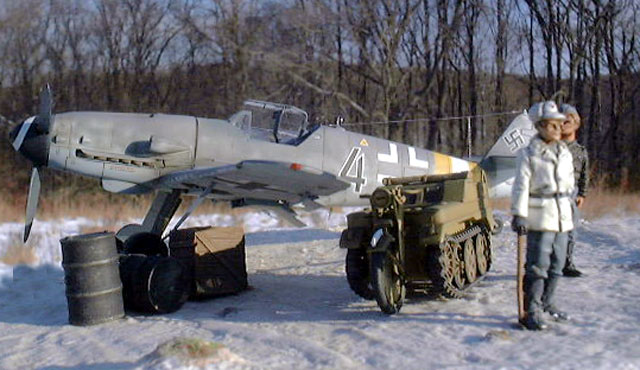
The Subject Aircraft
Why did I pick this aircraft to model? Well there is a lot of
controversy over this particular machine. It was found in Langensalza at
the end of the war. It wore light colored RVD bands that have been
interpreted to be JG2 (Yellow-White-Yellow). Some feel strongly that it
belongs to JG300 (Light Blue-White-Light Blue). One thing is sure,
neither unit had G-10s on strength at this time of the war, so where did
it come from and who owned it? What you see is my interpretation of the
three photos that I know of.
Will this solve the issue? No way, but it may stir up some
conversation.
The Luftwaffe Verband discussed this particular aircraft for an
entire year and sort of came to the conclusion you see before you. You
will notice some other peculiarities with this aircraft. The wing
crosses are smaller and further out than usual. Why? Who knows? Typical
of photo interpretations is the never ending and constantly evolving
question are those the right colors? More food for thought, but I think
it is very close.
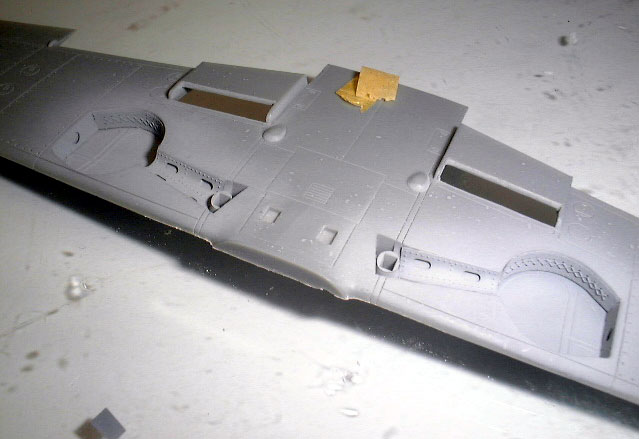
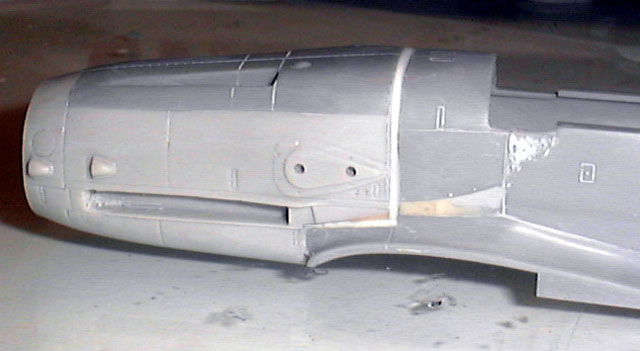
The conversion process was quite easy. Use a razor saw, files, sand
paper and cut the nose off. Square everything off and cement the new
nose.
Before you put the new nose on I made a vertical line in the
elliptical cowl bulge on the left side just in front of the windscreen
panel. Don’t cut too deep. Flat sand the cut to smooth the area aft of
the cut. Then take two part epoxy putty utilizing tape for masks and
build up the area forward of the cut below the cowl bump.
Be careful not to obliterate the wing fairing, but the panel must
meet this fairing.
Prime and re-sand as necessary and you're done with the hardest work.
 I also scribed a new oil filler port above the one on the
kit/conversion. I intentionally left the lower port visible as some
aircraft did. I elongated the upper gun troughs with a fine needle file.
They look real nice and when placed against a normal G-10 you can notice
the difference. I’m not sure what the difference is between the
conversion set and the standard G-10 nose section, but I elected to use
the resin replacement for the purpose of learning. I built the kit
normally with the sets and detail parts below. I also scribed a new oil filler port above the one on the
kit/conversion. I intentionally left the lower port visible as some
aircraft did. I elongated the upper gun troughs with a fine needle file.
They look real nice and when placed against a normal G-10 you can notice
the difference. I’m not sure what the difference is between the
conversion set and the standard G-10 nose section, but I elected to use
the resin replacement for the purpose of learning. I built the kit
normally with the sets and detail parts below.
Model Master acrylic paints were used throughout.
Eduard Messerschmitt Bf-109G-10 Set 48-390
As far as I know Eduard has been at the forefront of photo etch parts
since the process was introduced to modelers in the late 1980s. They
continue to put out sets for every modern kit release. Having built
their earlier 109 sets I was very happy to get my hands on this one.
What I got was a shock. You get two large photo etch sheets, one clear
sheet for the gun sight and one painted paper which has the instrument
faces painted. The instruction sheet is SIX pages long, SIX pages. The
set covers every aspect of the model, inside and out.
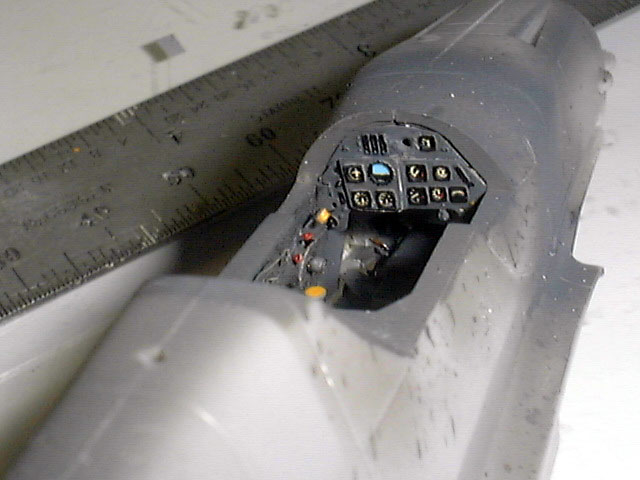
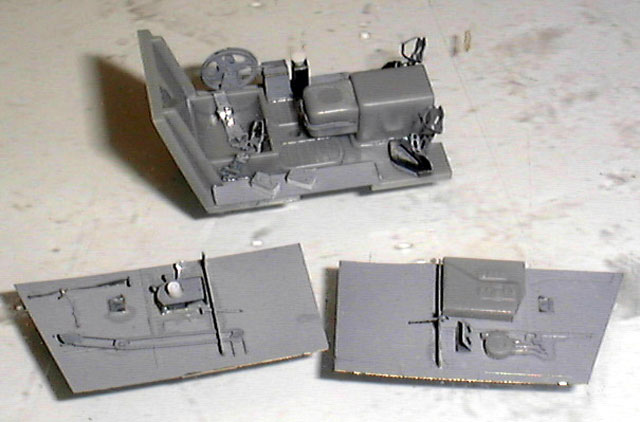
I was leery of the photo etch cockpit area which utilizes some of the
kit parts, notably the floor panel. I built the cockpit set up slowly
and was very surprised that everything, and I mean everything, fit like
a glove. Careful bending and rolling of some parts made for a quite
convincing interior. It was noticeably wider than the resin tubs I
usually use. I think I could put a pilot in there if I wanted to, but to
hide the exquisite detail would be a shame. You will have to have some
sprue stock but it looked great. The only thing you really have to add
is the fuel line and wires on the right panel. I made my lines from .025
and .010 leaded fly-fishing wire. The clear part was made from stretched
clear sprue. The armored plate on the canopy is nice but there is no
clear part for it. The kit part is way too small. Overall, I was very
happy with the cockpit.
The weakest part of the Hasegawa kit is the wing radiator area. Eduard
has a unique approach to this area that is beautiful in its execution.
Eduard has you make the front and back pieces that cover the openings
and allows the flaps to be positioned open. There is no see through and
the delicate hinges are a nice touch. The only issue on this kit is the
lack of doublers on the bottom side of the lower flap. I must say who
cares? It looks great. Don’t forget to thin down the trailing edge as
per the instruction set, this allows the flaps to be wedged in between
the wing and the enclosed back areas. This provides plenty of strength.
The landing gear is not forgotten either. The wheel well is enclosed
with your choice of end pieces. The top of the wheel well is large
enough for the area and this takes care of the gap in the Hasegawa kit.
I did have to thin my upper wing slightly. The strut gets a thin piece
that I lost so I ended up replacing it with some solder.
I also elected not to use the under wing antenna as I thought it was too
thin, but that is just my thought. It fit like a champ. One minor thing
is the instruction sheet has you put the canopy release handle on the
wrong side so be careful. A tip for the DF Loop antenna, I cut it out
and rolled it around a paintbrush handle. When I got to the end I used a
razor to straighten out a little bit for mounting. I love the results.
Bottom line, I loved this set. I highly recommend it. Thanks to Eduard
for supplying the review copy. Eduard is widely available and this set
retails for $19.99. Well worth the money.
Adeco MD480016 Bf-109G-6/AS Conversion
This set consists of a resin forward cowling to replace the kit one.
It also has a resin oil cooler, flattened main wheels, prop blades and
small wing bulges. The resin plug is a good fit if you are careful and
test fit constantly. All the other parts are drop replacements for the
kit parts.
I was very happy with the end result. It has the proper bulge that
the G-10 kit is missing. The resin nose does have a “grainy” surface but
after painting and priming it is not really noticeable. This set made my
Type 110 cowling conversion very easy. The set comes recommended to
anyone who has to have a G-6/AS. It is an easy conversion set.
Recommended.
The set can be obtained through www.ModelDesignConstruction.com. The
review copy was courtesy of my wallet.
Cooper Details CD4817 Bf-109G-6 and G-14
upgrade
Cooper Detail is the standard I judge other 109 products by. With
that said, Roy Sutherland developed this set to address some of the
minor problems with the Hasegawa kits, namely the bulbous nose. The set
also includes replacement tails for either the regular or tall tail and
new bulged main wheels. All the parts, with exception of the tails, are
drop in replacements. This set has been incorporated into the Bf-109 set
from Jaguar. Highly recommended. Review copy supplied by my wallet.
Cutting Edge Black Magic Camouflage Masks
CEBM48288
I’ve been using Black Magic masks for quite some time and I find them
indispensable. The set is very easy to use. I do one thing different, I
use Silly Putty under the masks to raise them off the model 1/8 inch and
get a slightly softer edge. The best use of these masks is on the
scalloped leading edge areas. These masks are reusable if you are
careful so they are well worth the money. Highly recommended. Review
copy again supplied by my 109 driven wallet.
Aeromaster Reich Defense Bf-109G/K 48-004
This set is long out of production but is the only sheet with the
decals for my aircraft including the smaller wing crosses. A word of
caution on the camouflage in the drawings, check your references.
I enjoyed this model a lot and it looks exactly like I envisioned it.
All the sets were very helpful in building up a Type 110 G-10. I hope
this model will stimulate some conversation on the original aircraft’s
origin.
-
Messerschmitt Bf109 G-1 through K-4 Engines
and Fittings. Mermet, Jean-Claude Available only through Mr. Mermet.
This is one of the reasons to belong to the Luftwaffe Verband. (Some of
the information is also in Eagle Files #3: “Augsburg's Last Eagles” by
Brett Green)
-
Broken Eagles 3; Bf-109 G/K Part II;
Hildebrandt, Carl
-
Luftwaffe Vol 2, Warbirds Photo Album, ISBN
T1005706112308,
-
Aero Detail 5 Messerschmitt Bf109G, ISBN
4-499-20589-1
Click on the thumbnails
below to view larger images:
Model, Images and Text Copyright © 2003 by
Floyd S. Werner Jr.
Page Created 21 March, 2003
Last Updated 17 March, 2004
Back to HyperScale
Main Page
|
 Home |
What's New |
Features |
Gallery |
Reviews |
Reference |
Forum |
Search
Home |
What's New |
Features |
Gallery |
Reviews |
Reference |
Forum |
Search