|
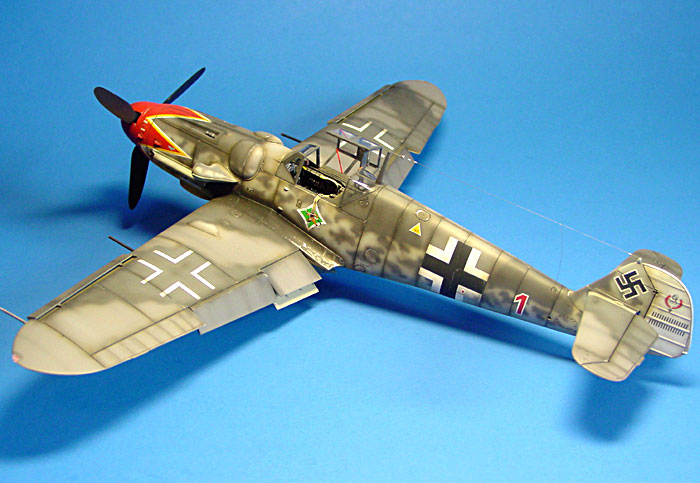
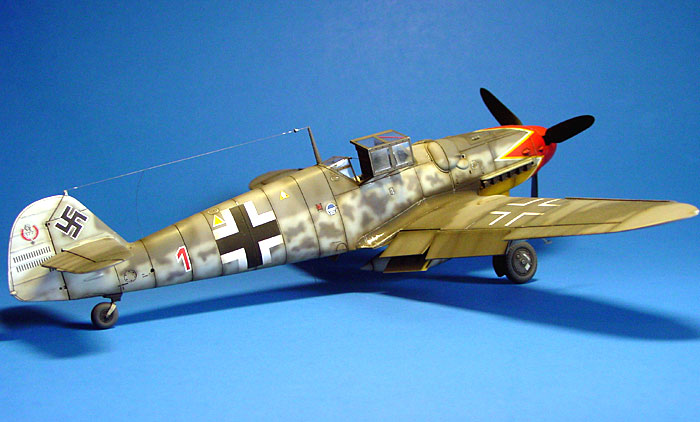
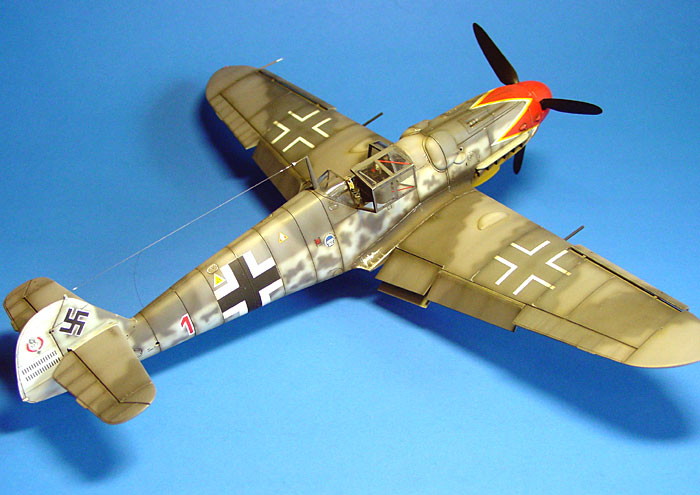
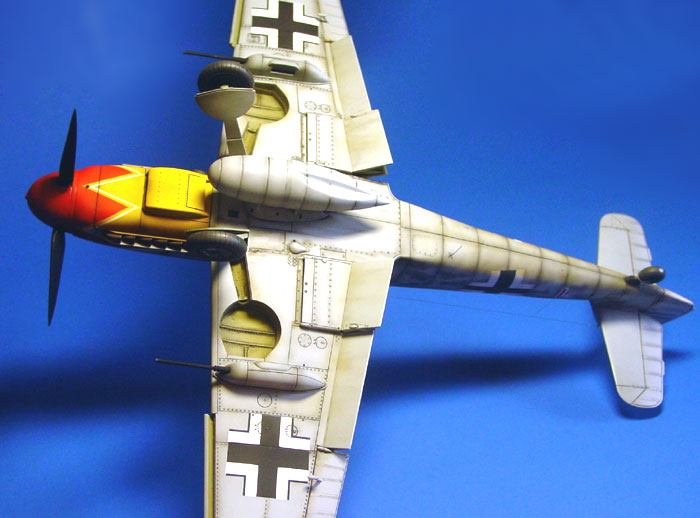
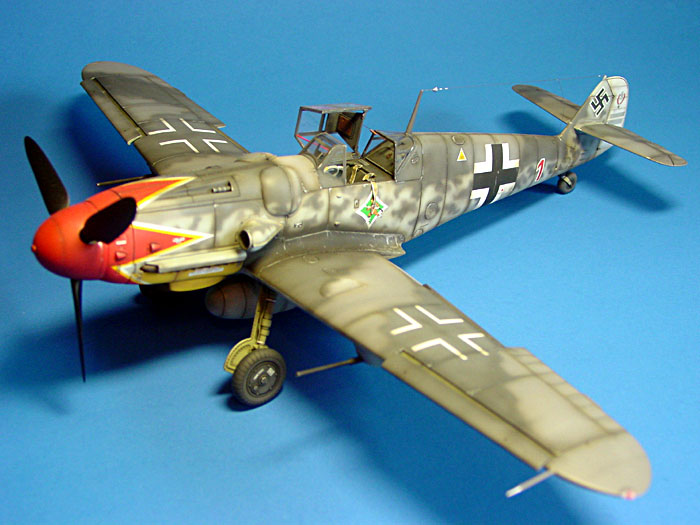
Messerschmitt Bf 109G-6
by Scott Samo
 |
|
Messerschmitt Bf 109G-6 |

Hasegawa's 1/32
scale Messerschmitt Bf 109G-6 is available online from Squadron.com
As soon as I heard Hasegawa was coming out with a 1/32 scale
Messerschmitt Bf 109G-6, I was ecstatic!
I had been working on the Revell kit for years but as soon as I
heard about the Hasegawa kit, the Revell kit found it’s way to the attic!
Completing the model was very easy. I will not discuss
construction in detail since there are numerous articles already written.
Instead, I will elaborate a little on the few construction items which were
unique to this model.
Mostly I will discuss painting, weathering and the application
of the insignia and data marks.
Cockpit and Fuselage
Beginning with the cockpit, I added a few items such as some
wires, a small hatch on the rear decking, acetate for the gunsight and a seat
harness from Eduard. I used Gunze RLM 66 for the base color and used my usual
wash of Turpenoid and Windsor and Newton Oils. A little bit of drybrushing and
BAM!! I was done. I realize MDC and others have awesome cockpits. However, as
any model geek knows, if something comes out that you have been waiting for, you
buy it and get to work! My next 109 will have the MDC set. The fuselage was
super easy to construct. I did not encounter any problems. Next it was on to the
wings.
Wing Root Fit
I approached this area with a little trepidation. Wing roots can
sometimes make or break a model. I hate, yes... I’m using the word hate...
sanding wing roots. I have finally found a way to avoid filling and sanding in
this area.
First I dry fit a lot and ensure BEFORE I ever glue anything that there is a
perfect fit. I will also use super glue to hold the areas being glued in a few
key areas, then joining the plastic with welding type cement. Yes... I agree
this is VERY time consuming. But hey... do you want to have a great fit or not?
I guess the argument could be some would rather slap the wings together, pile on
some putty and rescribe the lines. To each his own! Anyway, even before I glue
the fuselage halves together, I glue the tops of the wings to the fuselage. This
is an excellent way to ensure there will be a perfect fit. If I need to fill or
sand anything... it will be the leading or trailing edge of the wing which is
much, much easier to sand.
Once the wings are glued to the fuselage and the fuselage is joined, I will glue
the bottom of the wings. Again I carefully dry fit, sanding a little bit if
needed. Once I’m satisfied, I’ll tack the key points with super glue, then
secure the rest of the area with plastic weld type cement. This method works
great on WWII type aircraft with traditional designs. Next it was on to
painting.
|
Painting, Weathering
and Markings |
Painting
Painting and weathering is my favorite part of building. I love
it!! I used Gunze and Tamiya paint for everything. Mostly I used Tamiya for the
finish because it is dead flat when airbrushed. I thin it really thin...90%
thinner, 10% paint. I use 91% isopropyl alcohol for the thinning agent. It is
the only thing I use. It’s cheap and it allows me to really spay fine patterns.
I sprayed the first coat of RLM 76 on the entire model.
Next came RLM 75 then 74. I freehand everything so it takes a
while to get the pattern just right. After the mottling was done, I sprayed RLM
04 under the nose then white on the tail. Next came the fun part.
Markings
I bought the decals from Eagle Cals sheet EC#37. As much as I
wanted to use the decals for the nose, I did not think it would turn out right.
So... I airbrushed all the markings. The difficult part would be to get the
tulip on the nose perfectly symmetrical. How was I going to do it? Well, it was
really easy. Here is how I did it.
-
Leave the decals in the ziplock
plastic bag.
-
Staple the top, sides and bottom
of the plastic so the decal sheet will not move around in the plastic.
-
Use Tamiya yellow tape and outline
whatever individual decal you want by placing the tape on the plastic bag.
-
When the decal is outlined,
carefully pull off the tape and place it on the model.
-
You will have perfect measurements
transferred from the decal sheet plastic onto the model.
I used this method for the white individual tulip petals.
The red nose tulip was entirely airbrushed. First I sprayed the
white using the tape transferred from the sheet. Then I used tape to mask the
portion I wanted to remain white. Then I sprayed yellow, masked it and finally
sprayed red. It worked absolutely perfectly. It took a lot longer than a decal
but it looks much, much better. Once the camouflage pattern was applied, along
with the tulip, I used the above described method to airbrush almost all of the
insignia. The only part that is not airbrushed is the tail kill markings, the
emblem on the fuselage under the cockpit and a few small stencils on the
fuselage. This is a pain staking process but it allows me to control the finish
and produce a more spectacular and eye catching model.
Next it was on to weathering.
Weathering
Weathering is so easy! Just go slowly and you will be amazed at
what you can do. I like to use Gunze and Tamiya flat black for most of my
weathering. Sometimes I will mix in a little brown or rust to change the color.
I thin it very thin and it makes it so much easier to control. Slowly I will
follow all the panel lines, wear areas and build up the paint. I always have a
reference photo to look at and I am always stopping and checking to see how it
looks. The biggest problem is going overboard. To avoid this, just stop after
about 30 minutes or so and leave the model alone. Come back in an hour or so and
spray another 30 min. or so. Then leave it alone for that day. When you come
back the next day, it is easy to tell if you have weathered the model enough. I
will usually weather until I feel it is right. Sometimes I will even weather the
model months after it is completed. It all depends on how I feel.
Final touches were the surgical sutures for the antenna, wire
for the other antennas and Moskit exhausts. I used a Prisma Color silver pencil
for all the chipping. This is a great little tool! It is very easy to control.
Be careful not to overdo the chipping.
After all the little items were added and just before the canopy
was attached, I sprayed the model with a light, light coat of Polly Scale flat
to seal the entire model.
This was a dream kit to build. I did not use a single smear of
putty on this model.
I am also now a firm believer in airbrushing markings and
insignia. I realize my techniques are painfully time consuming. However, with
just a little bit of patience you can turn a good model into a FANTASTIC model!
Happy modeling and I hope you enjoy this one.
Now if only Hasegawa would produce a 1/32 Bf 109G-10...
Click the
thumbnails below to view larger images:
Model, Images and
Article Copyright © 2003 by Scott Samo
Page Created 18 September, 2003
Last updated 17 March, 2004
Back to HyperScale Main Page
Back to Features Page |
 Home |
What's New |
Features |
Gallery |
Reviews |
Reference |
Forum |
Search
Home |
What's New |
Features |
Gallery |
Reviews |
Reference |
Forum |
Search