|
The subject aircraft sported a typically simple
late-war finish of RLM 76 Light Blue on the lower surfaces, and RLM 75
Grey Violet on the upper surfaces. References seemed ambiguous about
whether this Bf 110G had a mottled fuselage, or whether there was a
simple, high demarcation between the colours. In the end, a compromise was
decided in the form of a very sparse mottle of RLM 75 Grey Violet over the
76 fuselage sides.
There are many ways to approach painting and
weathering.
This aircraft was destined to be post-shaded.
Highlighting of structural details and weathering would be added after
the basic camouflage colours were applied.
Gunze acrylic paints were used for both the
camouflage colours. The Gunze RLM 75 looked too dark during test-spraying,
so it was lightened with around 15% RLM 76 Light Blue RLM 76 Light Blue
and upper surfaces RLM 75 Grey Violet.
The airbrush was the usual Aztek A470 fitted with the
tan-coloured “fine line” nozzle.
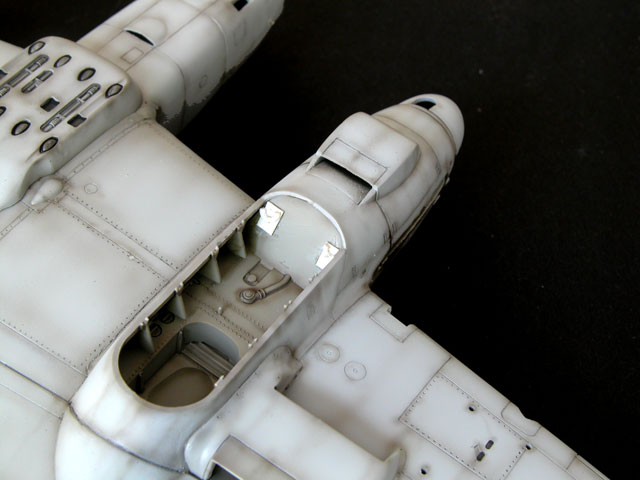
Cockpit and wheel well areas were masked before
spraying the lower surfaces.
Demarcation lines at the wing roots and upper
fuselage were not masked. They were sprayed freehand. Light mottling was
also applied freehand on the fuselage sides.
At this stage the model looked quite bland. Post
shading added some character and depth to the paint job.
|
|
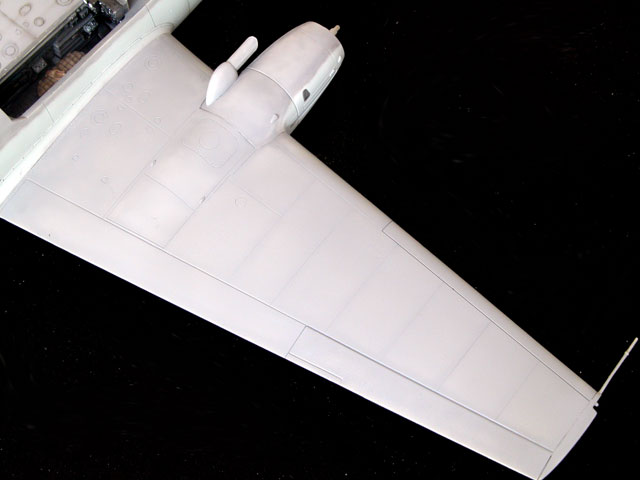
The basic
camouflage colours were sprayed on the airframe. This simple colour
scheme comprised RLM 76 Light Blue lower surfaces and RLM 75 Grey
Violet upper surfaces. Gunze paints were used, but their RLM 75 was
lightened with RLM 76.
The panel lines have not yet been shaded with a different colour.
The effect seen here is as a result of a heavier coat of the basic
colour being applied along panel lines. |
There is no single “correct” method for post shading,
but this model was weathered using the following steps:
Weathering Panel Lines on Pale Colours
It is easy to overdo panel
line shading under any circumstances, but it is especially risky over very
pale colours such as RLM 76 Light Blue. A 2B clutch pencil was used to
lightly draw along the panel lines and structural features on all the
surfaces painted RLM 76. This results in a more subtle effect than a wash
of black paint and is also more forgiving, as an eraser can be used to
remove any mistakes or heavy lines.
|
|
|
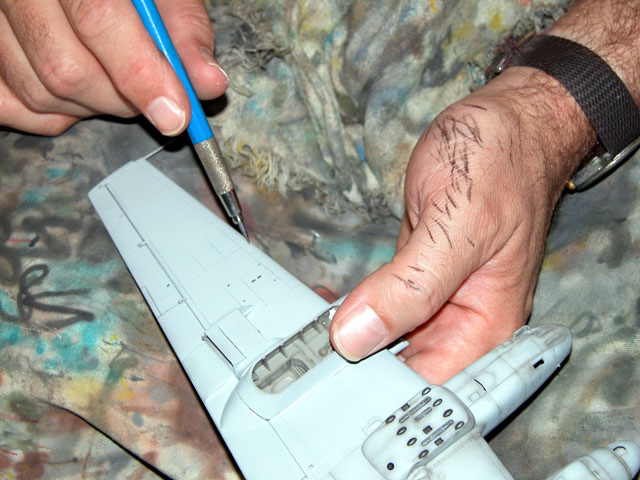
A sharp 2B pencil
is used to lightly draw along the panel lines on the lower surface.
For pale colours, this method has a more subtle impact than a black
wash. |
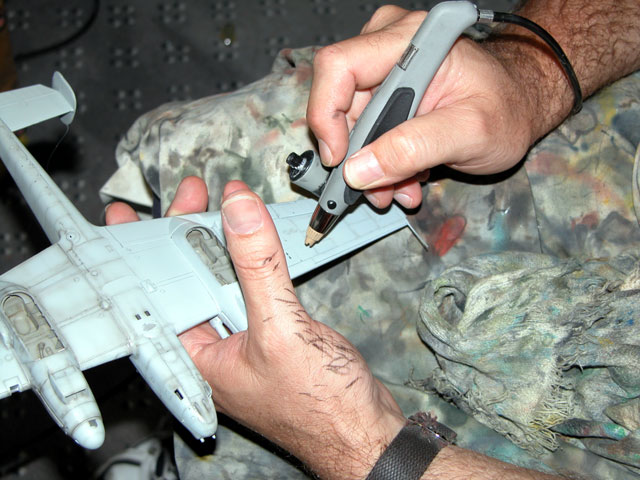
When the panel lines were
drawn-in, they received a very thin airbrushed shading of a brown/black
mix (Tamiya XF-1 and XF-64). In addition to panel lines, this thin mix can
be sprayed into the crevices between nacelle and wing; and the edges of
the radiators and oil coolers.
|
|
|
The airbrush is
used to trace over the pencil lines with a very thin mix of brown
and black paint. |
Always keep in mind that
the emphasis is on subtlety, so make sure that the airbrush paint mix is
very thin - almost transparent.
Weathering Panel Lines on Darker Colours
Darker camouflage colours
require a different treatment for panel lines.
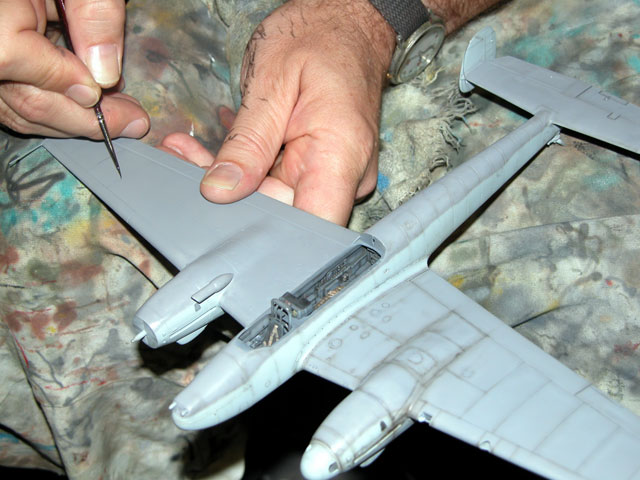
The panel lines on the
upper surfaces of this model were painted with a thin mixture of Tamiya
X-18 Semi-Gloss Black and water. The semi-gloss paint seems to flow nicely
into fine panel lines. It is important to note that this is not a sloppy
wash – the heavily thinned paint is directed into the panel lines with a
narrow brush, but capillary action will tend to draw the watery mixture
along the lines with minimal effort.
|
|
|
Panel lines on the
upper surface are first painted with a wash of Tamiya Semi-Gloss
Black, heavily thinned with water. |
Once the initial
highlighting has been completed, the panel lines are given the same
treatment as the lower surfaces with the airbrushed brown/black mix.
|

|
|
Next, as with the lower surface, the panel lines are shaded very
lightly with the airbrush. |
Additional Weathering
Exhaust stains were added
by gradually building up layers of the brown/black mix on the wings.
Paint chipping on the wing
walkways and around filler hatches was depicted with the point of a sharp
silver artist’s pencil.
|
|
|
Without
modification, the kit undercarriage legs lean too far forward.
The forward mounting holes for the gear legs were patched with
styrene and new locating lugs were glued in a lower location to
reposition the angle of the undercarriage. The semi-circular lugs
were sliced from styrene tube and cut in half. |
The rusty exhausts were
painted with, perhaps not surprisingly, Gunze Rust.
Decals for this aircraft were sourced from Aeromaster
sheet 48-322 – Nocturnal Birds of Prey Pt. III.
This aircraft was not fitted with the oblique-firing
Schrage Musik cannon in the rear cockpit, so the canopy did not need the
holes for the muzzles. Unfortunately, the holes are present in the
optional open rear canopy. An alternate rear canopy section without the
holes is also supplied with the kit, but this has the rear hatch moulded
shut.
The hatch was carefully cut out of the clear plastic
with a new scalpel blade. When this slightly frightening task was
complete, the glasshouse canopy was masked with strips of Tamiya masking
tape and the canopy frames were sprayed grey.
Once the masking tape was removed, rivet detail was
painted on the inner surfaces of the hatches with Flat Black paint. Strut
and hinge detail was added to the pilot’s top hatch using styrene and
stretched sprue.
The airframe was sprayed with Gunze acrylic Flat
Clear. A ring and bead gunsight for the MG81Z twin rear machine gun was
sourced from an Eduard photo-etched detail set. The completed gun was
glued in the rear of the cockpit then the canopy was secured with G-S Hypo
Cement, a strong, transparent jewellers’ glue ideal for clear parts.
A length of smoke-coloured invisible mending thread
was glued into a pre-drilled hole in the fin prior to painting. This was
now attached to the mast and a lead-in wire fed into a tiny hole in the
fuselage to complete the project.
This ProModeler Messerschmitt Bf 110G-4 delivers an
impressive result with minimal after-market enhancement.
"Modelling the
Messerschmitt Bf 110G" is available online from Osprey Publishing's website,
or worldwide through specialist bookshops and online outlets.
Images and Text
Copyright © 2003 by Osprey Publishing
Page Created 23 September, 2003
Last Updated
17 March, 2004
Back to
HyperScale Main Page |
 Home |
What's New |
Features |
Gallery |
Reviews |
Reference |
Forum |
Search
Home |
What's New |
Features |
Gallery |
Reviews |
Reference |
Forum |
Search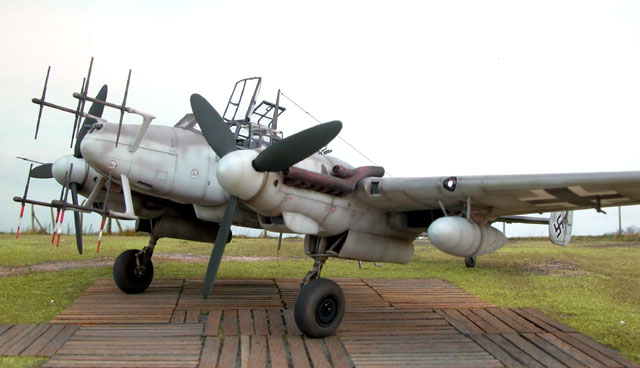

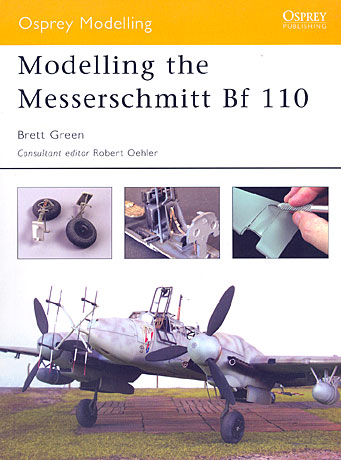 Osprey Publishing's book
in the new Osprey Modelling Series, "Modelling the Messerschmitt Bf 110G"
by Brett Green, features four detailed construction chapters with
1/48 scale models by the author and by Chris Wauchop; a Gallery of additional Bf 110
models; an examination of 1/48 scale kits, accessories and decal available today;
a summary of Bf 110 variants; correcting some common misconceptions plus a chart
of typical camouflage schemes.
Osprey Publishing's book
in the new Osprey Modelling Series, "Modelling the Messerschmitt Bf 110G"
by Brett Green, features four detailed construction chapters with
1/48 scale models by the author and by Chris Wauchop; a Gallery of additional Bf 110
models; an examination of 1/48 scale kits, accessories and decal available today;
a summary of Bf 110 variants; correcting some common misconceptions plus a chart
of typical camouflage schemes.