|
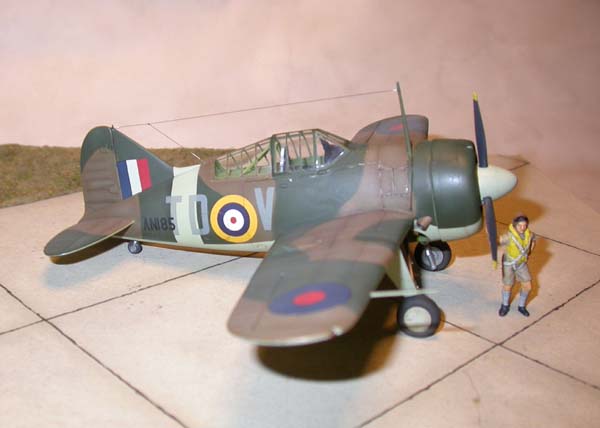
Brewster Buffalo
by Lee Rouse
|
 |
|
Brewster Buffalo |

Tamiya's 1/48 scale Buffalo is available
online from
Squadron
I originally purchased this kit when it was
re-released in 1991. About that time I also purchased the Eduard photoetch
set, which provides enhancement for cockpit and flaps. I worked diligently
on the project for a couple of weeks, and then put it aside. And there it
sat on my shelf, in the box for 12 years.
The project was finished over a period of
about 4 weeks during the months of July and August 2003.
The project turned out fine but was definitely
touch and go at times. There was the problem with the kit canopy. After
giving it some thought, I decided to use the kit part, rather than doing
the old "heat and smash" technique to make a new one. The canopy was
polished out (inside and out) using Blue Magic and then securely glued
into place using Fallers non-marring glue.
Eduard Easy Masks were then used
to mask off the many windows. Unfortunately, I had done such a good job of
polishing out the canopy that I managed to polish away a number of the
framing lines, making it difficult to determine exactly how some of my
masks should line up. The short of it is that I placed and removed the
masks so many times that the adhesive began to wear off, preventing a good
paint seal for several of the masks. I finally used the Easy Masks frames
to pattern replacement masks made from Tamiya masking tape. Even then I
discovered that paint had seeped under the edges of the canopy on the
inside. This required gently prying off the canopy and windscreen piece
cleaning off the paint gently with q-tip moistened with Tamiya thinner
(thankfully parts glued with Fallers are easier to pry apart than if I had
used a stronger glue like Tenax or Tamiya liquid).
Painting,
Markings and Finishing
|
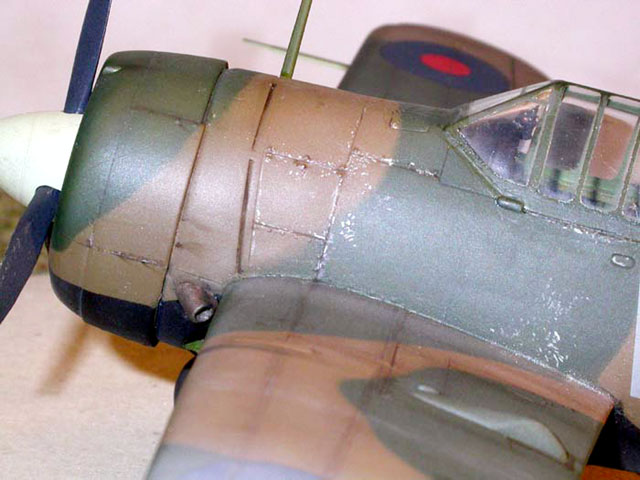
I used Tamiya paints. I first applied the base
colors. Painting the camouflage pattern was done using Poster Putty and
plastic wrap. For details on how I did this
click here to read my How To
article at the website for Eastern Carolina Plastic Modelers.
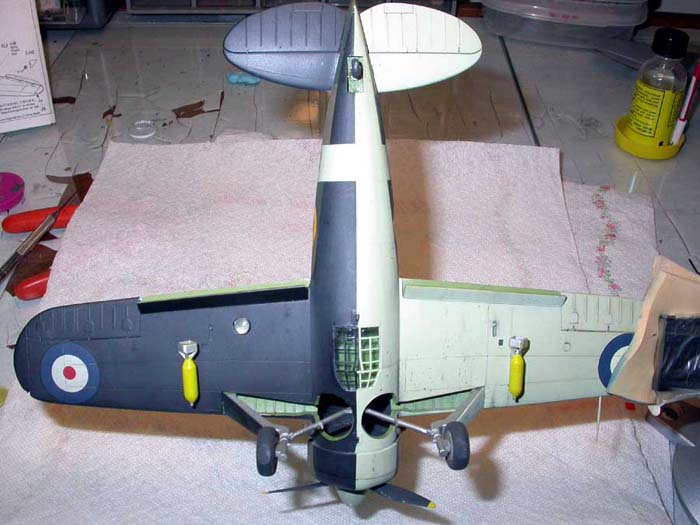
I had been trying to decide how to paint the
belly bomb window. This clear piece has many finely raised panel lines
which proved very difficult to mask and trim. I tried Tamiya masking tape,
Bare Metal Foil, Parafilm- none of them were really suitable for the job.
I finally ended up airbrushing clear decal film the approrpriate color
(either Sky or Black), cut into narrow strips and applied over the
framing. Not perfect, but I was satisfied with the results.
My biggest error was applying a base coat of Krylon chrome (aerosol can)
to the fuselage, thinking I would later chip paint back to the "metal",
and then foolishly applying Tamiya paint on top. Anyone who's ever done
this will know that the acrylic will not adhere well to a lacquer based
paint. Indeed, when I tried to mask underside Sky color prior to
airbrushing the black underside,the Sky came off in sheets. So, it was
steel wool the paint as far as possible back to the plastic, and reapply
the camo colors. This time I used Testors Model Master Sky for the
undersides. This adhered much better. I was able to get most of the chrome
off the upper surfaces, which allowed me to use the Tamiya paints as
originally planned.
Weathering
Weathering was done by lightening each color
and airbrushing the highly diluted lightened mix in the interior of each
panel line. I then went back along the panel lines with a very slightly
darker (again highly diluted)version of the original color. I also used a
silver Prismacolor pencil to simulate paint chipping.
I applied a burnt umber oil wash to some of
the panel lines. I also spattered the underside with mud behind the wheel
wells by making a sludge wash with black pastel powder mixed with liquid
dishwashing detergent and water. I then collected some on a old brush, and
flicked it onto the underside of the wing.
Decals
The final challenge was the kit decals. I
decided early on that I would tempt fate and use them. Keep in mind that
these were Tamiya decals that were at least 12 years old. But they hadn't
yellowed or cracked. I tested one from the alternate scheme on a scrap
model. It worked OK. I applied the wing roundels- a little thick- even by
today's Tamiya standards, but wil several aapplications of Solvaset they
laid down OK.
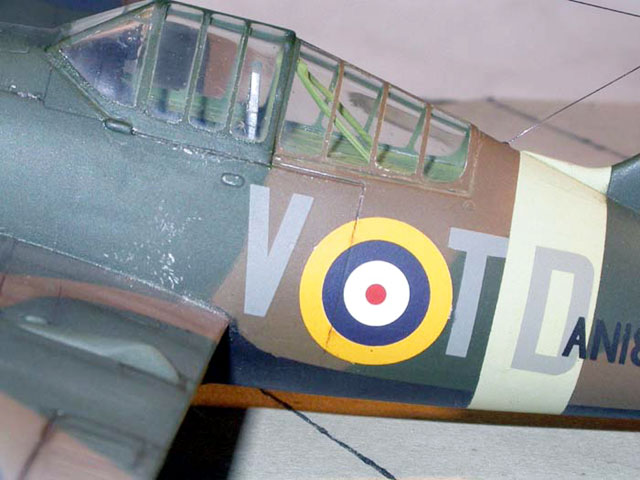
The fuselage roundels were unfortunately, out of register,
something I hadn't noticed until they were on the model. Fortunately I had
a couple in the spares box- actually a freebie sheet I had picked at a
previous IMPS Nats which was actually for 1/72 Lancasters. But I managed
to find a perfect match for my Buffalo, and they went on without a hitch.
Finishing Touches
One of the final steps was adding wingtip
navigation lights. I had originally intended to use clear sprue to
simulate the lights, but about that time I read issue #99 of Tamiya
Modelling Magazine which had a really neat suggestion about using the
small fiberglass beads which you will find inside any water filter. Lucky
for me, my wife had just changed the filter in our Brita carafe. I sliced
open the old filter, and admit the many tiny flakes of charcoal, there
were countless tiny fiberglass beads of varying sizes. I picked up a
couple about the right size with a pair of tweezers, superglued them in
place on the wingtip and painted them with Tamiya clear red or clear
green. Pretty neat idea! By the way, a good Optivisor is a must for such
detail work.
So there you have it.
13 years from start to finish. I think that
sets a record for me for time to finish a kit!
Model,
Images and Text Copyright © 2003 by
Lee Rouse
Page Created 23 December, 2003
Last Updated
17 March, 2004
Back to
HyperScale Main Page |
 Home |
What's New |
Features |
Gallery |
Reviews |
Reference |
Forum |
Search
Home |
What's New |
Features |
Gallery |
Reviews |
Reference |
Forum |
Search