|
Blohm und Voss Bv 155 V1
by Andrea Mariottini
|
|
|
Blohm und Voss Bv 155 |

HyperScale is proudly supported by
Squadron.com
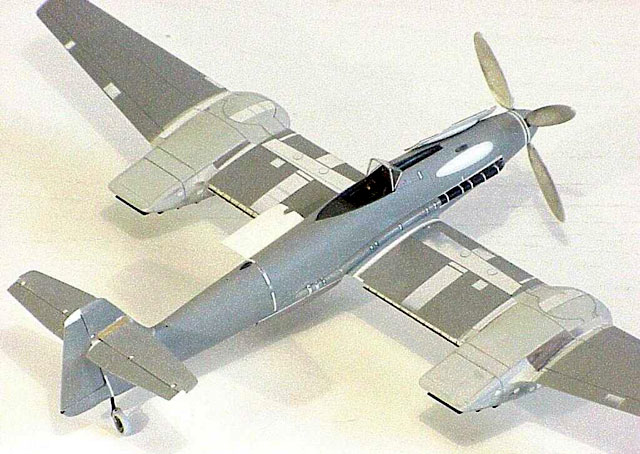
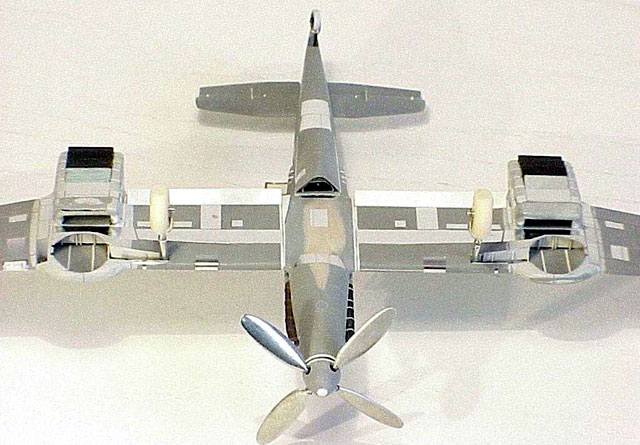
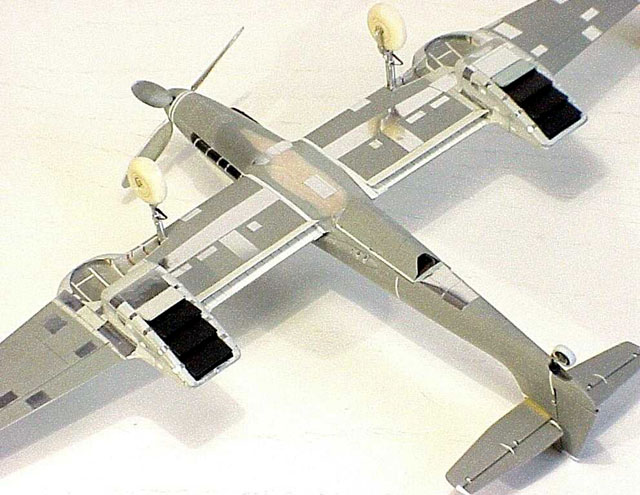
This is my latest model - the Blohm und Voss Bv 155
V1 from Pegasus in 1/72 scale.
I have been fascinated by this aircraft ever since I
saw her for the first time in William Green's booklet FIGHTERS Vol.1 in
the War Planes of the Second World War series published by
Macdonald in the 1960s.
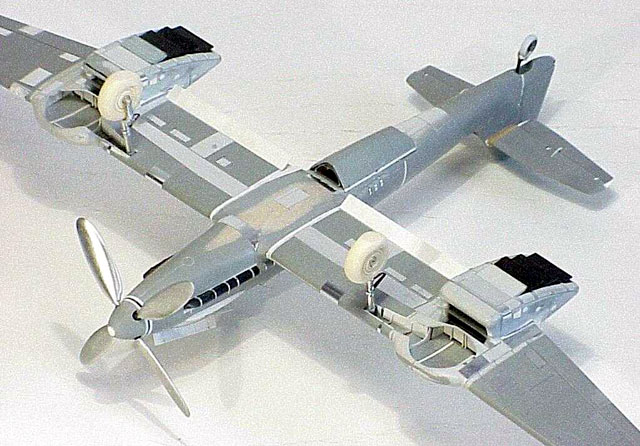
The Bv 155 was a high-altitude fighter designed with
a ceiling of 16 km in order to intercept high flying bombers, also having
a secondary reconnaissance capability.
Based on the Messerschmitt project Me P 1091, Blohm
und Voss continued development of this aircraft in 1943 due to the
overcommittment of the Messerschmitt design bureau. The deteriorating
situation of the war in Germany and, mainly, the friction between the two
design teams delayed the availability of the first prototype that flew
only few times and never reached the expected service ceiling.
I like high-altitude aircraft in general, but what I
like most in the Bv 155, from a technical point of view, is the DB603U
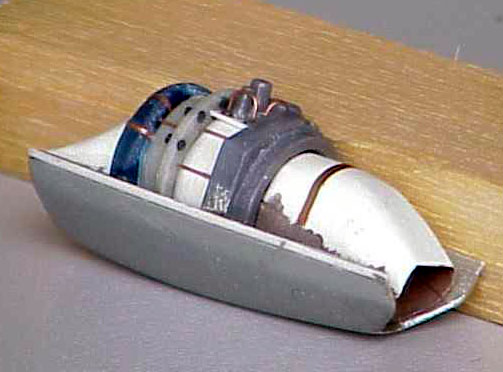
engine coupled with the TKL15 turbosupercharger. In some flight
conditions, the DB603U engine could operate with the turbosupercharger not
engaged. When the two units were connected, the exhaust gases of the
engine moved inside two semi-recessed pipes (one for each side of the
fuselage) until the turbine of the TKL15 unit. The turbine was connected
to a supercharger that, after taking fresh air from outside by means of a
ventrally installed intake, forced the compressed ait to the intercooler
and then, via a semi-recessed duct on the left side of the fuselage, to
the engine driven supercharger. Quite heavy and complicated but it would
have been interesting to see if it was effective!
My first attempt to make a Bv 155 model was the
Airmodel vacuformed kit.
I was able to assemble the wing with the two big
radiators but the plastic of the two fuselage halves was too thin,
moreover they did not fit well. I was not (and I still am not) a skilled
scratchbuilder so I dropped the Airmodel kit.
As soon as the Pegasus kit became available on the
Italian market, almost ten years ago, I started again with my project.
Please do not wonder that I took ten years to get the
stage you see in the photos. Sometimes I had to stop my job simply because
I did not know how to solve the problems that I have found during the
assembly. The Pegasus kit was not much easier than the Airmodel kit. In
case of the Pegasus kit the plastic was very thick; moreover every part of
the kit needed to be cut, sanded, drilled, filled, sanded again, rescribed
or simply scrapped and replaced with a hand-made one.
The list of modifications is endless.
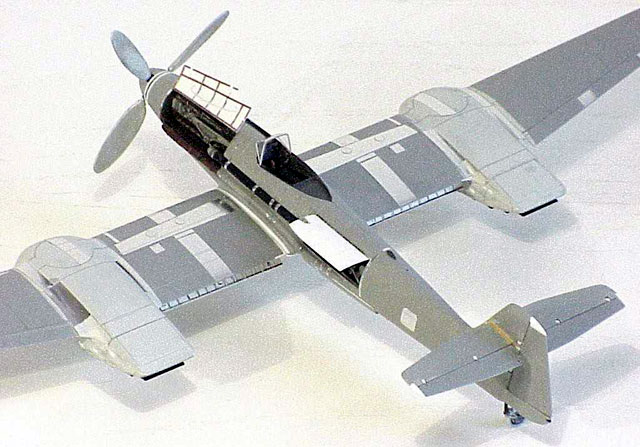
Just for example, it was easier to scratchbuild the
flaps instead of reducing the thickness of the wing trailing edge. The
result is not at Tamigawa level.
The Pegasus kit had some shortcomings. I tried to
remove them but I have introduced my own ones so do not look for the
geometrical perfection or the aerodynamic symmetry. Please, be sympathetic
in your judgement.
Even so, I have to thank Pegasus. Without this kit I
could not satisfy my wish to have a Bv 155 model.
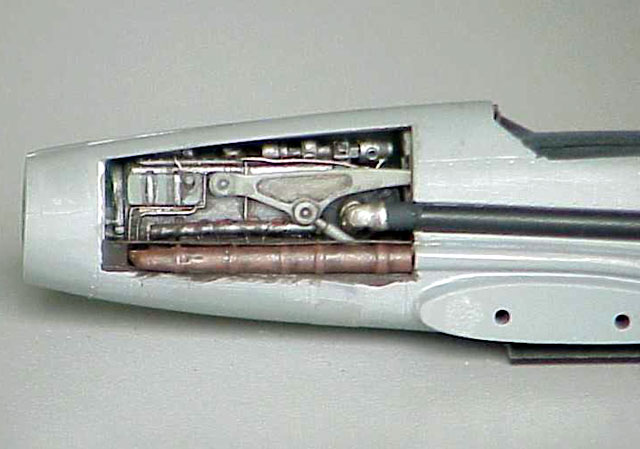
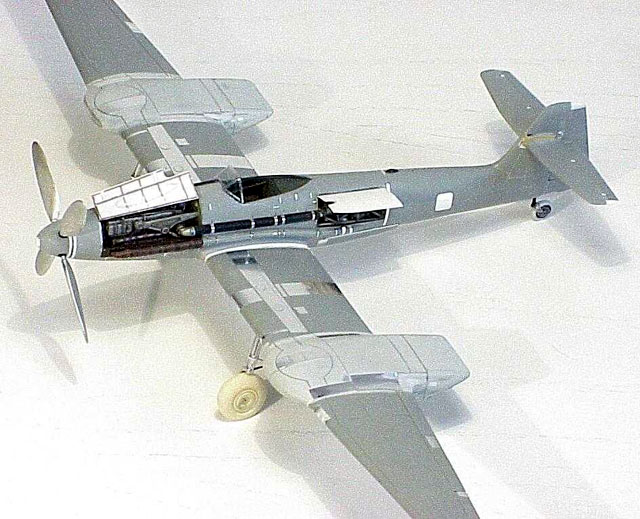
Usually I do not display the "interiors" of my models
but, due to my interest on the power train DB603U + TKL15, I decided to
complicate my task opening the fuselage and showing both the engine and
the supercharger.
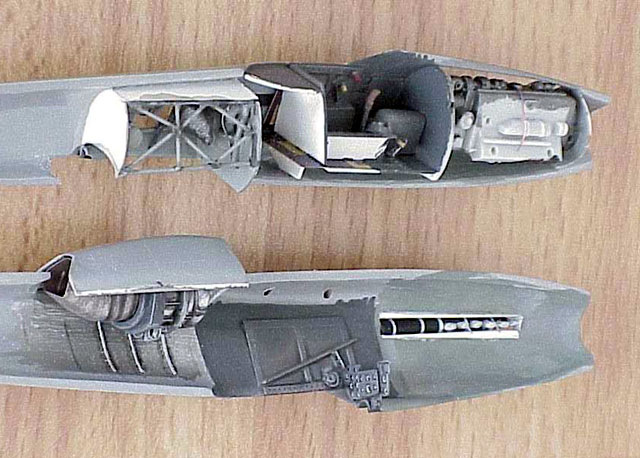
Engine, engine bearers and firewall come from the
Dragon's Do 335; additional details have been hand-made as well as the
engine cover.
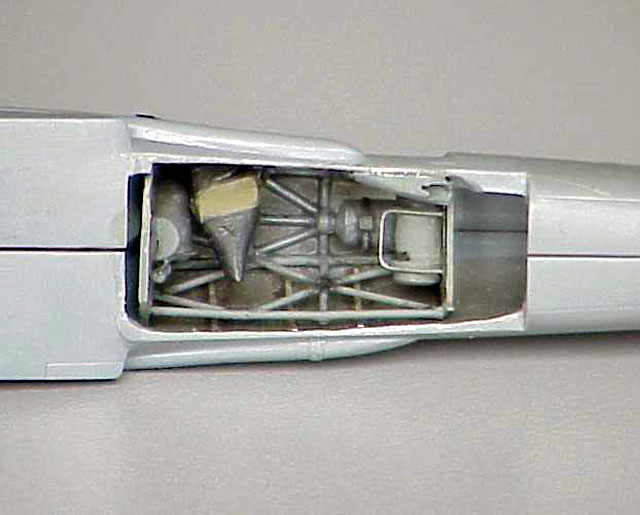
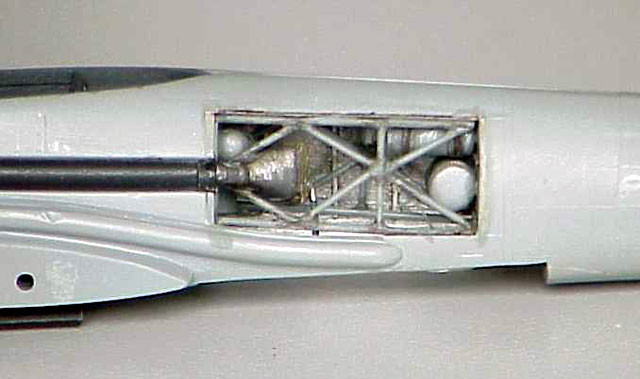
The TKL15 unit, intercooler, bay, frame, accessories
and cover have been completely scratchbuilt.
Click the
thumbnails below to view larger images:
The only after market assistance that I have found
are an Airwaves photo-etched sheet for the cockpit and two True Details
resin wheels, not specific for the Bv 155 but suitable after some sanding
to reduce the external diameter.
Some panels, the wing spar and some minor details
have been represented by using a thin metallic adhesive tape; this
technique has been described by the French magazine Replic.
Please note the dimension of the wing spar; as usual
in the Blohm und Voss aircraft, it had also the function of fuel tank
divided in several cells.
The only documentation I have found is the Monogram
Close-Up 20.
Click the thumbnails below
to view larger images:
Model, Images and Text Copyright © 2002
by Andrea Mariottini
Page Created 24 September, 2003
Last Updated
17 March, 2004
Back to
HyperScale Main Page |
 Home |
What's New |
Features |
Gallery |
Reviews |
Reference |
Forum |
Search
Home |
What's New |
Features |
Gallery |
Reviews |
Reference |
Forum |
Search