|
Macchi C.205 Veltro
by Chris Busbridge
|
|
|
Macchi C.205 Veltro |

HyperScale is proudly sponsored by Squadron.com
The two Craftworks Macchi kits will enable you to
build practically every version of the these famous aircraft. Of the
two, I'd favour the C202/205 kit, as the C.200 has quite a number of
errors that will need
patience to correct. The Craftwork package is certainly impressive and
gives you every confidence that a museum quality model will be the final
outcome, because most of the parts are nicely detailed.
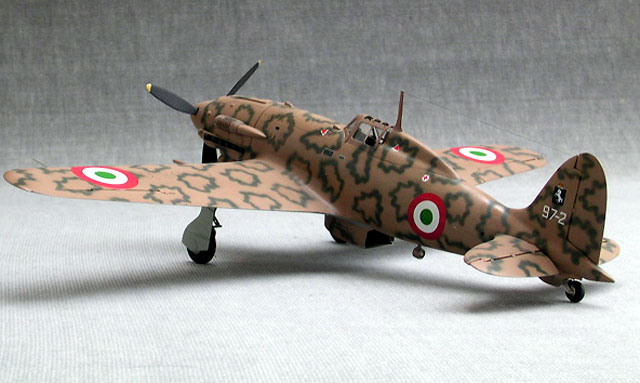
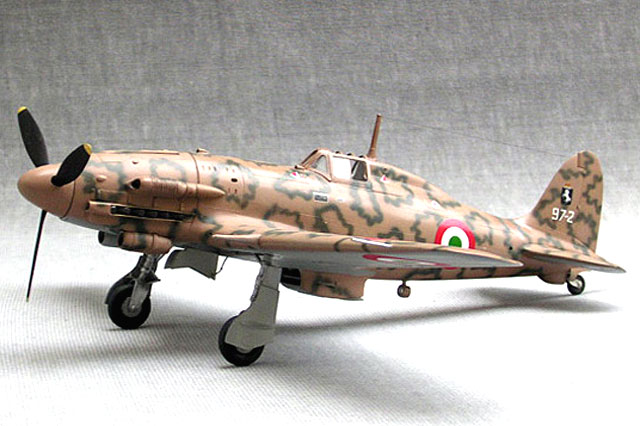
I chose to model the Veltro. For me, it's main visual appeal (apart from
the smoke ring camouflage) is the distinctive twin barrel shaped
oil-cooler arrangement. Together with the spinner and cannons, they are
the only obvious differences between it and the Folgore, although there
are small detail changes as well.
First thing was to check the accuracy of all the
major parts. Using scaled-up plans from the excellent AeroDetail book
(and the C.202 Ali d'Italia to back it up), the only serious problems I
found concerned
the spinner, canopy and tail fin. To resolve the spinner problem, I
simply rounded off the Folgore version, as the Veltro part was too badly
shaped to correct easily.
The canopy had to be completely rebuilt, as the kit
parts were found to be grossly over scale.
The oversized tail fin, which was moulded as part
of the one piece fuselage, was removed, reshaped and repositioned, using
Milliput to fair it back in. The rudder had very crude, exaggerated
fabric detail (as did the all the other control surfaces) and even after
reducing it with careful sanding, filler was still needed. Additionally,
it's shape had to be altered to fit the relocated tail-fin.
The horizontal stabilizers also needed slight
repositioning and reprofiling, especially the leading edges, which were
rather blunt.
The tail-wheel well was opened up for the
retractable style tail-wheel and new doors scratch-built. The C.202 bump
fairing was removed and replaced with the C205 version.
The cockpit detail is very comprehensive and even has alternative
instrument panels, depending on which version you're modeling. The
cockpit opening is quite small however, so some of this detail will not
be easily seen.
The one-piece fuselage had strange panel lines along the length of the
fuselage. I sanded them smooth and re-scribed them. The oval
cross-section of the fuselage was restored around the cockpit area. The
various cooling louvres, vents & scoops dotted around the nose were all
over-scale and therefore modified. Other detail lost as a result of this
work, such as access hatches etc, were re-scribed.
The upper engine cowling seemed to point upwards,
so it was removed, a wedge removed from the back and then re-attached.
The exhaust detail moulded integrally with the lower cowling is very
poor. I carefully detached and cleaned them up, to be added at a later
stage. New shrouds were made from plasticard. The lower cowling was made
rounder and deeper using Milliput and before it had a chance to harden
off, the reshaped oil coolers were pushed into the putty in their
correct position, removed and other additional detail was sculpted in
before fixing them in permanently.
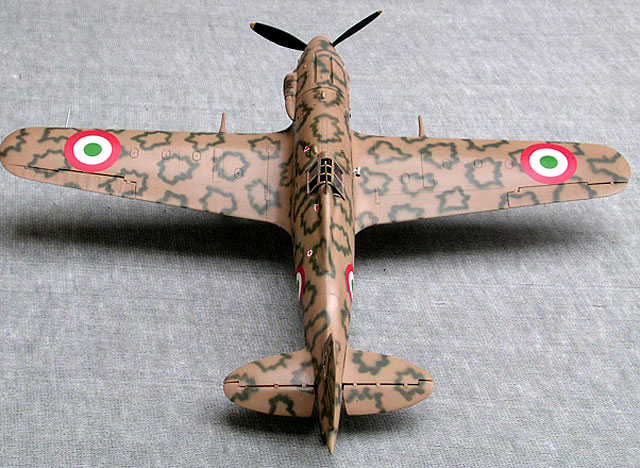
The wings had a little bit of work done on them. The wing-tips needed
small adjustments to its shape and the starboard wingspan was made
shorter. Other work included scribing detail for the row of inspection
panels on the upper surface of each wing. White metal clearance bulges
are fixed in place on the lower wing and new ejector chutes made.
The one "literal" strong point of this kit is the white metal
undercarriage, which was more than capable of supporting this weighty
model. The double layered brass-etch doors worked very well too. The
weakest parts were the resin wheels. I flattened of the side walls a bit
to give a more convincing appearance, as well enabling a better fit into
the undercarriage forks.
Although the rear of the engine and the veritable snake-pit of tubes,
wires and engine-mounts etc. would normally have been visible in the
central wheel-well area, Craftworks (probably to save costs) have
modeled the wheel-well covers in-situ, even though in reality they were
often discarded by the maintenance crew for being too cumbersome and
difficult to use. To attempt to detail this area properly was outside
of my scope and ability.
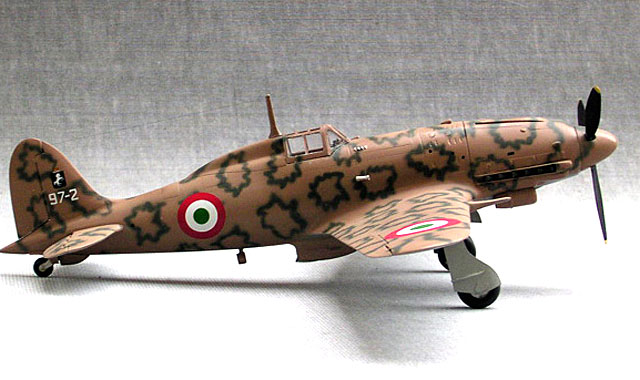
Most Veltros were camouflaged with the classic
"smoke-ring" finish.
I used Xtracolor enamels throughout, the smoke
rings being applied freehand.
Although there are a wide variety of decals
supplied with the Craftworks kit, not many were terribly accurate in
terms of size or colour. In most cases I used spare decals to depict a
Co-Belligerante aircraft of the 97 Squadriglia, 9°Gruppo, 4°Stormo
Caccia Terrestre based at Termoli 1944.
Although heavy weathering would be more appropriate
on this model, I prefer them to be factory fresh.
This model was a very frustrating experience for a
whole number of reasons. Even so, I just had to build this Craftworks
1/32nd Veltro because it is one of my favourite aircraft, .
Being aware of the quality of the Hasegawa models,
it soon became apparent that this model does not come close for accuracy
or ease of build.
Its purchase price alone made me persevere until I
got a result that I, personally, was happy with.
Click on the thumbnails
below to view larger images:
Model, Images and Text Copyright ©
2003 by Chris Busbridge
Page Created 23 June, 2003
Last Updated 17 March, 2004
Back to HyperScale
Main Page
|
 Home |
What's New |
Features |
Gallery |
Reviews |
Reference |
Forum |
Search
Home |
What's New |
Features |
Gallery |
Reviews |
Reference |
Forum |
Search