|
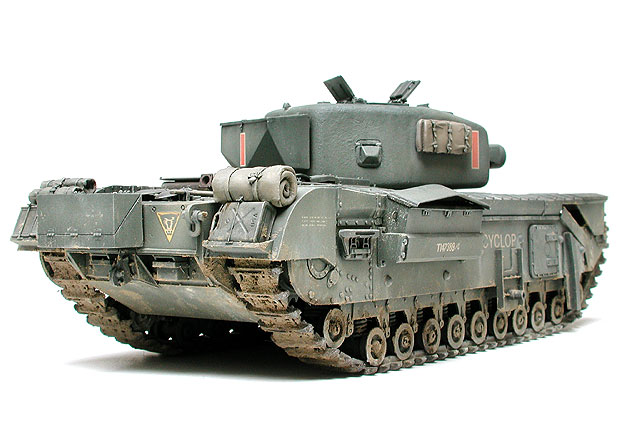
Churchill AVRE
by Werner Kampfhofer
|
 |
|
Churchill AVRE |
images by Wolfram Bradac

Tamiya's
1/35 scale Churchill Mark VII is available
online from Squadron
Tamiya’s 1/35 scale
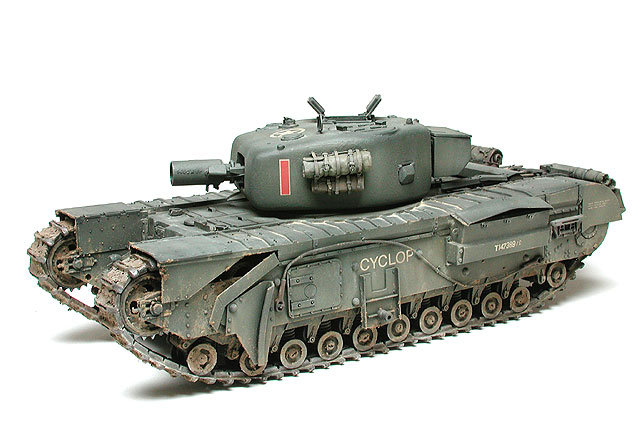
Churchill kit represents a Mark VII, but the earlier Mark IIIs or IVs were
used for the AVRE (Assault Vehicle Royal Engineers) version with the 290mm
Petard-Mortar. It is therefore necessary to backdate the Tamiya kit, which
is quite time consuming and stressful if one is limited to a 1.5 months
timeframe!
Tamiya’s Churchill was
released in the 1980s. Much to my surprise there are some sinkholes on
certain parts of the kit. I did not expect that and I also cannot recall
that any review pointing on this.
Kit construction is straightforward. Without the conversion it would have
taken only three days to complete this beast.
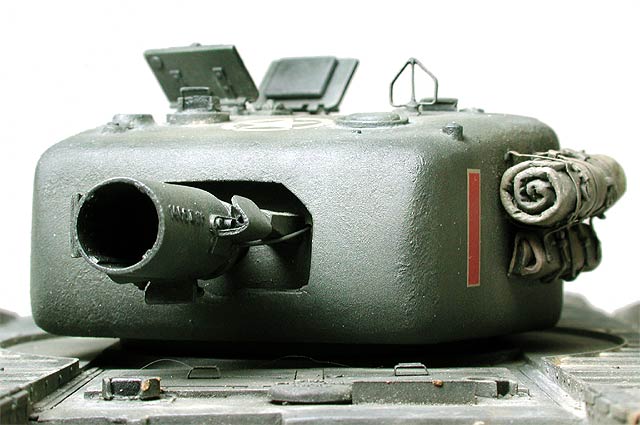
The AL-BY conversion comprises a hollow turret, the mortar (moveable), the
rectangular hatches for the side sponsons and the frontal armour of the
upper hull. On earlier Marks a part this frontal armour is angled back a
bit, while on the Mark VII the whole armour is vertical. As a result, the
upper front armour of the kit does not fit with AL-BY’s front plate. I
rebuilt the front and front upper armour from plastic sheet and added
details according pictures and photographs.
I also had to remove the 3 periscopes (driver & co driver), shortened two
in height and put them back on the vehicle.
Comparing the side sponsons of Mark IV and Mark VII revealed many
differences. Apart from the different hatches, Mark VII sponsons were
welded and up-armoured. Earlier Marks had them bolted. The design of the
opening behind the idler wheel is different. Earlier Marks also had a
slide which dealt with the dirt gushing from this hole. I cut off 2/3 of
the outer sponsons and rebuilt them with plasticsheet. The slide was built
from Evergreen L-profiles.
The smaller bolts were produced with a Grainers Set and 0,4mm Plastic. The
big nuts come from a baby’s rattle which I was begging for from a friend
of my wife (THANKS, Doris!)
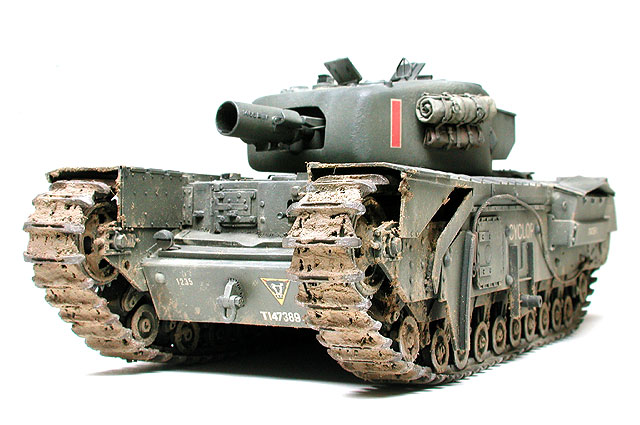
While I was examining photos I discovered that all Churchill AVRE’s with
Petard-Mortar had strange mounts fixed on the side sponson. I was puzzled
about the functionality, as they were too delicate to carry a dozer but
finally I found the reason. The mounts were intended to fix a frame for a
bobbin of canvas designed to lay a 10ft. wide carpet over soft sand.
Infantry was intended to follow the tank on this carpet. After landing
these bobbins were removed from the tanks. Obviously there were different
versions of these bobbin mounts in use. Due to the short timeframe I
decided to scratchbuilt the easiest design.
At the rear a small box has to be removed, which results in a hole which I
covered with a larger box from Verlinden.
Construction of the AL-BY turret is simple, but the fit between upper and
lower part is poor. The instructions are provided on a 15x10cm piece of
paper. They are scandalous!
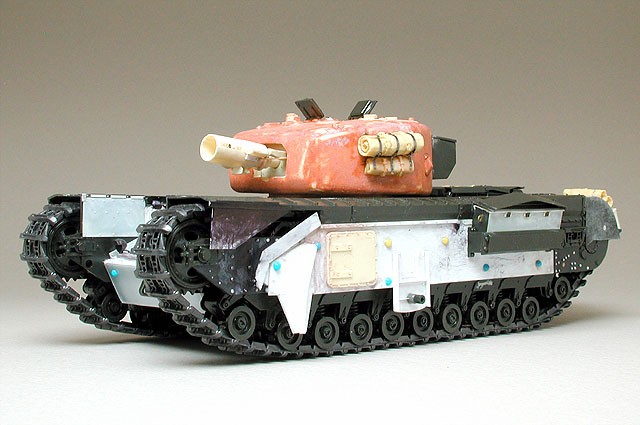
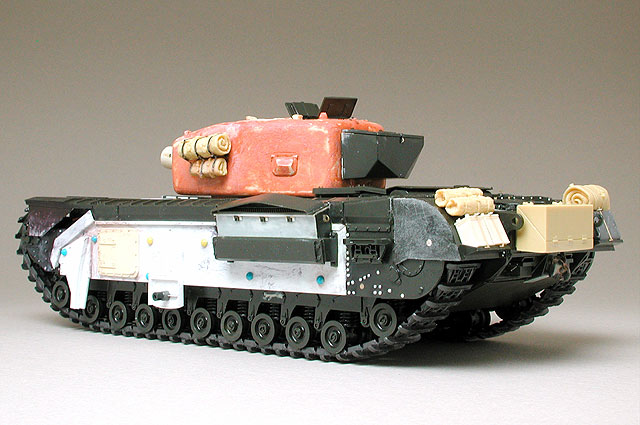
Some parts of the mortar were broken off and some seams had to be removed.
The cast-on construction numbers were created by using numbers from
several sprues. The whole turret was covered with an amount of Squadron
Red Putty, thinned with Italeri liquid glue. After 24 hours drying it was
sanded with fine sandpaper to recreate the armour texturing.

To represent the texture of the hull I used Italeri liquid glue to soften
the plastic and a brush to texture it.
Examining the pictures of original tanks more thoroughly I discovered that
the upper sponsons were fixed with nuts and bolts, which are not
represented on the kit.
Therefore it was time again for my Grainer’s Set and 0,2mm plastic card. I
created the necessary nuts and located them according to pictures and
drawings.
A problem appeared while mating the turret with the upper hull because the
turret was located too low. I had to insert a slightly raised turret ring
to overcome this obstacle.
In practice Churchill Mark VII hulls were a few centimetres wider than the
earlier Marks. Due to lack of time I did not address this issue and left
the hull at the kit width.
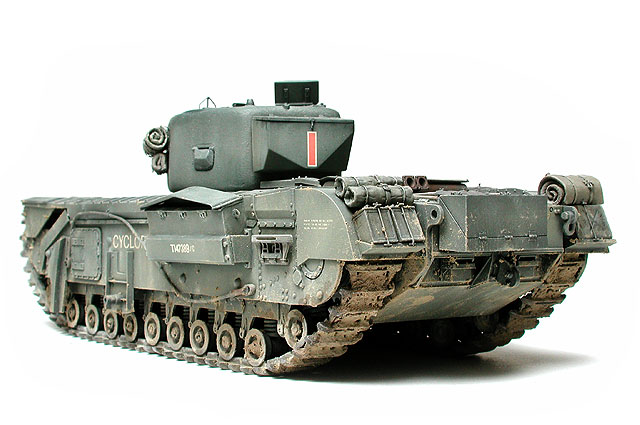
As the model was destined
for a diorama, it’s finish was already planned for this future use. It
depicts a little used vehicle which is rumbling over the countryside,
passing a knocked out bunker.
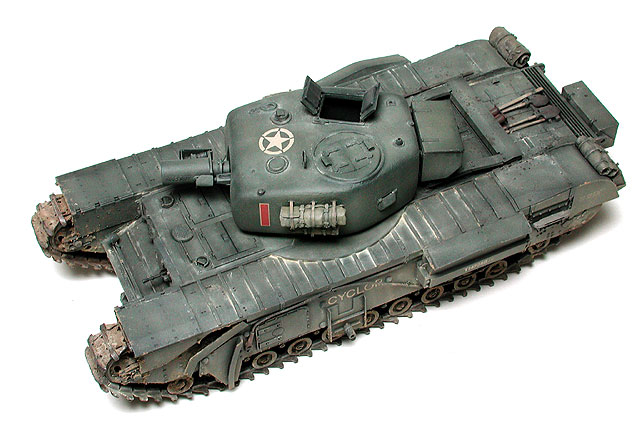
I airbrushed a base of Tamiya Flat Black and then 3 different shaded
layers of Olive Green from the Tamiya and Gunze ranges. I took care to
keep the edges and recessed areas dark, which helps to speed up the
washing process.
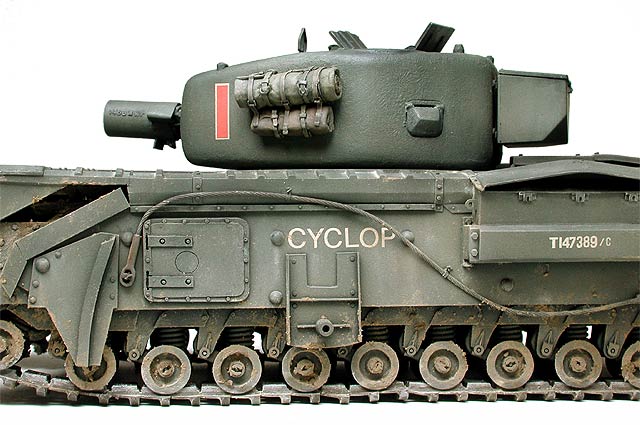
The markings are mostly from the Verlinden dry transfer range. The vehicle
name, CYCLOP, was added using dry transfers from Letraset.
After a layer of Gunze Matt 20 I added a “fog” with the airbrush. The
“fog” consisted of black and burned sienna oils which were thinned in 1:9
ratio. With the same colours, but less thinner a did the washing.
Finally the kit was rather dark and I tried to brighten it up and dust it
with a mixture of olive and earth. Although the paint had an earth tone in
the cup it turned out into a bright olive after airbrushing it on the
vehicle.
I don’t have a clue why it happened, but it was okay so far and, anyway,
the tank still did not look dusty!
Before I had time to fall into desperation, my friend Carlos Elias saved
my day and a parcel with some samples of a new “magic dust powder” from
MIG (Miguel Jeminez ) arrived at my home.
These powders should be available around September 2002 in the hobbyshops.
At first glance they looked to me like the colour powders which are
offered from German company FALLER ( railway supply ). In addition to the
FALLER’s colour range, MIG’s powder is available in sand yellow and white
as well.
I used a mixture of sand yellow and earth-coloured powder. The advantage
of MIG’s product is that the powder does not stick to the surface as heavy
as pastels do. This is true, but you need a lot of experience and it takes
much wiping and rubbing to get the desired result.
I definitely need some more sessions to get familiar with this method of
adding dust. Maybe a dark kit is not the best choice to start with…
The dirt was made from earth, sand, static grass and Revell airbrush
paints (earth, grey) which then was added with a brush.
Scratches and worn off paint was simulated with a pencil and Humbrol No
53, but on the dark model the effect did not come out as expected.
I am a bit unhappy with the colour of the tracks but I have not had time
to correct it yet.
-
Tamiya News 3: Churchill
-
Vanguard 13: The Churchill
Tank.
-
Militaria Magazine: 29 & 32
-
FSM: 12/98
-
Concord: D-Day Tank Warfare
-
Different Internetfiles
You can see more of Werner's
models at his homepage: www.rlm.at
Click the thumbnails below to view larger
images:
Model and Text Copyright ©
2003 by Werner Kampfhofer
Images Copyright © 2003 by
Wolfram Bradac
Page Created 28 March, 2003
Last Updated
17 March, 2004
Back to
HyperScale Main Page |
 Home |
What's New |
Features |
Gallery |
Reviews |
Reference |
Forum |
Search
Home |
What's New |
Features |
Gallery |
Reviews |
Reference |
Forum |
Search