|
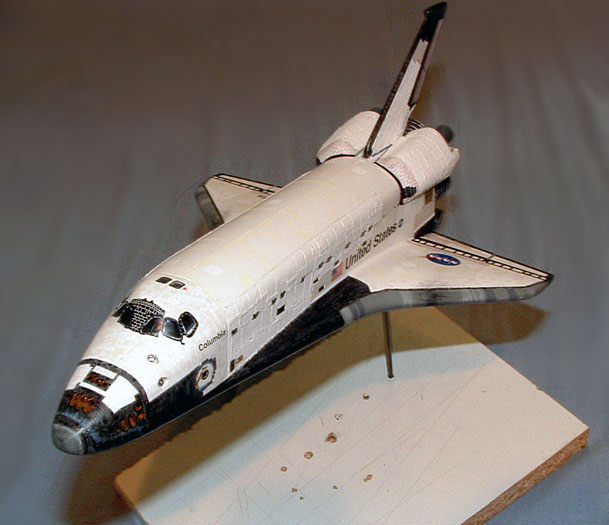
Revell's 1/144 Scale
OV-102 Columbia
by David Hanners
|
 |
|
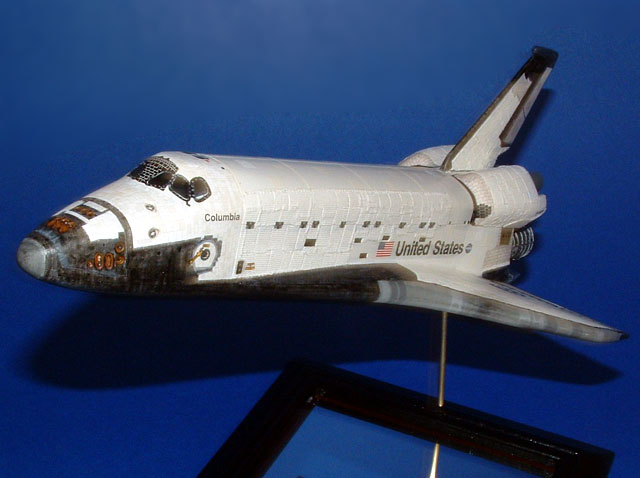
Space Shuttle Columbia |

Airfix's
1/144 scale Space Shuttle is available online from
Squadron.com
The original Revell kit was issued before the space shuttle even flew,
so it requires several modifications to build an accurate orbiter.
Modifications I made to the stock kit include:
-
 Reaction
Control System (RCS) thruster openings were cut out and backed with
styrene tubing; Reaction
Control System (RCS) thruster openings were cut out and backed with
styrene tubing;
-
Star tracker openings
were cut out, backed with sheet plastic and detailed with styrene
tubing;
-
Gaps between the
inboard and outboard elevons were cut out;
-
The body flap was
widened with strip styrene;
-
Aft base of the tail
was cut off and a drag chute compartment made from sheet styrene was
added;
-
Tail cap was cut off
and a Shuttle Infrared Leeside Temperature Sensing (SILTS) experiment
pod was added. The SILTS pod was made from styrene sprue;
-
The nozzles for the +X
RCS thrusters were replaced with styrene tube;
-
Panels were added to
the lower portion of each Orbital Maneuvering System (OMS) pod;
-
The kit Space Shuttle
Main Engine (SSME) and OMS nozzles were replaced by resin copies made
by Real Space.
-
Thermal insulation on
SSME gimbal mount and fairing was made from aluminum foil.
Thermal
Protection System (TPS) and Painting
|
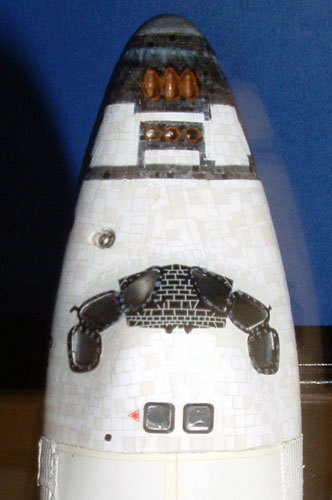
Advanced Flexible Reusable Surface Insulation (AFRSI) was replicated
with small squares and rectangles cut from 3M Durapore cloth surgical
tape. The model was sprayed with gloss white enamel. Additional painting
was done with a brush using Pactra, Testor and Badger paints. Testor
Model Master Metalizer was used on the SSME nozzles.
Decals
Decals by Cutting Edge were used for the High-Temperature Reusable
Surface Insulation (HRSI) areas, as well as for some of the Low
Temperature Reusable Surface Insulation (LRSI) areas. I photocopied the
Cutting Edge decal sheet onto an 8.5X11 sheet of white decal stock to
have additional HRSI decals. Once applied and dry, a thin wash of Badger
gloss black was used to darken and streak the HRSI areas.
I also made LRSI decals on my home computer using a brick pattern found
in Word, which I printed out onto clear decal stock. Decals by Cutting
Edge and Real Space were used for all markings and all detail around the
cockpit and overhead window frames. Strips of solid-color decal were
used to replicate the wing leading-edge Reinforced Carbon-Carbon (RCC)
T-seals, as well as the seals between the sections of the payload bay
doors and various other panels found on the Orbiter.
Finishing Coats
When construction, painting and decaling were completed, windows were
masked and the model was sprayed with Testor Model Master Semi-Gloss
lacquer overcoat. Badger Clear Flat was brushed onto all RCC and LRSI
areas.
Weathering
Weathering was kept to a minimum, and done with dry brushing.
Gray streaks were dry-brushed to the nose RCS housing, as well as the
underside in the area of the front and main gear doors, the External
Tank closeout doors, the body flap and the area immediately forward of
the body flap. Black smudging was dry-brushed to the RCC nosecap and the
wing leading edges, as well as an area on the LRSI behind RCC panel 9 on
each wing. (The area around RCC panel 9 on each wing experiences the
heaviest scorching on entry because it is where the shock waves that
form from the nose and wing leading edges intersect. Those panels
experience the highest surface temperature on the Orbiter) .
The insides of the SSME and OMS nozzles were dry-brushed with rust and
flat black.
Model, Text and Images Copyright © 2004 by
David Hanners
Page Created 16 January, 2004
Last Updated 17 March, 2004
Back to HyperScale
Main Page
|
 Home |
What's New |
Features |
Gallery |
Reviews |
Reference |
Forum |
Search
Home |
What's New |
Features |
Gallery |
Reviews |
Reference |
Forum |
Search