|
Dewoitine D.520C.1
1/32 Scale -
In Progress
Mike Swinburne
|
 |
|
Dewoitine D.520C.1
Azur Kit In Progress |

Azur's
1/32 scale D.520 is available online from Squadron.com
Azur 1/32
D.520 In Progress
|
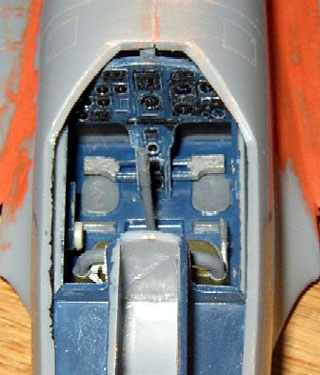
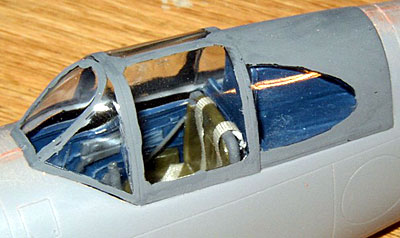
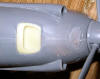
Cockpit
I quite like the cockpit detail in the end,
although alignment of sidewalls, panel, bulkheads, etc was difficult
since I was trying to make sure everything lined up in the fuselage. I
had to sand down the sides of the front bulkhead that the control panel
is mounted to, and a tiny bit of the top sides of the panel to get them
to fit inside the fuselage, and even then there are gaps. The sidewalls
have nice detail, but after I had glued them to the back bulkhead, I
discovered that they left nice gaps between their tops and the fuselage
interiors (see pic)
.
I added surgical tape seatbelts, and I still have to add the buckles.
You can see in the aerial picture that there is still a gap in front of
the control panel, and you can see the top of the sidewall that isn’t
exactly even. Bear in mind that I may have messed something up along the
way with alignment, too.
The canopy fits very nicely, with only a tiny gap along the sides of the
windscreen that can easily be filled.
Click
the thumbnails below to view larger images:
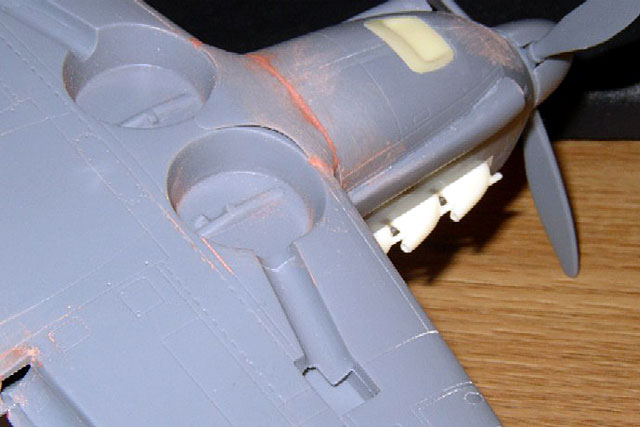
Fuselage
I glued some sheet plastic behind the holes for the
exhaust pipes so that they would have some extra support, and glues the
side intakes onto the cowling. Fit was not perfect, so I anchored the
back ends with pro-weld and worked my way forward.
At this time I glued
the cockpit into place after a lot of sanding/scraping of said bulkhead
and aligned everything as best I could. My fuselage halves were warped a
bit also, so I pulled out the trusty pro-weld and glued the tail
together first since it is easier for me to align parts that way.
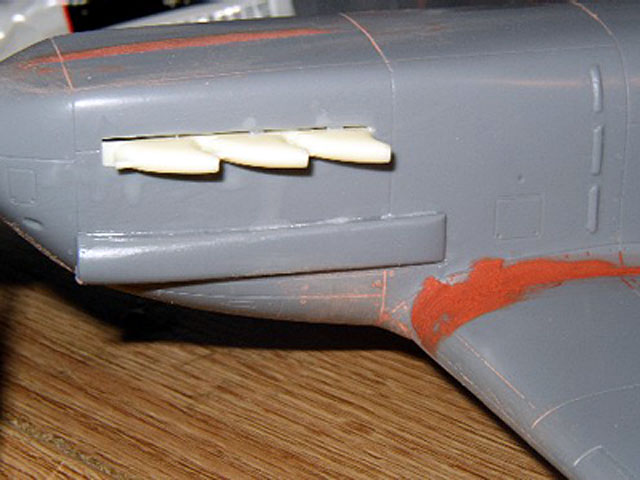
 I glued the plastic and resin front intakes into place under the nose
after a lot of sanding, and eventual pro-welded the parts to melt the
plastic for a quicker fit (Click thumbnail at right to view larger
image). I glued the plastic and resin front intakes into place under the nose
after a lot of sanding, and eventual pro-welded the parts to melt the
plastic for a quicker fit (Click thumbnail at right to view larger
image).
Wings
I glued the lower wing to the fuselage first to
assure good alignment, as it wasn’t warped. When this was on solidly, I
glued the front wing/fuselage fairing in place, and then the mounts for
the flaps.
It should be noted that these and the inner surface of at least the
upper wing need a good deal of thinning before the upper wing halves
will fit flush with the fuselage. It took me about an hour of scraping
these surfaces and the wing root surface of the wings with a #11 blade
to get a satisfactory fit.
I really do like this kit, despite the fact that it
has the annoyances of a short run kit including thick surfaces,
especially trailing edges, and not-quite-Tamiya-but-still-pretty-good
fit.
I am not putting quite as much effort into this
bird as I would some other kits, although any effort not put in is being
made up in putty on the wing/fuselage join.
Hey, it’s a good size, its pretty, it’s going to be
colorful, so if you have a little patience and are bored with countless
Spitfires or Mustangs, give this one a shot!
Also see
Brett Green's
In-Box Review of Azur's D.520C
Model, Images and Text Copyright ©
2003 by Mike Swinburne
Page Created 24 August, 2003
Last Updated
17 March, 2004
Back to
HyperScale Main Page |
 Home |
What's New |
Features |
Gallery |
Reviews |
Reference |
Forum |
Search
Home |
What's New |
Features |
Gallery |
Reviews |
Reference |
Forum |
Search