|
DFS 346 "Beutflugzeug"
by
Floyd S. Werner Jr.
|
|
|
DFS 346 "Beutflugzeug" |
48 Special Models

HyperScale is proudly supported
by Squadron.com
The German aviation industry during World War II is
known for it’s innovative designs. One aviation manufacturer that is
often over looked is the Deutsches Forschungsinstitut
fur Segelflug-Darmstadt, or DFS for short. This manufacturer was
instrumental in the development of the Me 163 and the Horton Go-229.
Until the release of this model by 48 Special I did
not know of the existence of the DFS 346. After some research I found
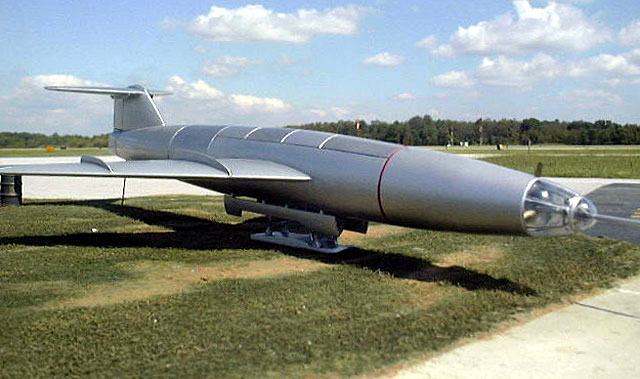
out that the DFS 346 was designed to break the sound barrier.
Originally designed in the winter of 1944, three years ahead of the Bell
X-1, there were three prototypes, two un-powered gliders and one powered
aircraft. Like the Bell X-1, the DFS 346 was carried aloft by a B-29 or
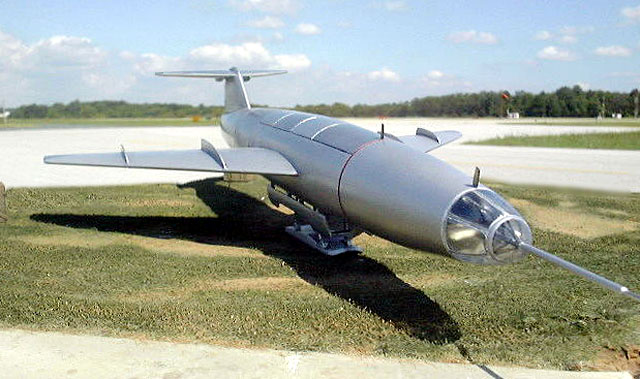
the Soviet equivalent Tu-4 and dropped. Looking more like a Buck Rogers
spaceship than a research plane, the DFS 346 was incomplete at the end
of the war. The Soviets recovered the three aircraft and the design
team and shipped them off to Russia.
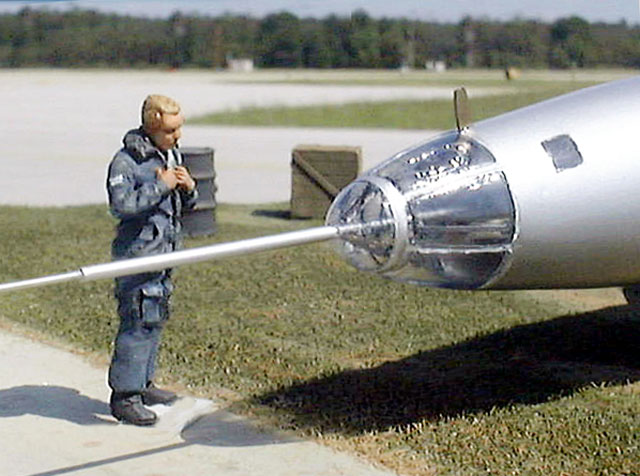
In an innovative move, the DFS team designed the
cockpit to have the pilot lying down in a prone position, behind a
pressurized bulkhead. In the event of a problem, the cockpit could be
jettisoned as an assembly.
The Soviets completed the airframes, both the
un-powered versions were launched with Russian pilots at the controls.
The aircraft displayed some instability problems and both aircraft
eventually crashed. Overcoming their fear of defection, the Russians
turned to Messerschmitt test pilot, Wolfgang Ziese, to fly the powered
version in 1950. Now think about this, the un-powered versions crashed
and now you want a man to fly at close to Mach 1. What a test pilot or
what an idiot. But true to his skills, Ziese flew the DFS 346 and
eventually flew it to Mach .95. In 1953, due to an uncontrollable
flutter, Ziese lost control and bailed out. Although he got out and
landed fine, the Soviets blamed him for the destruction of the DFS 346.
Ziese then died mysteriously in a hospital a few days after the failed
record attempt. My model displays this aircraft.
48 Special
Models' DFS 346
|
48 Special Models provides a multimedia resin kit.
The resin parts are nicely molded in a hard light gray resin, but some
have a few bubbles. Nothing major and nothing that a little filler
couldn’t take care of. There is a lot of mold release agent on the
parts that will need to be removed. All major components are resin with
some redundant photo etched parts. The photo-etched parts are made of
steel. The cockpit canopy consists of the pressure bulkhead, side
window and outer cockpit assembly. The clear parts are well formed, but
are slightly deformed. This is easily taken care of with a coat of
Future though.
The instructions are bilingual, German and
English. There is some spelling errors, but nothing that can’t be
deciphered. Included in the instructions are lots of tips for assembly,
which make building this kit easier for the resin kit beginner. I
recommend reading the instructions completely and repeatedly.
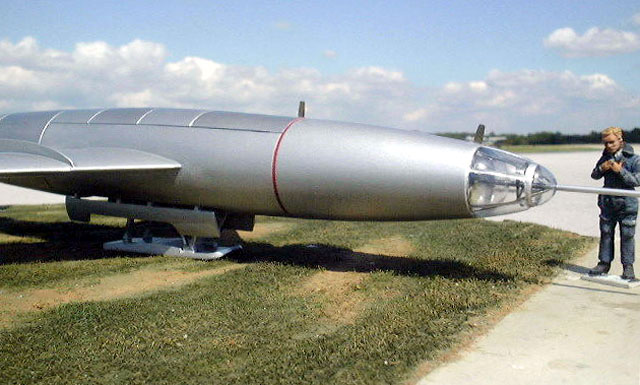
There are no decals, as the original aircraft had
no markings other than the red ring around the nose cone.
Getting Started - Cockpit
As usual constructions starts in the cockpit. You
have to decide whether to use the resin or photo etched parts. I used a
combination of parts. For the bench I used the photo-etched parts. Now
the parts are made of steel and are difficult to remove from the fret
and even more difficult to bend. Taking a hint from the instructions I
heated the parts on the stove first. This made them softer and more
malleable, but it was still tough. In my research I was able to find
one photo of the cockpit. 48 Special got real close, but if you want to
superdetail the interior go for it. I didn’t because once assembled the
interior is not seen at all, so why bother. I painted the interior RLM
02 but you can’t see it.
The sidewalls are separate pieces that must be
sanded to fit in the nose cone. They must be sanded a lot, as well as,
the nose cone interior. I used my Dremel tool and thinned and thinned
and thinned, well you get the idea. Resin dust everywhere. Wear a
respirator. The biggest part to worry about is the left side window
because you have to line up the window and have it thin enough to look
scale. Once it all fits take it out and cut out the side window and
smooth it into the exterior. I attached mine with superglue but was
careful not to apply too much. Once dry I polished on the outside to
get it to conform to the exterior contours. I then brushed on a coat of
Future on the inside. I saved the outside for later.
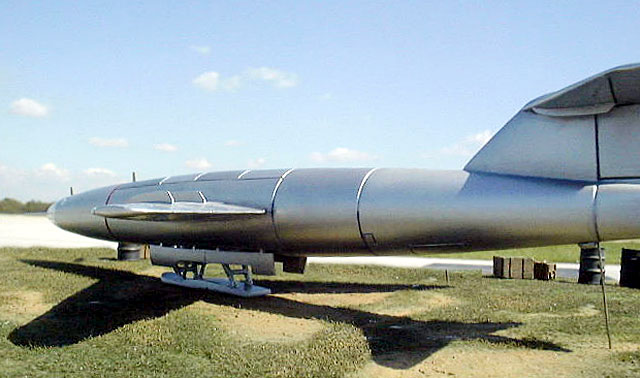
Fuselage
The fuselage is a solid piece of resin that the
cockpit sits in front of. This creates a situation where the model is a
tail sitter. If I had to do this over again I would cut off the tail
area and thin out the back and add weight to the nose area.
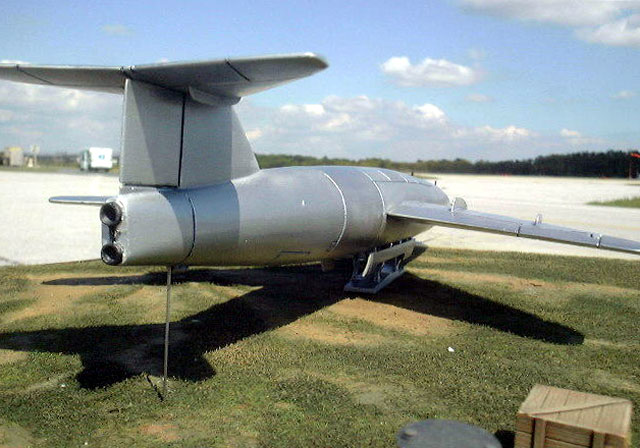
The tail assembly is added into a depression in the
fuselage that ensures the tail unit is straight and at the correct
height. Some photo-etched strakes are added to the underside of the
horizontal stabilizer. You have to cut along a panel line about halfway
through the tail. If done properly the part will just fit in nicely and
require very little superglue. The horizontal piece is attached to the
topside with a couple of pieces of tubing for strength. Any area that
needed to be filled was filled with 3M Blue Acryl.
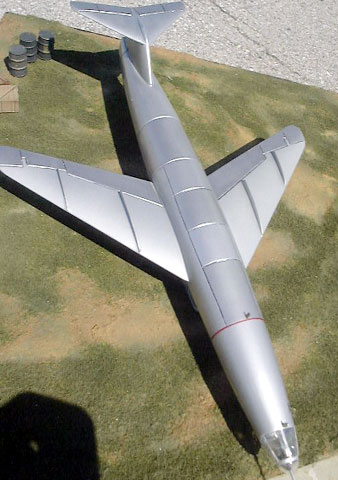
Wings
The wings are interchangeable. Once you decide on
which side is which you will have to cut along some panel lines just
like the tail surface. The wings have no dihedral. The only thing to
look out for was to ensure the inner flap is visible. I used some
tubing for strength again.
Landing Gear
Extended or retracted? Your choice, but if you
want to see display the aircraft on the ground then extended is the only
way to go. The gear consists of three braces and a landing skid.
Pinning these parts provides the strength necessary to support the
model. Superglue will not be strong enough. The biggest thing with the
landing gear is to ensure it is straight in the bay. The landing gear
doors were cut along the centerline front to aft. Then they were
attached to the fuselage after painting the interior RLM 02.
Canopy Assembly
You will need all your patience for the canopy. It
is multi layered and multi media. The one nice thing is that the canopy
and the pressure bulkhead are press fit. Now comes the fun. First off
you have to drill a hole in the two clear parts for the pitot tube and
it has to be straight and not too big. I think I mentioned that you
only get one set of clear parts. OK now that you’ve done that you have
to bend some of the steel photo etched parts and oh by the way it has to
fit in the nose cone and it has to fit on the pitot tube. I got lucky
and got that to fit pretty well. The next photo-etched piece is also a
part of the pitot tube support but this one goes around the pressure
dome. I couldn’t do it. I ended up bending it nicely and even had a
nice hole for the pitot tube to sit in but it didn’t fit. I ended up
scratch building the support from .010 by .020 and .025 tubing. It all
worked for me and I liked the results.
If you haven’t attached the cockpit assembly as per
the instructions, you will need to do it now. You are given a bench but
I couldn’t figure out how to attach it, so I didn’t. I did add an epoxy
cushion. Don’t forget the instrument panel and chin support. I
couldn’t figure out the panel so I ended up using an extra Hasegawa
Ar-234 instrument panel with some modification. I used this method to
ensure that the cockpit didn’t get broken off while handling. Now
attach the front nose cone and smooth it into the fuselage assembly. I
used two-part epoxy to do this and this aided in filling any gaps. Once
that is done attach the pressure dome, canopy, and pitot tube assembly.
I attached this with white glue and then filled around the area with 3M
Acryl putty.
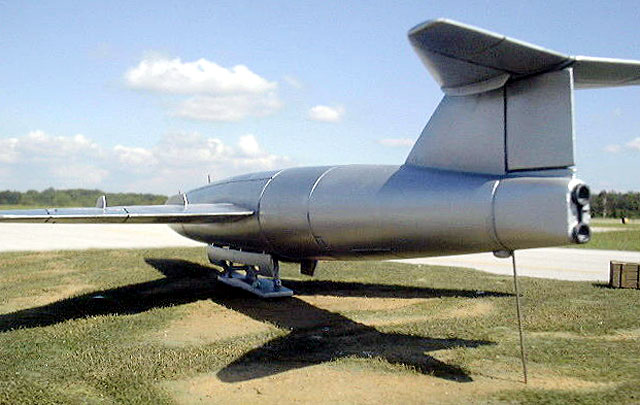
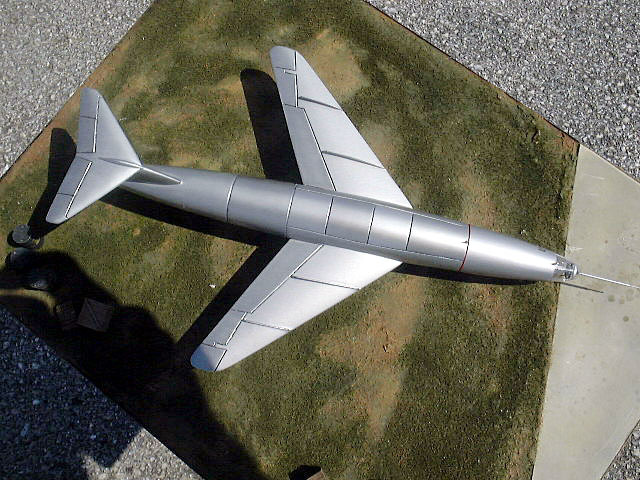
Natural Metal Finish
I have to tell you this is only my second NMF
aircraft. I still have things to learn, but I did like the outcome. I
masked off the clear parts with liquid masking material. I primed the
whole assembly with Tamiya Primer White and then sanded it smooth. I
used Alclad II and Tamiya spray can AS-12 for my silver finish. Can you
tell what I used where? The wings, nose cone and landing gear are
Tamiya while the rest is Alclad. I liked the finish of both. You can
spray the Tamiya over the Alclad for those so inclined. I still need
more practice. Am I glad the Luftwaffe didn’t have a lot of natural
metal finishes. I then masked off and painted the red ring.
Weathering
As this aircraft was brand new there is no real
weathering. I highlighted the control surfaces with Dark Grey India
Ink. The panel lines were accentuated with Paynes Grey artist oils.
Final Touches
I removed the masks and brush painted Future on the
clear parts. The model wouldn’t sit properly so I inserted a .5 needle
in the tail. The antennas were added to the spine and with that the
model was done.
This is only my third all resin kit. With that
said this kit is not for a beginner, but I think the finished product
looks like the real thing and is a good first offering from 48 Special
Models. Reading the instruction is imperative. The tips are very
helpful and invaluable. I recommend this kit to experienced modelers
only, but I definitely recommend it. I enjoyed the model a lot and it
stretched my modeling to another level.
The DFS 346 is available directly from 48 Special
Models at their website
www.48specialmodels.com or email at
info@48specialmodels.com . The DFS 346 costs approximately $95,
depending on exchange rates.
48 Special has released other interesting aircraft
including three different Mistels, FW-190/Ta-154, He-162 and Me-262
versions. The models released by 48 Special are limited editions. I
would like to thank 48 Special Models for the review sample.
-
Flugzeug Archiv Band 6,
1993, Flugzeug Publications
-
German Jet Aircraft
1939-1945, Hans-Peter Diedrich, Shiffer Publishing, 2000, ISBN
00-105623
-
Secret Aircraft Designs
of the Third Reich, David Myhra, Shiffer Publishing, 1998, ISBN
97-81279
-
DFS 228, David Myhra,
Shiffer Publishing
Click on the thumbnails
below to view larger images:
Model, Images and Text Copyright © 2003 by
Floyd S. Werner Jr.
Page Created 17 October, 2003
Last Updated 17 March, 2004
Back to
HyperScale Main Page
|
 Home |
What's New |
Features |
Gallery |
Reviews |
Reference |
Forum |
Search
Home |
What's New |
Features |
Gallery |
Reviews |
Reference |
Forum |
Search