|
Airco D.H.2
by Roger Fabrocini
|

|
|
De Havilland D.H.2 |

Eduard's
1/72 scale D.H.2 is available online from
Squadron.com
This is Eduards' Airco DH 2 in 72nd scale,
the non-Profi-Pack version.
I like Eduard's 1/72 scale WWI models and
build them as a 'break', straight from the box, from my more involved
projects.
I was determined to finish this kit with no
references, detailed parts, decals, etc. More on that later...
I find Eduard's 1/72 scale WWI models to be
little gems. This one is no exception.
Well molded parts, delicate detail, great
decals, a set of express masks and a decent rigging guide. (more than I
can say for some other companies).
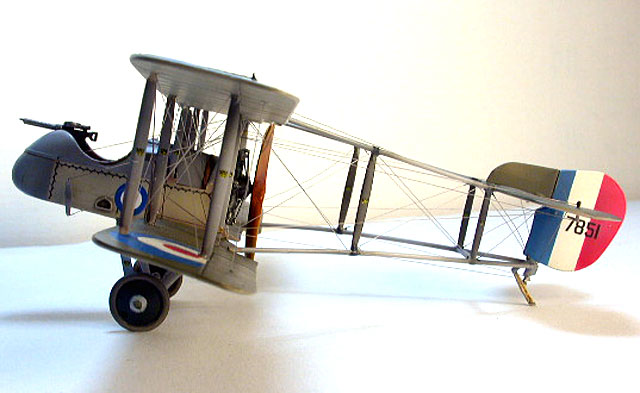
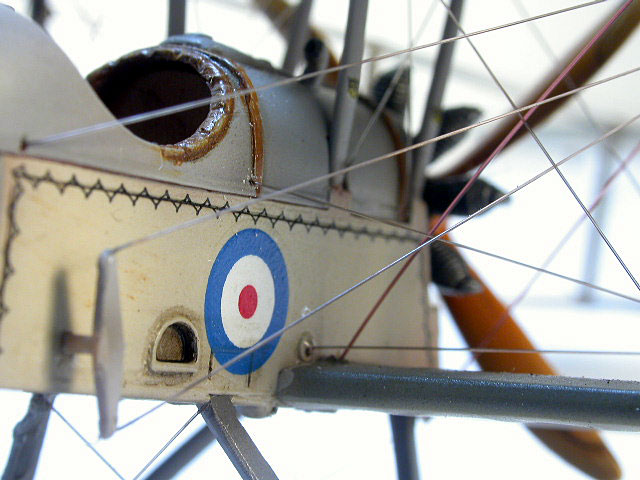
Two marking options are provided, a DH 2 of
no.32 squadron and one of no.14 squadron based in Palestine, 1917.
The box art is a beaut, and may well have
been the sole reason I started this project for the true masochist.
I have learnt how to do WWI aircraft in sub
assemblies - building, painting and decaling them separately - and
this was a necessity with the DH 2.
I assembled the fuselage/lower wing, finished
the top wing, assembled the tail and boom, and the landing gear
separately. I suggest lining up the boom with the wing attachment points
before your glue sets. I did mine without this step, and found that I had
to bend the tail boom out to fit into the slots.
The fitting of the top wing was tricky. I
first enlarged and deepened the mounting holes for the struts in the top
wing. This gives you some room to work with if one strut is too long or
the alignment is off.
I evened out the cabane struts then taped the
upper wing to the fuselage. I then fitted the interplane struts one by
one, gluing them the the lower wing only. When they dried I removed the
top wing.
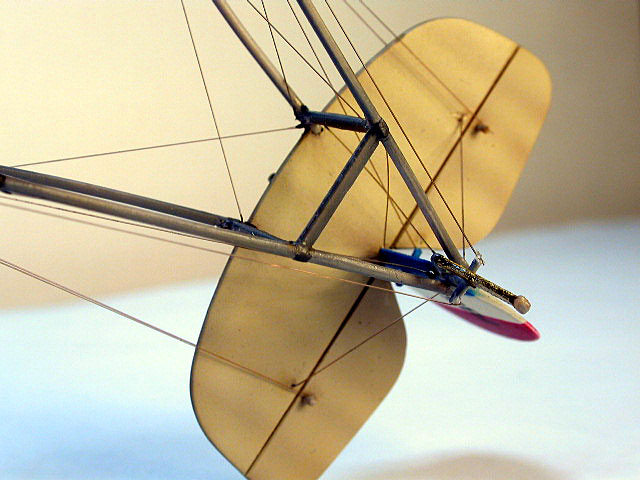
Now it was time to rig the pup.
I put this task off for a while because it seemed a bit daunting, but
after much thought, I attacked!
I used .003" fishing monofilament line except
for the double lines, for that I used .005" (I said I'm crazy, not
stupid). In this scale, it works fine.
After all holes were pre-drilled, inter strut
cables were tacked on first, using the opened thread end of a sewing
needle as an applicator, CA accelerator, tweezers and three hands.
Monofilament is great, because you can tighten it by applying heat. I've
used an electric soldering gun, a cigeratte, but have now found a great
new tool. It's a small, butane fueled soldering 'stick'. the tip is small,
so it fits into small places and on the lowest setting the heat generated
is barely noticeable. You get great control and are less likely to burn
through a line, something I always dread.
Holes were drilled in the upper wings, but
not all the way thru, then all interwing cables were attached.
Painting commenced with my primer of choice,
Mr. Surfacer 1000.
The fuselage was painted per instructions
using Gunze H53 and the struts in Gunze H338.
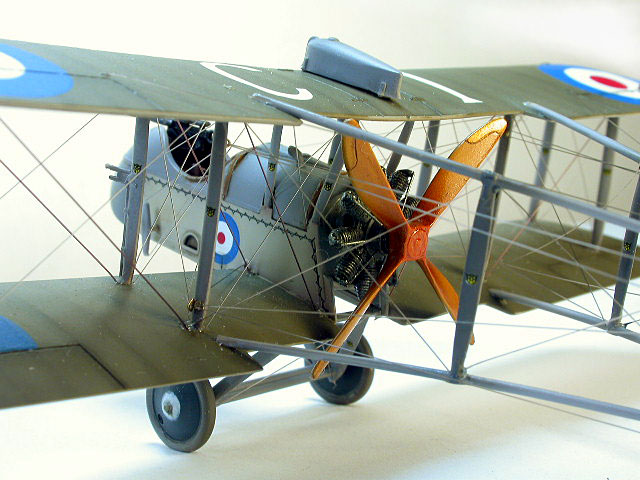
The uppersurfaces were pre-shaded with Tamiya
Red Brown mixed with Black. The actual color is Gunze Olive Drab H78,
lightened with White and Sail Color H85. Undersurfaces were preshaded with
Tamiya Red Brown. The undersurface color is Sail Color H85 also lightened
with white.
My standard mix of denatured alcohol,
retarder and flow enhacer was used on all the above.
I obtained the subtle rib effect by post
shading the hollows with a lightened and thinned color coat. I keep going
over the area with lighter and thinner coats until I achieve the desired
effect. It is important to keep the paint very thin. In fact, it is so
thin that it is hard to see a color change. I watch the paint hit the
surface, looking at it at an angle as I paint, then go back and check my
work. It is a long and tedious process, but I like the results.
I really enjoyed this kit, and learned a lot
in the process.
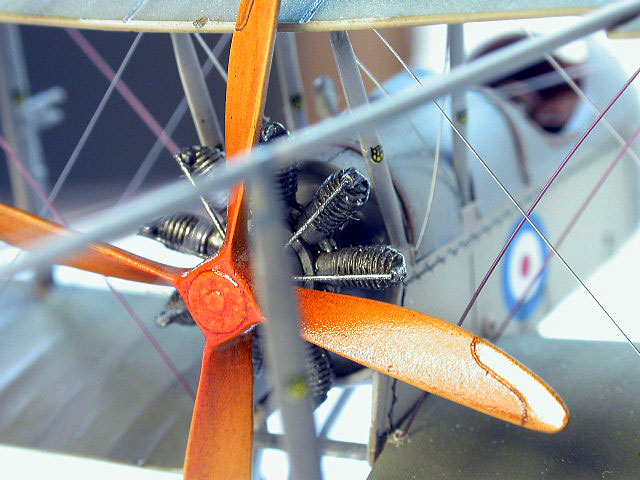
Almost all the techniques used on this DH 2 I
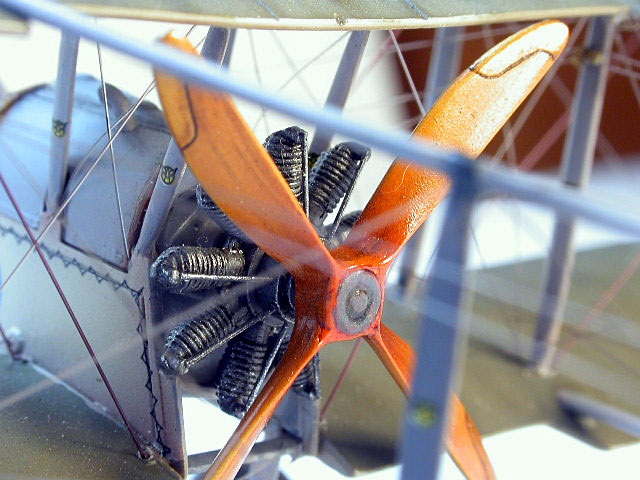
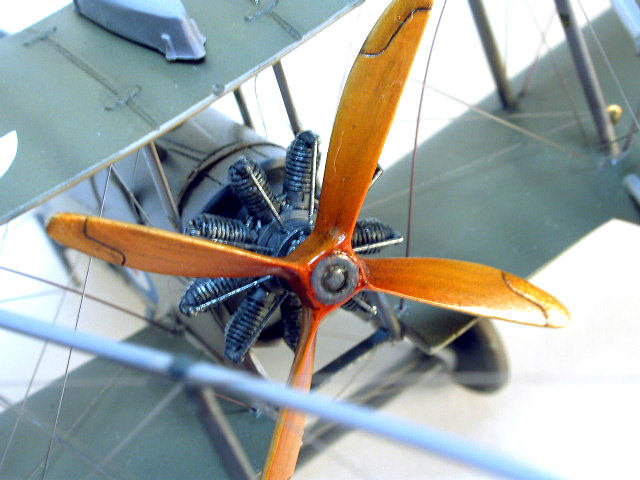
learned from this website. I 'stole' the preshading from Brett, rigging
from Glen, the wood finish on the prop from who knows who, so thanks
everyone.
My skills have improved ten fold since I
started visiting this site last year, but most importantly I enjoy my
hobby (passion?) so much more because of the interaction.
Take care everyone, and thanks again!
Click the
thumbnails below to view larger images:
Model, Images and Text Copyright © 2003
by Roger Fabrocini
Page Created 30 June, 2003
Last Updated
17 March, 2004
Back to
HyperScale Main Page |
 Home |
What's New |
Features |
Gallery |
Reviews |
Reference |
Forum |
Search
Home |
What's New |
Features |
Gallery |
Reviews |
Reference |
Forum |
Search