|
Dornier Do 26
by
Bryan "Tuck" Tucker
|
|
|
Dornier Do 26 |

Mach
2's 1/72 scale Dornier Do 26 Seaplane is available online from
Squadron
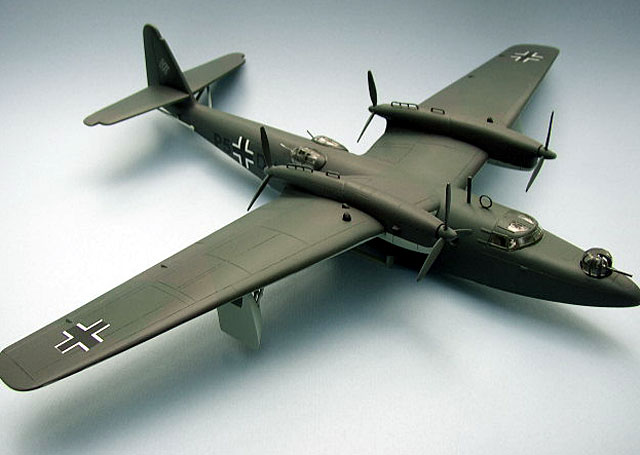
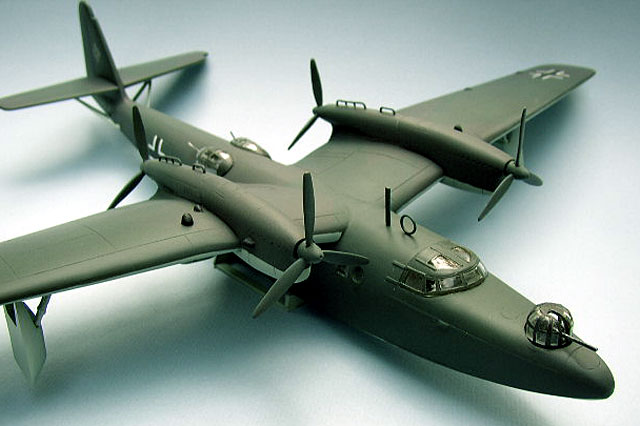
Arguably the most beautiful
flying boat ever manufactured, the Dornier Do 26 was constructed for
Lufthansa to meet the requirement of a trans-Atlantic mail and passenger
carrier.
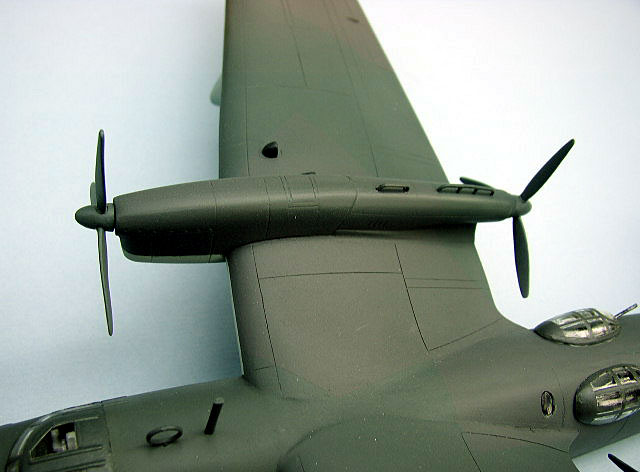
Dornier by this time had
extensive experience in manufacturing flying boats, as well as the novel
tandem engine approach seen on so many of his aircraft. The rear engines
were hinged upward during takeoff to avoid the propeller tips striking the
water.
|
Kit Summary |
|
Kit |
1/72 Scale Mach 2
Dornier Do 26 |
|
Cost |
USD$60.00 (from
Squadron) |
|
Markings |
Kit decals for two
aircraft |
|
Comments |
Better eat your Wheaties
for this one….. |
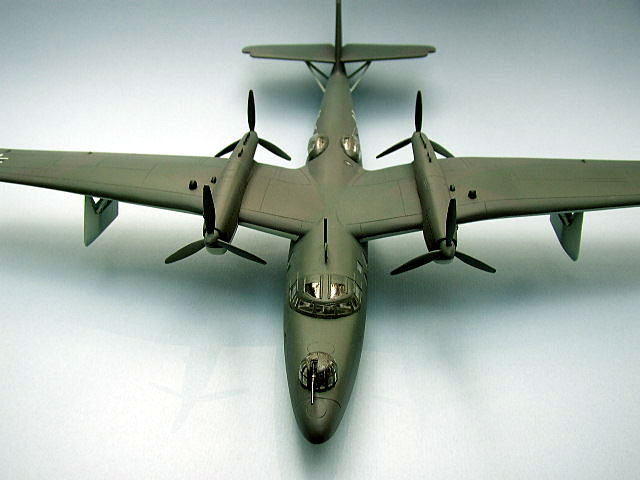
Upon the outbreak of war,
the Luftwaffe took charge of all six Do 26s and utilized them for
operations in the fiords of Norway, as well as general patrol and staff
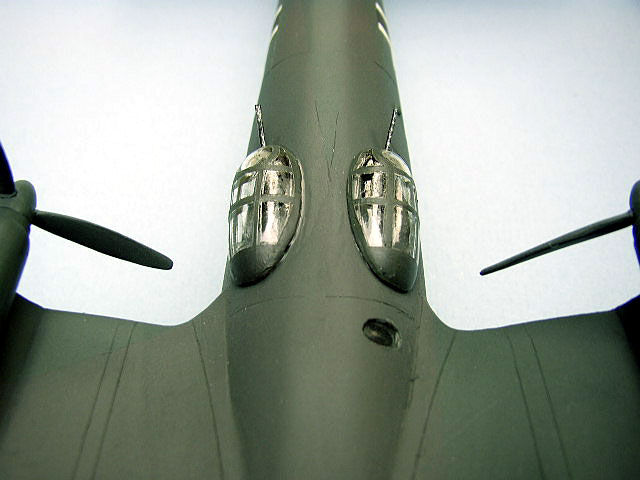
transport duties. In service, it was armed with a 20mm MG151 in the nose
turret and MG15s in the beam hatch positions and mid-fuselage blisters. No
bombs or depth charges were carried.
The boats were quite weakly
armed and slow, so they were quickly relegated to behind-the-lines duties,
where general attrition and lack of spares caused them to fade from
service.
None survive today.
Mach 2's 1/72
scale Do 26
|
Mach 2 from France has a bad
reputation amongst modelers. This is not undeserved, as their kits are
somewhat crude and difficult to build. Having already built their Arado
232 transport, I had a good idea what I was in for.
The kit is molded in light
gray plastic, and the moldings are rough in texture, soft in detail and
have flash and general imperfections all over.
The clear parts are hardly
that. They are opaque and extremely thick!
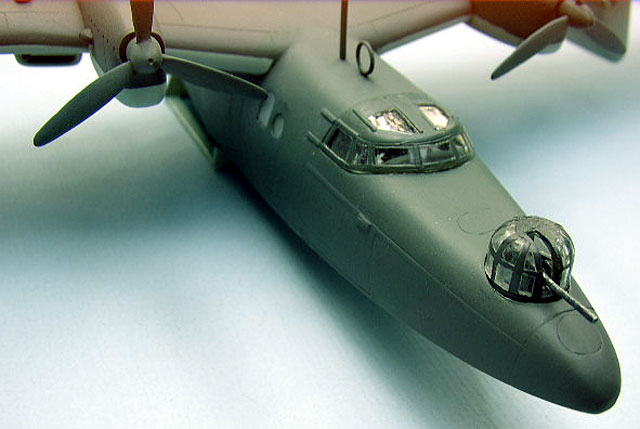
This kit was unusual, as it
had a decently detailed cockpit compartment and rear gunner blister
compartment. All bulkheads, seats, radios, navigation tables, control
columns, etc. are included. All other Mach 2 kits I have built have
minimal cockpit detail.
You have the option to build
the kit as either the Lufthansa ‘Seafalke’ (Seafalcon) prototype from 1939
or a military boat used in Norway in 1940. Decals are provided for both
versions. A rudimentary display stand is also included.
Pay close attention to the
instruction sheet for different parts to use between the civil and
military version. The instruction sheet is minimalist, and no painting
guides are provided other than the box top 3-view (and that is only for
the military version!).
I spent the first two nights
of construction removing all parts from the sprues and cleaning them up as
much as I could. This included fixing small shape errors, sanding away
rough surface texture, sanding mating surfaces, etc.
I first glued the outrigger float bay sidewall parts to the lower wing
halves, and then glued the wing halves together. Masking tape held the
parts together until dry. After drying, I removed the tape and began
working on the seams. It took many applications of super glue and setting
solution to fill all the imperfections in the leading and trailing seams,
but I got the worst of them. The wings were then gently sanded all over to
remove more pebbly texture.
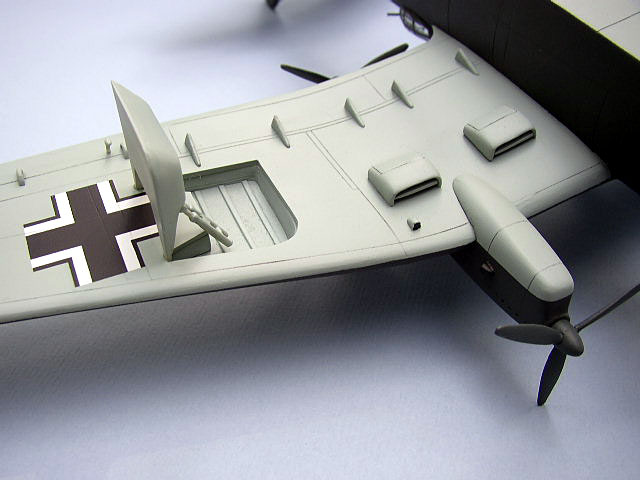
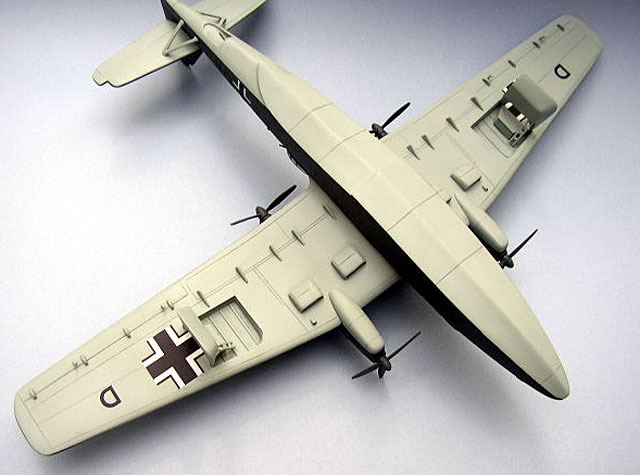
Next I began work on the under wing radiators, two per wing. Luckily,
these parts fit fairly well, with only a little trimming and sanding
necessary for a good fit. I painted the wing surface and radiators at this
time, as they would be very difficult to reach after assembly. I then
added the flap hinge fairings to each wing. These are simple butt joints
and were glued with super glue. I left off the aileron balances until
construction was complete to avoid constantly ripping them off.
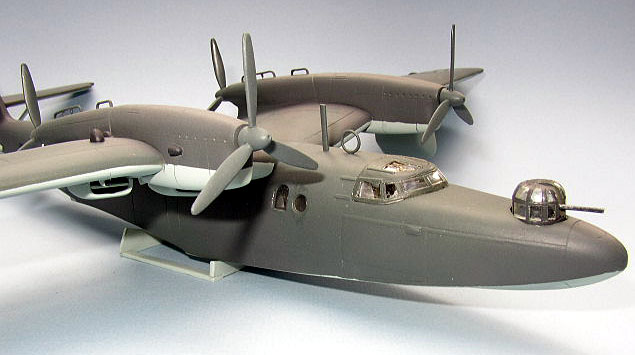
I then added the engines to each completed wing assembly. The parts are
designed to give you the option to raise the rear engines to the take-off
position, but this will require scratch building. I did not want the
hassle, so I left my engines in the in-flight position. Each front and
rear engine is assembled in halves, and these assemblies are then glued
onto the wing. Massive gaps and holes were the result of this
construction, so more time was spent applying and sanding filler.
Finally, I plucked up the courage to start the cockpit interior. These
parts suffer from soft detail, but end up making a decent representation
of the front office. I could find not photos inside of the Do 26, so I
cannot comment on accuracy. I painted the interior RLM 02 gray with silver
seats and black instrument panels. The bulkheads offer adequate detail,
but again this is soft. The rear gunners blister station interior was
completed in the same manner.
Now for the decisive moment. The completed cockpit assemblies were placed
in the fuselage for test fitting. I cringed as I started to close the
halves, but was extremely happy to find that they fitted with no
adjustment required! Before gluing the fuselage halves together, I glued
the lower rear gunner’s trough (under the boat at the tail) in with slow
setting glue so I could adjust it. It is impossible to install this after
the fuselage halves are joined, so be careful! If you chose to do the
civil version, this trough is replaced with a fairing (provided). Again,
all completed subassemblies were filled, sanded, and cleaned up to remove
as many imperfections as possible.
The horizontal stabilizers were assembled without incident. By now, the
drill of filling seams and sanding was well established, and these items
were quickly completed. I also assembled the propellers at this time. I
would like to meet the Mach 2 designer who decided to make each propeller
blade separate! Each (count them – 12) requires massive cleanup, including
bending, trimming, etc. The prop spinners and hubs were awful as well. I
highly recommend replacing these with spares box replacements, but I was
on a mission to use all of the kit’s parts, no matter how bad they were!
The completed props were painted according to standard practice. The
spinner is RLM 70 and the propeller blades, which are metal, are RLM 70.
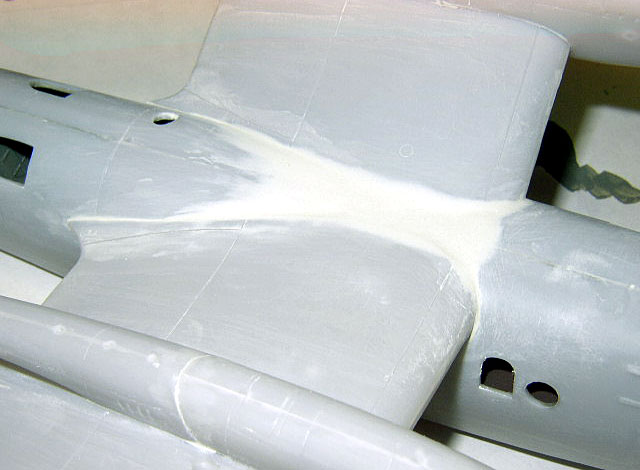
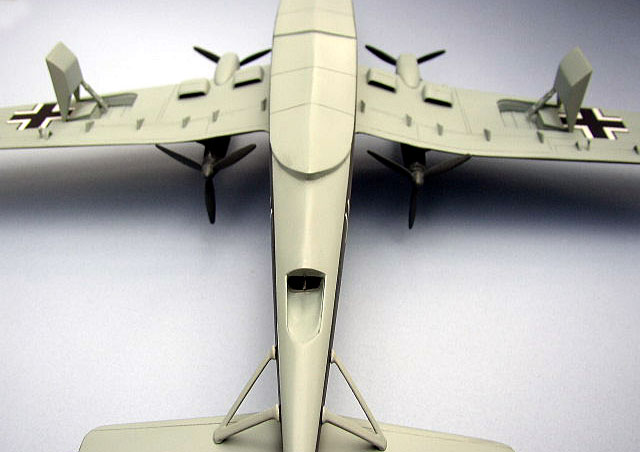
Now for the next challenge: joining the wings and horizontal stabilizers
to the fuselage! The gull wing attachment to the fuselage of the real bird
is graceful, elegant, and aesthetically pleasing. No, so on the plastic
kit. I glued the wing on with super glue, then made three separate
applications of filler and sanded away at the joints. The process was
repeated, albeit smaller scale, on the horizontal stabilizers. I left off
the support struts until after painting to ease final assembly.
Before painting, the entire model was again wet sanded with progressively
finer papers in an attempt to smooth out all final flaws. Then on to the
paint booth.
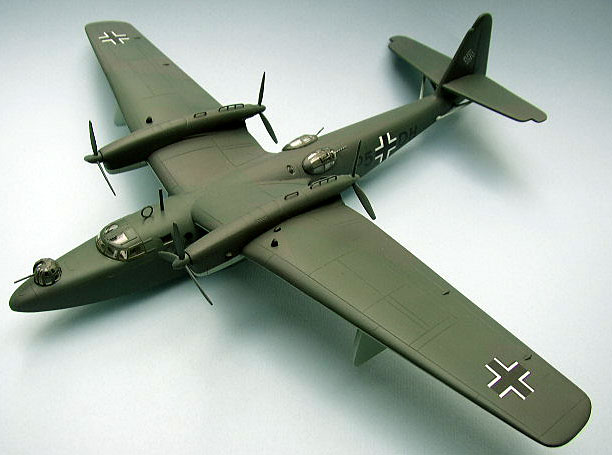
 All
paints were Model Master Acrylics. All military seaplanes were painted RLM
72 and 73 over RLM 65. Since these paints have a tendency to lift off with
masking, I used Tamiya masking tape for the splinter pattern. I highly
recommend this tape when using the Model Master Acrylics. Since I have
been using the tape, I have had minimal lift of paint. All
paints were Model Master Acrylics. All military seaplanes were painted RLM
72 and 73 over RLM 65. Since these paints have a tendency to lift off with
masking, I used Tamiya masking tape for the splinter pattern. I highly
recommend this tape when using the Model Master Acrylics. Since I have
been using the tape, I have had minimal lift of paint.
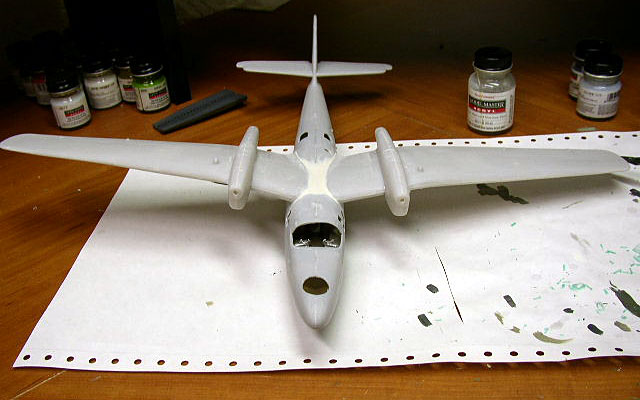
I first sprayed the entire model with RLM 65 as a primer coat to see if
there were any flaws. Let’s just say this, there were many, and I fixed
them as best I could. I re-sprayed the RLM 65 color. I then masked the
upper/lower demarcation line as the real aircraft had a hard edge between
the colors. I covered all the lower areas to remain RLM 65 and sprayed the
upper surface colors.
I shot the kit with Model Master Gloss in preparation for decals. I’ve had
mixed results with Mach 2 decals, and I can say these were a pleasant
surprise. On my sample, there was no carrier film between any of the
fuselage code letters, making the risk of silvering non-existent. All wing
and fuselage crosses went on without incident, and all reacted well to
Micro-Sol. I chose to use aftermarket swastikas.
The canopies were then cleaned of flash, test-fitted, and trimmed to fit
the fuselage. Ambroid Liquid Mask was used, slathered on in three coats.
Each window was cut using a sharp No. 11 blade, and the canopies painted.
After the mask was removed, each clear part was dipped in future. This
cleared up the windows significantly, but made the window frame color
deepen significantly. This makes the canopy parts look like they were
painted with different paint. I was quite tired of this kit by then, so I
lived with it. Micro Kristal Kleer was used on all small windows and
portholes. After a shot of Dullcoat, the rear struts were installed,
canopies glued, and display stand assembled. DONE!
Well, it has been over five
months since construction started, and I tired of it many times, but
another Mach 2 dragon has been slain. I can proudly say I used every part
the kit offered, from aileron balance horns to machineguns. These kits are
indeed tough, but Mach 2 has a nasty tendency to produce kits that no
mainstream kit maker will ever produce, making their products curiously
desirable. However, they are so tough that they wear you down, and I swear
I will never do another one. Dang!, I forgot the Ju 352 in my stash. It’s
looking at me…make it stop! AAARRRGGGH!!!
Seriously, it’s tough, but it can be done. It’s also the only injected
molded kit in town of this subject, so good luck!
-
The Monogram Painting Guide
to German Aircraft 1939-1945, Creek and Hitchcock
-
Warplanes of the Third
Reich, William Green
Click on the thumbnails
below to view larger images:
Model, Images and Text Copyright ©
2003 by Bryan "Tuck" Tucker
Page Created 29 July, 2003
Last Updated
17 March, 2004
Back to
HyperScale Main Page |
 Home |
What's New |
Features |
Gallery |
Reviews |
Reference |
Forum |
Search
Home |
What's New |
Features |
Gallery |
Reviews |
Reference |
Forum |
Search