|
Arado E.555
by
Bryan "Tuck" Tucker
|
|
|
Arado E.555 |

HyperScale is proudly supported by
Squadron
What history? This was only
a paper project!
Revell's 1/72
Scale E.555
|
Revell Germany has released a gem of a kit of a very interesting subject.
It has been reviewed in detail several times, so I will not waste space
here.
|
Kit Summary |
|
Kit |
Arado E.555 |
|
Scale |
1/72 |
|
Manufacturer |
Revell Germany |
|
Additional Parts Used |
Monogram 1/48 Hawker
Hurricane 40mm Cannons; Condor 1/72 Henschel Hs 293 Guided bombs |
The kit is readily available
and is usually very cheap.
Detailing throughout is
admirable for a 1/72 scale kit. It really puts many Tamigawa kits
to shame in detail, fit, price and quality (in my humble opinion).
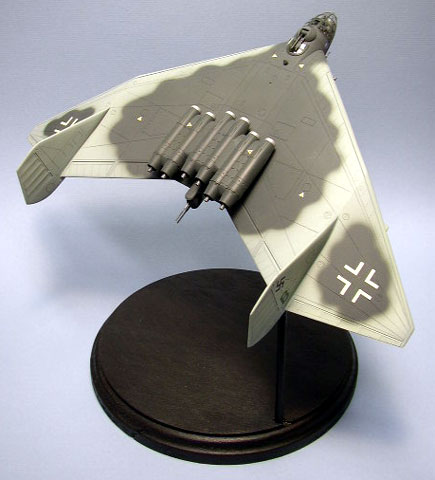
Since I decided to depict
this kit in flight, construction was simplified due to the elimination of
the landing gear and all it’s associated painting (trust me, the landing
gear are gems and will be wonderful additions to the spares box).
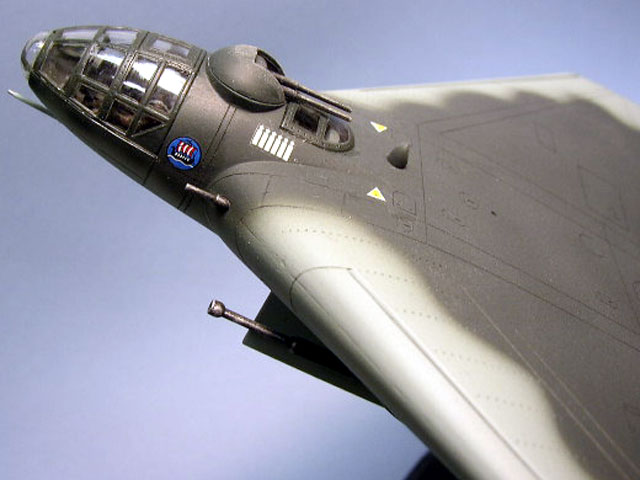
I added pilots and a rear
gunner (Italieri) from the spares box. The co-pilot/bombadier had to be
significantly “cut up” in order to get him to fit due to the bombsight
being in the way.
All other parts went
together with no filler and no fuss. The fit was excellent. My only
difficulty was the sprue attachment points for the upper and lower halves
of the wing/fuselage. They are rather thick and some damage ensued with
removal. However, this damage was easily eliminated with a little cyano
and sandpaper.
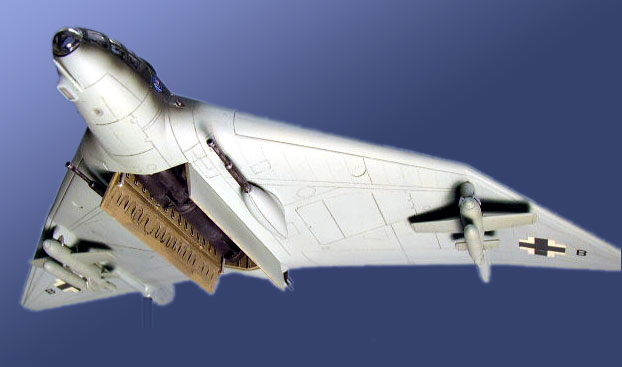
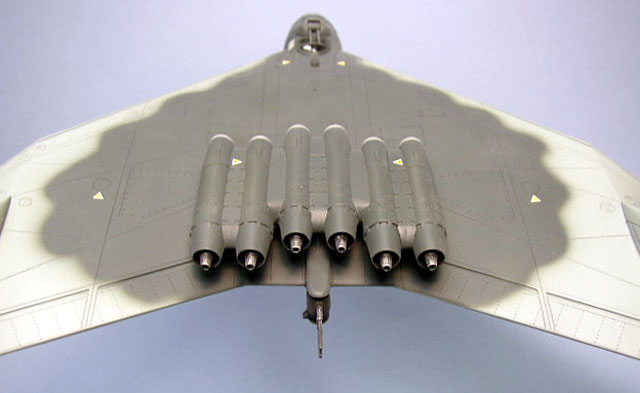
I installed the bomb load
and bomb bay doors. The engine pod was left off until after painting. I
added the guided bombs and large under wing cannons as I intended this to
be a “what-if” anti-shipping aircraft.
 Painting Painting
All paints were Model Master
Acrylics. I painted the upper surfaces in a freehand application of RLM 71
over RLM 76.
The Hs 293 Missiles were
hand painted RLM 65 to provide a little contrast. RLM 02 was used for the
bomb bay, with the bombs being painted black with a dry-brush of RLM 02.
The cockpit was painted RLM
66 with dry brushing of RLM 76 to bring out details. Dials, switches, etc.
were painted according to standard Luftwaffe practice. The pilots were
painted in brown flight suits with light gray parachute harnesses with dry
brushing of tan to bring out flight suit details.
I hand painted the aluminum
rings around the jet intakes as these were not always painted. The bomb
bay was washed with black and dry –brushed with more RLM 02 to bring out
the fine details.
A sharp No. 2 pencil was
used to highlight all panel lines.
Decals
Decals came from the spares
box. I attempted to make some of my own for a little humor. I wanted to
put stenciling on the tail of the bird and name it “Luft-Tirpitz” and add
kill markings of the USS Enterprise, HMS Hood II, etc. etc. but I could
not produce them on decal film or freehand paint them on. I even tried to
draw them on with pencil. No luck. Maybe next time...
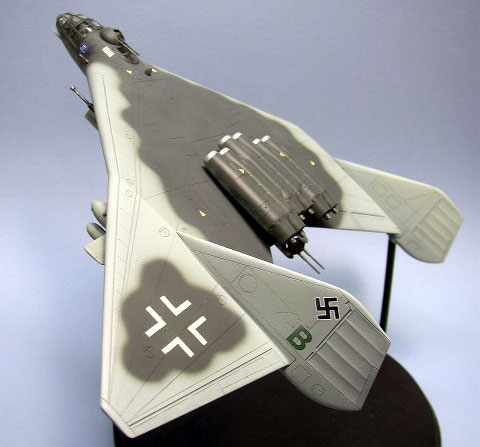
A coat of Model Master Clear Flat was applied and the kit was done. I then
drilled a hole on the back tail for the mounting rod (in hindsight, this
was a bad idea, I almost ruined the model doing this. Next time, I’ll
build the rod into the plane while I’m constructing it.) The rod and base
are from a craft store, and were painted black with water based art paint
(the thick, gooey kind). I mounted the plane for ease of viewing the bomb
bay.
This was a fun project that
tested personal limits.
“What-If” subjects are a
blast as there is no “correct” way to do them. Just have fun and
experiment with detailing and painting. The kit was slammed together in a
few sessions and the display base was much easier than I thought it would
be.
Give “What-If’s” and
in-flight displays a chance; you just may like them.
Click the
thumbnails below to view larger images:
Model, Images and Text Copyright ©
2003 by Bryan "Tuck" Tucker
Page Created 04 February, 2003
Last Updated
17 March, 2004
Back to
HyperScale Main Page |
Home |
What's New |
Features |
Gallery |
Reviews |
Reference |
Forum |
Search