|
F-15D Eagle
by
John Chung
|
 |
|
F-15D Eagle |

HyperScale is proudly supported by
Squadron
McDonnell Douglasí F-15
Eagle has had a long and distinguished history, with over a hundred
air-to-air kills and no loses to opposition air assets. Operators of the
family models include United States, Japan, Israel and Saudi Arabia, with
Korea soon to join with the F-15K variant of the F-15E Strike Eagle. Since
many of the aircraftís background and details are well known and abroad, I
shall not elaborate further.
The F-15 has been kitted several times in 1/72 by various manufacturers.
The current consensus would call the Hasegawaís release being the prime of
the bunch, with finely recessed surface details and in its latest releases
adequate featherless nozzle details. Ironically, Iíve never personally
possessed, handled or seen the kit in person.
ESCIís moulding of the F-15
eagle in 1/72 scale has been re-boxed by AMT and sold with relatively
inexpensive prices. Being a slightly older kit, the model stands well on
its own in terms of generic surface details, which are finely recessed.
The control surfaces are nice and thing, and little or no ejector pin
marks are visible for the most part. Detail wise the kit is a beast. The
cockpit is extremely sad, composing a single tub, two flap plastics for
panels with no surface detail, and two plainly molded seats.
Undercarriages are passable with careful painting, and the wells are
plain.

The feathered nozzles
provided are useable, though the featherless examples are nothing more
than a plastic tube with strakes representing what is supposed to be push
rods. This being the F-15E kit, it is nothing more than the earlier F-15B
kit with conformal tanks with no pylons. The saddest point is, though the
shoulder pylon is provided, no missile rails are given in this release,
which are included in their single seat kits, IIRC.
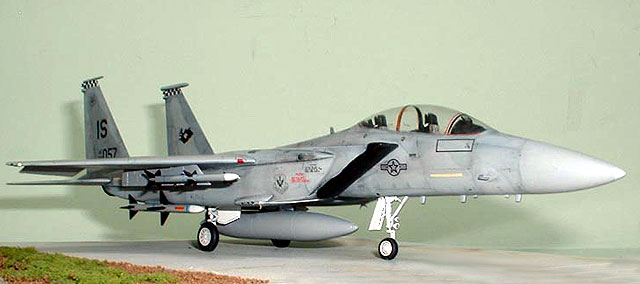
The bird is destined to be a F-15D from the start, which allowed minimal
modification on top of the already tedious list. The conformal tank
provided is utilized, given not too much models exhibit this rare
arrangement. However, it did dawn on me afterwards that Astra Decalís
Iceland-based aircrafts was the only decal option available to me. As
well, pylons for the CFT had to be constructed out of sheet styrene, and
would stick out like a sore thumb should it be missing. The latter proved
to be not too difficult, though references were extreme limited, and some
guess works were done on their relative shapes and positions.
Iíve elected to construct
this airframe primarily out of the box with respect to super detailing.
However, as the build continued, Iíve included an increasing amount of
modification and scratch builts I deemed necessary to satisfy my limited
desire for scale authenticity. Dropping the wing outboard flaperons, for
instance, was done just prior to painting. By then Iíve had the project on
the bench for more than a year on and off, and was getting extremely
impatient. I had to cut the kit somewhere to vent, so the flaperons came
off.
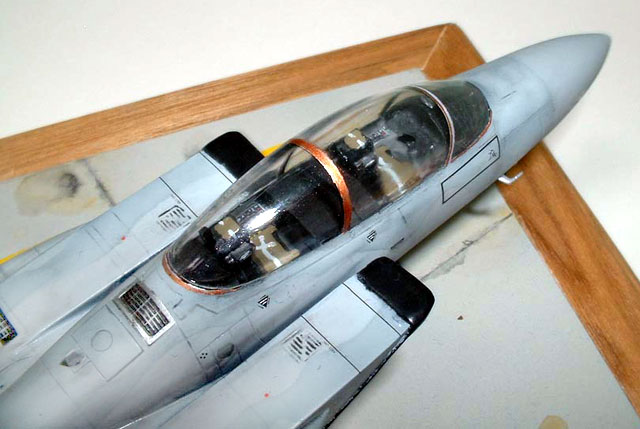
The cockpit of the model had to be re-adjusted in its relative position as
it was quite off. New back walls for both the pilot and WSO positions had
to be made from scratch, as none were provided. Kit instrument panel and
decals were used as I figured them good enough for a closed canopy. Kit
seats were used with some detail painting. I wasnít about to spend big
dollars on resin seats for this model, and by the end of the construction
when it was time to install the seats, I was too tired from detailing them
anyway. Canopy fit wasnít very encouraging, with quite a bit of filling
and sanding done around the peripheral plastic. The clear area were later
sanded with progressively finer grits and coated with future prior to the
application of paints.

Generic fits of the main body parts were atrocious. I cannot describe how
much filler Iíve spent, how much sand paper Iíve managed to dull and how
much more time to rescribe the lost details. This will apply to all major
assemblies, or rather all parts larger than a quarter that may be found,
as none fit well, anyhow. Iíve managed in the end, with countless hours of
breaks in between while working on other projects. Though the original
intend was for this to be a relaxation, quick build, it ended up requiring
such from other kits.
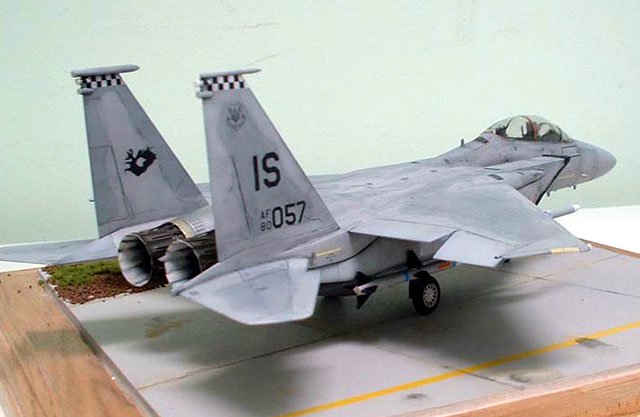
Noteworthy is the fact that this model has been slightly modified to
represent the MSIP airframes, with the sensor on the starboard tail boom.
Iíve never seen the actual aircraft with such modification, but after the
accidental landing on the concrete floor and the subsequent lost of the
spike, it might as well have been done. Intake covers were constructed out
of styrene, tissue paper, white glue and super glue.

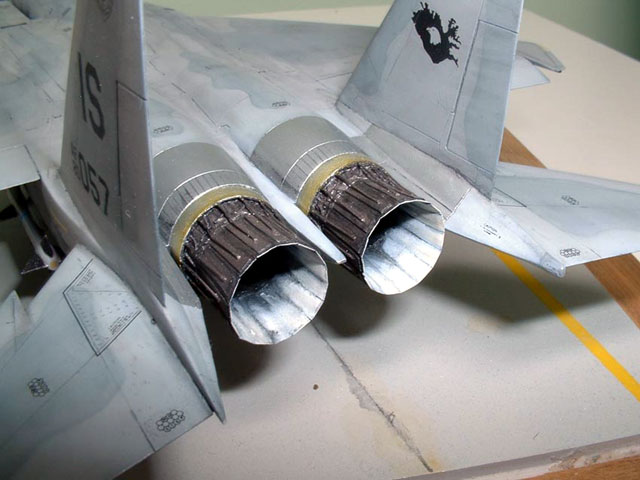
New nozzles were constructed
out of sheet and strip styrene after struggling with myself about the
inadequate featherless examples provided, and the inaccuracy in detail
with the feathered nozzles. Such is the dilemma with scale modelers.
The model was finished with
Gunze Acrylic paints weathered with oil wash. Iíve managed to spray way
too thick a coat of Aeromaster acrylic flat right after the application of
the decals, resulting in such a heavy build up that many of the surface
details were buried. I was extremely disappointed but had to continue with
the oil wash. The result was passable, though it could have been better.
All in all, it has been a
very tedious build. The end result was worth it, I believe.
This model now resides in the home of a friend of mine, for whom has been
built.
Click the thumbnails below to view larger
images:
Model, Images and Text Copyright ©
2003 by John Chung
Page Created 09 April, 2003
Last Updated
17 March, 2004
Back to
HyperScale Main Page |
Home |
What's New |
Features |
Gallery |
Reviews |
Reference |
Forum |
Search