|
F-16C - Taxi Cab Viper
by Darren McTee
|

|
|
F-16C
Taxi Cab Viper |

Hasegawa's 1/72
scale F-16CJ is available online from Squadron.com
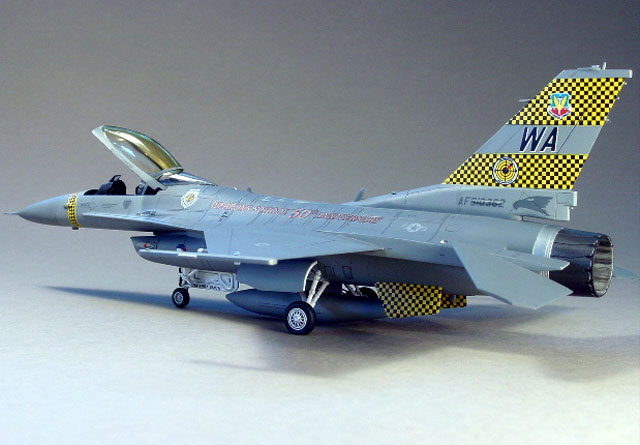
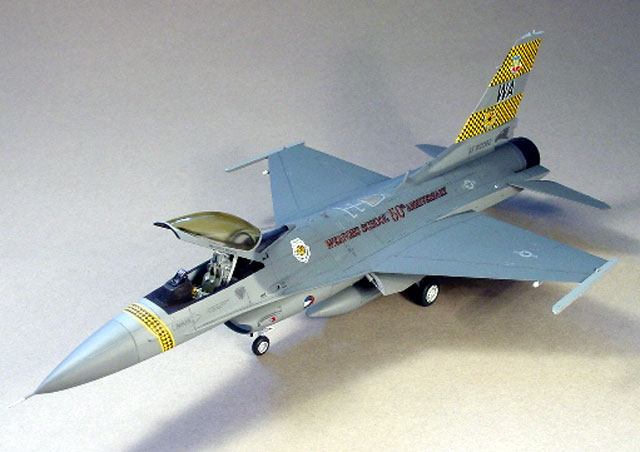
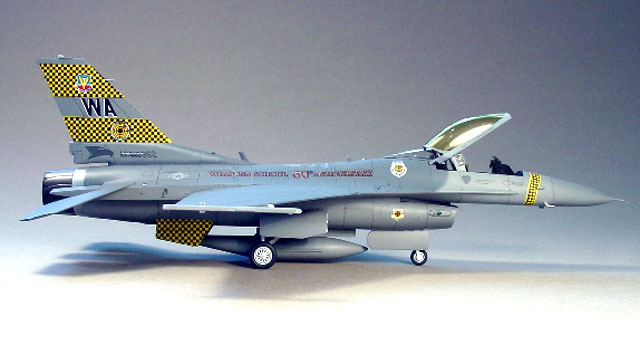
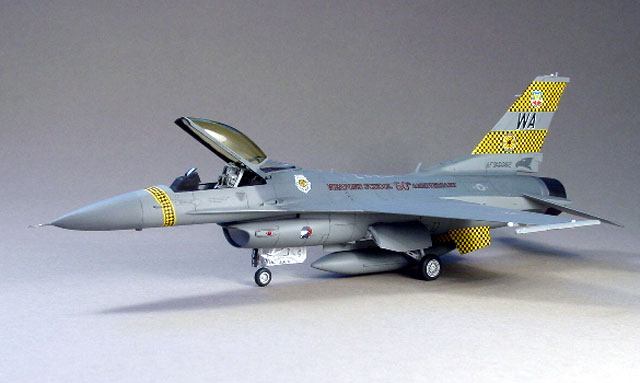
Here is my recently completed Hasegawa 1/72 F-16C. I was looking for
a quick easy build after several big projects with too many resin and
detail parts. This project fit the bill and was quite enjoyable.
Kit construction was out-of-box except for a True Details ACES II
ejection seat.
The most confusing part when building any F-16 is what parts do you
need to build the correct “Block” F-16. I used one of the new Block 50
CJ kits to build this F-16 as it is a Block 52 aircraft. To build a
Block 52, use the Pratt & Whitney engine and the small mouth intake.
When installing the nose wheel well into the intake pieces you need to
use the older style wheel well piece not the new one designed for the
wide mouth intake. However I did use the new nose wheel door, so I could
mount the landing lights to the nose wheel door. If you use this
combination of old style wheel well and new nose door, the mounting
holes in the wheel well do not line up with the nose door mounting tabs
and must be filled in prior to painting. Also, use the bulged main gear
doors.

A problem with Hasegawa 1/72 F-16’s is that the nose gear looks too
“long” making the plane sit with the tail too low. To fix this, I cut a
small amount off the nose gear where it mounts to the nose wheel well
thus shortening it. It still sits a little low but definitely looks
better.
The instructions call for removing the molded on AIM 9 rails from the
wing and replacing them with the new AIM 9 rails provided in the kit.
This too is appropriate for a Block 52 Aircraft. The wing mounted RWR
antennas, commonly known as “beer cans”, do not fit very well. If you
just glue them on they look like they are hanging below the wing and
this is not correct. I thinned the fairing by cutting down the mounting
surface of the antenna. When installed, this raises the forward antenna
portion so the leading edge of the wing splits the circumference of the
“beer can”. Using putty, blend the top portion of the antenna into the
upper surface of the wing. When complete the fairing should be on the
top and bottom of the wing, with the larger portion of the fairing on
the bottom of the wing.
 Paint Paint
Painting was rather easy using Model Master Gunship Grey 36118 and
Neutral Gray 36270. I lightened the Gunship Grey slightly with white, as
it tends to fade on the real jets.
The nose cone was painted with darkened 36270.

Another aspect to consider when modeling a Block 52 F-16 is the
exhaust nozzle color. The real jets have a composite material used for
the “turkey feathers” and the color is a shiny blackish metallic color.
I used Model Master Metalizer “Exhaust” color then buffed it to nice
shine.
Decals
I used Twobobs sheet #72-05 “Taxi Cab Viper” decals. This is probably
the best decal sheet I have ever used. I was a bit worried before using
them because several of the decals are multiple parts that must be
layered over each other. Some markings required three different decal
layers. Even the checkered band around the nose is two different layers.
I placed them over the top of the RWR bumps on the nose and with plenty
of Micro-Sol they snuggled right down over the complex curves of the
antennas and look painted on. Amazing. I was pleased to find that all
the decals fit absolutely perfect on this kit and I was amazed at the
detail and resolution of these decals in 1/72 scale, they look really
really good.
Canopy
Finally, time to tackle the canopy color. I have built several 1/48
Hasegawa over the years and have never been happy with their “smoked”
canopies. The parts in this kit are clear so I decided to try and paint
the gold/smoke color seen on many F-16’s.

After thoroughly polishing the canopy with Tamiya Rubbing Compound I
masked all outside surfaces of the canopy. For a paint color I used
Tamiya Clear Smoke and Tamiya Clear Yellow mixed at approximately 80%
Smoke 20% Yellow. Don’t over do the yellow color, as it is very powerful
and can easily look too yellow. I thinned the paint slightly with water
then sprayed the canopy from the backside using several very light
coats. Do not spray too heavily as the paint may easily run and pool in
the top of the canopy making an uneven shade. Overall I was very pleased
with gold tint on the canopy and it was easy to do.
Overall this was a good little kit and a nice break from some of my more
complex projects in the works -just what I wanted when I started it.
Model, Images and Text Copyright © 2003 by
Darren McTee
Page Created 18 March, 2003
Last Updated 17 March, 2004
Back to HyperScale
Main Page
|
Home |
What's New |
Features |
Gallery |
Reviews |
Reference |
Forum |
Search