|
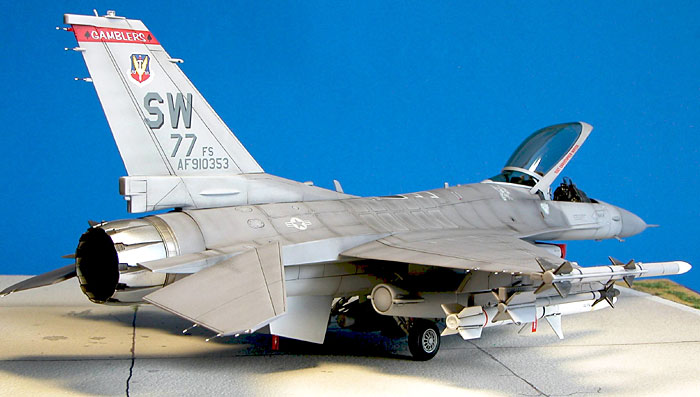
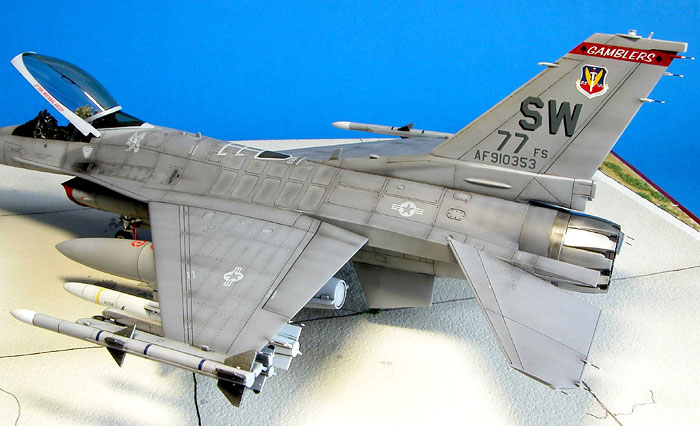
F-16CJ Block 50
by Scott Samo
 |
|
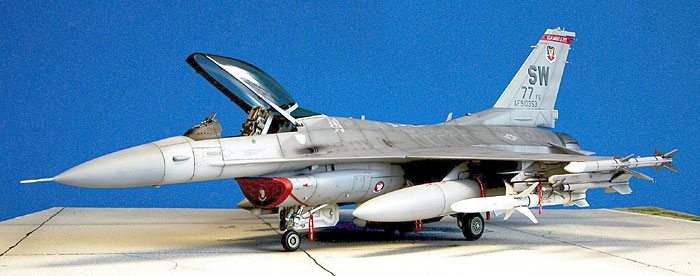
F-16
CJ Block 50
77 Fighter Squadron, Shaw Air Force Base |

HyperScale is proudly supported by Squadron.com
This is Hasegawa's 1/48 scale F-16 CJ Block 50 model.
Construction of the kit has been documented extensively elsewhere, so I
will concentrate on the unique construction items of my kit. I will say,
that the kit has great fit . . except for the big mouth intake. Other than
that, it simply falls together.
Hmmm . . well, maybe it doesn’t fall together, but it’s your typical
Hasegawa kit. Anyway, on to the model!
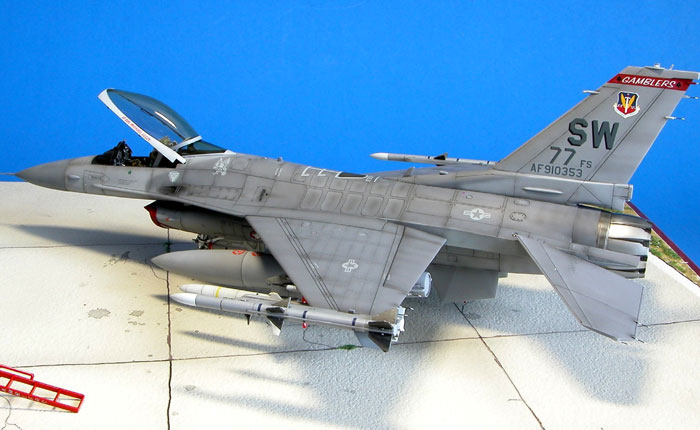
I began this kit about three years ago, hence the hesitation on the
"falls together" part above. I have always liked the lines of the F-16.
And Hasegawa’s kit definitely has the perfect shape of the F-16. As with
all my kits, I originally just wanted to build another F-16 out of the box
to have on my shelf next to my modern US Navy aircraft. As some of you
know by now, building an out of the box model is just not possible with
me.
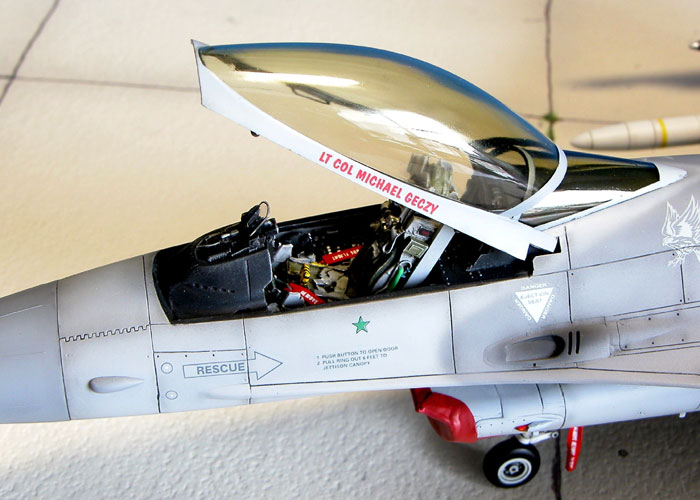
I spied the Black Box cockpit set at the model shop and was hooked.
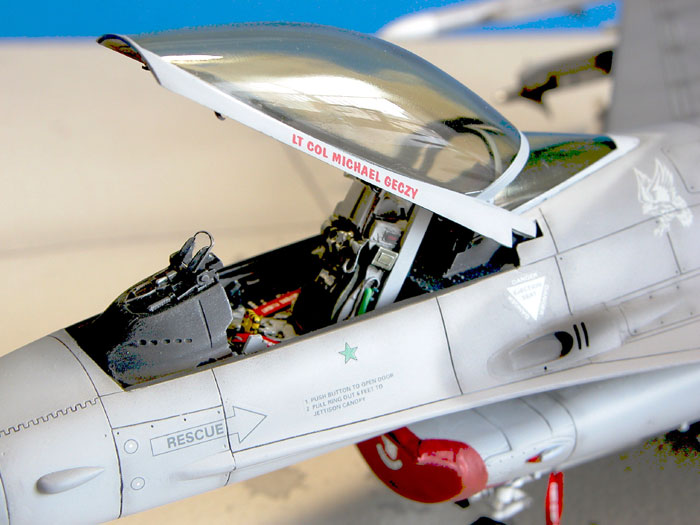
While the cockpit set required a little work to acquire a nice fit, it
greatly enhanced the kit and was much better than the stock cockpit. After
some careful sanding, the set fit well and presented no problems in
joining the fuselages. I used Vallejo acrylics to paint the interior. I
think the finished cockpit looks great. The remove before flight tags were
made using the Verlinden dry transfer decals and plumber’s wool for the
lanyards. The HUD was made from the Teknics HUD set. Cutting out the kit
cockpit and replacing it with the BB set was a lengthy process. However,
once I had the cockpit installed and joined the fuselages, the
construction process moved rather quickly.
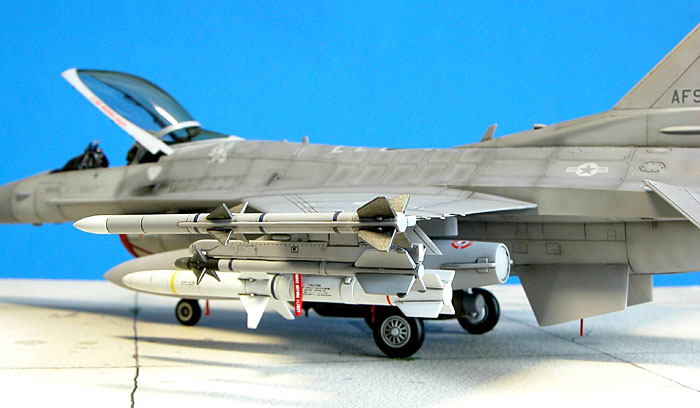
The only complaint that I have is the big mouth intake fit. It was not too
bad a fit on the outside, but the inside would prove to be an absolute
pain to fix. Thank goodness for intake covers! I crafted the intake cover
from lead foil from a champagne bottle. This is the best material I have
found to replicate anything made of cloth. It is the perfect thickness for
intake covers. I highly recommend getting your hands on some of this
stuff. It is extremely easy to work with and the results have been
fantastic! I should have used one of the resin aftermarket big mouth
intakes, but I had been bit by the model bug and I didn’t want to wait.
Next time . . . I’ll wait! Other than the intake, everything else fit
together well.
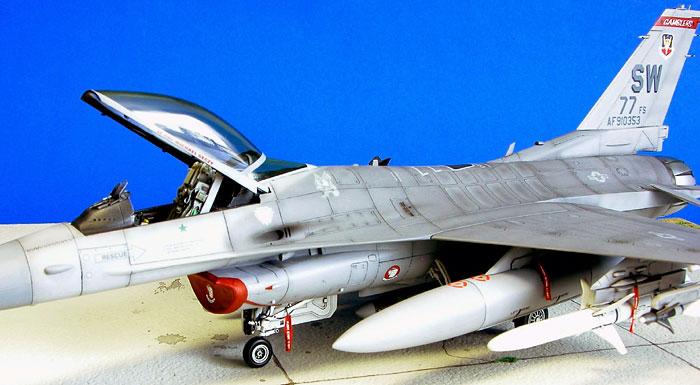
Next came the landing gear and wheel wells.
I realize the F-16 wheel wells are very busy and loaded with detail. But I
wanted to finish this model sometime this century, so I moderately
detailed the wells and gear with copper wire. I think the finished product
looks nice. I also used my usual mix of Turpenoid and Winsor and Newton
artist’s oils for the wash.
Before I installed the gear, I had to do my favorite thing . . . PAINT
and WEATHER!
Paint
I used Gunze and Tamiya paint for the entire project. H 308, 305 307
were used for the surface of the model. After I had the base color
applied, I masked several panels and sprayed a lighter color for
highlights. I like to use Post-it Notes for this process because they have
the perfect amount of adhesion to the painted surface. The smaller panels
were masked with Tamiya tape. This is a lengthy process but looks really
nice on a finished model. After the lighter color was applied, I removed
the Post-it Note and shaded again with a mixture of Tamiya flat black.
This mixture is extremely thin which gives me a tremendous amount of
control when spraying through the airbrush. After the model was weathered,
I used microscope lense paper and a buffing pad to polish the surfaces
where the decals would go.
I’m sure many of you think I am absolutely NUTS, not use a gloss coat.
Believe me, I am scared to death of silvering decals too! Trust me on this
one . . next time you build a model, use Gunze or Tamiya paint and polish
it with the lense paper first. Then take a soft T-shirt and polish the
surface a little more. Finally, use the buffing part of a sanding stick.
(You know, the one that looks like rubber or latex.) And by all means...DON"T
USE A GLOSS COAT! I promise you will not need it. If you follow these
steps, the finishes on your models will look much smoother and more
uniform in color. Oh, one more thing, make sure and allow the paint to
fully dry before buffing, usually a few days is sufficient. Or . . . you
can be lazy and spray that Future stuff on your beautifully painted model
and forget everything I’ve written. It’s up to you, but I guarantee your
models will look better if you do not use a gloss coat.
Okay, okay... I’m off my little soap box now. Back to the model.
Decals
One of the reasons this kit took so long, was that I couldn’t find any
decals I liked. Finally this past November, I found the Two Bobs set
#48-024 and here we are! Anyway, I do not use a gloss coat with Gunze.
Samo theory: The less crap you put on the surface, the smoother the finish
will be. After the decals were on, I used a wash for the panel lines. I
allowed the decals several days to completely dry, then I used a thinned
down flat coat from Polly Scale. It’s the best stuff made.
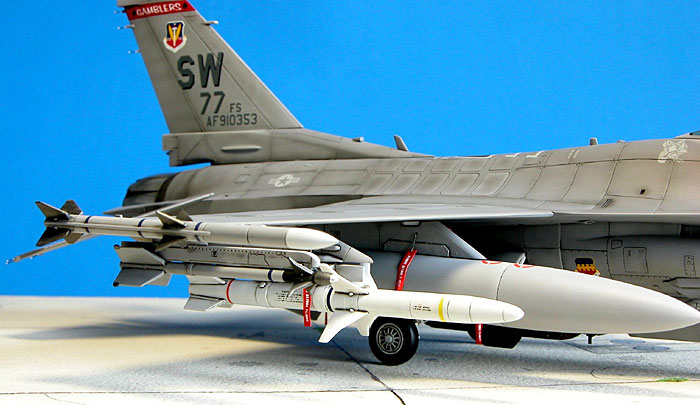
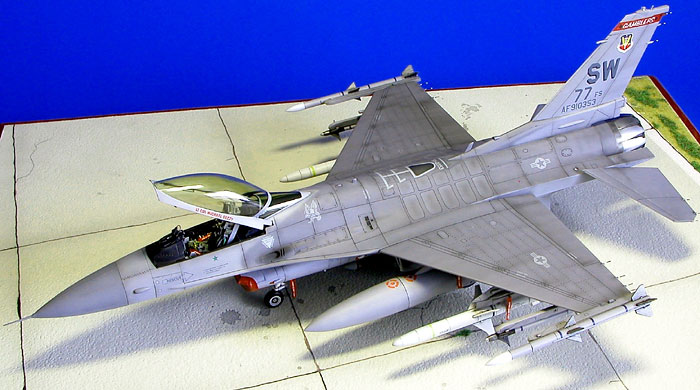
Once the majority of the parts were painted, I continued building the
remaining items of the kit. I dressed up the weapons just a little by
re-scribing a few panel lines on the pylons and fuel tanks just to add a
little detail to them. I used the decals for the weapons from the Hasegawa
kit. The only addition to the weapons load out that the kit didn’t
provide, was the ALQ-131 pod under the centerline. I think it looks great
on the model. I snagged it from the Verlinden 1/48 F-111F detail set that
is presently on my built 1/48 Academy F-111F. It looks much better on the
CJ than the F-111!
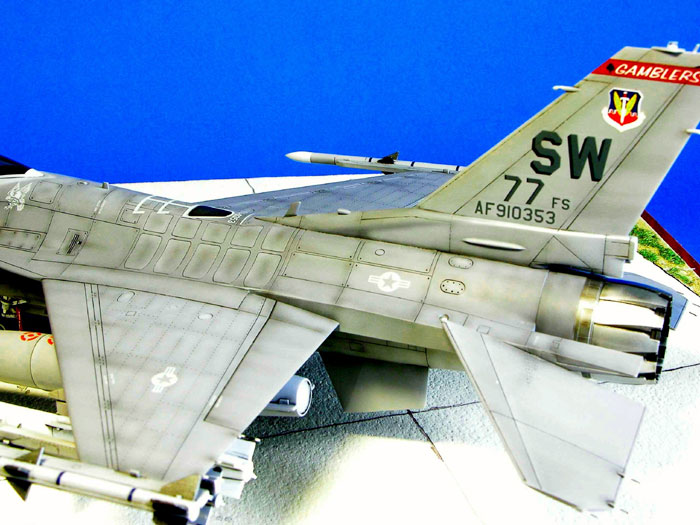
Also, I used Alclad II for the metal areas on the model, replaced the
tail light with a clear one on the top of the tail and I used toothbrush
bristles for the static dischargers on the wing tips. Lastly, I used
Tamiya smoke and clear yellow to tint the canopy.
Here is a summary of the work I performed on the kit:
-
Black Box cockpit.
-
Teknics HUD set.
-
Vallejo acrylics for cockpit detail painting.
-
Copper wire for landing gear and wheel well
detail.
-
Verlinden dry transfer REMOVE BEFORE FLIGHT
tags.
-
Plumbers wool for the RBF tag lanyards.
-
Lead from a champagne bottle for the intake
cover.
-
Verlinden ALQ-131 pod.
-
Clear plastic for the tail light.
-
Toothbrush bristles for the static wicks.
-
Tinted canopy with Tamiya clear smoke and
yellow.
-
Alclad II for the metal areas.
-
Two Bobs decals sheet # 48-024.
-
Gunze and Tamiya paint.
-
Polly Scale acrylic flat.
-
Winsor and Newton oils thinned with Turpenoid
for the wash.
I am very happy with the result.
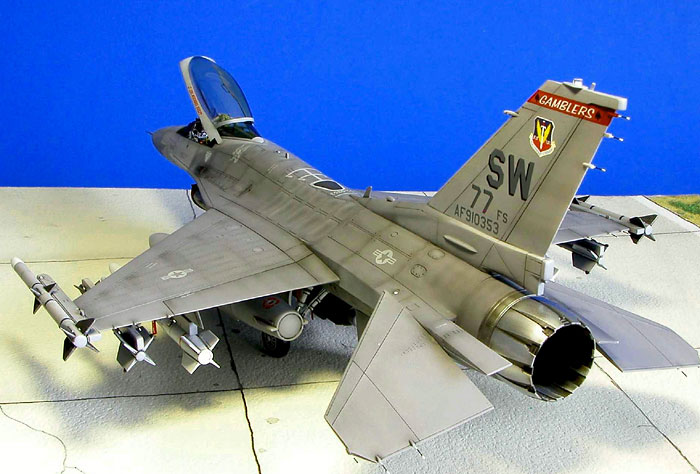
The work involved was not too difficult, just time consuming. I know I
could have finished this kit years ago, but it would not have looked this
nice.
Feel free to email me with any questions or comments. I hope you all
enjoy the model.
Happy modeling!
Click the
thumbnails below to view larger images:
Model, Images and
Article Copyright © 2004 by Scott Samo
Page Created 01 March, 2004
Last updated 17 March, 2004
Back to HyperScale Main Page
Back to Features Page |
 Home |
What's New |
Features |
Gallery |
Reviews |
Reference |
Forum |
Search
Home |
What's New |
Features |
Gallery |
Reviews |
Reference |
Forum |
Search