|
F3H Demon
by Tory Mucaro
|
|
|
F3H Demon |

HyperScale is proudly supported by
Squadron.com
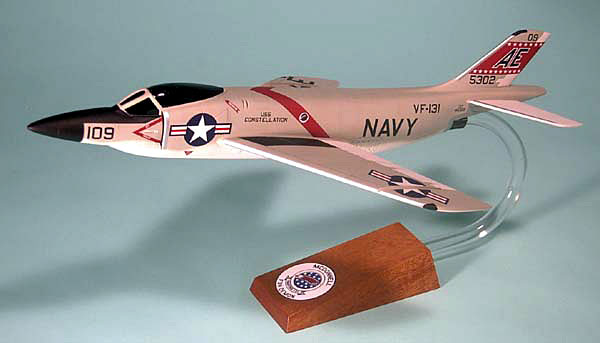
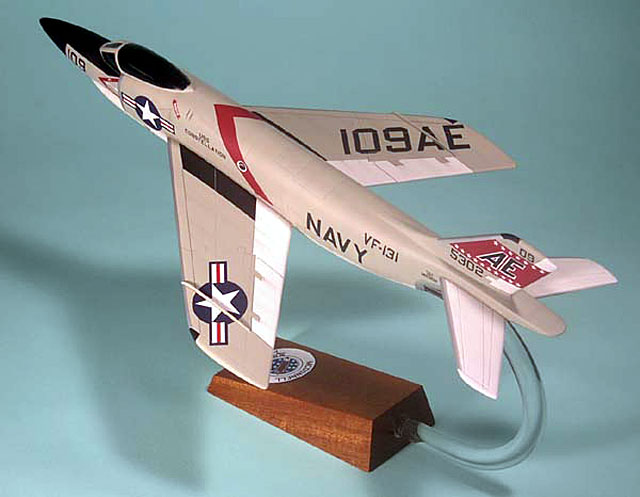
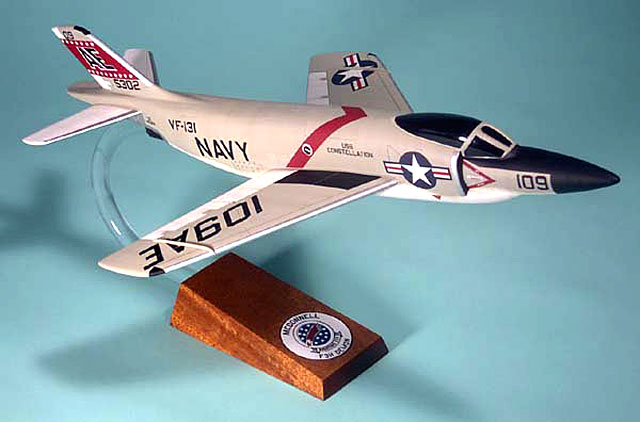
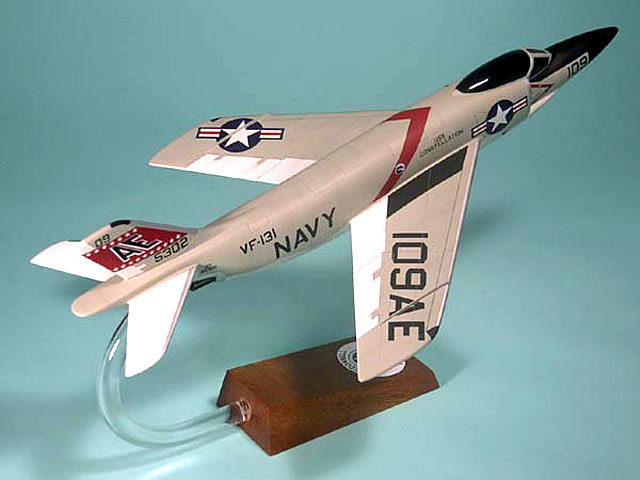
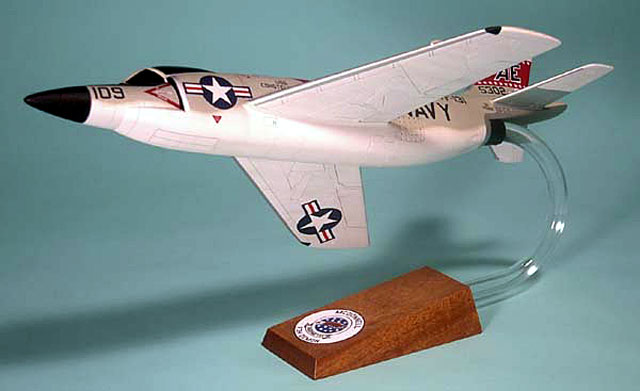
This is Hobbytime’s 1/48 (approx.) F3H Demon.
For those of you not familiar with this kit, a little history lesson
is in order. This kit is old. Very, very old. There isn’t any date on
the box or instruction sheet, but I’d lay odds it predates me (also
old!). My guess would be late 1950s.
Anyway, it was designed to be a rubber launched glider and is
comprised of 1/64 inch thick vacuum formed white styrene parts that can
barely hold their shape. The only injection molded parts in the kit is
the canopy, which ironically is molded in 1/8 inch thick clear styrene,
and the landing gear/pilot head/wheels which are molded in silver
styrene and are nothing more than formless lumps of plastic (the pilot
looks to be in a WWI flying cap!)! Go figure. But for a very long time,
if you wanted a 1/48 (approx.) Demon in your collection, this was the
only game in town. And they were very hard to find at that.
My good friend Andy Yanchus once described his search for one of
these by saying “…it took forever to find one, and then when I did
finally get my hands on it and saw what it would take to build it, took
longer to sell it off!” My son describes it as the model kit equivalent
of a Christmas fruitcake!
So you may ask, how did I wind up with one of these? And why, with
Collect-Aire and Golden Wings offering state of the art kits would I
attempt to build it? Ah, you see, for the same reason men climb Mt.
Everest, or raft down the Colorado River, or dive from the cliffs of
Acapulco. Because some one double dog dared me to, that’s why. You see,
this sadistic guy in my model club, who shall remain nameless but goes
by the nomenclature “Ming the Merciless” on HyperScale Discussion Forum
gave me the kit and by doing so, challenged me to build it (actually I
think he figured no one in there right mind would ever want to buy it
from him anyway). Fortunately, I have never been in my “right mind” so I
happily took it and went about trying to convert a sow’s ear into a
fully assembled sow’s ear.
I began by trimming all the parts down. That’s when I realized that
this thing would never be able to support itself without some internal
structure. So I tack glued one half of each part to a sheet of 3/32
styrene and traced the outline. I then removed the vac-formed part from
the sheet and cut the profile out on a band saw. I then glued the
vac-formed part to the sheet part about halfway over the edge. I then
glued the other half up to the first half and this actually made quite a
strong assembly.
After some liberal applications of body filler that would make Bondo
proud, I assembled all the parts and primed it with auto primer (lightly
so it wouldn’t eat through the “barely there” plastic). Some more
liberal filler applications and it started looking like a Demon. I then
re-scribed the panel lines that were still marginally visible after all
the filling and sanding. I decided early on that I would build it in
flight, as the thought of trying to engineer a way of attaching the
landing gear would have driven a stake through the heart of the project.
I also decided that scratch building a cockpit interior would also
have had the stake/heart effect. So I took up master builder and friend
Pat Hawkey’s lead and blacked out the “oh so thick” canopy.
Now it was time to paint and decal this baby.
I took one look at the kit-supplied decals, which were reduced to
various shades of yellow/orange from years of attic and/or basement
storage and realized I needed new decals. So, I went onto HyperScale's
Discussion Forum and asked for help with my decal dilemma. And low and
behold, from out of the West rode Fotios Rouch with a set of Collect-Aire
Demon decals that he very generously donated to the cause.
Now the sharper eyed Demon lovers out there will be quick to point
out that the model I built represents an early F3H-1 Demon which never
saw full squadron service and was only ever finished in glossy sea blue.
And you’d be correct in pointing that out. And I don’t care, because I
really like the look of the gull gray Demons in squadron service, and
because that’s all I had decals for. So we’ll chalk it up to “artistic
license” and move on.
The model was finished with Model Master enamels, Insignia White and
Gull Gray. The silver leading edges were done with silver decal strips,
a tip I got from an article in FSM for doing deicer boots. Works great,
and is loads easier than trying to mask and spray them. I then applied a
coat of Testors Dull Coat. It was given a little light weathering with
colored pencils and grimy black thinned way down and applied with an
airbrush.
Base
The base is a piece of Philippine mahogany with a clear acrylic rod
heated and bent to shape.
My brother Damian created the label art showing the squadron insignia
for me in Adobe Illustrator.
And that about wraps it up. And now that I went through all the
trouble of building this, all that is left to do is sit back and wait
for Revell/Monogram or Tamiya to announce they will be releasing a state
of the art injection molded kit of the Demon in the very near future!
Happy Modeling!
Click on the thumbnails
below to view larger images:
Model, Images and Text Copyright © 2003 by
Tory Mucaro
Page Created 01 August, 2003
Last Updated 17 March, 2004
Back to HyperScale
Main Page
|
 Home |
What's New |
Features |
Gallery |
Reviews |
Reference |
Forum |
Search
Home |
What's New |
Features |
Gallery |
Reviews |
Reference |
Forum |
Search