|
 |
|
McDonnell-Douglas F-4B Phantom II |

HyperScale is proudly supported by Squadron.com
Shortly after Hasegawa started releasing their 1/48th
scale Phantom series, a friend asked me to build a Phantom kit for him.
Since he was paying for the model kit and throwing in an extra $50.00
for my work, how could I argue? Boy, what a deal ... I have come a long
way since back then.
All that remains of that Phantom kit are these pictures. I took them
with my trusty old Minolta X-570 35mm camera about fifteen years ago.
Please excuse my shallow depth of field in the images. I had not yet
learned the trick of using small apertures to increase the depth of
field when I took these pictures.
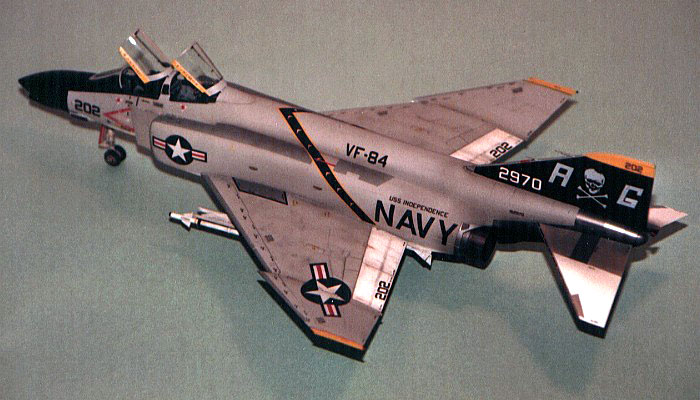
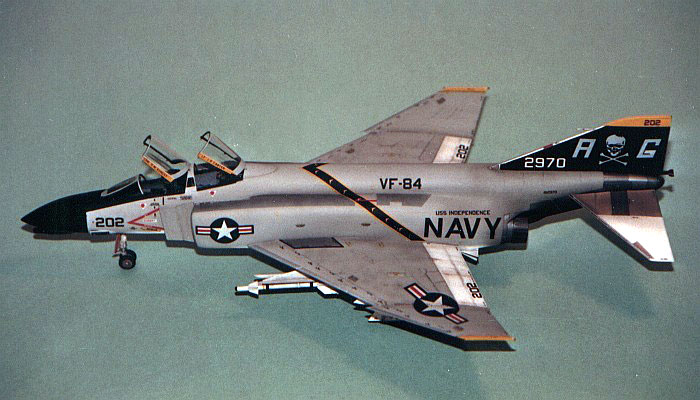
This model of an F-4B Phantom from VF-84 "Jolly Rogers" is the old
raised scribing, original Hasegawa 1/48th
scale F-4B/N Phantom kit. This was my third time building one of the
Hasegawa Phantoms. The friend I built this for had served as a crew
member on an SH-3 Seaking on the USS Independence in the Gulf of Tonkin.
He was specific on how he wanted the model built, down to the weapons
loading and the weathering. The model represents how he remembered
seeing the aircraft on the deck during the Vietnam conflict.
Specifically, the model is armed as it would have been for a BARCAP
mission to safeguard the carrier from an air attack, or at least that is
what he told me.
For construction, I kept the model mostly out-of-the-box. About the
only things I did that were extra were to incorporate the Model
Technologies F-4 Phantom cockpit and canopy detail set and to use
weapons taken from the Hasegawa weapons sets.
I used all Testors Model Master enamel paints to finish the
model. The model is painted in the standard Light Gull Gray (F.S.36440)
camouflage with a Gloss White bottom. The Gloss White fades to a
semi-gloss and finally to a flat finish rather quickly, so the model is
actually flat coated on top and bottom.
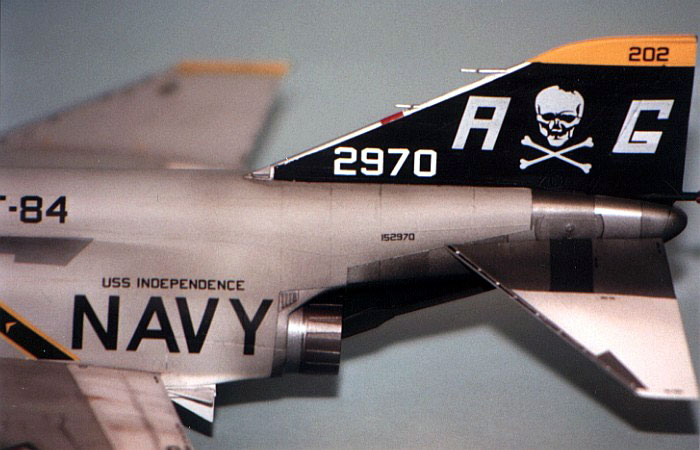
I needed to steal and modify the kit decals from a Hasegawa
F-4J kit to make this specific aircraft. No after-market decal company
of that time made the VF-84 markings with the all black tail. The F-4J
kit actually provides markings for a VF-84 aircraft from the USS
Roosevelt (tail coded "AC"). I modified the "C" to be a "G" in the tail
code and obtained the ship name from a ScaleMaster decals sheet
(#SM-15A) that provided US Navy style block lettering and all the
aircraft carrier ship names. The rest of the decals worked as is from
the F-4B kit.
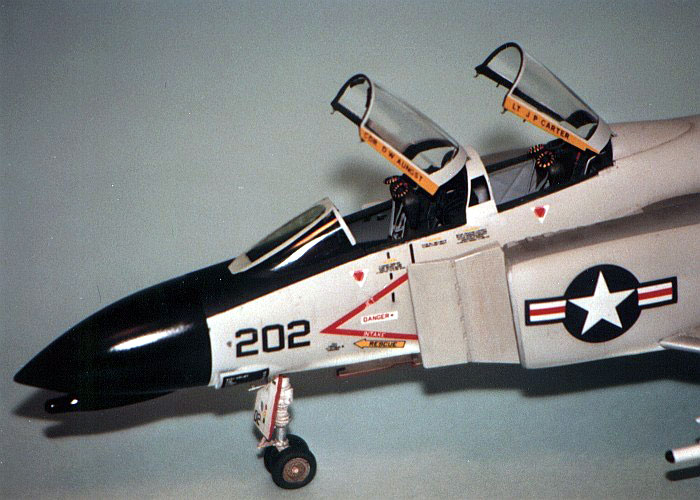
In the days before computers entered my arsenal for making decals, I
pieced together my name and my friend's name on the canopy rails, one
letter at a time, using tiny N-scale railroad decals. Oh, how easy it is
now to print up decals in whatever font I fancy and print them for use
in one full name decal. Back then was a simpler time, though.
For weathering, I used my typical style of thinned down enamel paint
washes and air brush shading. I finished the weathering with some dry
brushing to pop out the surface details. My friend was specific on how
he wanted the model weathered. He wanted it very dirty, so I gave him
what he wanted. For a more complete discussion of what I do to weather
my models, see my posting on
"Weathering
Aircraft".
|
Additional Images and Project
Summary |
Click the
thumbnails below to view images full-sized.
Click the "Back" arrow on your browser to return to this page.
|
|
|
Project Statistics |
|
Completion
Date: |
November 1987 |
|
Total Building
Time: |
40 (estimated) |
|
Research: |
2.0 |
|
Construction: |
12.0 |
|
Painting
(includes creation and printing of custom decals): |
20.0 |
|
Decals /
Markings (includes creating and printing custom decals): |
4.0 |
|
Extra Detailing
/ Conversion: |
2.0 |
|
Model, Description and Images Copyright ©
2003 by David Aungst
 Home |
What's New |
Features |
Gallery |
Reviews |
Reference |
Forum |
Search
Home |
What's New |
Features |
Gallery |
Reviews |
Reference |
Forum |
Search