Squadron.com
Have you ever accomplished some major modeling task on a model, only
to have some new release provide that detail right in the box? I have.
It can be quite annoying. This model, however, is not an example of
this.
Just after I learned that I was going to need to build this aircraft
for the collector's toy company, I stopped at a hobby shop along the
route home from my meeting. What should my wondering eyes behold on the
shelves of that hobby shop -- Hasegawa coming to my rescue with a
kit of exactly this aircraft. I immediately purchased the model.
Additionally, I had made contact on the HyperScale forum with someone
that had the same kit and decals and was not planning to use the decals.
This person (whose name eludes me right now) sent me his extra decals,
giving me two sets of decals for the model. I was prepared to start (and
even had back-up extras on the decals).
This is Hasegawa's F-4F Phantom II kit. It is the second time
I built this F-4F kit. The first time I built the kit in 1993, I built a
JBG 35 Phantom
in standard markings and the six-color "mod-81a" camouflage. The newly
released kit had no changes in the plastic from the one I had built
before.
The kit is built almost entirely out-of-the-box. The only changes I
made were to carve off the inner weapons pylon sway braces. These are
molded as part of the lower wing. I also filled in all the weapons pylon
locator holes. As the model was to have no external stores, these all
needed to be fixed.
The majority of the kit is engraved scribing. Notable exceptions are
the weapons pylons, external fuel tanks, and horizontal tails. These
items were raised scribing -- a throw-back to the older raised scribing
linage of this kit. Of these items, only the horizontal tails were going
to be used on the model. I chose to not rescribe the tails as the toy
company would not even notice this detail if I had taken the time to fix
it.
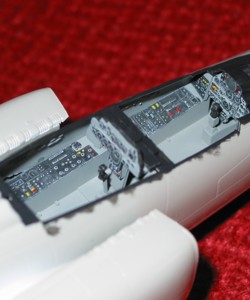
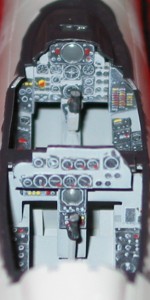
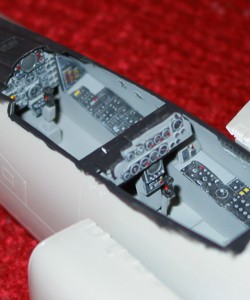
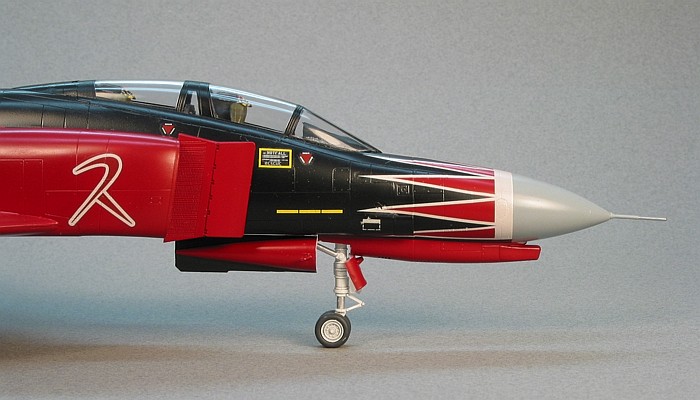
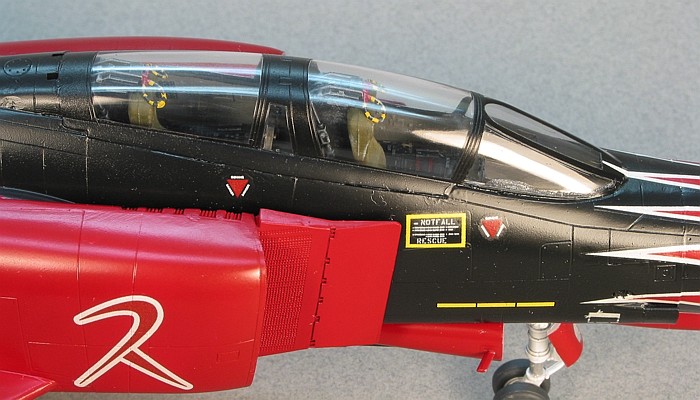
The cockpit has raised detailing and, with a little careful painting,
builds out-of-the-box into a fair representation of an F-4F cockpit.
There is no sidewall detailing to mention, just a bit of raised relief.
Particularly, the bulky circuit breaker panels found on the side walls
of the rear cockpit are just slightly raised molded-on details. The
ejection seats are simplistic, but adequate.
With no weapons to build up and detail, construction went quite fast
and I was working on the aircraft's paint job in no time.
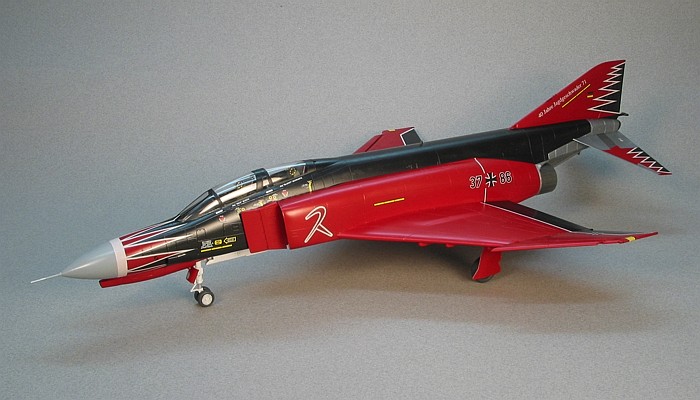
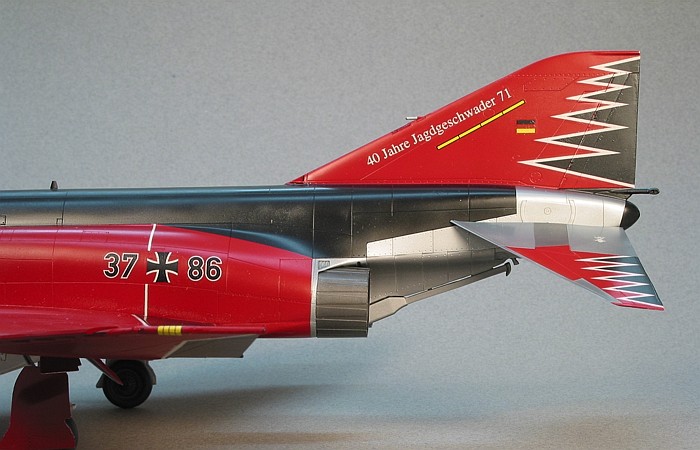
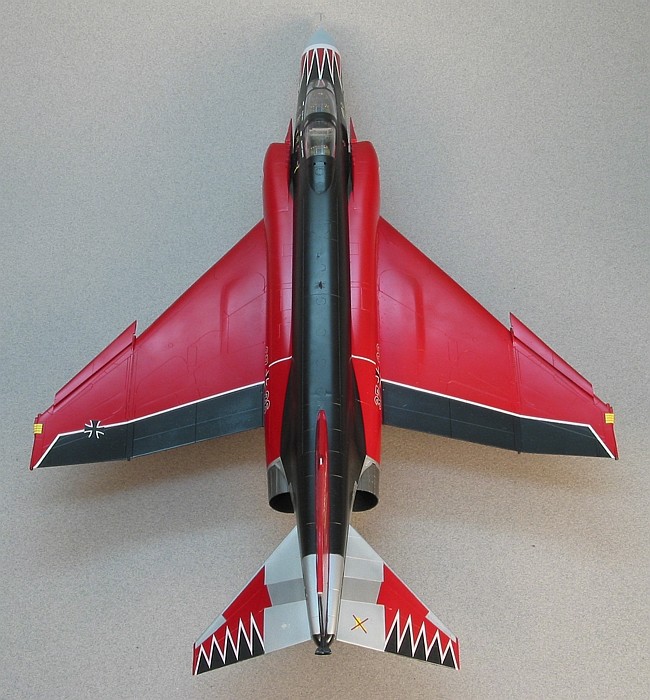
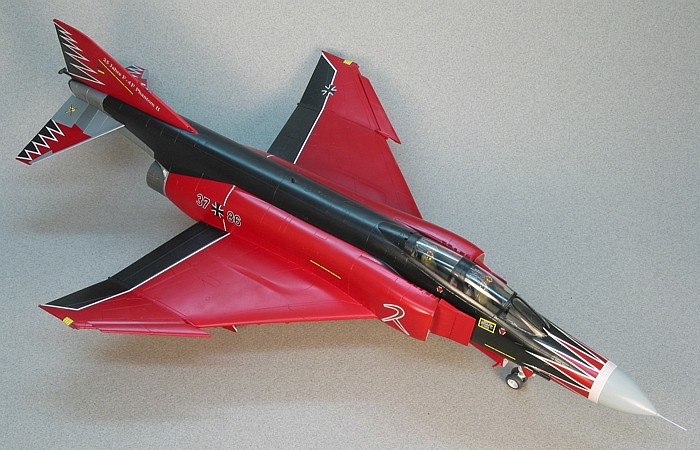
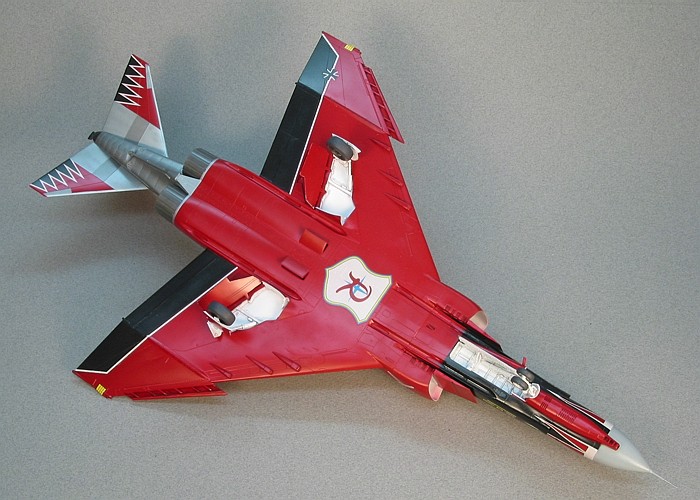
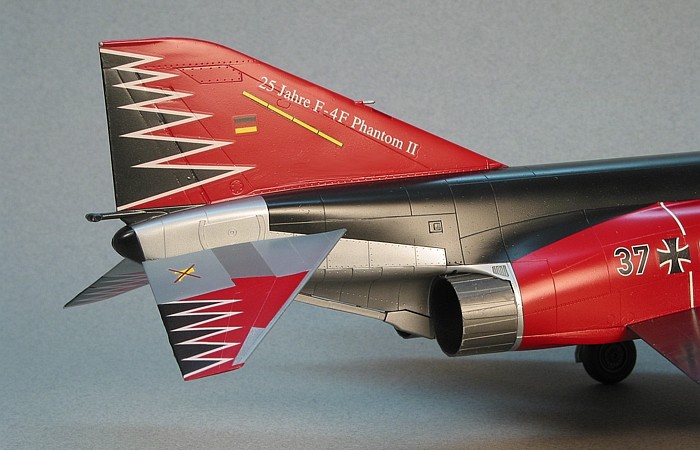
The "camouflage", if you want to call it that, is a one-of-a-kind
specialty scheme that was applied to this aircraft in 1999 to
commemorate the 40th anniversary JG 71,
25 years in F-4F Phantom II aircraft. It is basically a red and black
pattern with white cheat lines running about in specific locations.
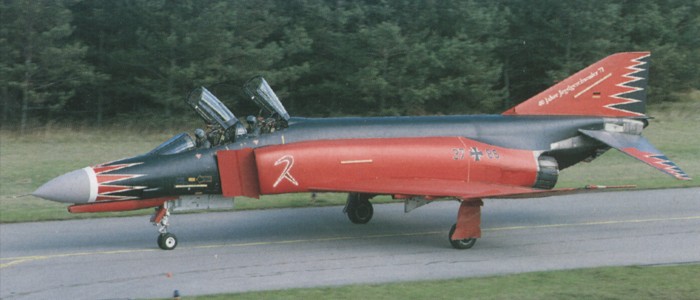
I used all Testors Model Master enamel paints. The black
portions are gloss black (F.S.17038). The pictures I had on hand showed
the red to be darker than standard Insignia Red (F.S.31136). Hence, I
chose to use Light Ghost Gray (F.S.36320) as an undercoating (instead of
white) before painting the red. This darker undercoating gave the
desired darkening effect to the red. The actual red I used was Model
Master Chrysler Engine Red. I find this to be a good match to Insignia
Red, only it is gloss.
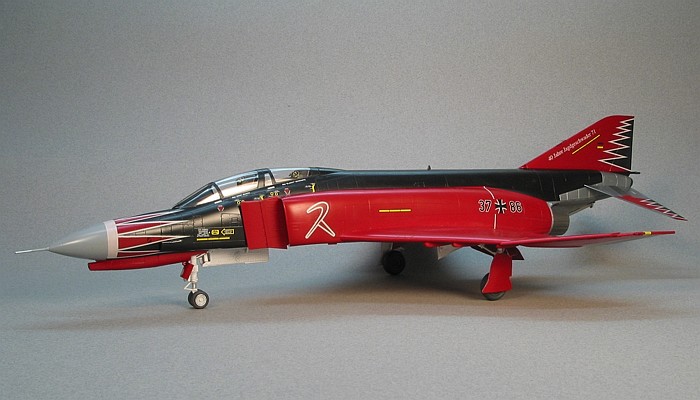
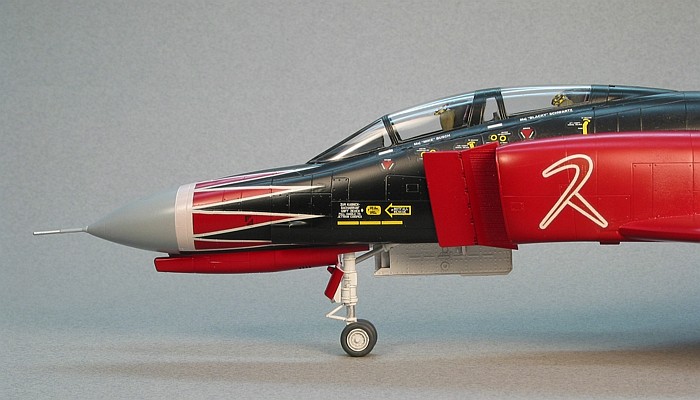
The engine exhaust area is painted in three shades of metalizers. I
started with a base coating of Steel, then applied Magnisium to the
panels immediately behind the engine exhausts and to the center panels
on the horizontal tails. The engine exhaust nozzles, themselves, are
painted in Burnt Metal. After a consultation with the toy company, they
relayed that no weathering should be done to the model. Hence, the
exhaust area was not blackened.
After evaluating the Hasegawa decals, one of the two sheets I
had on hand had white printing that looked too yellow-ish. The other was
a little yellowed, but not unacceptable. As I really did not feel like
creating these markings and printing my own decals, I used the less
yellowed sheet to mark the aircraft.
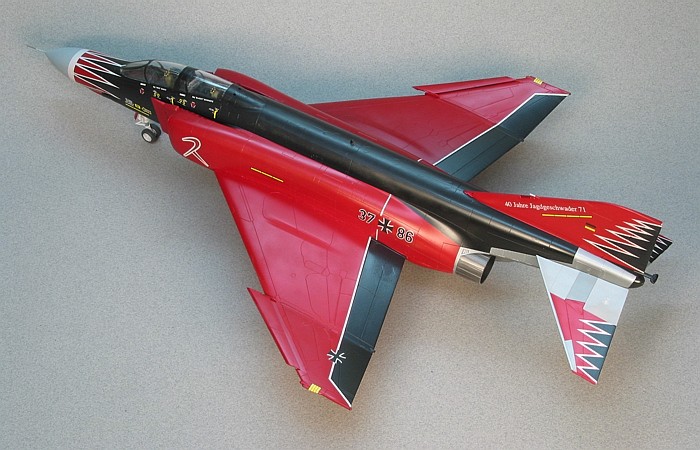
I chose to mask the "tulip" pattern around the nose and paint both
the black and red colors. I was afraid the red I used would not match
the printed red on the Hasegawa sheet. I carefully cut out the
red portions of the nose "tulip" and applied only the white striping.
This was the toughest part of the painting and markings.
For weathering, as I mentioned earlier, the toy company had
instructed me to not do any. Being a show-bird, the aircrfat was quite
clean, anyhow. I used my typical style of thinned down enamel paint
washes and only highlighted the edges of the control surfaces. I also
applied a light black-wash to the landing gear. I left the rest of the
model otherwise clean and un-weathered.
The production schedule with the toy company had me completing three
Hasegawa Phantoms, all within the month of May. That makes for
one busy month. This was the third one of the three. I was pleased with
the outcome and happy to be done.
|
Additional Images and Project
Summary |
Click the
thumbnails below to view images full-sized.
Click the "Back" arrow on your browser to return to this page.
|
|
|
Project Statistics |
|
Completion
Date: |
1 June, 2002 |
|
Total Building
Time: |
23.1 |
|
Research: |
0.0 |
|
Construction: |
6.0 |
|
Painting
(includes creation and printing of custom decals): |
12.1 |
|
Decals /
Markings (includes creating and printing custom decals): |
5.0 |
|
Extra Detailing
/ Conversion: |
0.0 |
|
| |
Model, Description and Images Copyright ©
2003 by David Aungst
 Home |
What's New |
Features |
Gallery |
Reviews |
Reference |
Forum |
Search
Home |
What's New |
Features |
Gallery |
Reviews |
Reference |
Forum |
Search