Squadron.com
Ever since I first saw this camouflage on German Phantoms, I've
always thought it was a cool scheme. I wish they had not changed over to
the dull grays they currently use, instead staying with this rather
complex six-color camouflage. When X-tra Color released their
line of paints that included all the needed RAL colors to do this
Phantom camouflage, I decided it was time to build an F-4F and make use
of the six paint tins I had ordered.
 The
Hasegawa F-4 Phantom kits are quite nice on their own. They are
mostly correct in shape and outline and include the proper pieces to
make the versions that the box art claims are in the box. To make an
F-4F, the biggest change from the F-4E is to include the unslotted
horizontal tails as found on the F-4C/D. Hasegawa does this in
the F-4F kit, but I wanted to do much more to the stock kit. I made the
following changes and improvements to the kit:
The
Hasegawa F-4 Phantom kits are quite nice on their own. They are
mostly correct in shape and outline and include the proper pieces to
make the versions that the box art claims are in the box. To make an
F-4F, the biggest change from the F-4E is to include the unslotted
horizontal tails as found on the F-4C/D. Hasegawa does this in
the F-4F kit, but I wanted to do much more to the stock kit. I made the
following changes and improvements to the kit:
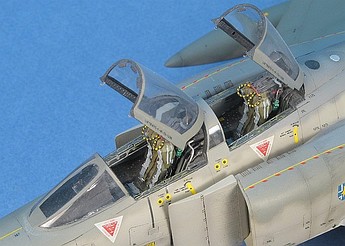
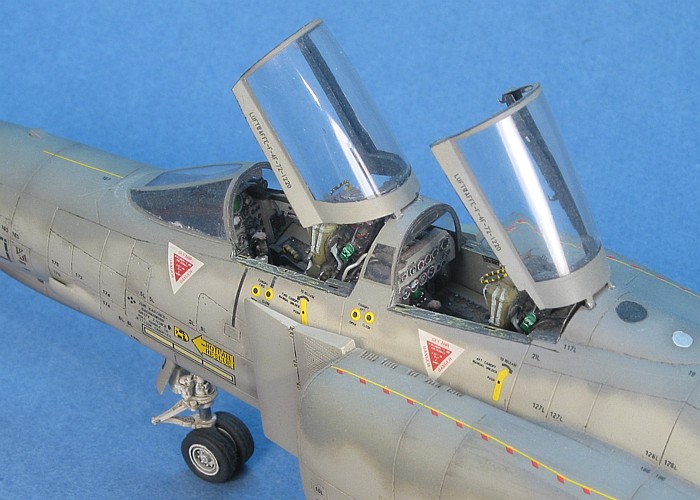
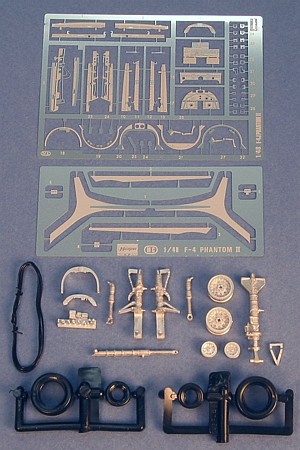
-
Etched metal cockpit and canopy
etchings.
-
Etched metal blade antennae.
-
White metal landing gear. I adding
plumbing and electrical lines to the white metal pieces. I
maintained the Hasegawa plastic wheels, though, as the
True Details F-4E/F/G wheel set was not available when I built
this model and the Hasegawa white metal wheels have the Naval spoke
pattern and vinyl wheels.
-
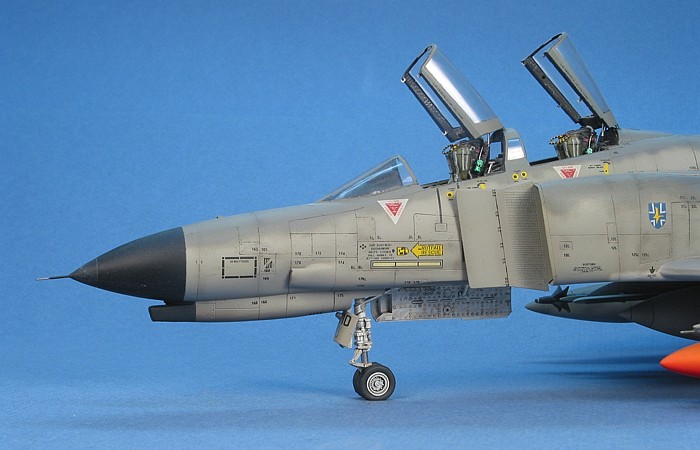
I opened the gun gas purge vent on top of
the nose.
-
I replaced the kit engine exhausts with
High Flight products.
-
I added the pitots inside the engine
intakes and replaced the nose pitot with brass wire and styrene stock.
-
I re-scribed all the following items to
obtain engraved scribing over the entire model:
-
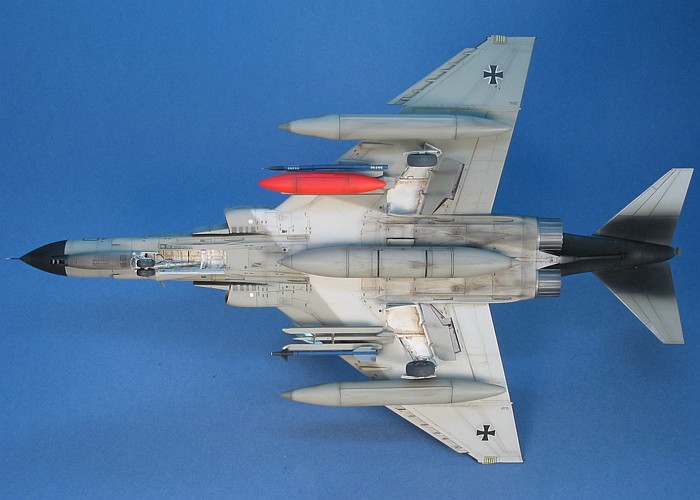
I scratch built and cast my own MXU-648
Travel (luggage) pod using the back ends of two Monogram 20mm gun pods
(the F-5E kit). This makes the earlier, rounded style used before the
newer angled ones became vogue. I laminated 0.005" styrene on one side
to make the door and used a short length of brass wire to represent
the hinge.
-
I scratch built and cast my own ACMI Pod.
This was done using an old Sidewinder missile with the fins stripped
off.
-
I added sway bracing to the inboard
weapons pylons and enhanced the detailing of the flare and chaff
dispensers on the rear portions of the pylons.
-
I obtained (from a Hasegawa F-15C
kit) the newer F-15 style fuel tank and modified the center fuselage
to accept the different tank.
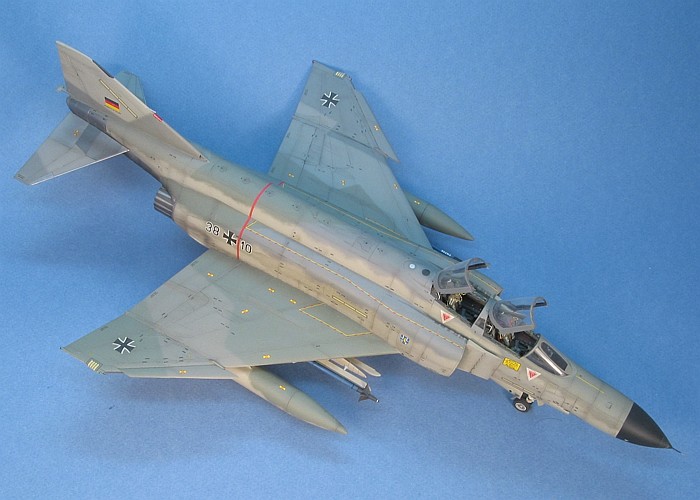
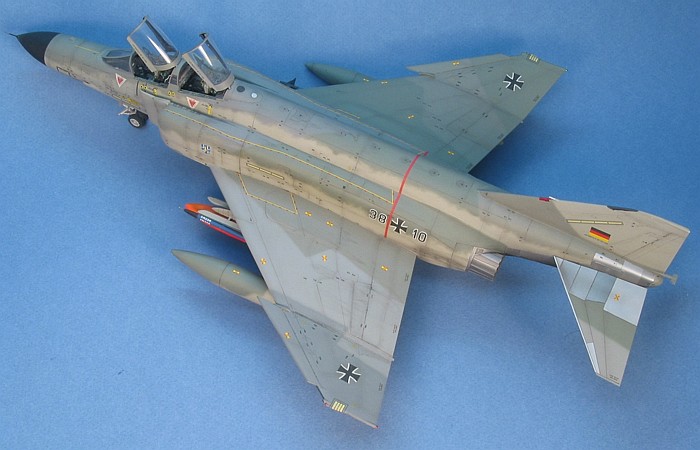
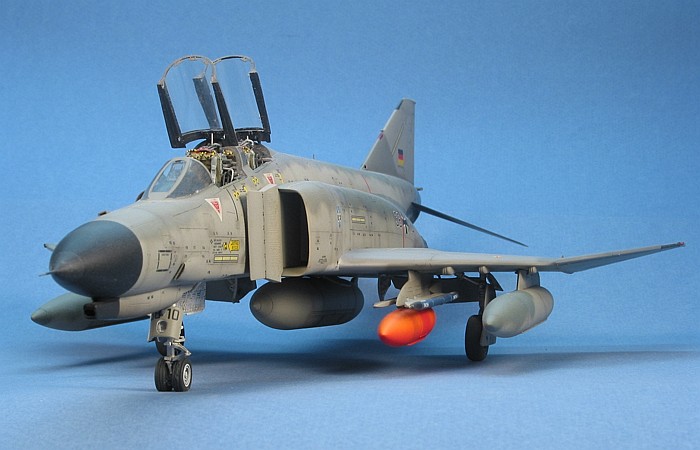
For the camouflage is referred to by the Germans as "Norm81". I
mentioned at the start of this writing, I used all X-tra Color
enamel paints for the camouflage. The Norm81 camouflage for the F-4F
uses six colors. Years after I finished the model, I found out that
there are two variations on the scheme, Norm81A and Norm81B. I painted
my model in the Norm81A scheme.
-
RAL 7009 - Green Gray (X-tra
Color X256)
-
RAL 7012 - Basalt Gray (X-tra
Color X245)
-
RAL 7030 - Stone Gray (X-tra
Color X257)
-
RAL 7035 - Light Gray (X-tra
Color X260)
-
RAL 7037 - Dust Gray (X-tra
Color X258)
-
RAL 7039 - Quartz Gray (X-tra
Color X259)
 After
painting the airframe once without scale effecting the colors, I found
it to look way too "rich". So, I scale effected the paints 20% with
white. This provided colors more in standing with the pictures I was
seeing in books and magazines.
After
painting the airframe once without scale effecting the colors, I found
it to look way too "rich". So, I scale effected the paints 20% with
white. This provided colors more in standing with the pictures I was
seeing in books and magazines.
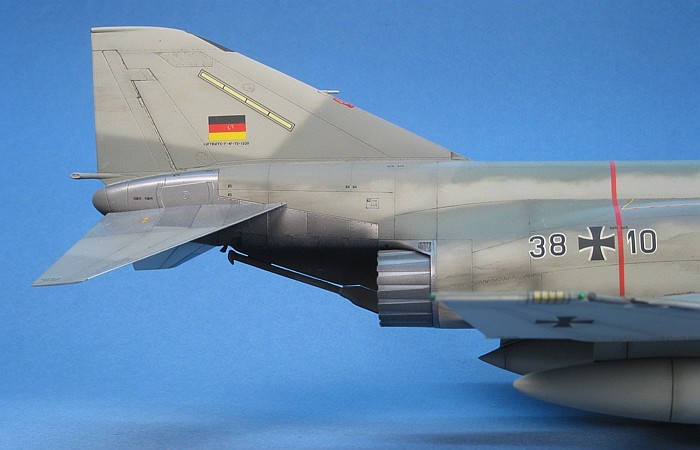
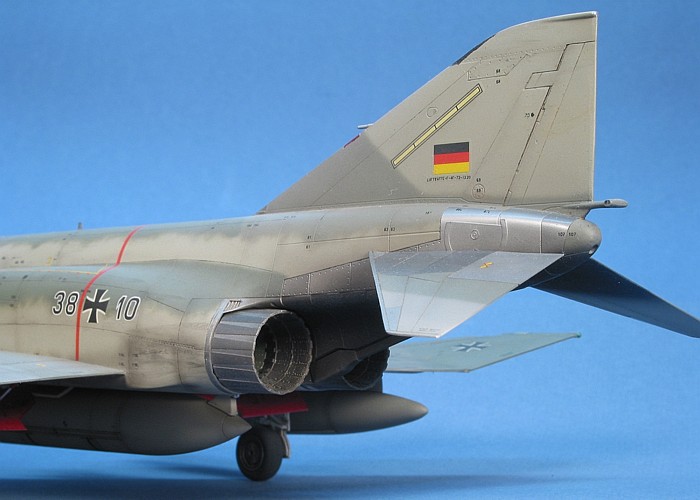
All the rest of the painting was done with Testor's Model
Master enamel paints. The natural metal tail surfaces are done with
various name brands of Metalizer paints (five shades, interspersed to
give the effect of separate panels).
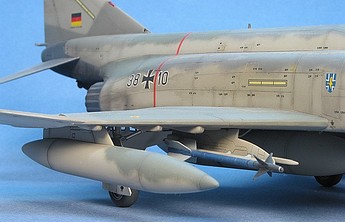
The travel pod was a challenge for painting. I wanted to capture the
heavily weathered look that the fluorescent colors take on after some
time in the sun. I started by painting the pod in Insignia Yellow. I
then slowly misted on the Day-Glo red, heavier on the bottom areas,
until I got the effect I wanted. I liked the way it turned out, but
hidden in the shadows under the weapons pylon and Sidewinder missile
rails, you really do not get a chance to see it too well.
The aircraft is from JBG 35 of the (then) West German Luftwaffe as
seen when it visited Deci AB for an exercise in 1990. The primary decal
markings are from the Hasegawa kit, except the serial numbering
on the rear fuselage sides and the JBG 35 unit badge on the intake
sides. I got the numbering from a SuperScale Modern German Codes
decal sheet. The JBG 35 badges come from a 1/72nd
scale SuperScale Gr-91 sheet.
Because I live for data markings on aircraft models, I could not
resist applying the 207 decals needed to put all the access panel
numbering all over the airframe. I created these on my PC and printed
them on a laser printer. I used the SuperScale Phantom Data decal
instructions and various photographic sources to get all the numbers
mapped out. I could not just use the SuperScale Phantom Data
decals because they are printed in two tone (black and gray). I needed
them all in black. These numbers are now available from AeroMaster
on their Luftwaffe Phantom Data decal sheet.
For weathering, I used my typical style of thinned down enamel paint
washes and air brush shading. I finished the weathering with some dry
brushing to pop out the surface details. For a more complete discussion
of what I do to weather my models, see my posting on
"Weathering
Aircraft".
There you have it -- another Phantom. You just can not have too many!
I hope the Fw 190 and Bf 109 population is not getting too nervous. I
am pretty far from outnumbering them just yet. But, they might want to
start worrying.
With the recent release of the RF-4 reconnaissance Phantoms from
Hasegawa, I am only just getting warmed up on Phantom models.
|
Additional Images and Project
Summary |
Click the
thumbnails below to view images full-sized.
Click the "Back" arrow on your browser to return to this page.
|
|
|
Project Statistics |
|
Completion
Date: |
1 June, 2002 |
|
Total Building
Time: |
23.1 |
|
Research: |
0.0 |
|
Construction: |
6.0 |
|
Painting
(includes creation and printing of custom decals): |
12.1 |
|
Decals /
Markings (includes creating and printing custom decals): |
5.0 |
|
Extra Detailing
/ Conversion: |
0.0 |
|
| |
Modelling the F-4 Phantom
II
Osprey Modelling 3 |
|
|
|
|
Author: Geoff Coughlin, Neil Ashby
US Price: $17.95
UK Price: £12.99
Publisher:
Osprey Publishing
Publish Date: September 25, 2003
Details: 80 pages; ISBN: 1841767468
|
|
|
Model, Description and Images Copyright ©
2004 by David Aungst
 Home |
What's New |
Features |
Gallery |
Reviews |
Reference |
Forum |
Search
Home |
What's New |
Features |
Gallery |
Reviews |
Reference |
Forum |
Search