|
F-4G Wild Weasel Phantom II
by David W. Aungst
|
 |
|
McDonnell-Douglas F-4G Wild Weasel Phantom II
|

HyperScale is proudly supported by Squadron.com
I completed this kit in December of 1986. It was built a little by
accident. Someone had asked for me to build an F-105F "Wild Weasel"
Thunderchief (the forerunner to the F-105G), but in researching to build
that model, I got myself really interested in building the replacement
of the Wild Weasel THUD, an F-4G Phantom II. I was especially impressed
with the war load that a Phantom could carry and decided to add a lot of
weapons to this kit. Of course, it did not hurt that the then new
Hasegawa F-4G Phantom kit had just been released.
The pictures in this posting were taken just this month of the model
which still lives on my display shelves in the living room. This model
is the second oldest model that still graces my display shelves. Before
taking the pictures, I spent an evening cleaning the model from end to
end using window cleaner (Windex) and a cotton swab. I found that the
finish has held up quite well over the last sixteen years. I did note
some age related things on the model, though.
The Hasegawa decals for some of the data markings have started
to silver. Other decals, notably on the HARM missiles, have started to
yellow. There was one aging spider nest woven inside the bomb cluster
that I cleaned away after popping the bombs off the weapons pylon. This
was the first model I ever used wire pins to attach the weapons. This
proved a geat thing for cleaning as I could just pop off the weapons,
clean them and the area under them, then pop them back on.
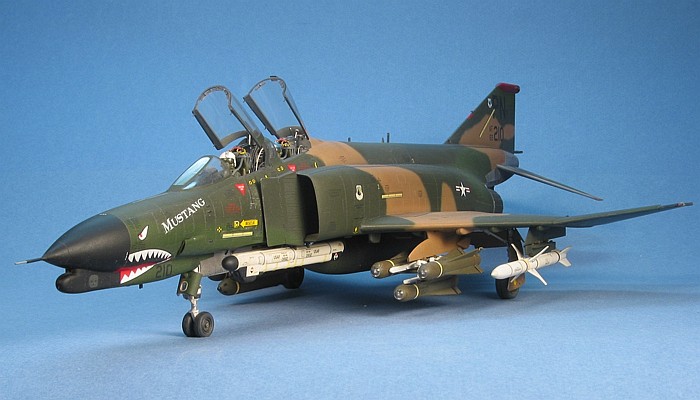
This is Hasegawa's 1/48th
scale F-4G "Wild Weasel" Phantom II (stock number 07104 / P004). The kit
is very acurrate for the F-4G, externally, providing all the proper
bumps and bulges to make the "Wild Weasel" verion of the F-4 Phantom.
The scribing is all engraved and nicely done. The kit even includes
weasel weapons! AGM-45 Shike and AGM-78 Standard ARM missiles (one each)
are present in the kit along with an ALQ-119 ECM pod. These are in
addition to the AIM-7 Sparrow and AIM-9 Sidewinder missiles that come in
all the Hasegawa Phantom kits.
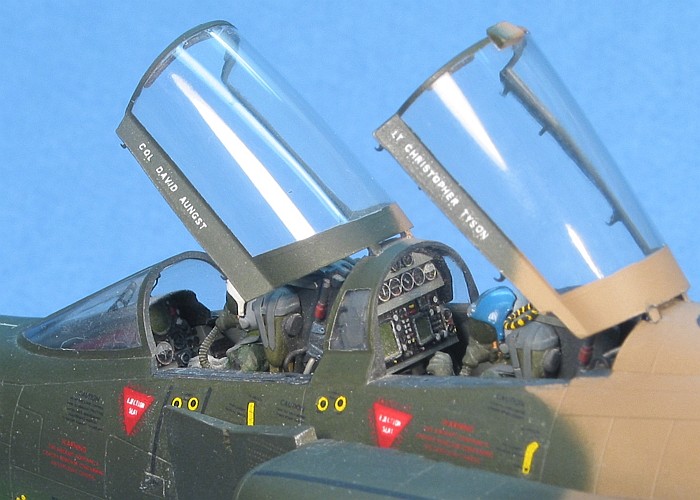
The cockpit is the basic Phantom cockpit that most all the
Hasegawa Phantom kits provide. The instrument layout and
configuration is closest to being a basic F-4C Phantom. The F-4G kit
provides a new rear cockpit main instrument panel in the correct
configuration for the F-4G. Built out of the box, the cockpit is
passable as an F-4G.
This was my second time building one of the Hasegawa Phantoms,
I felt ready to start enhansing the kit with some better detailing. I
made the following changes and improvements to the kit:
-
As the high-grade Phantom kits had not
been released when I built this kit, I incorporated the Model
Technologies etched metal Phantom cockpit and canopy etchings set.
These were new and state-of-the-art at the time I built this model.
Boy, have extra detail sets come a long way since then...
-
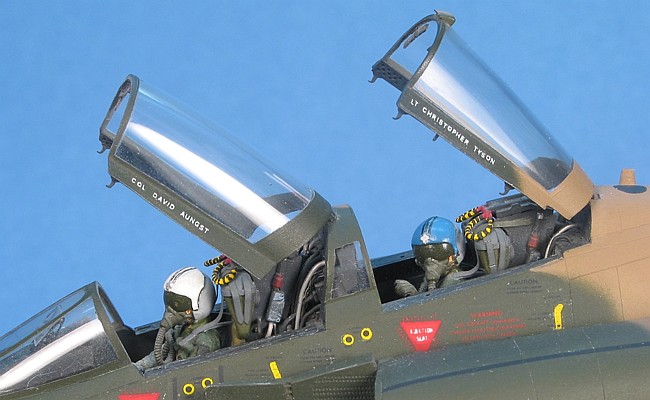
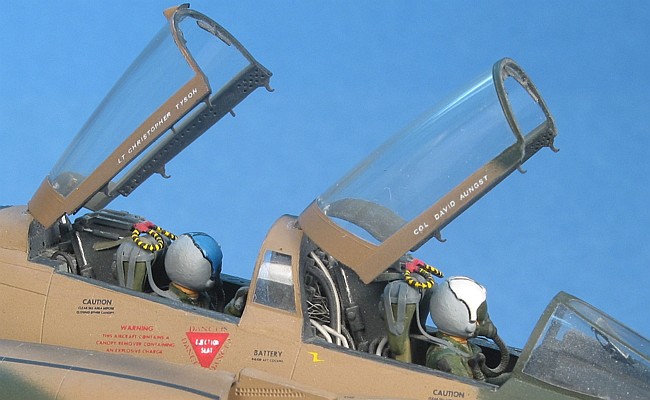
I scratch-built the wiring details
between and behind the cockpits. This is done mostly with pre-colored
wiring sold as ignition wires for 1/24th
scale car model.
-
I enhanced the kit ejection seat
detailing with styrene stock and fine wire. There were no resin
ejection seats for the Phantom when I built this model..
-
I included the kit provided pilot figures
in the cockpit which is unusual for me. I like my models to be
unmanned to show off the cockpits, but since the cockpti was basically
out of the box, I felt the pilots would help fill the space. Besides,
I like painting helmets. I used thin sheet styrene to add the seat
harnesses that strap the pilots to their seats and replace the oxygen
hoses with Waldron oxygen hose.
-
I added the pitots inside the engine
intakes using brass wire and styrene stock.
-
I added plumbing and electrical lines to
the kit landing gear.
-
I added sway bracing to all the weapons
pylons, which I obtained from the Hasegawa weapons sets.
-
I enhanced the detailing of the flare and
chaff dispensers on the rear portions of the pylons at weapon stations
2 and 8.
-
I obtained (from a Hasegawa F-15C
kit) the newer F-15 style fuel tank and modified the center fuselage
to accept the different tank. The current Hasegawa F-4G kits
include this tank and its needed attachment points in the box, but the
first release which I was building did not yet include this item.
-
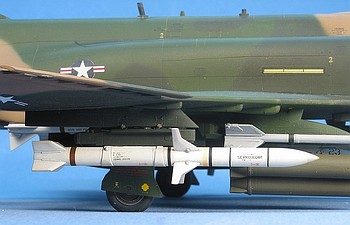
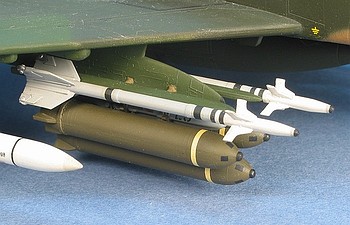
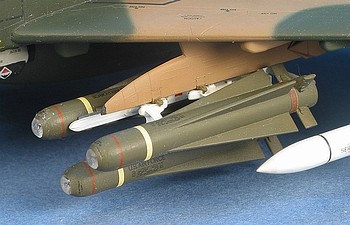
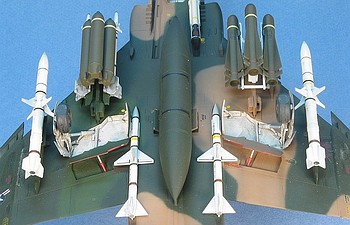
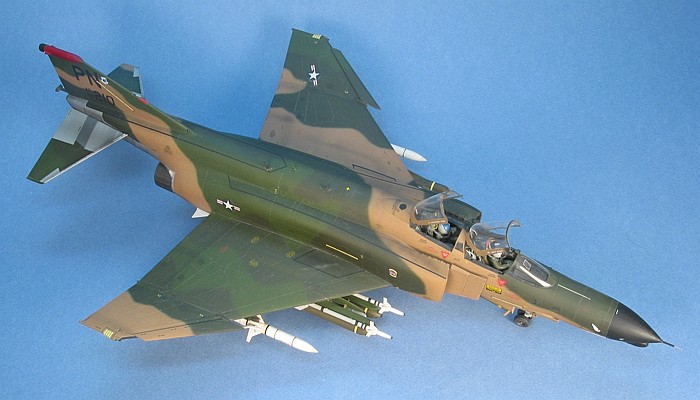
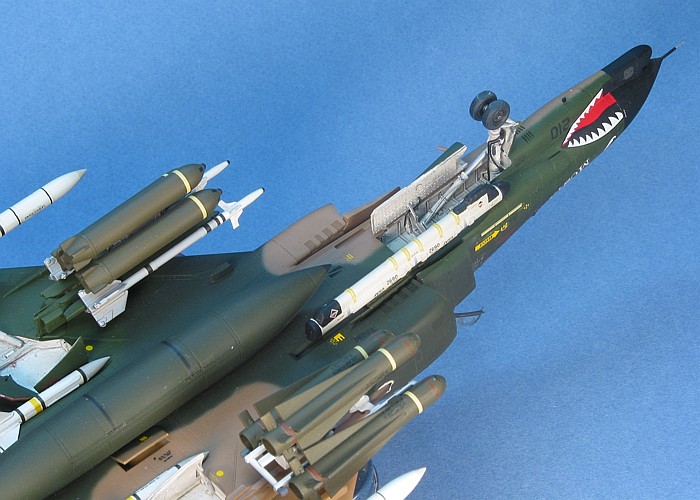
I incorporated weapons from the
Hasegawa Weapons Sets as listed below. A friend that armed F-4's
in the Air Force informed me when I first displayed the model at my
modeling club that this is actually a "legal" load for the F-4.
However, the unrefueled combat range of a Phantom with this weapons
load would be just a little past the end of the runway ... ;o)
-
Two AIM-7E Sparrow Missiles
-
Two AIM-9J Sidewinder Missiles
-
Two AGM-88 High Speed Anti-radiation
Missiles (HARMs)
-
Three AGM-65B Maverick Missiles
-
Three Mk-20 Rockeye Cluster Bombs on a
Triple Ejector Rack (TER)
-
One ALQ-119V ECM Pod
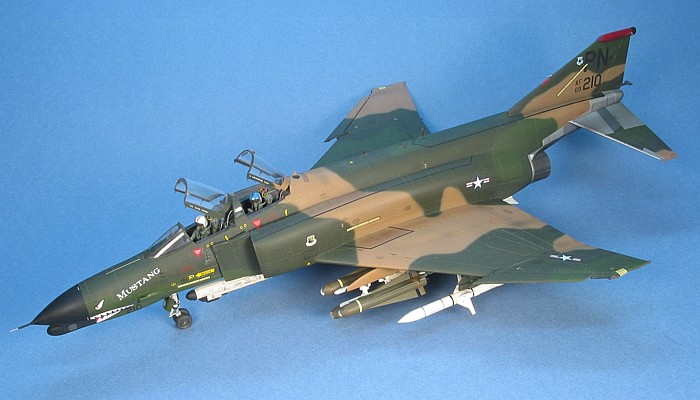
There were three choices for camouflage on the model when I built it
-- standard S.E.Asian (light gray bottom), wrap around S.E.Asian (no
light gray bottom), or European "lizzard". No manufacture made F-4G
specific decals at that time, either. I searched through various sources
to decide what camouflage and markings I wanted to build. I liked the
S.E.Asian wrap around scheme, and decal availablility sealed the deal. I
could get decals for a 3rd TFW F-4E
from SuperScale (sheet 48-147). I could also get the unit badges
for the 3rd TFS and 3rd
TFW from a differnt SuperScale decal sheet (72-327). I found
several pictures in old Koku-Fan magazines to provide the needed
reference matterial.
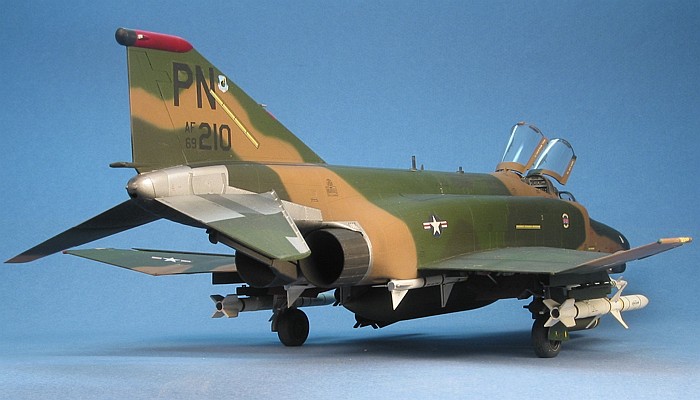
 For the camouflage, I used all Testors Model Master enamel
paints. The camouflage is a wraparound S.E.Asian scheme with Tan
(F.S.30219), Dark Green (F.S.34079), and Medium Green (F.S.34102). The
natural metal tail surfaces are done with various name brands of
Metalizer paints (six shades, interspersed to give the effect of
separate panels). For the camouflage, I used all Testors Model Master enamel
paints. The camouflage is a wraparound S.E.Asian scheme with Tan
(F.S.30219), Dark Green (F.S.34079), and Medium Green (F.S.34102). The
natural metal tail surfaces are done with various name brands of
Metalizer paints (six shades, interspersed to give the effect of
separate panels).
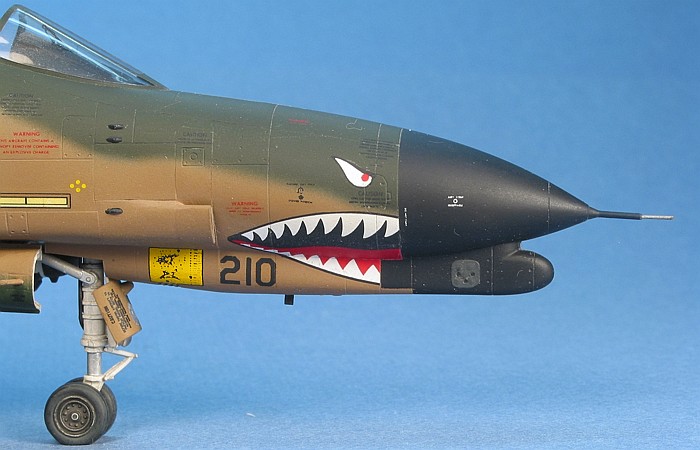
The aircraft is from the 3rd TFS / 3rd
TFW, based at Clark AFB in the Pillippines. Most of the decal markings
are from various SuperScale decal sheets, pieced together to make
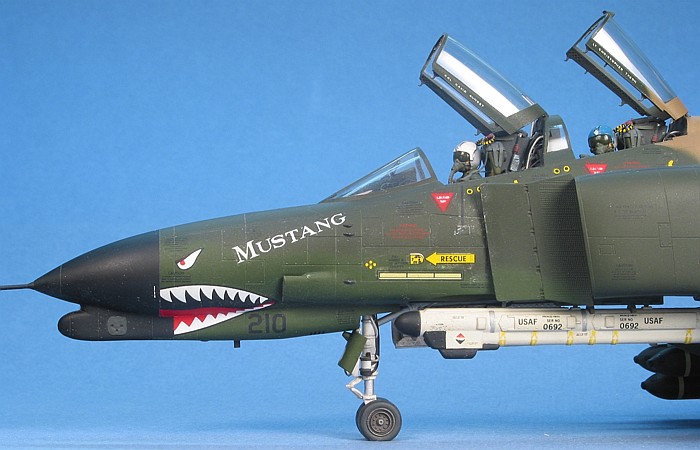
this aircraft. While I have photographic proof that this aircraft (the
serial number) was a member of the the 3rd
TFS / 3rd TFW, the nose name "Mustang"
is fictitious (and the canopy rails display my name). The rest of the
markings conform to the way aircraft of the 3rd
TFW were marked in the middle 1980s.
The aircraft name ("Mustang") and my name on the canopy rails was
done in N-scale railroad lettering decals, one letter at a time. I had a
method for applying these decals to get them all on the model fast
enough so that I could position them before applying decal solvent. I
barely remember the process, though, since I have been making my own
custom decals on the computer for quite a while at this point.
For weathering, I used my typical style of thinned down enamel paint
washes and air brush shading. I finished the weathering with some dry
brushing to pop out the surface details. For a more complete discussion
of what I do to weather my models, see my posting on
"Weathering
Aircraft".
|
Additional Images and Project
Summary |
Click the
thumbnails below to view images full-sized.
Click the "Back" arrow on your browser to return to this page.
|
|
|
Project Statistics |
|
Completion
Date: |
December 1986 |
|
Total Building
Time: |
60 (estimated) |
|
Research: |
2.0 |
|
Construction: |
15.0 |
|
Painting
(includes creation and printing of custom decals): |
28.0 |
|
Decals /
Markings (includes creating and printing custom decals): |
5.0 |
|
Extra Detailing
/ Conversion: |
10.0 |
|
Model, Description and Images Copyright ©
2004 by David Aungst
Page Created 28 January, 2004
Last Updated
17 March, 2004
Back to
HyperScale Main Page
|
 Home |
What's New |
Features |
Gallery |
Reviews |
Reference |
Forum |
Search
Home |
What's New |
Features |
Gallery |
Reviews |
Reference |
Forum |
Search