|
Lockheed F-5E Lightning
by Jamie
Haggo
|
|
|
Lockheed F-5 Lightning |

Academy's
1/48 scale F-5E Lightning is available online from Squadron.com
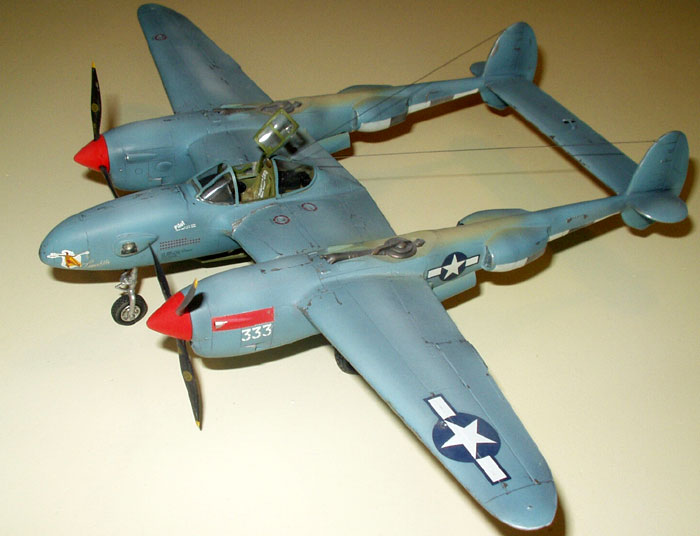
Ever since I saw a photograph of a reconnaissance P-38 in Haze Blue
colour scheme I’ve always fancied modelling it and recently I’ve done
just that. Haze Blue was a development of shaded paint, the aim being to
render the painted aircraft invisible against the blue of the
stratosphere, one of the first attempts of stealth! In one test, a Haze
Blue lightning closed to within a few hundred feet of the target B-17
before being spotted by the crew.
For this project I wanted to get hold of the Academy P-38 F-5 however I
could not track one down therefore I had no choice but to do a cut and
shut on a fighter. I purchased the Paragon resin conversion with the aim
of using the superior Hasegawa P-38J that the conversion was designed
for however I drew a blank. This meant I was forced into buying the
Academy offering, a good kit but not as refined as the Japanese example.
In the end I decided to go the whole hog and bought the True Details
resin cockpit, bulged tyres and Fast Frame canopy as well as the Eduard
zoom etched set and Aeromaster decals. All this amounted to a sizeable
outlay with large capacity for everything to go breasts aloft.
Getting Started
The first job was to prime the resin and metal with Halfords grey
acrylic primer, this is an excellent product giving a very smooth thin
finish whilst drying very quickly with little odour.
Next I sprayed all the relevant bits with Aeromaster US Interior
green (apart from the nose wheel well......DOH!!!!) and when dry they
were all treated to a wash of darkened base colour. Then I lifted all
the detail by dry brushing with gradually lighter shades of base colour.
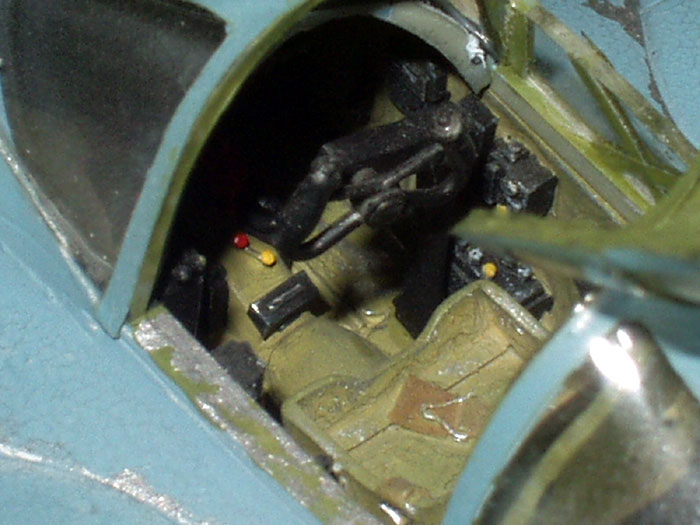
In the cockpit the relevant black boxes were picked out in black and
given a dry brushing with grey as was the etched instrument panel to the
back of which was glued the acetate instruments, this I find is the most
realistic way of producing an instrument panel and is worth the cost of
the etched set itself. Dabs of red and yellow paint finished off the
cockpit and brought it to life.
The resin pieces were removed from their casting blocks and
superglued together, the tub was then glued onto the lower wing/fuselage
centre section.
Undercarriage
The next areas to turn to are the wheel wells and undercarriage. The
wells themselves are made up of three pieces which after weathering
using the same process as the cockpit were glued together using liquid
poly. The instructions say that the gear legs and associated struts
should be fitted at this stage, I digressed from the instructions here
preferring to leave them off until after painting. The wells were then
fitted into the booms which are split vertically, at this stage I added
the eduard mesh radiator inserts which look great once painted up.
Airframe
The top wing half was glued to the lower half trapping the resin
cockpit tub. This left a gap at the rear of the equipment bay so I
snapped this part off and re-glued it into a higher position, this in
consequence raises the seat which is on the other side of the bulkhead
but this is preferable to having a big fuselage/bulkhead.
Once the booms were set they were glued to the wings/fuselage and the
tailplane glued in place. Care needs to be exercised to ensure
everything dries true and square. A fair amount of filler was required
around the boom/wing join which is a shame as there is some very fine
rivet detail which is subsequently lost in the rubbing down.
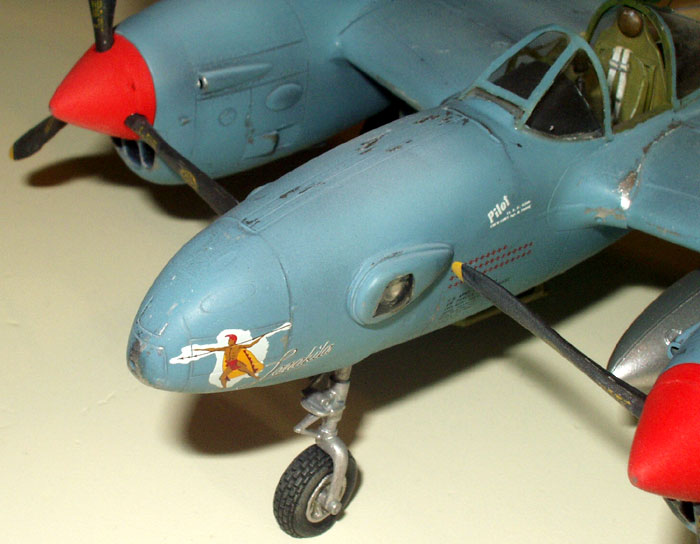
Nose
Attention is now focused on the main part of the conversion, namely
the nose pod. The two nose halves were joined together and the resin
nose tip test fitted. The conversion set was designed for the Hasegawa
kit which must have a slightly slimmer nose cross section as the nose
insert was too narrow. Rather than sanding the nose halves to a thinner
section I decided to discard the resin piece and use the kit piece which
had the gun ports filled and sanded and the panel lines rescribed. The
underside camera pack was superglued into position after the relevant
plastic was removed with a razor saw. This bit was again too narrow but
this sides were built up with filler and sanded to the correct profile.
Once all this was completed it was time to add the nose weight, the
P-38 being one of the most obvious tail sitting candidates. I used
Araldite mixed with fine lead shot from a fishing takle shop ( the bloke
behind the counter was not suprised to here it wasn’t for fishing, I was
the third modeller in that day!!). The mix was duly poured into the nose
cavity and left to set, initially I was flapping a bit thinking the nose
would melt as it got quite hot but no such calamity occurred, much to my
relief. The resin oblique camera ports were separated from the pouring
blocks and superglued onto the nose halves and the whole lot was grafted
onto the fuselage. The whole model was filled and sanded in the relevant
bits ready for painting.
Painting,
Markings and Weathering
|
The clear canopy was attached with white glue and then, along with
the wheel wells, was masked. The model was undercoated with Halfords
acrylic grey primer. I was initially sceptical about this product
thinking the coat would be far too thick but nothing could be farther
from the truth, a lovely thin smooth finish is produced. I only wish
cars were painted in camouflage!
The next job was to spay the pre shading. For those who have not come
across this technique before, pre shading is a way of breaking up the
continuous colour of a scheme. It is achieved by spraying a dark colour
along panel lines and in the nooks and crannies of the airframe, the
camouflage colour is then sprayed over the top in thin coats allowing
the shading to just be seen. It is important to tailor the colour of the
shading to the camouflage for example a white scheme needs a grey for
shading as black is too harsh. I have since moved on and now use the
post shading technique, see my article in the reference section to see
how I do this. Anyway, for this Haze Blue colour I used black shading
with Xtracolour Haze Blue which was a departure for me as I usually
stick to acrylics. Once the gloss of the Blue had dried hard I masked
and sprayed the invasion striping under the booms. The Aeromaster sheet
said that these were faded so I used off white and dark grey. To finish
the painting I masked off the red panels on the cowlings and sprayed
them as well as the spinners.
Finishing
The decals were applied using micro sol and set and reacted really
well. The fast frames which had been painted as the same time as the
airframe were now applied. This is a supurb product which comprises of
the painted portion of the canopy pre cut on self adhesive film which
once painted just sticks onto the kits canopy.
The last construction now took place with the undercarriage being
sprayed Halford Nissan Sliver and glued in at the same time as the
remaining well detail. The True Details weighted wheels were painted,
weathered and glued on.
Weathering
This is my favourite part of modelling as before your eyes the
subject turns from a model into a miniature aeroplane . The Aeromaster
sheet said this scheme was well weathered which I why I chose it (I was
like a pig in poo!!)
First of all a coat of Halfords clear lacquer was applied to seal in the
decals but AAHHH! It started to wrinkle the paint, Mayday. I let it dry
and rubbed down the affected areas with fine wet and dry. Luckily I
could carry on so applied a few coats of acrylic matt varnish but I wont
be applying a lacquer on enamel paint unless It’s had at least a week to
dry. The next step was to run thinned brown and dark grey wash into the
panel lines with a fine brush, any sploges were wiped away with a damp
cloth. I never use black as I find it too harsh. The next stage was to
fade the paint, this was done by misting an extremely thin white on the
upper surfaces, subtlety is the order of the day as it’s easy to over do
it. The final thing to do was to spray the exhaust which went from
brown, through grey to white. The exhausts were then added. The final
task was to add the aerial wire from stretched sprue and that was the
project finished.
I really enjoyed the construction of this model,. It makes a change
from shake the Japanese box and out falls a model. There were a few
heart stopping moments but they were well worth it as it looks great
along side the standard camouflage WW2 fighters on my shelves.
Right, now whose for a pink Spitfire?
|
 Home |
What's New |
Features |
Gallery |
Reviews |
Reference |
Forum |
Search
Home |
What's New |
Features |
Gallery |
Reviews |
Reference |
Forum |
Search