Kit: AMT F7F-3 Tigercat
Scale: 1/48
Price: US$ 50 (in Argentina)
Medium: Injected molded plastic, vinyl tires.
Markings:
-
US Marines, VMF-312, October 1946 (sea
blue, white/green bands scheme)
-
US Marines, (?), June 1946 (overall sea
blue scheme)
-
US Navy, Delivery sea blue scheme, 1945
Third in the successful line of 'Cats built by Grumman primarily for
the Navy, the Tigercat was intended to be both a fleet interceptor and a
long-range attack aircraft. With two Pratt and Whitney R-2800 radials,
the Tigercat was fast at over 400 mph. Armed with four .50 caliber
machine guns in the nose and four 20 mm. cannon in the wing roots, it
was also heavily armed. Used as an attack aircraft, the F7F could carry
either bombs or rockets. The first operational group reached Okinawa the
day World War II ended, so they saw no action during World War II. Later
models of the Tigercat saw service in China before the Communist
takeover, and in Korea during that war. Tigercats served on in civilian
livery into the 1970's as borate bombers fighting forest fires in the
Western U.S.
AMT/ERTL's
1/48 Scale F7F
|
AMT/ERTL has nicely filled the gap in 1/48 scale between the Hellcat
and the Bearcat with a well-detailed kit of the -3 model Tigercat. The
only other kit in this scale is the Classic Castings resin kit.
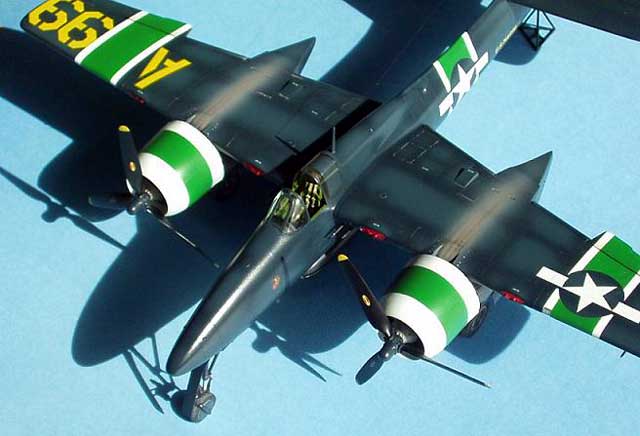
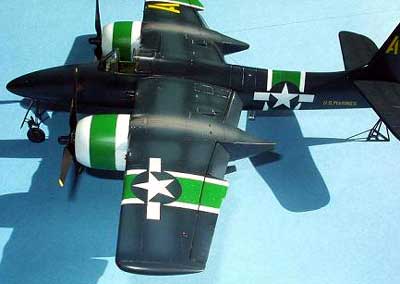
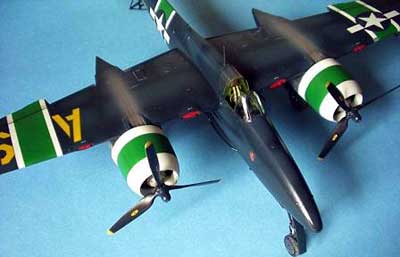
My kit represent a beautiful Tigercat of the VMF-312 based at MCAS El
Toro in 1946. The white/green bands on the wings and fuselage are used
to identify aircraft engaged in instrument training.
For your money you get a well molded kit with recessed panel lines.
The kit's plastic is a light gray color, a perfect base color for the
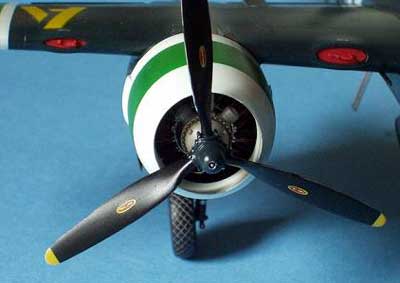
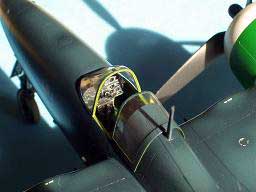
overall sea blue worn by most Tigercats. The R-2800 engines are
particularly well done. You get both cylinder banks, the ignition
harness, and the crankcase for each engine. The front cylinder bank even
has dimples on its front side in the proper places where the spark plugs
go, in case you decide to wire the engines (I used copper wire from
this).
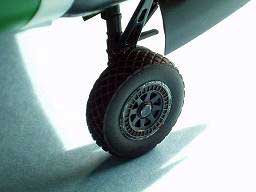
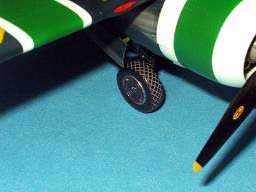
The main complaint I have about the kit are the improper propellers
design and the number of mold release pin marks on the various kit
parts, some in hard to reach places. Particular attention must be paid
to the wheel wells in this regard. A minor complaint was the small
amount of flash I found on some parts, particularly on the propeller
blades and landing gears.
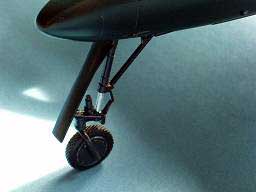
While I'm complaining, I should make mention of the fragile nature of
the main gear. I opted not to put any weight in the nose of this model.
Instead I will rely on a scratchbuilt jack to keep this notorious tail
sitter on its gear.
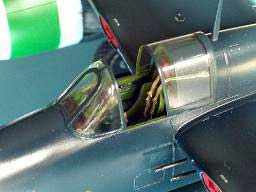
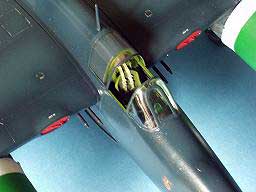
Construction begins with the cockpit, as usual. The cockpit provided
is a nice one. I added a correct resin seat from the Verlinden
TBF set to dress it up a bit. I painted the instrument panel very dark
gray with dry brush white details and black side boxes. All the side
cockpit and floor are painted with interior green. The cockpit
floor/nose gear well roof was warped a bit on my example. A bead of
super glue behind this part held it in its proper place.
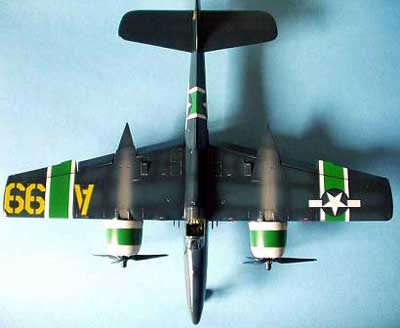
The wings of Tigercats had a pronounced dihedral that is built into
the kit's design, so don't attempt to "straighten" the wings. I decide
cut and dawn the flaps for broken the visual line and add “life”. Parts
fit was fair to excellent. Problem areas requiring filler included the
wing to fuselage joints, the nacelles to wings joints, and a few spots
here and there along the fuselage seam.
The canopy and windscreen have nicely done frame lines, easy to mask
and paint, but for open the canopy is necessary change the clear piece
for a new vacuformed (I use a Falcon canopy) .
The decals were not as bad as I heard they were. To be on the safe
side, I use the kit decals (and extra Microsol) except the green/white
bands, substituted for painting. All the lettering are from my spare
decal box. Note: cut the decals into individual before application.
If weathering is your bag, you can have a field day with this one.
Like most Navy and Marine Corps aircraft, the Tigercat saw long service
periods under harsh conditions. Most prominent on the Tigercat were the
engine exhaust stains on the nacelles and wings. I like to use a
combination of gray airbrushed paint and brown pastel to replicate this
effect.
Aside from the few problem areas I encountered, I enjoyed building
this kit and would recommend it to anyone.
 Home |
What's New |
Features |
Gallery |
Reviews |
Reference |
Forum |
Search
Home |
What's New |
Features |
Gallery |
Reviews |
Reference |
Forum |
Search