|
F-86D Sabre Dog
in Yugoslavian Colors
|

|
|
F-86D Sabre Dog
|
Model, images and text
by Aleksandar Šekularac

Revell's
1/48 scale F-86D Sabre Dog is available online from Squadron.com
One of many paradoxes of the post WWII Yugoslavia was being the only
eastern European country that called itself communist, but wasn’t the part
of Warsaw pact, and furthermore it was receiving western military support.
Yugoslavia was called “east for the west, and west for the east”. On
reflection, those grounds had the same role throughout history. Being on
the crossroads did not bring much luck to its people.
As such, the Yugoslav Air Force in fifties, and sixties managed to paint
red stars on some very advanced flying machines from the American
inventory of the day. The last in the line of western fighter jets sent to
Yugoslavia was F-86D, Sabre Dog. It remained in Yugoslav service until the
1970s, and for a while it flew together with MiG-21. This was a unique
occurrence in the world.
The F-86D Sabre Dog was a development of the successful F-86 family. It
was an interceptor, utilizing sophisticated radar equipment for tracking
enemy targets (mainly strategic bomber formations). It was not designed
for dogfights. The sole armament consisted of 24 unguided Mighty Mouse
rockets. Pilot had a tough job of flying the aircraft, and aiming at the
same time using its radar. After depressing the trigger imbedded algorithm
determined the final moment for releasing the rockets.
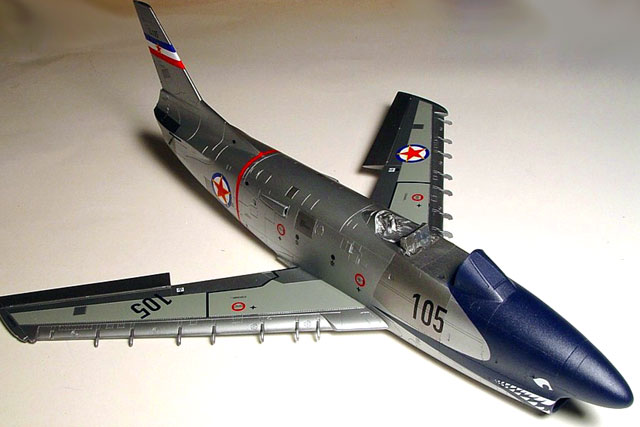
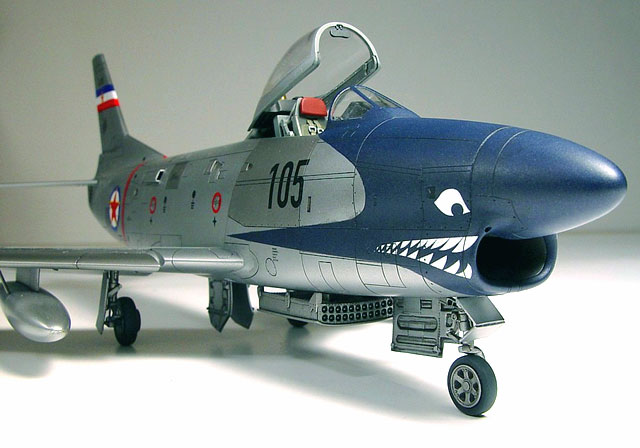
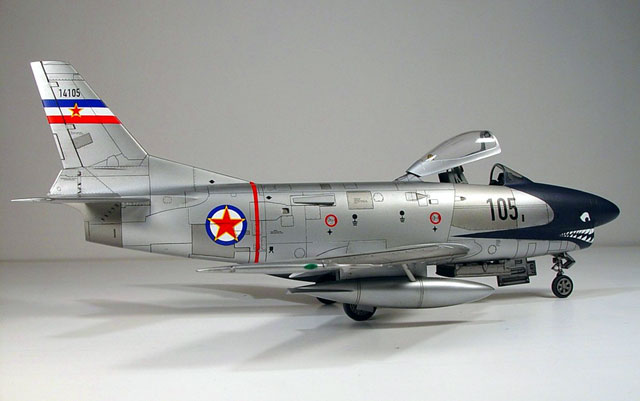
The subject of this article is one unusual Yugoslav Sabre Dog that
received a facelift close to the end of its service. There is an ongoing
discussion if this plane ever flew operationally with this striking shark
nose, or if it was painted on its retirement. What’s certain is that it
was favorite background for unit photos.
Revell/Monogram kit of the F-86D in 1:48 is by now
well-discussed and celebrated among interested circles, so I won’t dwell
in the details on the sprues. This is overall very well detailed and
engineered kit, but it has some imperfections.
Wanting to make a Yugoslav Sabre-Dog I need a late type, hence a Revell
model. This proved to be difficult to find in the U.S., as the market was
inundated with the early Monogram boxing. By the way, the main difference
between early and late F-86D is the braking-shoot housing in the root of
the vertical tail. Well, finally a colleague of mine from Germany came to
rescue with a Revell box straight from Frankfurt.
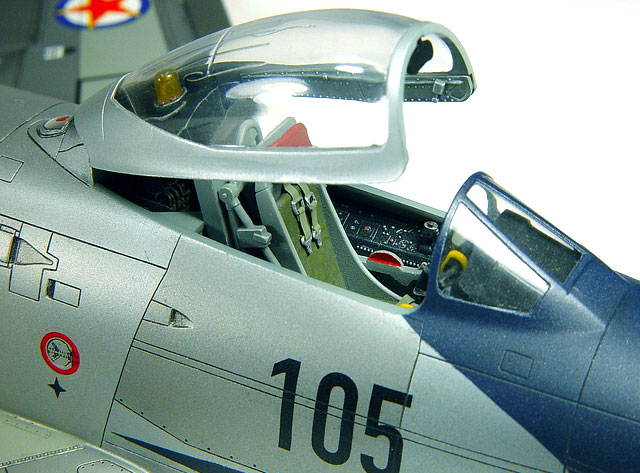
The Cockpit
I did not get any aftermarket parts for this model.
The cockpit is very good, frankly much better then average Hassegawa, but
still not perfect. The instrument panel is not accurate for later variants
of this type. I finally decided to let it be, and replace just the radar
scope with brass tube and a polished bit of transparent plastic glued
inside, and painted transparent green. When assembled, this gives a very
convincing look.

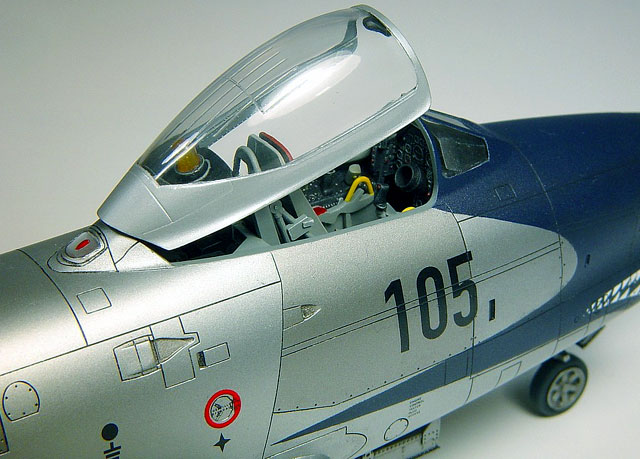
The seat is also nice, with the tubular
frame incasing it, but the prominent head cushion is given molded with the
back of the seat as well as the harness. This did not look right to me, so
I tried first to enhance the kit part, but just managed to destroy it. I
was left to scratch-build a new seat tub, with separate headrest and
padding. Harness was made from aluminum foil, with leftover photo-etched
buckles. Aluminum foil was also used to reproduce ripples of the fabric on
the seat padding.
Picture03
Behind the pilot seat there is an area filled with different system boxes,
oxygen bottle etc., and this can be seen when the canopy is in the open
position. The corresponding kit part is done in half detail (boxes
emerging from the flat plate). I’ve decided to add some life to this spot,
so I resorted to spare bits and scratch-building. I tried to follow layout
in the kit, but allowed myself some artistic freedom to depict general
busyness of this area.
Click the
thumbnails below to view larger images:
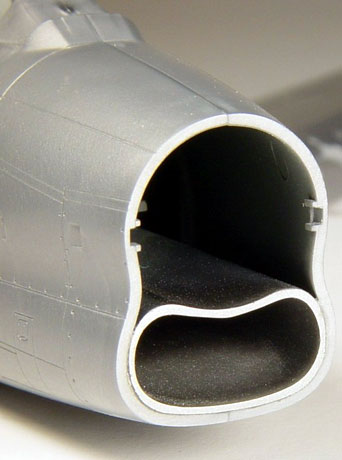 Inlet
& Exhaust Inlet
& Exhaust
Revell box offers a very lifelike inlet section that
ends abruptly behind the cockpit tub. This is enough depth to obscure the
view of what’s behind when the whole fuselage is assembled. I added a matt
black plug to the end of it, just to be safe.
The inlet channel comes in two parts, and has some
ejector pin marks and locator towers protruding what should be a smooth
surface. This area is also hard to work with once the inlet is assembled.
I have managed to sand the inside seam of the channel by wrapping a piece
of sandpaper around the blunt end of the pencil.
The jet pipe of the engine is depicted too short in
the kit, so some extra surgery was necessary for more realistic look. The
turbine face should be recessed some extra 4 cm in the fuselage. One ball
pen with appropriate diameter was sacrificed to provide tubing.
I have cut open the back of the kit exhaust, glued
extra length of the jet pipe, and then placed turbine face on the back
side of this assembly.
When doing this, it is a good idea to paint separate
sections of the jet pipe, because it is considerably long when assembled,
and therefore very hard to airbrush (or hand paint for that matter).
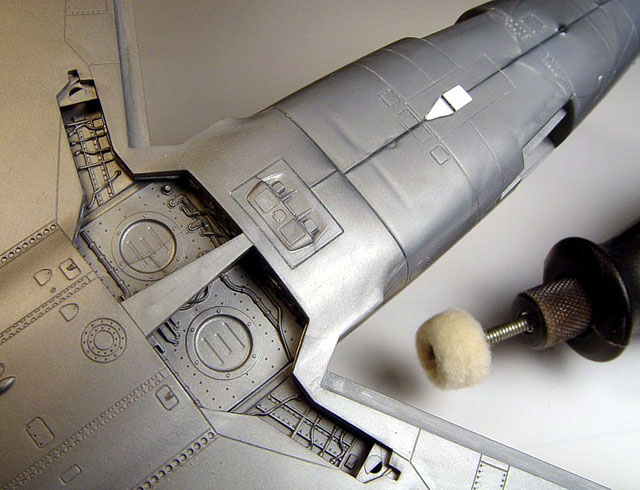
Fuselage & Wings
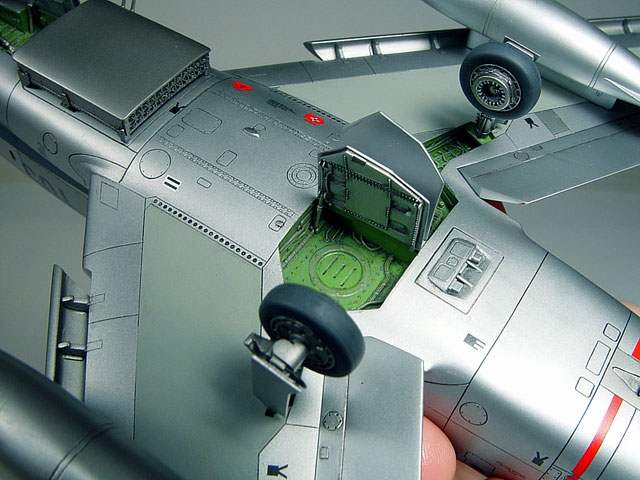
Undercarriage compartment walls are very well
detailed and they attach to the inside of the bottom wing, and the outside
of the inlet channel (for the nose bay), prior to the assembly of the wing
and fuselage.
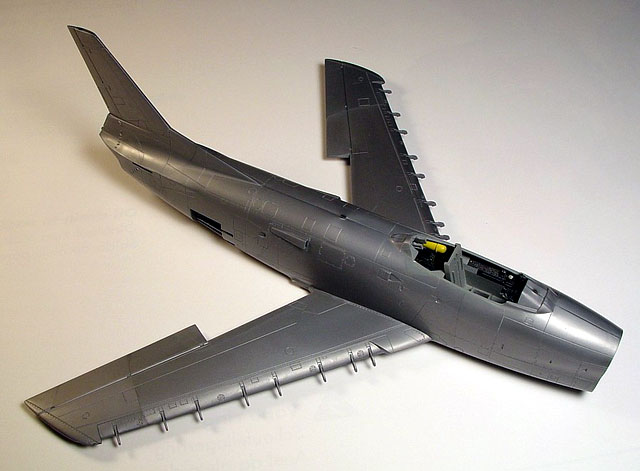
Assembling the fuselage halves and wing is always my
favorite relief while modeling. If everything is done right, this is
usually an easy step, with an instant reward of familiar shape emerging
from bunch of parts. This kit was no different.
As with most aircraft kits with the nose wheel
layout, distribution of mass is a problem. Center of gravity of the real
aircraft is always just in front of the main landing gear, but the kit
plastic does not know for this. A significant mass needs to be added in
the nose section, or else the model will sit on its tail when finished (I
have seen some real planes assume this position and it is a sad and
comical site at the same time). I like using fishing lead for this
purpose, and F-86D offers a lot of space for it in its radome cavity. I
used some modeling clay to imbed the lead weight into the nose part.

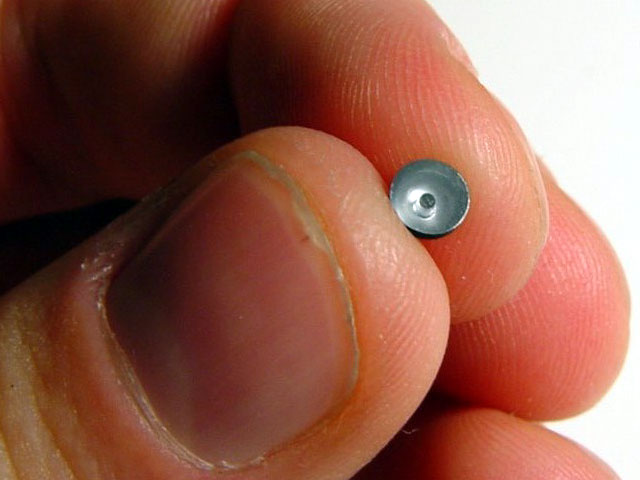
The landing light is to be inserted before joining
the fuselage halves. It is given just as a round plate of transparent
plastic. I replaced this detail with the homemade item that could be
inserted when the model is all done, and looks better too. I started with
a peace of transparent sprue, rounding one end of it to the shape of
reflector cone. When done with sanding and polishing, I’ve cut this piece
with a sharp blade, just ahead of the curved end. This flat end is to
represent the face of the landing light so it also needs to be polished.
After this I drilled a hole in the center of the conical back of the light
(to represent a bulb). Attaching the bit to a piece of adhesive tape, face
down, I sprayed the back with aluminum metalizer and sealed it. The result
is convincing, 3-dimensional landing light.
Ah, yes, not to forget the “Revell-Monogram” logo on
the outside of the wing flap! Why is that there? Boundary layer device?
The rest of the smaller parts assembled without a problem, and soon enough
it was time to prepare the model for paint.
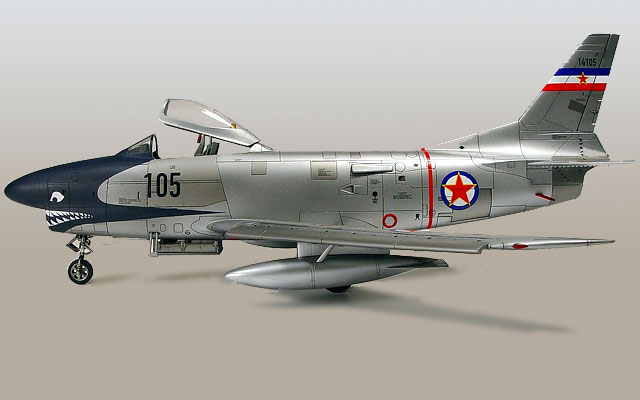
Natural Metal Finish
As with all natural metal finishes, this kit needed
sanding to perfection, with graduation of grits, from coarser to the
finest. No scratches allowed in the end. Some solid plastic color would be
beneficial here, as this silver Revel plastic leaves “ghosts” of sanded
seams, and it is really hard to see if the surface is smooth or not.
I elected to use Alclad II lacquers for this job, because of their
durability. I wanted to achieve “paneled look”, and therefore needed a
strong surface for masking. This is when inevitable disaster struck.
Constellation of planets at that particular moment was such to make me
think that I don’t really need a primer for Alclad II, even though it said
different on the bottle. I started spraying this magic liquid, admiring
its fine grain and the rate at which it dries on the surface. By the end
of the night I already masked off some panels and was spraying over
different shades. The grin from my face disappeared when I tried to
de-mask the surface and a layer of metallic finish started to peal of with
the masking tape. Not to be discouraged, I tried to fix things by masking
around panels where chipping occurred, and spraying over. Again when I
pulled the tape, new chipping appeared.
After several futile attempts, a painful realization came that all the
paint needed to go. Alclad II is a lacquer, and lacquer thinners eat
styrene for breakfast, so using this solvent was not an option. I really
did not look forward to sanding the whole model to the bones. Desperate
times ask for desperate measures, so I remembered previous bad experience
with 70% alcohol attacking some enamel finishes. I tried it, and it
worked! Alclad gave away, drenched in isopropyl alcohol. It was messy, but
I managed to prevent the sludge from penetrating into the cockpit.
Pictures of the model at this stage are censored to maintain the “R”
rating of this article.
When everything was cleaned up, and after few days of rest it was time to
start the painting process again. This time I opened a new jar of Tamiya
gloss black to use it as a primer, as prescribed by the doctor. It
produced very smooth layer, and gave Alclad II something to ”bite”. This
time, the metallic surface was solid and no chipping at all occurred, even
under heavy masking. After a week of doom and gloom, the model started to
look promising again.
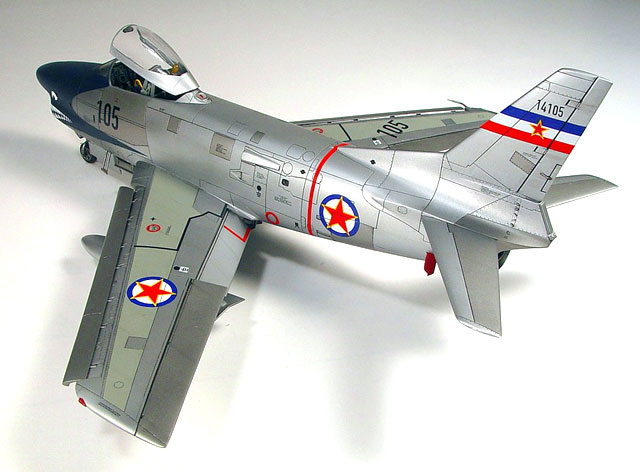
Decals & Panel Lines
On my surprise I discovered two decal sheets with
this obscure aircraft on them. One made by Cutting Edge, and another by
Flightdecs, with the first choice being much easier to obtain in the U.S.
Cutting Edge set is very good, and it even includes vinyl masks for the
painted part of the nose. One mistake in the instructions is that it
describes the nose color as being black. All reliable sources from back
home agreed that this bird had dark blue nose, and I even found a native
article that states the same. Masks conformed to the surface without a
problem, and I mixed my own brew of dark blue shade. Gloss cote followed,
to prepare the surface for decals.
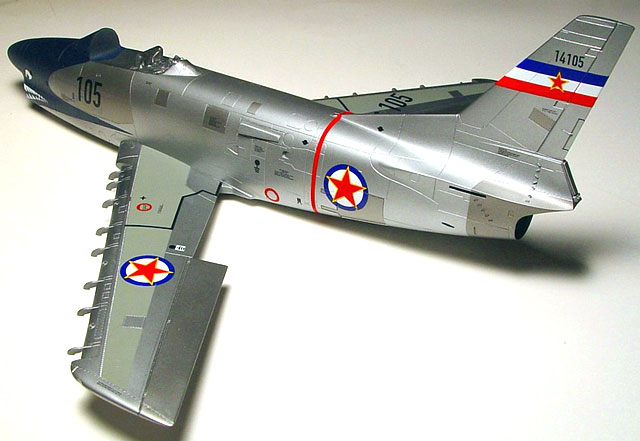
National insignia came as separate roundels and red
stars. Stars had annoying tendency to curl up, so much so that I had to do
a paint touch-ups on one of them that dried with a crooked tentacle. Rest
of the decals did not create any problems.
Click the
thumbnails below to view larger images:
I traced panel lines with diluted water-based mix of
burnt umber and black, and used the same mix to make gentle streaks behind
the wing mechanization. I did not want to weather the airframe any
further. I added some more “mud” only to the insides of landing gear bays.
Another semi-gloss coat sealed everything, and the model was done.
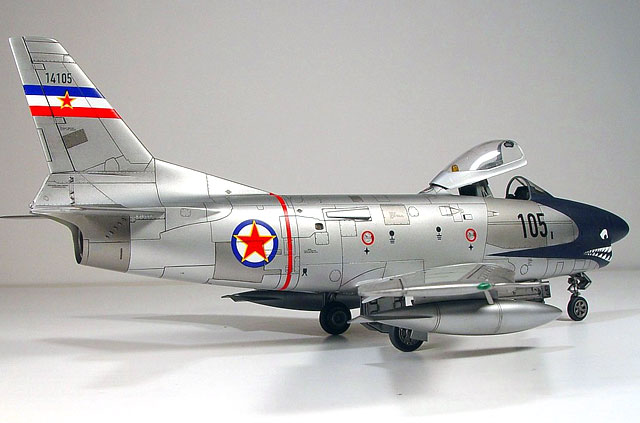
I can’t be anything but satisfied by how this F-86D turned out, especially
after the painting blunder. In the building process it gained some
character, and lost its plastic perfection from the unopened box. That’s
what modeling is about. It has also proved that, except of a steam-roller
accident, almost anything is recoverable in this hobby. Maybe not the same
day, but in a while... On last years Nationals (2002) in Virginia Beach,
this model won 1st Place.
Happy model building!
Click the
thumbnails below to view larger images:
Model, Images and Text Copyright © 2002
by Aleksandar Šekularac
Page Created 13 February, 2003
Last Updated
17 March, 2004
Back to
HyperScale Main Page |
 Home |
What's New |
Features |
Gallery |
Reviews |
Reference |
Forum |
Search
Home |
What's New |
Features |
Gallery |
Reviews |
Reference |
Forum |
Search