|
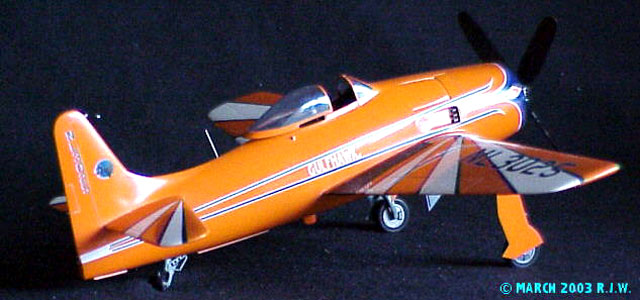
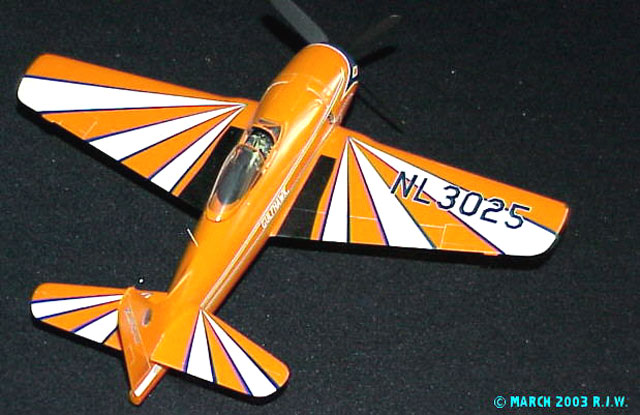
Al Williams' F8F-1 Bearcat
"Show Plane"
by Rodney Williams
|
|
|
Al Williams' F8F-1 Bearcat "Show Plane" |

Testor's
1/48 scale F8F-2 Bearcat is available online from Squadron
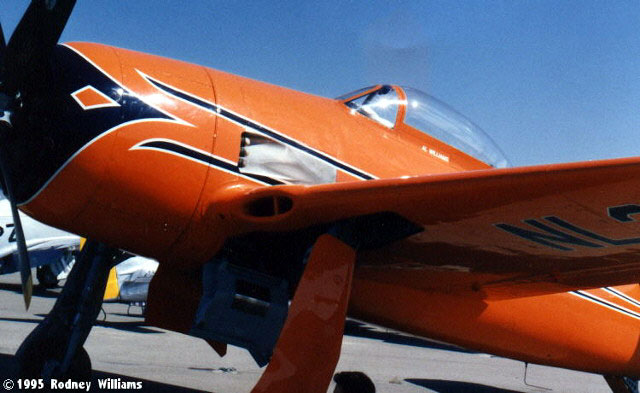
Several years ago I went
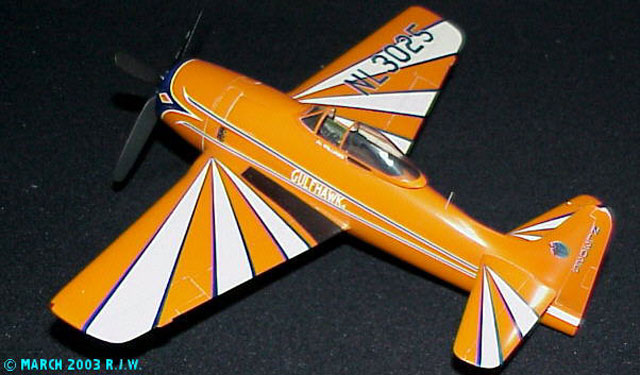
with Mike Meek to the Tracy, California Air Show. I spotted a beautiful
racer, all decked out in high gloss orange, white and dark blue paint. I
took a couple of photo's with my 35mm camera. Later, I mentioned to Mike
that I would like to build a model of it. Mike said it was not a racer,
but more or less a show plane, that comes to a lot of air shows.
Furthermore Mike said that this aircraft is the second one, as the
original crashed and was destroyed.
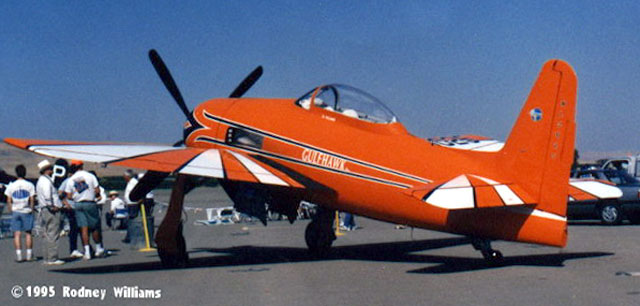
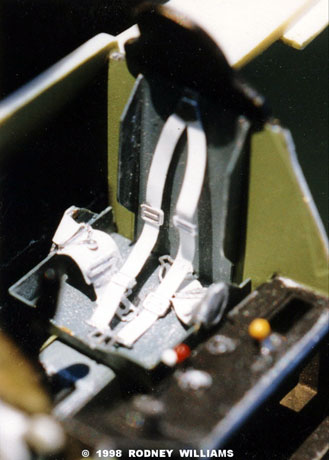
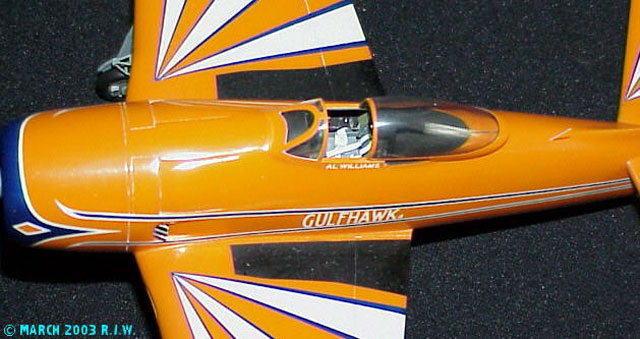
This aircraft was also
modified in the cockpit, including the bubble canopy to hold two people.
Low and behold, D & J Hobbies had a Testor kit of the original Bearcat in
1/48 scale. Upon opening the kit, I got a shock. It had the decals
for the show plane. Man, did I luck out.
At home, I got the second
shock, yeah! you guessed it, no cockpit, that means scratch building one.
It sat on the shelf for quite some time. Then I heard that either Eduard,
and/or True Details came out with a photo etch cockpit for this bird.
I was now off, and running!
I think I started on the kit
sometime during 1995, and finally finished it just before the IPMS/
SEMICON National Contest in July, 1998.
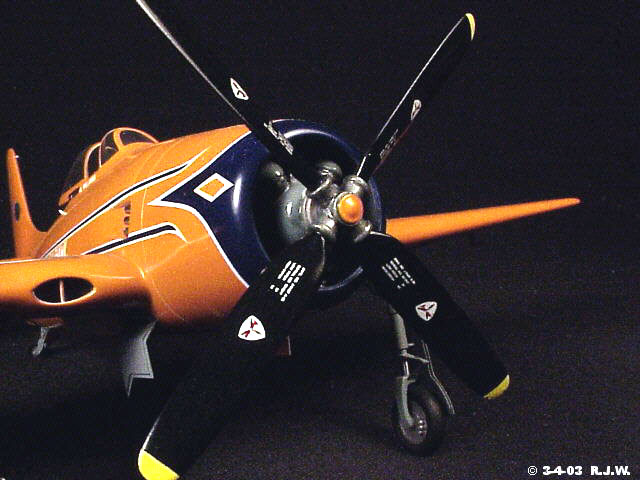
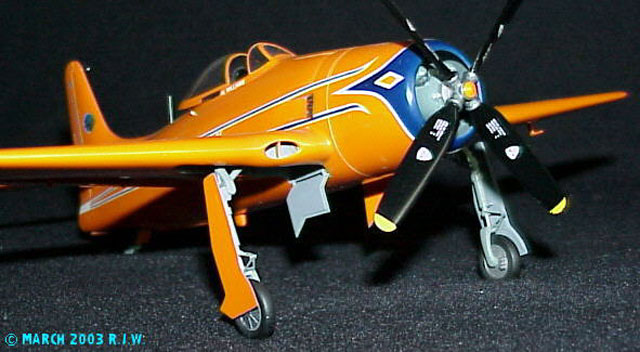
I started working on the kit engine, and prop. They looked good, so I did
not add any detail, just paint.
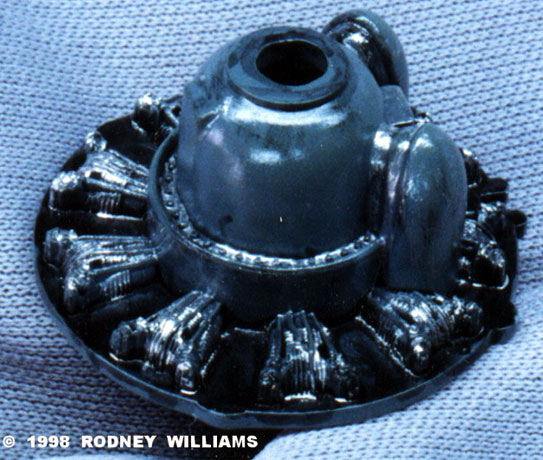
I added the kit decal data
blocks, but there were no "Aeroprop" logo's. Thanks to Mike Braun, he had
some good quality spare decals logo's, and sent them to me. These logo's
add that finished look to the four blades.
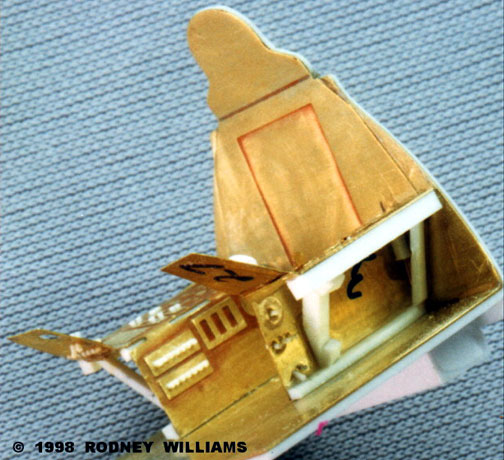
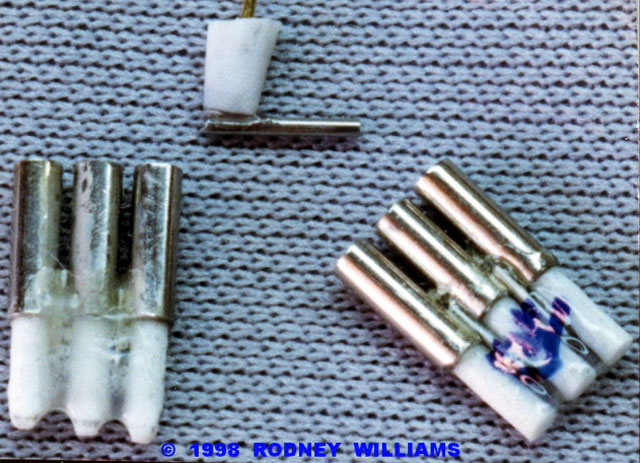
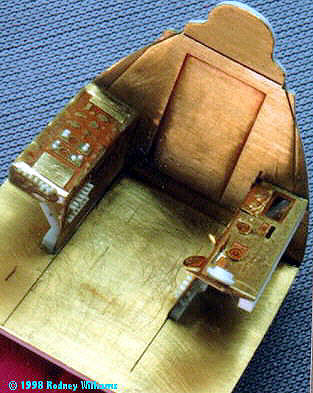 I
reinforced the cockpit brass photo etch items with thin styrene. When dry
fitted, and taped into the cockpit area, I put the two halves of the
fuselage together. Wow, it fit like a tailor made suit! The cockpit was
painted, and was now ready for installation. I
reinforced the cockpit brass photo etch items with thin styrene. When dry
fitted, and taped into the cockpit area, I put the two halves of the
fuselage together. Wow, it fit like a tailor made suit! The cockpit was
painted, and was now ready for installation.
Click the thumbnails below
to view larger images:
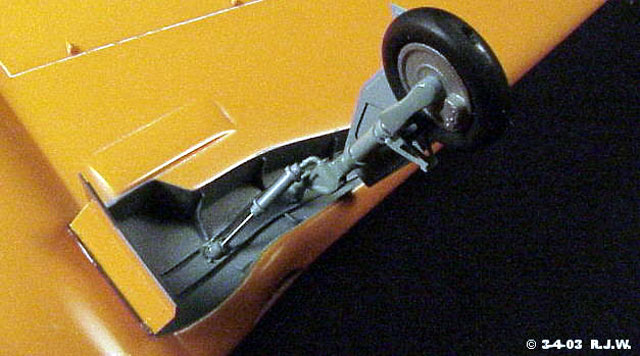
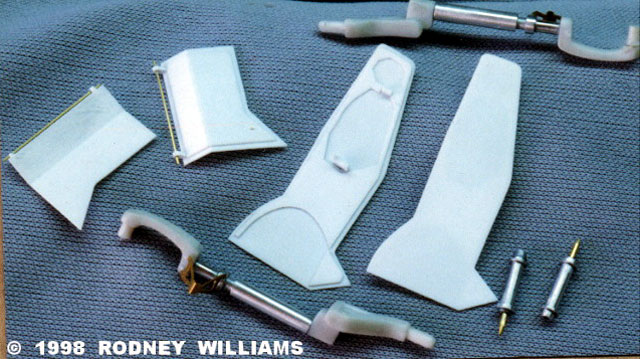
I built in a small box for
the tail opening, then revised the kit wheel, with some of the photo
etched items. They were painted and installed. The tail wheel was on a pin
system, which let me swing the tail wheel assembly up into the tail wheel
opening. This way, one can push the tail wheel up inside, while sanding
and painting on the outside. On final assembly, you just tack the tail
wheel in position with a "micro dot" of super glue. Works every time.
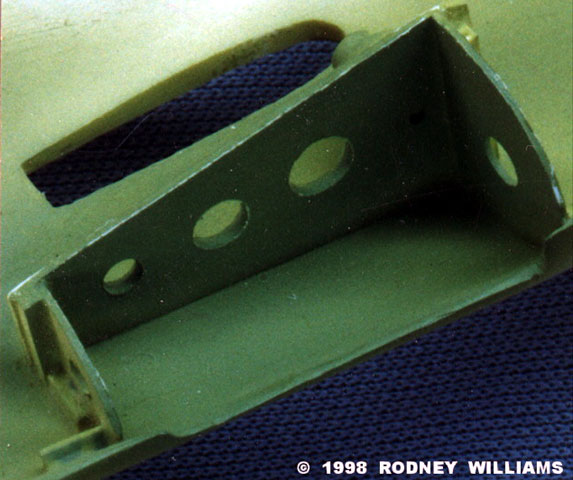
I added a few stringers to the main wheel well bays, and scratch built all
four gear doors, and added the photo etched torque links to each main gear
strut. I also closed in the back of the air scoops, and added a vertical
bar, which I saw on some Bearcat photo's.
The aircraft had a few present day avionics on the outside, like some sort
of small bubble on the bottom of the fuselage, aft of the cockpit, and a
whip antenna on top. I hand carver the little bubble, and uses .010" white
styrene rod for the antenna.
I made the six exhaust sacks from stainless steel tubing, which were
attached on final assembly.

Paint time was at hand.
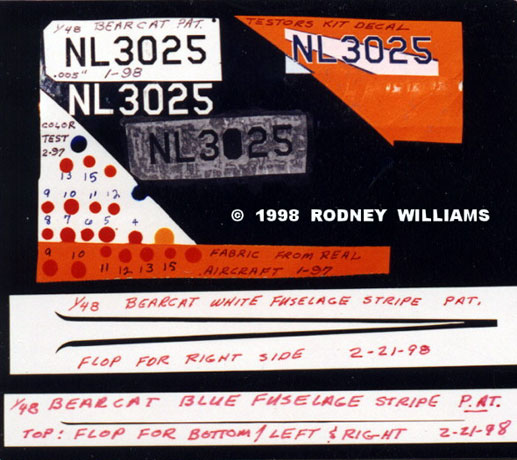
I mixed my own orange
looking color from my automotive lacquer paint colors. I sent some color
chips to Tony, Mike Meeks friend. It seemed that the second Bearcat had
crashed, but could be saved. Tony, who works for Square One Aviation in
Southern California was helping rebuild the Bearcat. He choose one of my
color chip's, and said it look's good enough.
My mix ratio is the same for all of my paints, which was handed down to me
by the late "Master" model maker George Lee. I start out with 3 to 4 parts
thinner to one part paint. With automotive lacquer, you "must" use
automotive thinner. (YOU CAN NOT USE ANY OTHER THINNER). George gave me a
"demo." He stuck a stick into my paint jar, which was shook up. He pulled
out the small stick, and the paint run off slowly, for quite some time. He
ask, if I was using the paint as glue? He then opened up a bottle of his
paint, which was shook up as well. When he pulled out his stick, a few
super thin drops of paint came off. He said go home and add LOTS MORE
THINNER. I've had excellent paint results ever since then, (circa 1988).
The orange lacquers went on like a charm, sanding in between every few
coats, to get rid of dust particles settling onto the paint, as my paint
booth is just outside of my garage door. Some have ask; "how many coats of
paint are on your model (s) ? My answer is somewhat !! Like I don't know,
maybe 50-100-150!
I cleared coated the orange with clear lacquer, then mask it off, and
applied the white on the wings, and tail plane. This was also clear coated
with clear lacquer. Next, I applied the dark blue lacquer around the
cowling, again clear coating, then air-brushing on the thin white outline.
The white fuselage stripes were cut out of white decal film, using a pre
made template. Next, I sprayed the dark blue lacquer onto white decal
film. Using the second template, I cut the strips out and applied them
over the white. I used the same method to apply the dark blue separation
strips between the orange and white for the wings and tail plane.
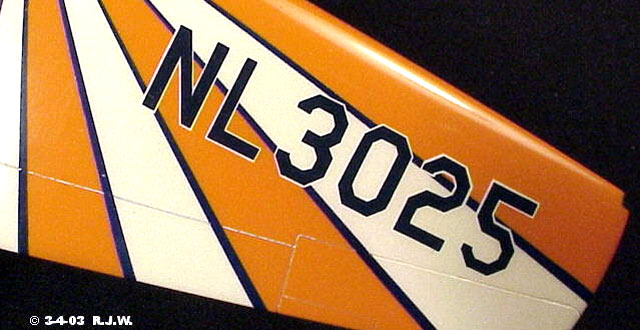
The civil license number of "NL 3025" for the wings were cut out of white
and pre sprayed dark blue decal film, from two (2) separate pre made
template's. I used the kit decals for Al William's name, Gulfhawk-4, the
Grumman logo, along with the civil number for the rudder. These white
decals were doubled up, so the orange would not show through.
Many clear coats of lacquer was applied, again sanding with 2000 grit,
between every few coats. Final application is rubbing out the paint with
Blue Magic. It takes a great deal of time, but the end result is worth it!
Final paint application was the black wing walks, using Tamiya XF-1 flat
black.
On final assembly,
everything went on like clockwork, including the antenna wire. By the way,
for you new-comer's in the club, I use threads from women's nylon panty
hose for my antenna wires. On the Bearcat, I used two, and for 1/32 scale
models, I use four.
I also crafted a pitot tube, and built-in wing tip lights, and a tiny
white tail light.
Three weeks to go before the
Santa Clara SemiCon Convention. Reviewing the model, and checking
everything, I'm convinced that I am a sure thing for first place in the
Civil Category.
NOT TRUE!

While sitting at the judge's breakfast, one of the judges says "Rodney,
first place is the only place to be in a contest, right?"
"Yes!" was my answer.
The Judge then says, "That's your Bearcat in Civil?" "Yeah!!"
"YOU HAVE YOUR MAIN GEAR
DOORS ON BACKWARDS. We discovered your mistake during pre-judging, (you
will get a second place).
It's best you go down real
quick and fix them or take the model out of the contest."
The gear doors were secured
with white glue. Well, I rushed down, and darn it all, that judge was
right. I took the model off the table.
The moral of the story is: I
made this same mistake before.
Happy Modeling!
Click the
thumbnails below to view larger images:
Model, Images and Text Copyright ©
2003 by Rodney Williams
Page Created 24 March, 2003
Last Updated
17 March, 2004
Back to
HyperScale Main Page |
 Home |
What's New |
Features |
Gallery |
Reviews |
Reference |
Forum |
Search
Home |
What's New |
Features |
Gallery |
Reviews |
Reference |
Forum |
Search