|
F9F-2 Panther
by Rusty Keeler
|
|
|
F9F-2 Panther |

HyperScale is proudly supported by
Squadron.com
I chose the version, squadron and the markings of this plane because I
have a friend who served in this unit for a short time. Lt. Herbert “Herb”
Newmark started his Naval aviator career toward the end of WWll stationed
aboard the USS Bon Homme Richard “CV-31” flying F4U-4 Corsairs with
VFB-81. After the war he went into the reserves where he was flying F6F
Hellcats.
This squadron transitioned to the F9F Panther shortly before
hostilities broke out in Korea. VF-781 is credited as being the first
squadron to volunteer for active duty at the outbreak of the Korean War.
Herb had just a few hours in this plane when the Navy called for all
experienced Corsair pilots to be transferred to Corsair squadrons. Herb
was transferred to VF-874, put back in the seat of an F4U-4, and there he
served his country for another year flying missions over North Korea.
An interesting point in this story is that he was stationed once again
on the Bon Homme Richard and he was flying along side VF-781, his old
Panther squadron. VF781 was flying the F9F-2 Panther during 1950 and 1951.
Later VF-781 was stationed aboard USS Oriskany “CV-34” flying the
F9F-5.
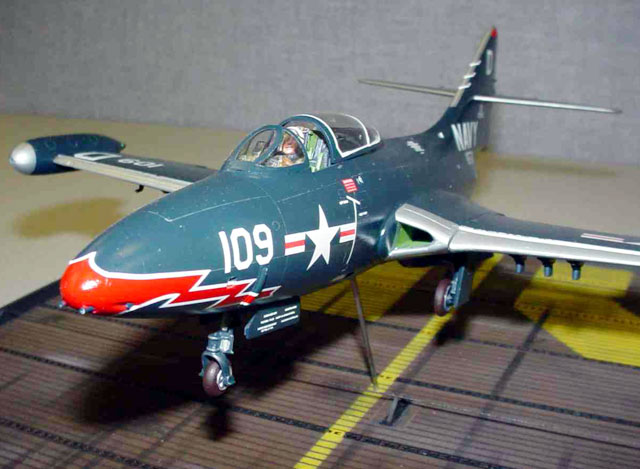
This is Monogram's 1/48 scale F9F-5 Panther backdated to the -2
variant.
I built this model out of the box with some minor modifications using
sheet and rod styrene. No after market sets were used in the construction
of the plane. Since I was backdating this to a “-2” I relied heavily on
the Squadron walk around books, both the one included with the model and
the Squadron/signal publication “F9F Panther Cougar in action”.
In addition to the books, I was building the Hasegawa 1/72 scale
Panther for Herb, which is a "-2", and he had provided me with several
photographs from His collection. The Hasegawa kit includes decals for
VF-781 while stationed aboard the Bon Homme Richard.
For the backdating portion of modifying this model I filed and sanded
the rudder to the shorter more rounded shape of the “-2”. I also removed
the wing fences at the intake mouths and removed the pronounced leading
edge chevron shape in this area. I left the ordinance pylons as they were
but believe I should have replaced them with a longer more slender style.
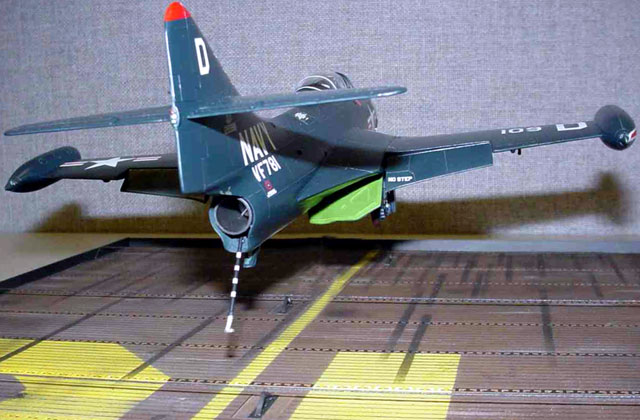
The general modifications I made consisted of cutting out the rear
flaps, both the wing and the lower fuselage flaps as well as the leading
edge slats and reattaching them in the deployed position. I also deployed
the arrestor hook by adding a length of styrene rod to the hook.
The gun barrels were replaced with stretched styrene tube.
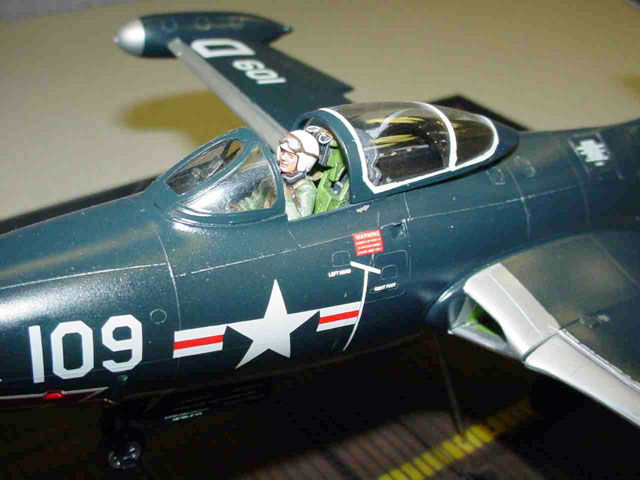
The cockpit was slightly modified by adding the ejector seat loops to
the top of the seat, adding a “Tee” handle to the throttle and replacing
the molded in oxygen hose with a piece of solder wrapped with a piece of
wire and attached where the molded one had been removed.
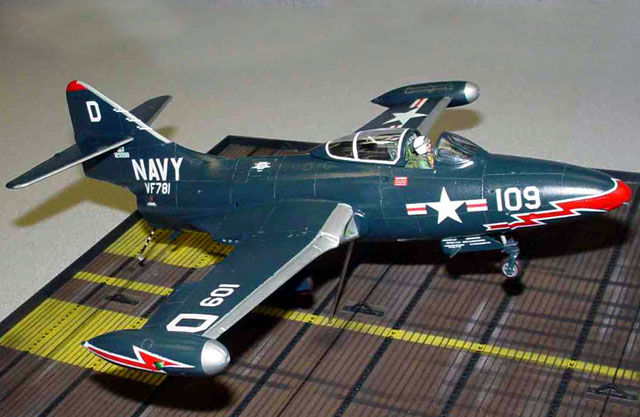
A combination of the kit decals and Eagle Strike decals were used. The
Eagle strike decals were actually for the “-5” version stationed aboard
the Oriskany but resembled the earlier “50-51” version enough to fudge.
The lighting bolts for the wing tip fuel tanks were incorrect for the
earlier version so I redrew them to scale in AutoCAD, cut masks out of
masking tape and painted the correct version. The BuNo and version of the
plane found under the horizontal stabilizer was left as a “-5”. I couldn’t
find any old decals to scab the correct numbers out of and since it is so
small I left it alone. Someone would have to be looking for it to notice
it so "Don’t tell".
The base is of my own design and is available through Flattops & More
Hobbies. I wanted to display this plane in the seconds before touch down
and I could not find a base that could be modified to add the "fiddle
bars" and arresting cables. I also wanted this base to be large enough so
that the plane would fit within the perimeter of the base and not hang
over. So I designed one.
The base comes in kit form and consists of brass photo-etch tie-downs,
a 12” x 12” x 1/2" plywood base and 600 grit wet-dry sandpaper for deck
material. The plywood has shallow parallel grooves for the photo-etch to
sit over and a single perpendicular cut that can be used to replicate the
catapult channel. Currently there are two kits covering carriers from WWll
and Korea, one for the Yorktown class carrier and one for the Essex class.
For additional information on the base contact me at
flattoppsandmore@reliable-net.net .
Early on in this project I had dipped the canopy in Future as per a tip
found on
http://www.aircraftresourcecenter.com . This worked great however,
after I painted the framework I went to spray my gloss coat using Future
again. I had never seen anything on how to spray Future through an
airbrush so I “assumed” that it should be thinned and that is how I had
been using Future, thinned with alcohol. Note: Since doing this I have
been told by several people that they spray Future straight.
Well when I went to remove the masking tape from the canopy I found
that the alcohol had seeped back up under the tape and had frosted the
canopy. I thought for sure that all was lost. I figured I had nothing to
loose so I re-dipped the canopy in Future and set it aside with a cover
over it.
The next morning, you couldn’t tell anything had ever been wrong with
the canopy.
Model, Images and Text Copyright © 2004
by Rusty Keeler
Page Created 05 January, 2004
Last Updated
17 March, 2004
Back to
HyperScale Main Page |
 Home |
What's New |
Features |
Gallery |
Reviews |
Reference |
Forum |
Search
Home |
What's New |
Features |
Gallery |
Reviews |
Reference |
Forum |
Search