|
F/A-18A Hornet
VFC-12 "Omars"
by
Brian Marbrey
|
 |
|
F/A-18A Tomcat
VFC-12 "Omars" |

HyperScale is proudly supported by
Squadron
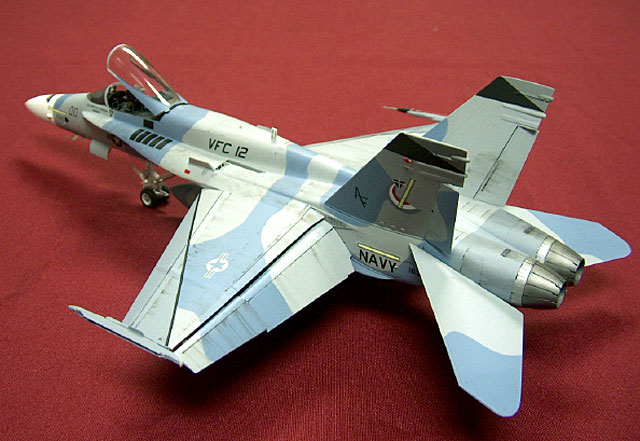
Building Hasegawa's beautiful Hornet is no
easy task, but it's detail is much better than Revell's F-18.
After getting a little burned out of building
the same 'ole TPS colored Hornets and Tomcats, I decided to try my hand at
a VFC-12 bird. The inspiration for the model came from my trip to NAS
Oceana back in March of this year. VFC-12 had switched hangars since my
previous years visit, so while I was visiting with VF-103, I walked down
to VFC-12's end of the barn.
I won't go into the construction of the kit, but for the most part the kit
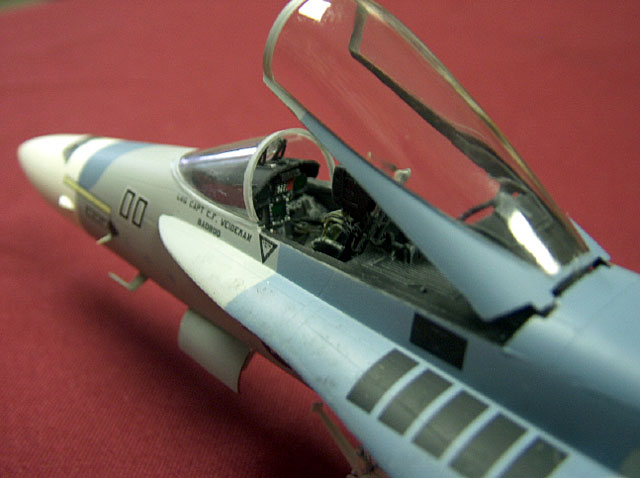
was built from the box except for the addition of the Black Box F-18
cockpit.
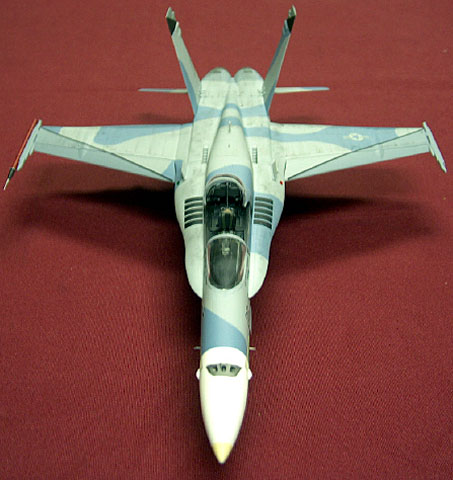
Painting a bird in this scheme is a time
consuming task in itself.
I think I spent around 12 total hours painting
the camouflage pattern, not to mention masking time. VFC-12's Hornets have
a hard edge camouflage scheme, and I had never done a scheme like this
before. So, after getting a great tip from Jarrod Cunningham, I put my
trust in his advice and flowed with it. How I painted the scheme was
pretty simple.
 To
start, I painted the entire aircraft Model Master Light Ghost Gray. After
letting the paint dry for a couple days, I took a mechanical pencil and
drew in the camouflage patterns for the Soviet Flanker Blue. Using Silly
Putty as a mask, I tacked the Silly Putty around the outside of the
camouflage pattern, and sprayed in the darker color. This is an old
masking tip, and it works great! To
start, I painted the entire aircraft Model Master Light Ghost Gray. After
letting the paint dry for a couple days, I took a mechanical pencil and
drew in the camouflage patterns for the Soviet Flanker Blue. Using Silly
Putty as a mask, I tacked the Silly Putty around the outside of the
camouflage pattern, and sprayed in the darker color. This is an old
masking tip, and it works great!
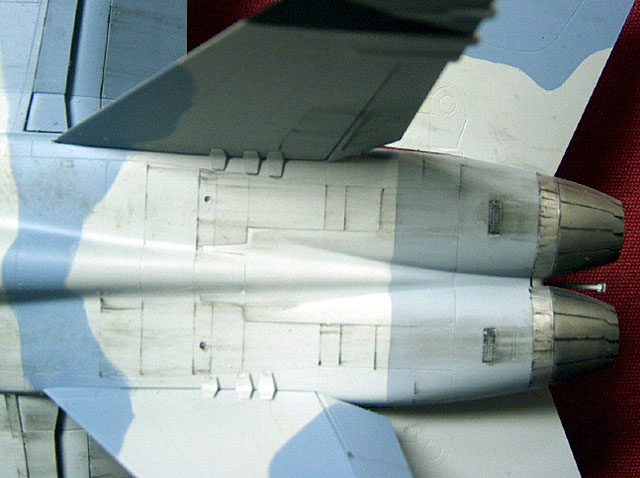
The darker color I used was Soviet Flanker Blue, from the Model Master II
line. After the Flanker Blue dried, I then masked off the tops and bottoms
of the wings and the tail end of the bird so that I could paint the areas
which required Dark Ghost Gray. The last thing I painted was the flat
white on the nose, followed by the tip of the nose which is painted Radome
Tan.
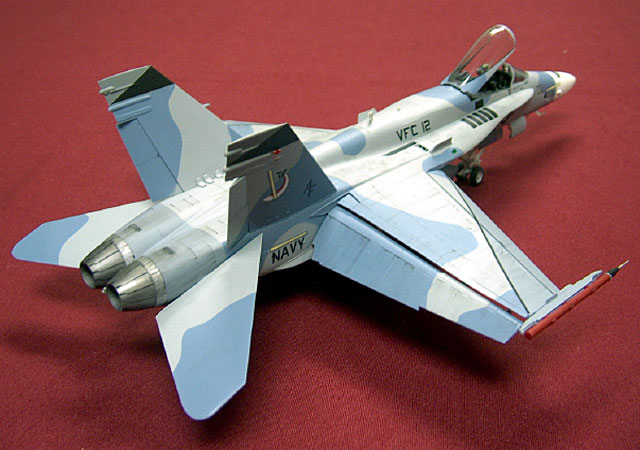
Of course, several coats of gloss lacquer were applied, and after the
gloss dried came the decals. The decals were courtesy of TWOBOBS, and went
on with absolutely no problems at all.
 Weathering
the aircraft was done using a Bic Ink Rollerball pen which was run through
the panel lines selectively, and wiped toward the back of the plane using
damp tissue. Weathering
the aircraft was done using a Bic Ink Rollerball pen which was run through
the panel lines selectively, and wiped toward the back of the plane using
damp tissue.
The "splotchy" looking effect caused by ground
crew walking on the plane was done by taking the dirty tissue used from
streaking the panel lines and blotting it on the walkway areas. An acrylic
black wash was then applied to the wheel wells, and wheels to highlight
some of the details.
Finally, several coats of flat lacquer were applied, and after drying, the
canopy, windscreen, and lights were then attached.
All in all this was a fun project, and I look forward to doing more fleet
adversary birds. I hope you enjoy the article.
In memory of ENS Jack Ernie-
"Skipper! Remember me with the Jolly Rogers!"
ENS JACK ERNIE VF-17,VF-61,VF-84,VF-103
"Fear The Bones"
Model, Images and Text Copyright ©
2003 by Brian Marbrey
Page Created 02 August, 2003
Last Updated
17 March, 2004
Back to
HyperScale Main Page |
 Home |
What's New |
Features |
Gallery |
Reviews |
Reference |
Forum |
Search
Home |
What's New |
Features |
Gallery |
Reviews |
Reference |
Forum |
Search