|
 |
|
F/A-18A Hornet |

Hasegawa 1/48 scale F/A-18C Hornet is available online from
Squadron.com
The 1/48th scale F-18 from Hasegawa was one of those models that I
just could not wait to get my hands on. When it was finally released and
retailed for nearly $80, I pitched a fit over the price but eventually
paid the bill to acquire a copy of the kit for myself. Anyone that
bad-mouths this kit for any reason other than its whopping price is not
giving the kit all the time it deserves in construction.
In my opinion, this is the definitive scale model of the Hornet in any
scale. The fit is good; I only needed filler for a small spot on the
intakes. The kit's major shortcoming is its complexity. So much detail
and so many options are provided as to make the construction a complex
and time consuming task. The complexity of some of the construction
makes it a poor choice for a novice modeler.
Hasegawa's 1/48 Scale
F/A-18 Hornet Kits
|
The kit is comprised of over 350 pieces, molded in light gray and
clear plastic, white metal, and photo etchings. The part count is
somewhat inflated by two facts.
The first is that there are a lot of parts in the kit that are specific
to only certain Hornet versions. Present in the kit are details for a
two seated variant, a "C"/"D" variant, a Blue Angel aircraft, and a
Canadian aircraft. The alternate parts for these other Hornet versions
are ignored in the instructions for the "A" variant kit.
The second reason for the part count being high is the number of kit
building options. There is not much room for the modeler to do more to
the kit. The building options contained include all the following:
-
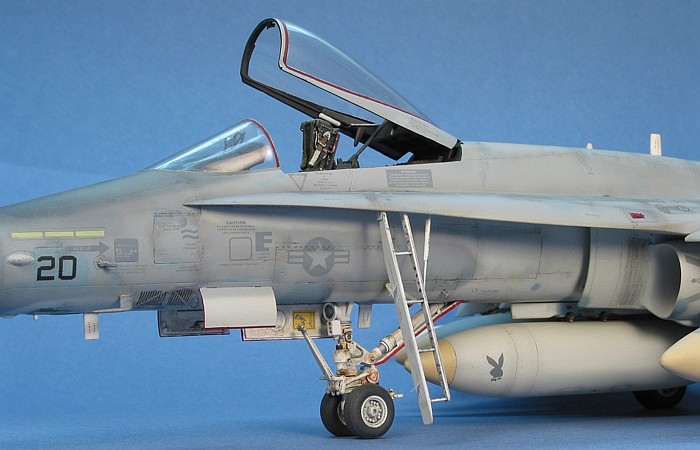
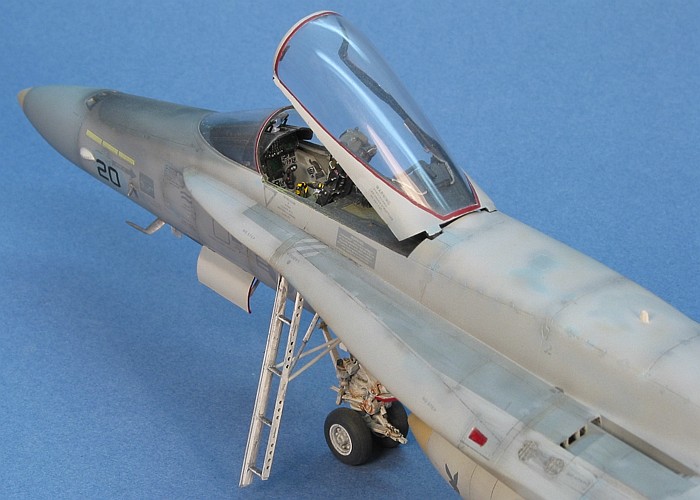
Raised Cockpit Detail with Photo Etched
Portions for the Main Instrument Panel
-
Cockpit Canopy (Up/Down)
-
Boarding Ladder (Up/Down)
-
Landing Gear (Up/Down) with White Metal
Landing Gear Struts
-
Catapult Launch Bar (Up/Down)
-
Variable Position Wing Leading Edge Flaps
-
Wing Trailing Edge Flaps (Up/Down)
-
Variable Position Horizontal Tails
-
Variable Position Rudders
-
Speed Brake (Up/Down)
-
Optional Engine Exhaust Cones
-
Optional FLIR and LASER Guidance Pods
What more could you want? The only real option missed is a folding
wing, which Hasegawa provided in one of the "high-tech" releases of the
F-18 kit. All these options mean lots of parts and inherent complexity.
As an example, take the wing. Because of the separate flight control
surfaces, each wing comprises 13 parts (not including weapons pylons).
Even if the fit is good, which for the most part it is, the number of
pieces in the assembly can cause problems. When is the last time you
heard a modeler claim a kit gave too much detail?
I built the kit nearly out-of-the-box. The only changes I made to the
kit were to substitute a Verlinden resin ejection seat and add weapons
from the Hasegawa weapons sets. Even building mostly out-of-the-box,
note my construction time was over 28 hours, compared to a little over
31 hours for painting. Normally my construction time is only about half
of the time that I take to do painting. Here the times are almost even,
and this was a very complex painting project. Because of all the kit
options, this is a complex model to build.
In spite of all the building options, the fit on my kit was quite good,
even in places I would have expected problems (like around the intakes).
I needed only a tiny spot of filler around the intakes to build this
kit. A little care in construction and a little touch with an X-acto
file to level any slight mis-matches was mostly all I had to do.
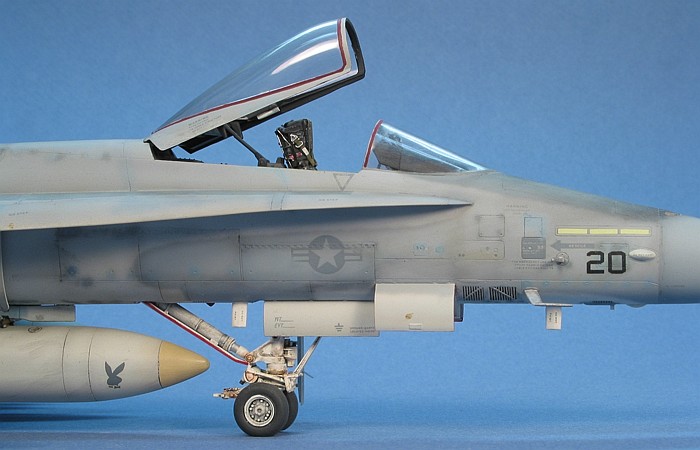
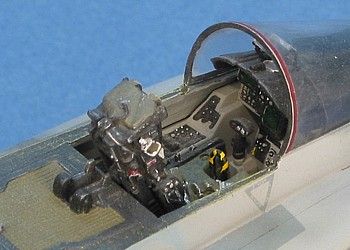
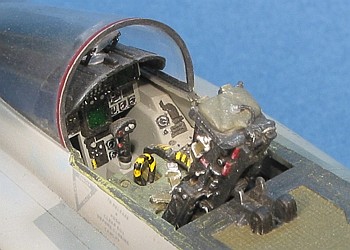
As I mentioned above, I replaced the kit ejection seat with a Verlinden
resin seat. I am unconvinced that the Verlinden seat is total right,
being substancially undersized compared to the kit seat. But, I wanted a
little more detail in the cockpit than the kit seat provided, so I
painted it up and installed it. The rest of the kit is out-of-the-box,
including the photo-etched inserts for the main instrument panel. I
feared these would not have enough relief to look right with the rest of
the nicely molded plastic details, but some careful dry-brushing popped
them up so they looked like the rest of the cockpit.
 |
 |
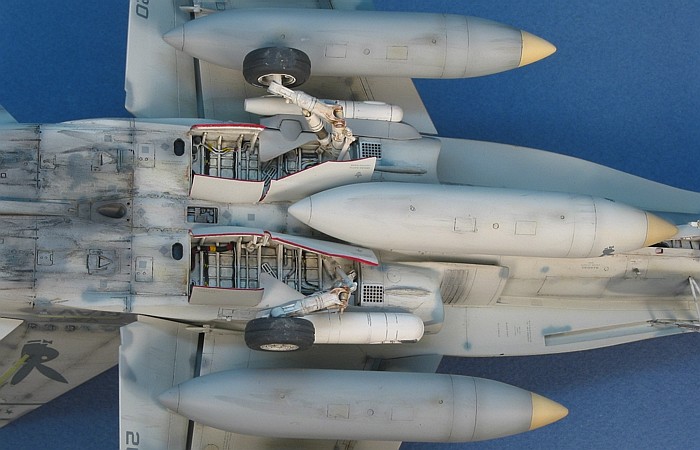
The most trouble in the whole kit came from the wing trail edge flaps.
The Hornet has a form of slotted flap. This means that in the lowered
position, there is space between the wing and the flaps. The only
connections to the wing are the actuators. The alignment of the actuator
mounting points must be precise in order to make the assembly work. This
was not the case in my kit. I ended up attaching the actuators to the
wing, then removing the flap locator pins on the actuators and filling
the locator holes in the flaps. Drilling my own locator holes, I mounted
the flaps using fine brass wire.
Further, the eyelid door that covers the whole affair on the real
aircraft is not represented well and needed some help. I removed the
locator tabs on the wing and thinned/reshaped the eyelid door to get it
to fit correctly on the trailing edge of the wing. If you are able to
work out these details, the final result is very convincing, correctly
capturing the look and feel of the real thing with the flaps down. I can
not address how the flaps fit in the retracted position as I did not
build mine that way. My guess is that the same problems would be in
effect.
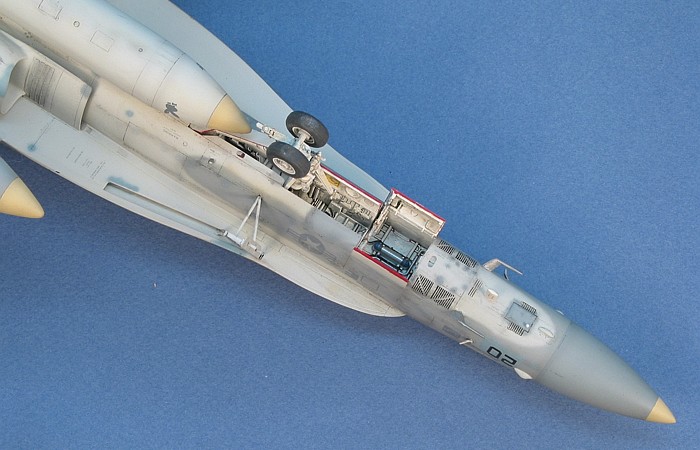
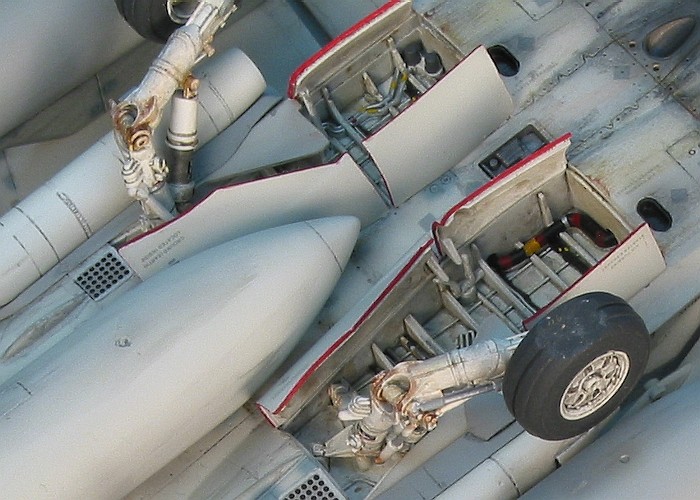
The white metal landing gear caused me some more aggravation. While the
detail level was exquisite, the pieces were just a tiny bit bent in the
box when I opened it. The bends affected the levelnes of the kit when I
set the model on its landing gear. Unforunately, I did not learn this
until I had already completed painting and detailing the struts. I was
not happy having to reshape (bend) the painted and decaled struts to get
the model to sit level.
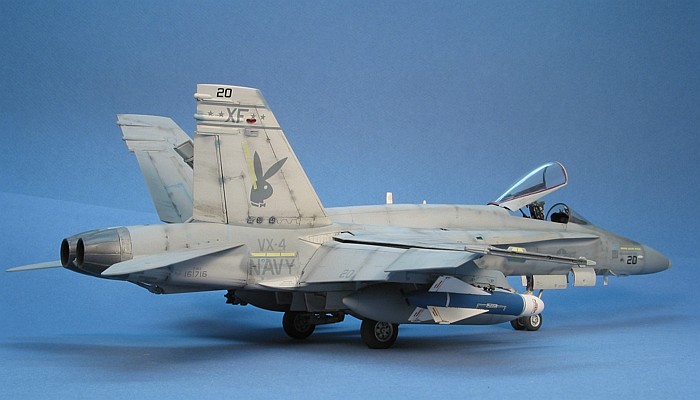
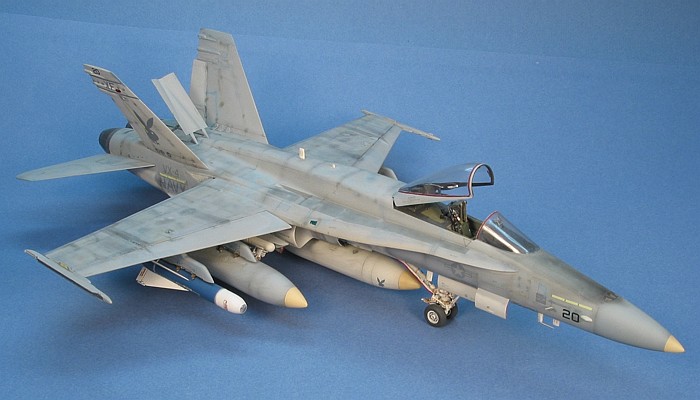
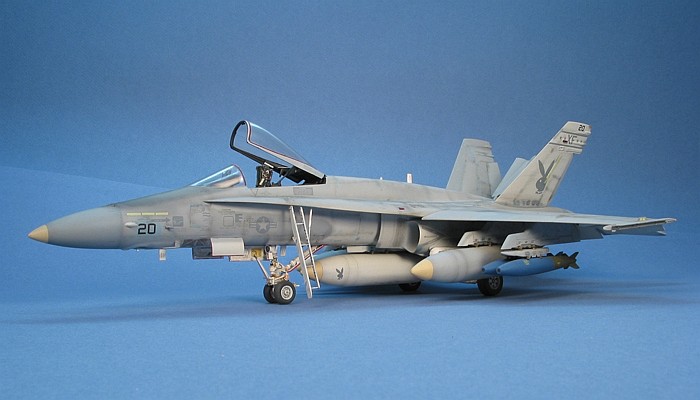
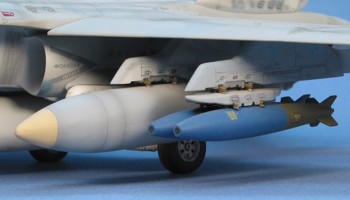
Once I decided on the markings I wanted to build for the model, the
weapons choice was easy. I wanted something different. I found the
loading that I eventually settled on in a picture from Koku Fan
magazine. The loading consists of a practise Walleye glide-bomb on the
right outboard pylon and two practise Mk.83 low-drag general purpose
bombs on the Dual Ejector Rack (DER) that is unique to the F-18 Hornet.
 |
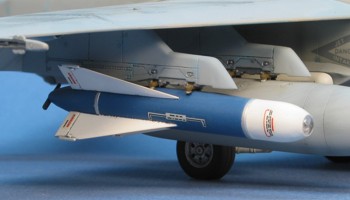 |
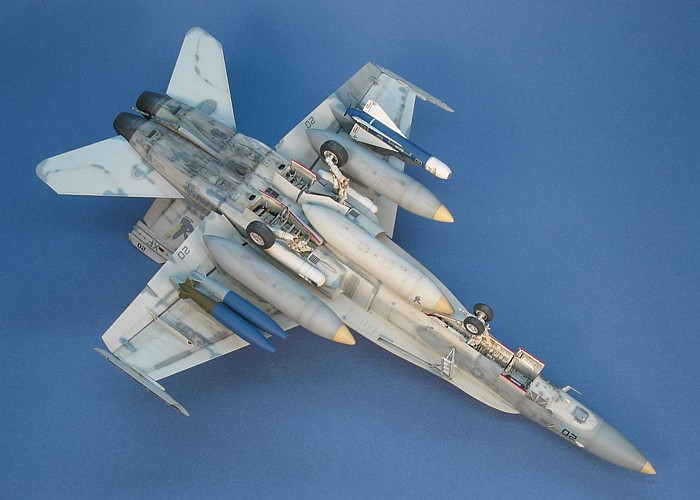
To go with the Walleye, I decided to load the weapons guidance and
targeting pods on the lower fuselage sides. I finished the loading with
a full compliment of three external fuel tanks. I have read that the
Hasegawa kit tanks are undersized (too short) by about an eighth of an
inch, but they looked OK to me on the model.
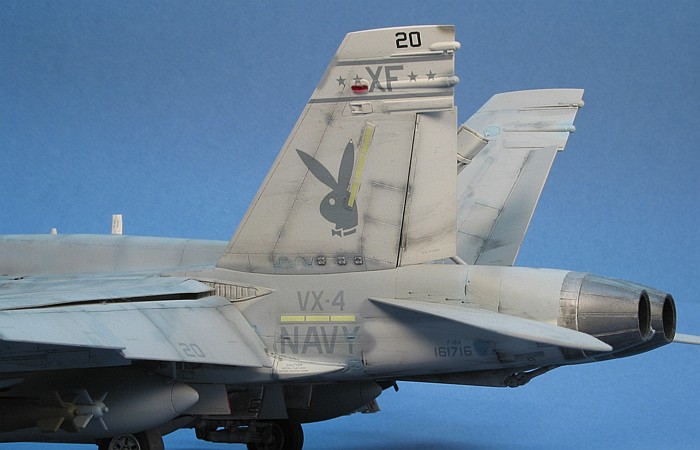
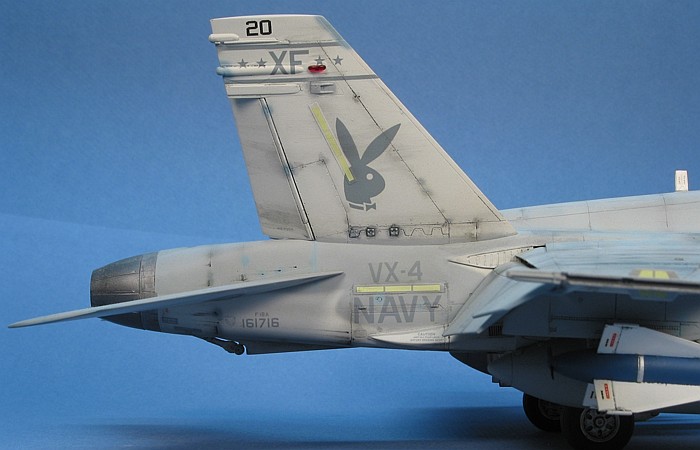
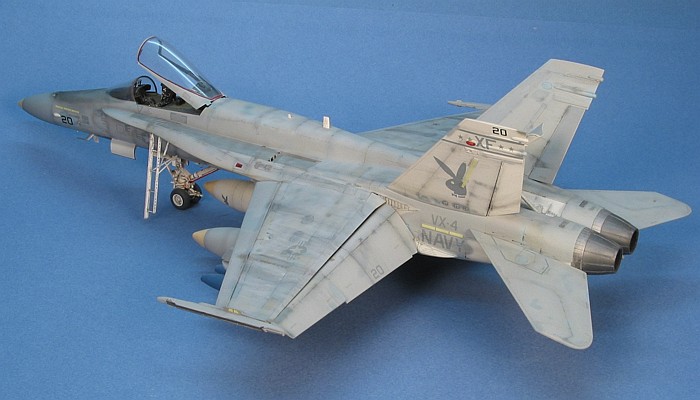
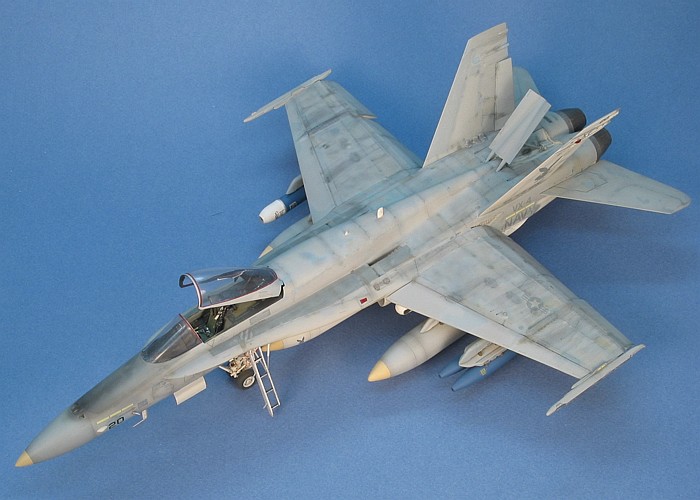
For markings, I wanted something different on the model. At the time,
SuperScale had about a hundred different F-18 decal options, but most
all of them in my opinion were "ordinary". After looking through several
books and magazines, I came across a couple pictures of some VX-4
aircraft that had gotten the "Playboy Bunny" motif added to their tails.
Having always liked that marking, I decided that was the one to build.
What really made the decision (besides the bunny) was the camouflages on
the VX-4 aircraft. They were still in the original Light Ghost Gray
(F.S.36375) over Light Gray (F.S.36495) with really beat up finishes and
touch ups in various non-matching colors. I like a painting challenge,
and this was definitely going to be that.
 For
the camouflage, I used all Testor's Model Master enamel paints. I
painted the basic camouflage of Light Ghost Gray over Light Gray. Then I
started making small "touch-up" paint splotches using varied shades of
grays and blue. All these spots are done free-hand with my air brush. I
used the following colors for this - Graish Blue (F.S.35237), Neutral
Gray (F.S.36270), Dark Ghost Gray (F.S.36320), and a custom mixed light
blue color that I frequently see in photographs of US Naval aircraft
from the period. The process of painting all the little paint spots was
time consuming, but the results were very worth the effort.
For
the camouflage, I used all Testor's Model Master enamel paints. I
painted the basic camouflage of Light Ghost Gray over Light Gray. Then I
started making small "touch-up" paint splotches using varied shades of
grays and blue. All these spots are done free-hand with my air brush. I
used the following colors for this - Graish Blue (F.S.35237), Neutral
Gray (F.S.36270), Dark Ghost Gray (F.S.36320), and a custom mixed light
blue color that I frequently see in photographs of US Naval aircraft
from the period. The process of painting all the little paint spots was
time consuming, but the results were very worth the effort.
The decal markings all came from SuperScale. I used various decal sheets
looking specifically for decals printed in the gray colors that closely
matched the paints I was using. The majority of the decals came from two
SuperScale F-18 Hornet sheets -- #48-191 (unit markings including VX-4)
and #48-246 (Hornet Data). The bunny motif on the tail was taken from
sheet #48-422 (VX-4 F-14 "Bunny" Aircraft).
I have to say that this model tips the scales as probably my most
involved weathering project. See my "Weathering Aircraft" posting for a
more complete description of how I do my weathering. On this model, the
weathering is in multiple overlapping layers.
I started with the off-color paint touch-ups during the camouflage
painting and decal application processes. This was followed by a session
of panel line highlighting using washes. While highlighting panel lines,
I also smeared the washes with my finger tip (in the direction of the
air flow) to create assorted streaking effects. I completed the proces
with some air brush shading. There is also a little dry brushing done
around the cockpit area.
The final results of this process are what you see in the pictures.
The Hasegawa F-18 kits are truely great kits. While expensive
(perhaps overly so), they delivers some of the most detailed modern era
jets available on the market. In spite of the high kit prices, I have
accumulated several more kits in various releases. My next F-18 model
will likely be an F-18D in full-color VMFA(AW)-224 "Bengals" markings.
Of couse, a "Valions" F-18C would be nice. Or. how about a Blue Angels
F-18B? Then, there are the NSAWC F-18 aggressors or assorted Canadian
commemorative schemes. There are lots of different and varied choices
for great looking Hornets.
|
Additional Images and Project
Summary |
Click the
thumbnails below to view images full-sized.
Click the "Back" arrow on your browser to return to this page.
|
|
|
Project Statistics |
|
Completion
Date: |
26 August, 1992 |
|
Total Building
Time: |
72.0 |
|
Research: |
4.2 |
|
Construction: |
28.9 |
|
Painting
(includes creation and printing of custom decals): |
31.2 |
|
Decals /
Markings (includes creating and printing custom decals): |
7.0 |
|
Extra Detailing
/ Conversion: |
0.0 |
|
Model, Description and Images Copyright ©
2003 by David Aungst
 Home |
What's New |
Features |
Gallery |
Reviews |
Reference |
Forum |
Search
Home |
What's New |
Features |
Gallery |
Reviews |
Reference |
Forum |
Search