|
Lockheed A-12
Blackbird
by Toby Nelson
|
 |
|
Lockheed A-12 Blackbird |

Testor/Italieri's 1/72 scale SR-71 Blackbird is available online from Squadron
Many people will be familiar with the Lockheed
SR-71 Blackbird, the fastest and highest-flying jet in the world. Fewer
people are aware that the SR-71 was the third member of the
Blackbird family.
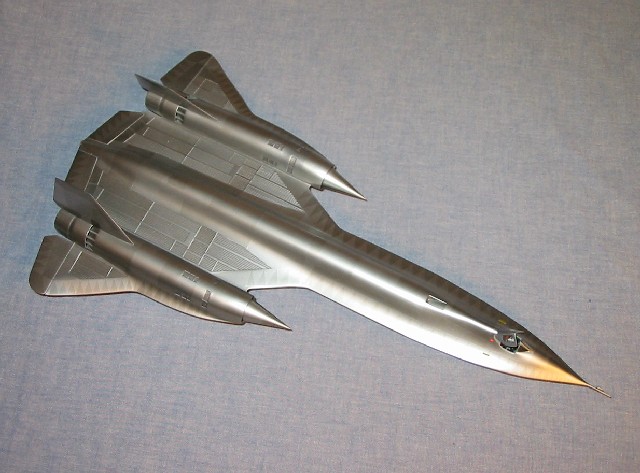
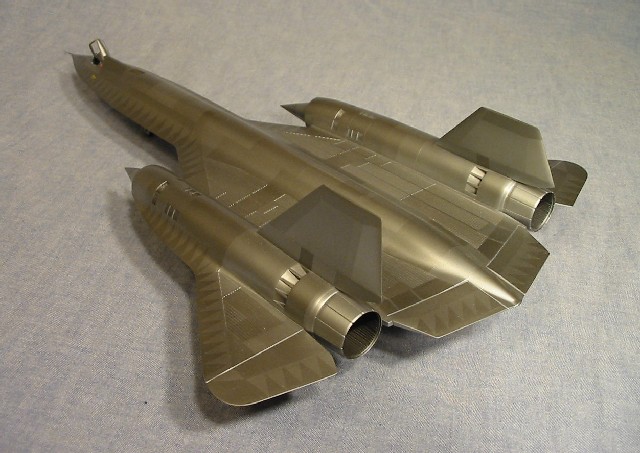
The first Blackbird was known as the A-12, and it was used by the CIA.
It was a single-seat aircraft, with a large camera occupying the spot
that the Reconnaissance Officer sat in the SR-71. The A-12 also had a
shorter, more sharply pointed nose, and a shorter fuselage tail cone.
The A-12 first flew in April 1962. For the first few months of flight
testing, the first three A-12s were left in overall natural titanium.
The chines and leading edge of the wings were later painted back to
radiate the heat, and the aircraft were eventually painted the familiar
overall black scheme.
The April 2002 issue of Airpower magazine contained several pictures of
the early natural-metal A-12. As soon as I saw them, I knew I had to
build a model of one. But it wasn't until I got the 1/72 Italeri SR-71
kit at the Hobby Island weekend-after-Thanksgiving sale last November
that I finally started.
Conversion
I used the Testors/Italeri 1/72 SR-71 and YF-12
kits for this project. Academy also makes an SR-71 kit, but comparing it
to plans revealed that the nacelles were too far forward and too far in,
giving that kit an odd "stretched" appearance.
In the December 2003 issue of Fine Scale Modeler, Paul Boyer writes
about making an A-12 model out of the Testors/Italeri kits. Paul did a
good job, however he said that he didn't have drawings of the A-12, so
he modified the chines by comparing them with photographs and sanding
them down.
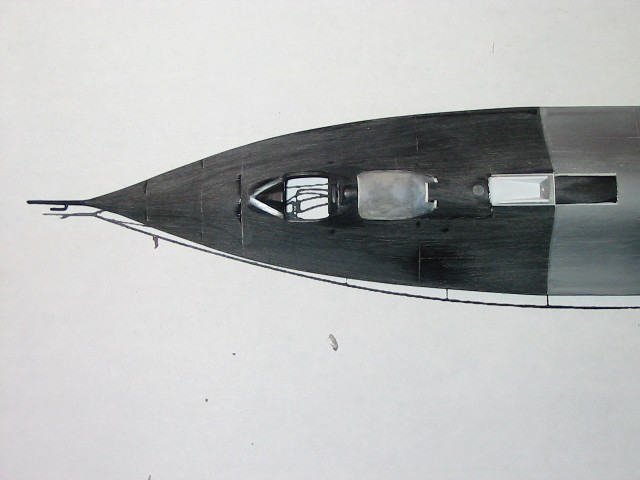
I took the A-12 drawings in Jay Miller's Lockheed Martin Skunk Works:
The First Fifty Years and enlarged them to 1/72 scale. I quickly found
out that the A-12 nose was not only more sharply tapered than the
SR-71's nose, it was also much shorter (by about half an inch if I
remember correctly). So that meant much more work for me!
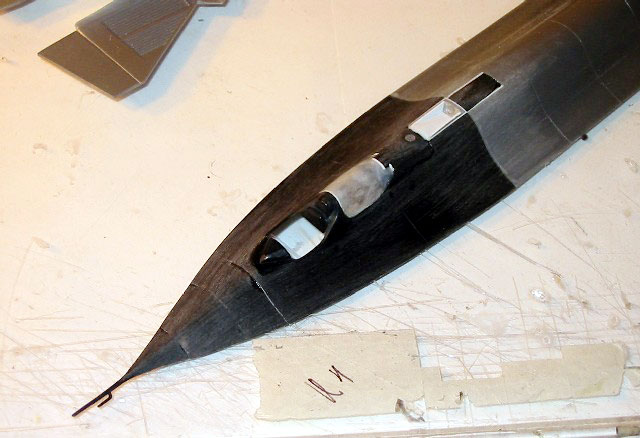
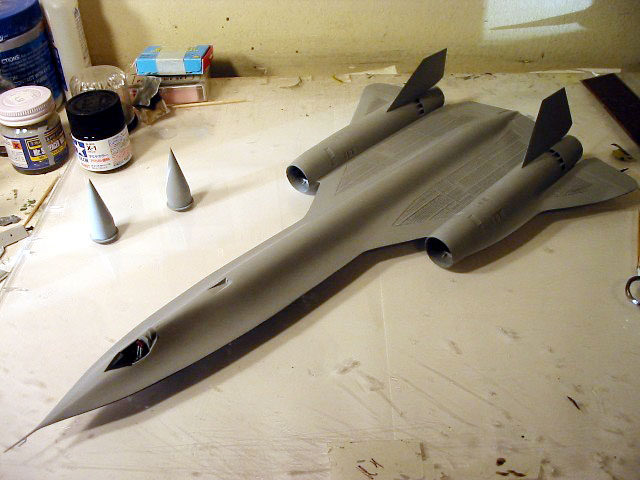
I started by chopping two sections out of the SR-71 kit's nose halves,
then glued the three sections together. This resulted in the correct
length, but distinct steps to the nose. So I poured lots of superglue
into the inside of the nose, curing that with accelerator, then rough
sanding the outside of the nose with 80 grit sandpaper (it's like a roof
shingle). While I was at it, I made the lower part of the nose thinner
to match the side profile.
I used the rear fuselage from the YF-12 kit to get
the shorter tail cone. You could modify the SR-71 tail with few problems
(I've done it before), but I had several YF-12 kits I got from someone
for $10 each a few years ago. The only modification to the YF-12 parts
is filling in the holes on the bottom for the fording tail fin. I glued
the rear fuselage parts to the front fuselage, then later I would glue
the top to the bottom.
I glued the rear canopy in the closed position and reinforced the inside
with yet more superglue. The in-flight refueling door was located
further forward on the A-12, so I cut it out and repositioned it. My
pictures and drawings also show that the refueling door was narrower
than on the kit, so I shimmed it with styrene.
I then puttied the entire nose section with Tamiya putty and sanded it
smooth up to 400 grit. Several airbrushed coats of Mr. Surfacer 1000
filled in the small gaps and smoothed the surface even more.
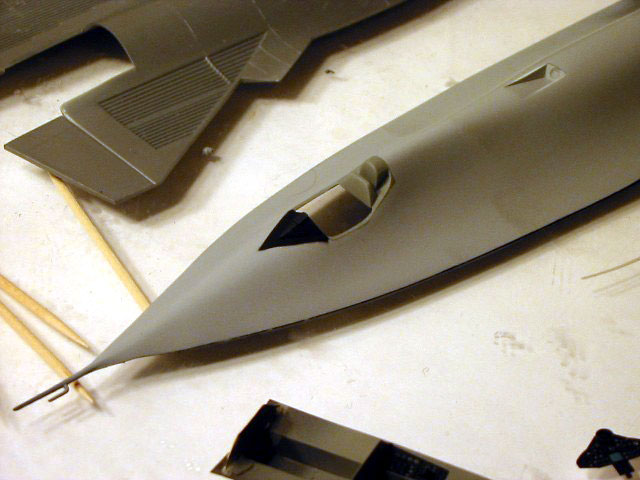
Now that the conversion was pretty much complete, I
could start the cockpit!
Cockpit and Nose Wheel Well
A couple of years ago I picked up the Eduard photo
etched set for the Italeri SR-71 kit. This set is really nice, with a
replacement cockpit, nose wheel well (the kit's nose wheel well is about
1/8 in. deep!), and landing gear parts.
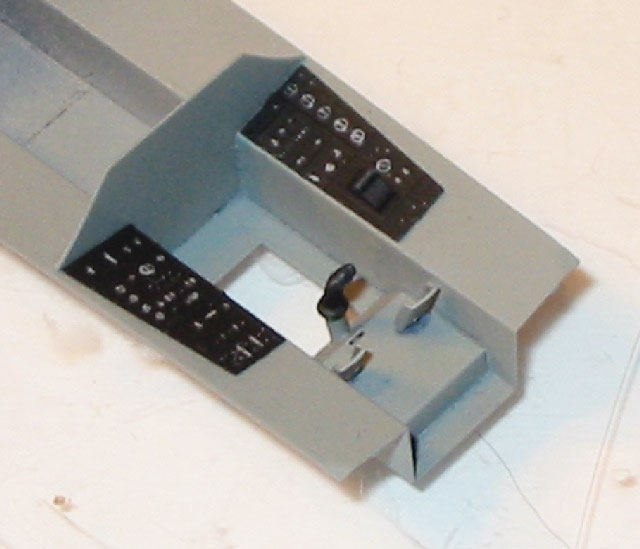
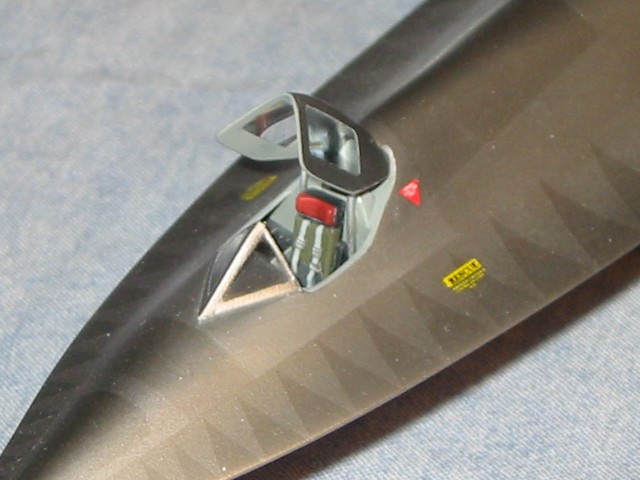
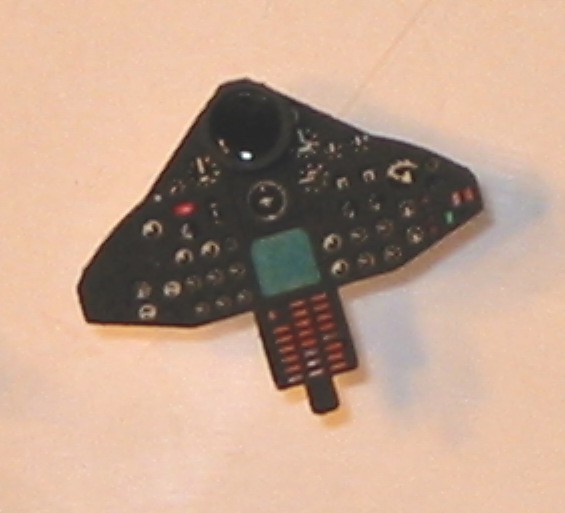
I used the Eduard set for pretty much an entirely new cockpit. The only
real modification was the addition of a large drift sight to the top of
the instrument panel. This was made using a small section of aluminum
tubing and a clear disk punched out with my Waldron punch set. The rest
of the instrument panel isn't 100% accurate, but it looks really good.
Click
the thumbnails below to view larger images:
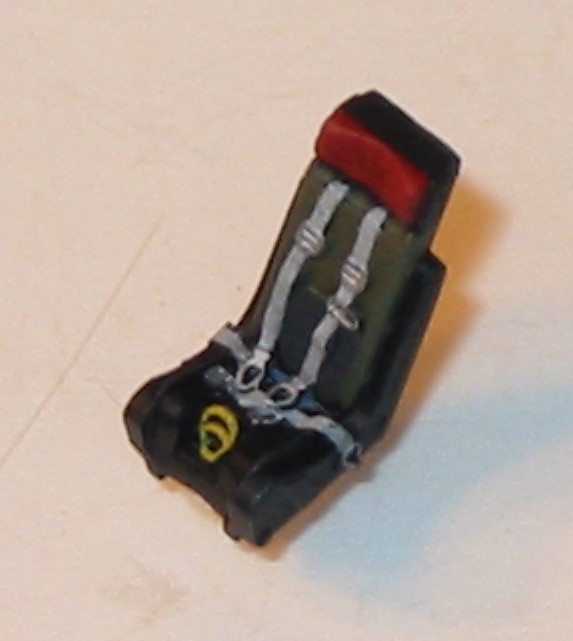
The kit's ejection seat was used, with the seam
carefully cleaned up and photo-etched parts added to it. The cockpit was
painted with Polly Scale acrylics, with a white pencil used for the side
console details. ["Cockpit 1" and "Cockpit 2" pictures]
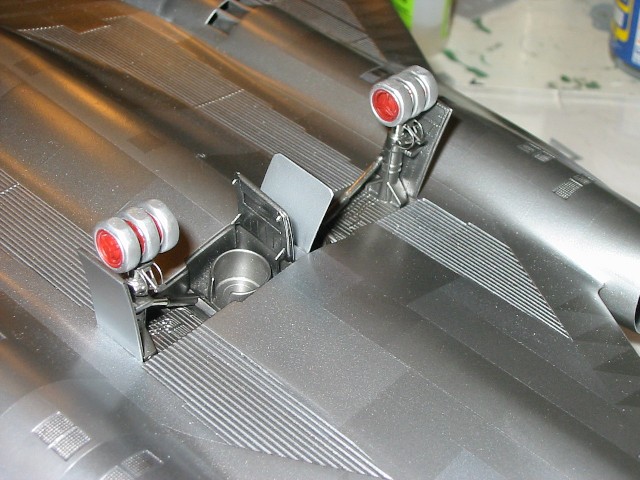
The Eduard nose wheel well was a simple replacement, and really improves
the look of the model. I put in a couple of wires in the nose wheel well
to add interest, but didn't go overboard.
Once I had the cockpit and nose wheel well glued in, I glued the top and
bottom halves together with Tenax and superglue.
Airframe Construction
Quite a large amount of putty was required for the
joints.
After a couple of days sanding, puttying, and
priming I was satisfied. I also finished sharpening the edges of the
reshaped chine. In the process, I sanded off most of the panel lines,
but I'll show them later by painting dissimilar panels.
I thinned out the exhaust nozzles and glued them on, then carefully
puttied and sanded the exhaust blow-in doors. I glued the vertical
tails, then several more coats of Mr. Surfacer (I used an entire bottle
on this model) and I was ready for paint.
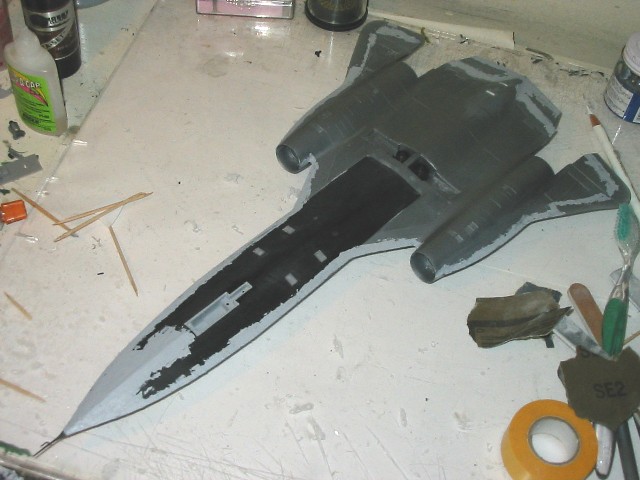
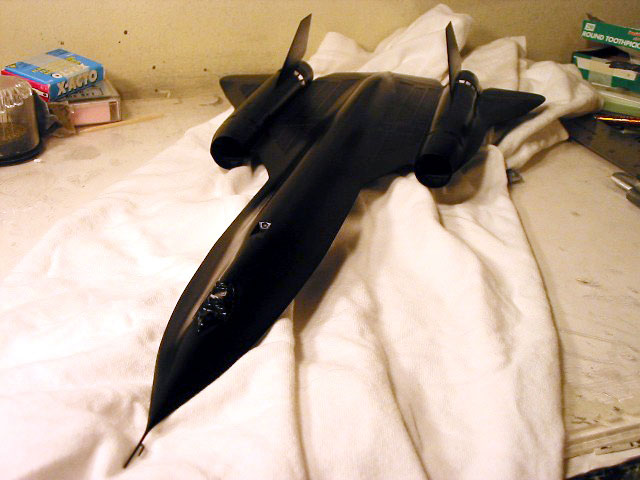
I sanded the Mr. Surfacer smooth with very fine
steel wool. I then airbrushed Tamiya Gloss Black to the entire model.
This was real easy, even for someone like me who is deathly afraid of
gloss finishes. The secret is to thin the paint down a lot and put
several light coats, building up the gloss. I then let the model dry for
48 hours.
I airbrushed a nice coat of Alclad II Aluminum on
the airframe. I let the model dry for another 48 hours. While it was
drying, I worked on the landing gear, gear doors, and canopy.
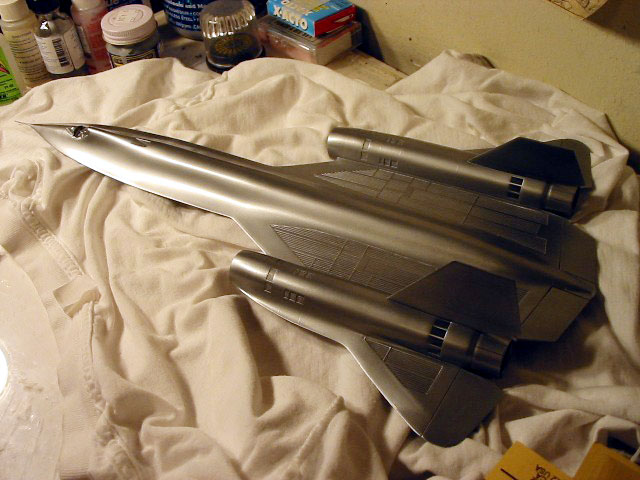
Once I was confidant the Alclad base coat was
completely dry, I started the dissimilar panels. This took about four
days of work. I used Tamiya tape and masking tape to mask off the
panels, then used Duraluminum, Dark Aluminum, White Aluminum, and
Magnesium for the different shades. I used the pictures from Airpower as
a guide, but a lot of it was more of an artistic "what looked right".
Sometimes I would paint a panel one shade, then airbrush another shade
over that to get a shade different from the first two. Lots of trial and
error.
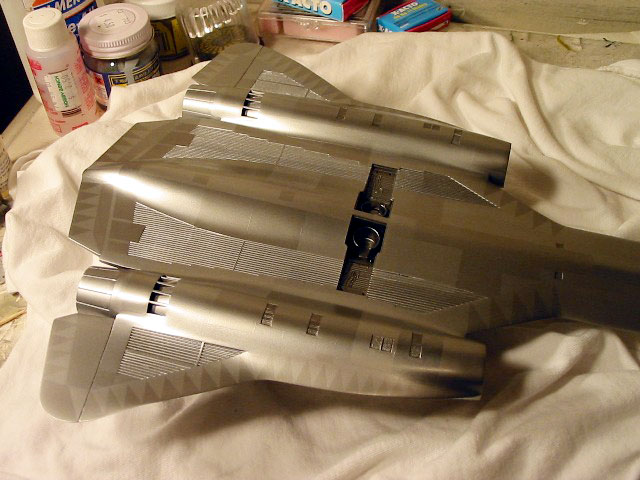
The most time consuming part of painting was painting the triangular
wedges on the chine and leading and trailing edges of the wings. This
was prominent in the Airpower photos, so I knew I had to paint them. I
put a strip of Tamiya tape on a piece of glass, then gut out a about
twenty triangles. I then put them on the model and painted maybe six
inches at a time. I was able to reuse the Tamiya tape triangles for
other parts of the model.
Now the model was really looking sharp!
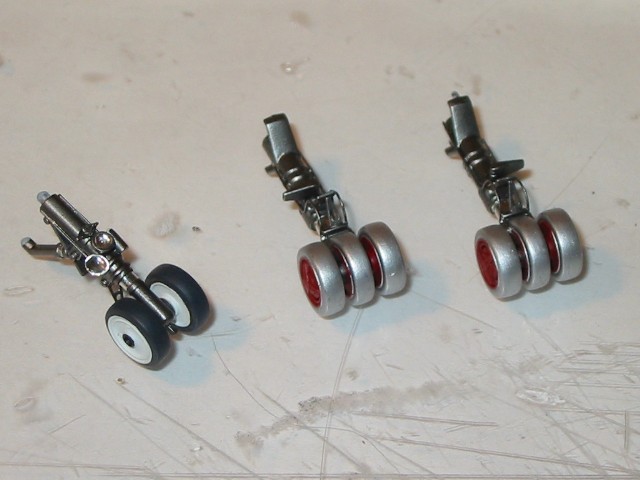
Landing Gear
I used the kit landing gear, with Eduard photo
etched torque links. I used MV lights for the landing lights on the nose
gear. I also added the brake lines.
Click the thumbnails below to view larger
images:
The gear doors were made with the kit doors as the
basis, with photo etched parts for the inside detail. This was very time
consuming, but well worth it.
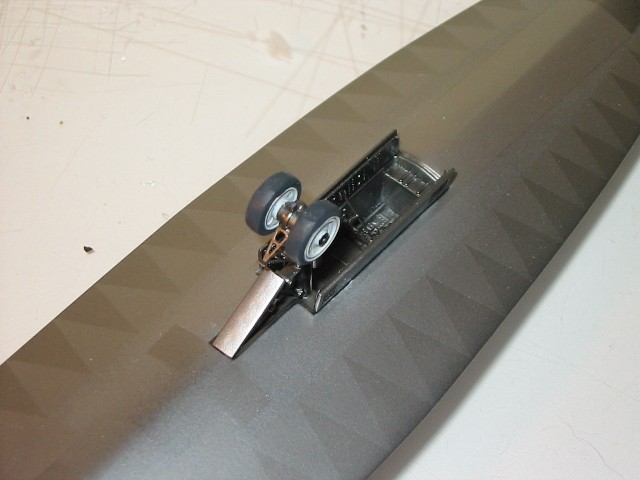
After I glued the gear and doors to the airframe, I sanding flats on the
tires. This also enabled all eight tires to touch the table. ["Gear 2"
and "Gear 3" pictures] I originally used a tire to flatten the tires,
but this melted them, so I had to replace the tires (good thing I had
lots of extra parts from the YF-12 kit).
Final Details
The only decals were some warning triangles and
stencils around the cockpit. I used some from a Superscale SR-71 sheet
that I had.
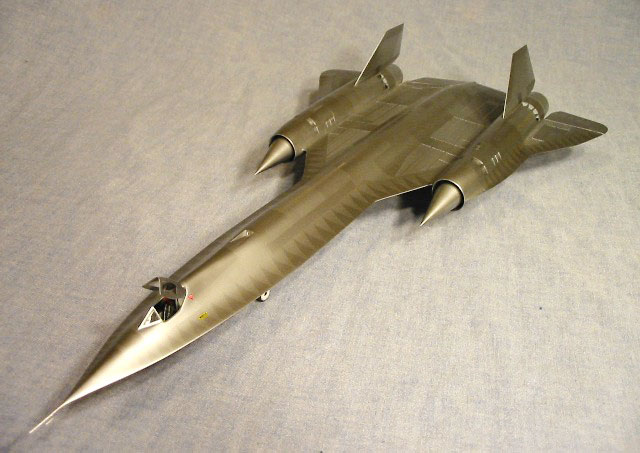
The intake spikes were glued in, and the canopy was glued in the open
position. I installed canopy actuator arms out of styrene rod, and spent
much time getting the angle of the canopy right.
I was really happy with how this model turned out.
It also went by really quickly; it only took me about three weeks to
finish it, which is some kind of record for me. Half that time was spent
painting. I built it when I was home from college over Thanksgiving and
Christmas (I'm attending Embry-Riddle Aeronautical University in
Prescott, Arizona).
Perhaps the most amazing part of this model was that I managed not to
break off the pitot tube during all that sanding and painting!
The model is now on display at Hobby Island in Houston, Texas.
Click the thumbnails below to view larger images:
Model, Images and Text Copyright © 2004
by Toby Nelson
Page Created 29 March, 2004
Last Updated
29 March, 2004
Back to
HyperScale Main Page
|
 Home
| What's New |
Features |
Gallery |
Reviews |
Reference |
Forum |
Search
Home
| What's New |
Features |
Gallery |
Reviews |
Reference |
Forum |
Search