|
Nakajima A6M2-N Rufe
Floatplane
by
Ian Robertson
|
 |
|
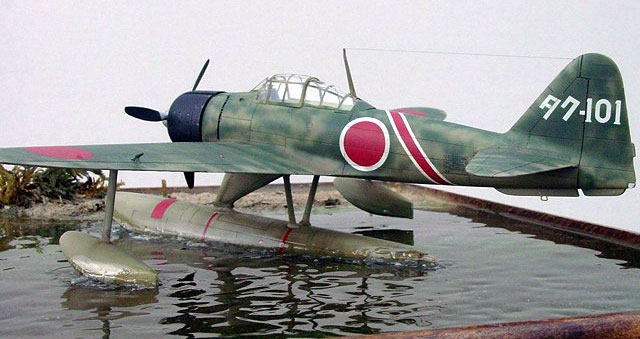
Nakajima A6M2-N Rufe
Floatplane |

Hasegawa's 1/48 scale Rufe is available online from Squadron
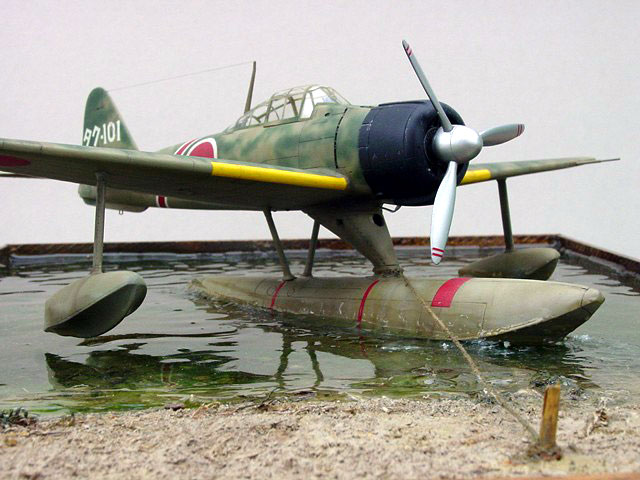
The Nakajima A6M2-N Rufe floatplane was derived from the A6M2 Zeke
fighter. The main changes in the Rufe were the elimination of the
landing gear in favor of a large center line float and two small
outrigger floats attached to the wings, and an increased rudder area on
the tail. There was also a small fin added to the underside of the rear
fuselage. The Rufe was intended as a practical solution to the reality
of island-hopping warfare in the south-Pacific, where construction and
maintenance of air strips was difficult.
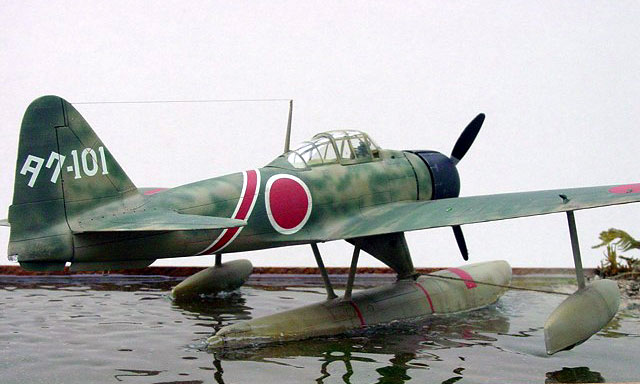
In this simple vignette I depict a Rufe moored in the shallows of a
lagoon in the south Pacific, sometime around 1942-43.
Construction
and Painting
|
Hasegawa's 1/48 Rufe is based on their superb Zeke series, with a
revised fuselage and lower wing, plus the floats and a dolly. The only
additions I made to the kit were etched metal seatbelts from Eduard and
a set of metal cross hairs to enhance the gun sight.
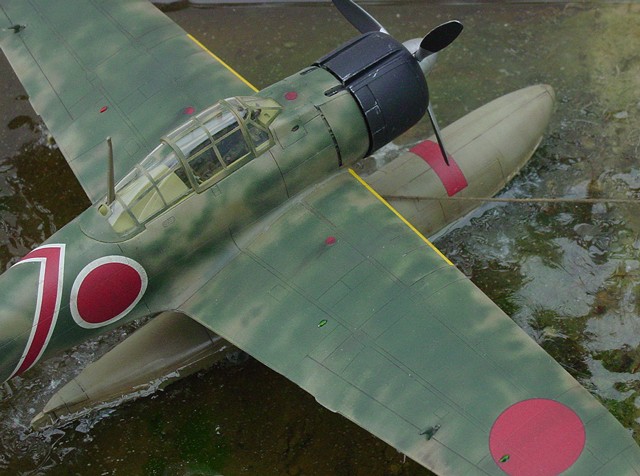
Hasegawa's box art (kit 09440) depicts a Rufe with green mottles sprayed
over a base color of Japanese Navy Gray. This base color has been the
standard interpretation for Japanese navy aircraft early in the war.
However, I opted for an alternative interpretation of green mottles over
Ameiro. Ameiro is often described as a light caramel color.
Using
reference photographs of downed Zekes from j-aircraft.com as a guide, I
mixed Tamiya Japanese Army Grey (XF-14) with Tamiya Khaki (XF-49) in
roughly a 90:10 ratio to simulate Ameiro. The dark green mottles were
sprayed freehand using Aeromaster's Japanese Navy Green acrylic.
The
cockpit interior was painted in Polly Scale Weyerhaeuser Green, which is
similar in color to Nakajima Interior Green.
The propeller and spinner
were painted with Alclad II Aluminum.
Prior to adding decals a clear coat of Future floor wax was sprayed over
the model. Most of the Hasegawa decals went on fine; however, the
hinomarus on the upper wing did not settle well over the navigation
lights. Normally I would tackle this problem with an application of
decal solvent, but experience has shown that Hasegawa decals often react
poorly to solvents. As an alternative, I dipped a cloth in near-boiling
water and then pressed it firmly over the decals for a few seconds. The
decals immediately conformed to the shape of the lights (thanks to Tom
Gloeckle for the tip). Once the decals were dry I sprayed a coat of
Polly Scale clear satin acrylic and clear flat acrylic in a 50:50 ratio
over the model.
The base consists of two parts. A simple frame constructed from four
strips of wood edging was attached with carpenter's glue to a wooden
bread board. The entire base was stained and then treated with several
coats of clear satin lacquer.
Within the frame I glued pieces of styrofoam to the bottom to create the
relief for the groundwork. On top of the styrofoam I added celluclay
mixed with water, white glue, and brown acrylic paint. A thin layer of
sand was then sprinkled over the wet celluclay. Near the shoreline I
added small stones and crumbled bits of dried moss to simulate debris
washing ashore. The groundwork was painted dark greenish-brown in the
deeper water, fading to light tan on the beach.
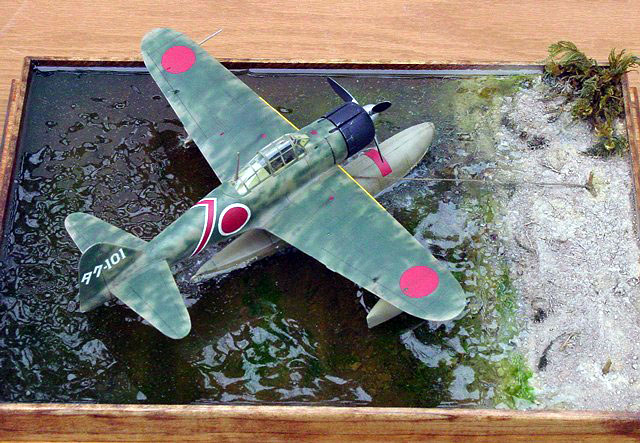
Water was simulated using EnviroTex Lite high gloss finish, a two part
epoxy that dries crystal clear in 24-72 hours depending on temperature
and thickness. I added the epoxy in several layers, letting each layer
set before adding the next. For the lower layers I tinted the mixture
very lightly with brown and green acrylics. (Be warned, just a speck of
color goes a very long way.) To simulate mats of algae in the water,
small drops of Tamiya clear green were added in patches once a layer of
epoxy had been poured.
The finished Rufe was placed into the first layer of epoxy before the
epoxy had set completely. Within hours the model was securely fixed to
the base. Three or four additional layers of epoxy were then added over
the next few days, using extreme caution to avoid any strings of wet
epoxy coming in contact with the model.
To create the appearance of gentle waves in the water, the end of a
paint brush handle was poked repeatedly into the top layer of epoxy as
it set. Timing was everything here. Initially the dimples made by the
brush handle simply filled in. Eventually, however, the epoxy had set
enough that the dimples would not fill in completely, leaving a subtle
rippled appearance on the surface. Drying time was accelerated using a
portable space heater.
To give the impression of splashing waves around the floats I used
5-minute epoxy tinted with a very small amount of white acrylic paint.
Just as the epoxy mixture began to set (i.e., after about 4 minutes)
I applied it with a toothpick around the base of the floats. The quick
curing time allowed me to manipulate the epoxy so that it appeared to
splash away from the floats.
Images of the completed model were taken outdoors on a bright
overcast day with a SONY digital camera set at its highest picture
resolution (2048 x 1536 pixels). Other camera settings were as follows:
200 ISO film speed, 400th/sec shutter speed, F-stop 8.0, and fixed focus
distance of either 20 or 30 cm. I propped up a sheet of drywall as a
neutral backdrop for the photographs. Images were cleaned up using Adobe
Photoshop 6.0 for the Macintosh. Specifically, each photograph was
sharpened using the "sharpen edges" tool. Sharpening images in such a
way helps to restore some of the clarity lost during image compression.
Click on the thumbnails
below to view larger images:
[file:///C:/Documents and Settings/Owner/My Documents/My Webs/features04/photogallery/photo23540/real.htm]
Model, Images and Text Copyright ©
2004 by Ian Robertson
Page Created 17 March, 2004
Last Updated 22 March, 2004
Back to HyperScale
Main Page
|
 Home
| What's New |
Features |
Gallery |
Reviews |
Reference |
Forum |
Search
Home
| What's New |
Features |
Gallery |
Reviews |
Reference |
Forum |
Search