|
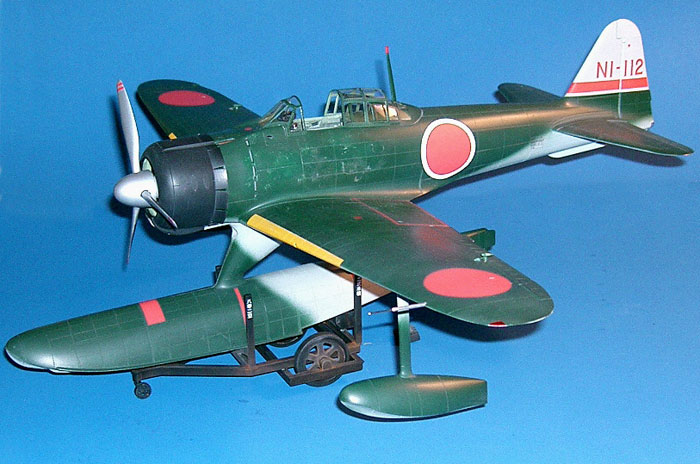
A (mostly) Trumpeter 1/24
scale
Nakajima A6M2-N Rufe
by Frank Mitchell
|
 |
|
Nakajima A6M2-N
Rufe |

HyperScale is proudly
sponsored by Squadron.com
Every once in a while, a kit comes out that gets lots of folk’s panties
in a twist due to problems of accuracy.
This, of course, appeals to my perverse nature and makes me want to
see if it can be fixed. In this case, I didn’t need much urging as I
have always liked the Rufe. In fact, I built a 32nd one years ago using
the old Horizon conversion set. It was even painted purple. Therefore,
this new kit was an obvious challenge that needed addressing. Once it
was finished, I thought some others might be interested in my take on
the kit and its problems.
I had read most of the reviews and commentaries that have appeared on
the internet and had also accumulated, over the years, at least a dozen
sets of drawings of the Zero. So, one evening when TV was dull (when
isn’t it?), I got them all out and played with the Trumpeter kit. I also
had a 24th Bandai late Zero kit which was added to the mix.
Correction and Construction
|
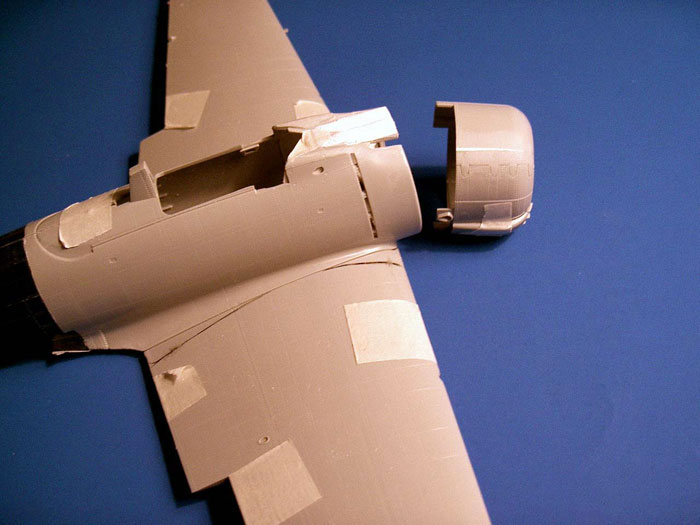
I decided that the main problem was the aft (really the middle),
fuselage. I thought the forward fuselage was fine, except for the area
between the gun bulges. Since the Bandai kit was never going to get
built anyway, out came the razor saw.
The photo below really tells the whole story in a nutshell. The Bandai
fuselage, from the main joint just aft of the cockpit, to a point just
forward of the horizontal tail was grafted into the Trump fuselage. The
two fuselages, by the way, matched almost exactly.
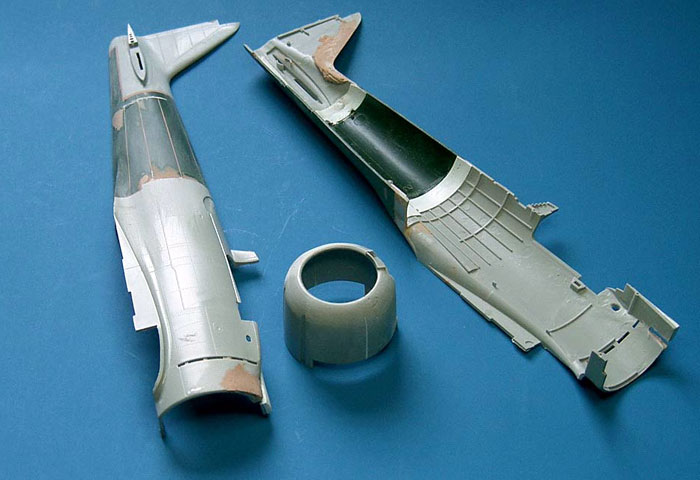
The area between the guns was built up with sheet styrene (see picture
below), and the cowling had wedges of styrene grafted in at the sides to
match. The wedges were 1/16th of an inch at the wide end. The vertical
fin (not the rudder) was modified on the leading edge, since that was a
different shape on the Rufe. Also re-shaped was the intake on the bottom
of the cowl to be much deeper and more rounded in the side view. The
additional fin on the bottom of the aft fuselage had to be replaced
since it had been lost in the surgery. The headrest was removed as it
was on most Rufes.
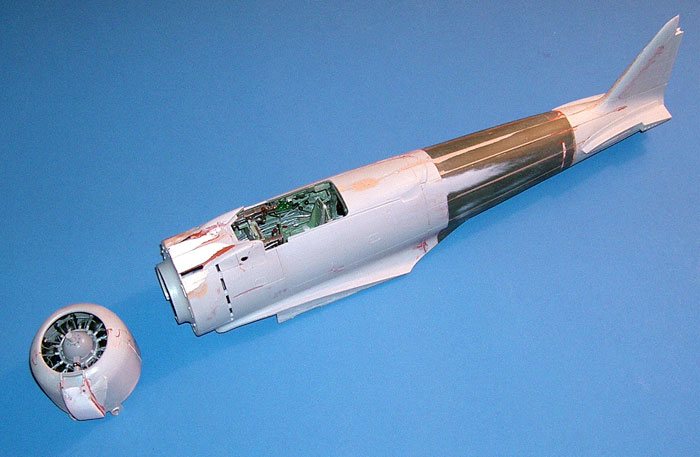
Obviously, some sanding, filling, and lots of re-scribing were
necessary.
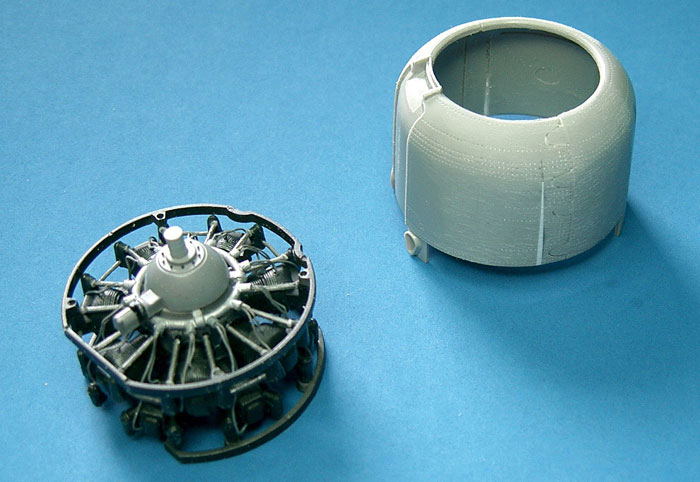
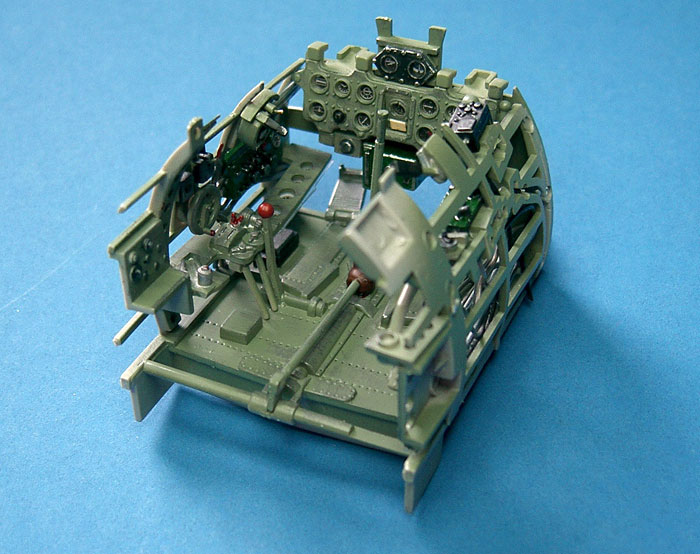
I know it sounds silly, but from here on, the model was built pretty
much out of the box. The engine and cockpit are really very nice and
although a bit of extra detailing was done, it wasn’t very much.
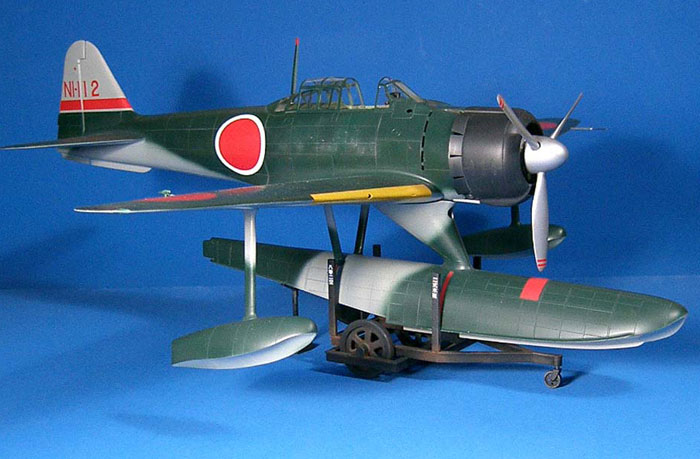
The fit of the kit is good, except for the wing tips, which, in my view,
are an excellent example of why movable parts aren’t all that neat. All
the surfaces were, by the way, glued in place.
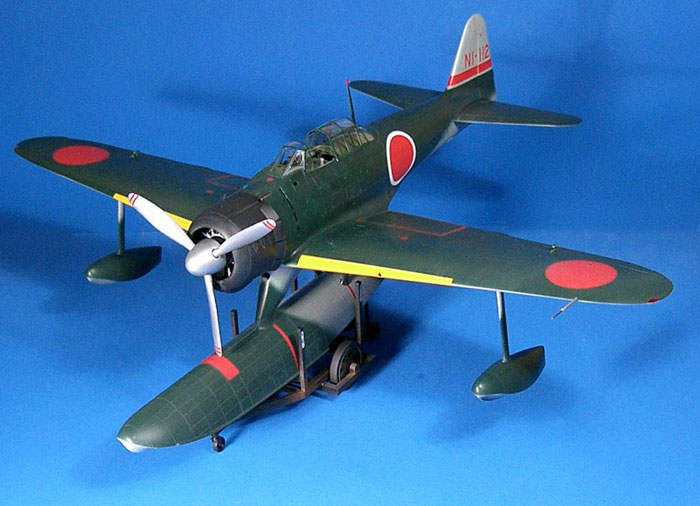
The model was painted with Gunze N1 and IJN Gray and one of the kit
markings was used. The supplied decals were very good. A bit of
weathering was applied using some Rub ‘N Buff and a piece of cotton
along with spraying some lighter and darker areas here and there.
You can decide for yourself if the corrections I used accomplished
their purpose. I am satisfied with the result; it really is a unique
airplane and the process of correction was interesting.
Click on the thumbnails
below to view larger images:
Model, Images and Text Copyright ©
2004 by Frank Mitchell
Page Created 29 October, 2004
Last Updated
29 October, 2004
Back to
HyperScale Main Page |
 Home
| What's New |
Features |
Gallery |
Reviews |
Reference |
Forum |
Search
Home
| What's New |
Features |
Gallery |
Reviews |
Reference |
Forum |
Search