|
Tamiya's 1/48
scale
A6M3 Model 32 Zero
by Roger Fabrocini
|
 |
|
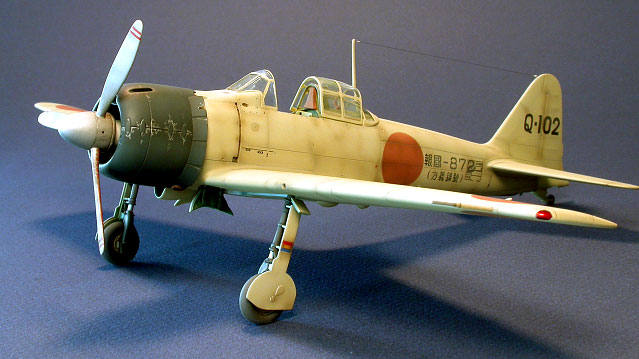
Mitsubishi A6M3 Model 32 Zero |

Tamiya's 1/48 scale A6M3 Model 32 Zero is available online from Squadron
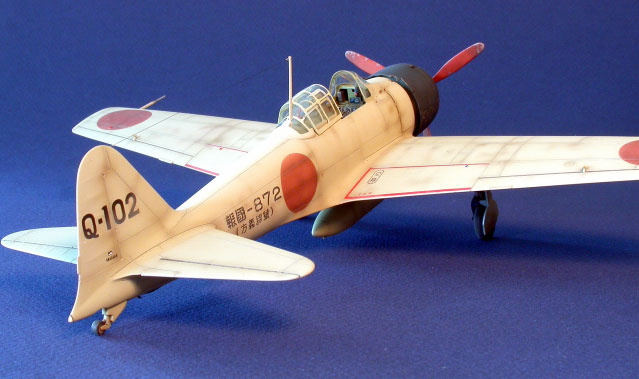
This is Tamiya's 1/48 scale A6M3 model 32 Zero Fighter (HAMP).
TAMIYACON snuck up on me this year. It was mid March when i looked up
from my workbench long enough to read a post on Hyperscale's Plane
Talking Forum asking who was going to this years competition, scheduled
for April 8 & 9. With only two and a half weeks to work with whatever I
entered would have to be Out-of-the-Box and simple, i.e.: single engine
prop., to make the deadline.
A quick inventory of my stash offered up many
possibilities which I finally narrowed down to Tamiya's A6m3 HAMP. It
fit my requirements, had a single color paint scheme and I looked
forward to the challenge of trying to bring a 20+ year old kit up to
current and competition standards.
The first order of business was to put the HAMP on a
"diet". I inventoried all the parts that would need to be thinned down
to scale thickness. these included Landing gear doors, cowling flaps,
pilots seat, and cockpit canopy and windscreen. The most challenging
were the clear parts. I used a method I tried last year on my 1:72
Tamiya F4U, That is using a cone shaped dremel grinding bit, held
parallel to to surface to thin the part. Micro-Mesh pads are then used
to remove scratches and ridges followed by their Micro-gloss liquid
polishing compound.
The next major step was rescribing. The Tamiya 'family'
of Zeros all have a combination of raised and engraved detail. Though I
truly wanted to work with the raised detail as a modeling challenge, I
saw no way to replace raised detail lost during construction. Most of
the raised detail/panel lines are straight though, making the job
easier.
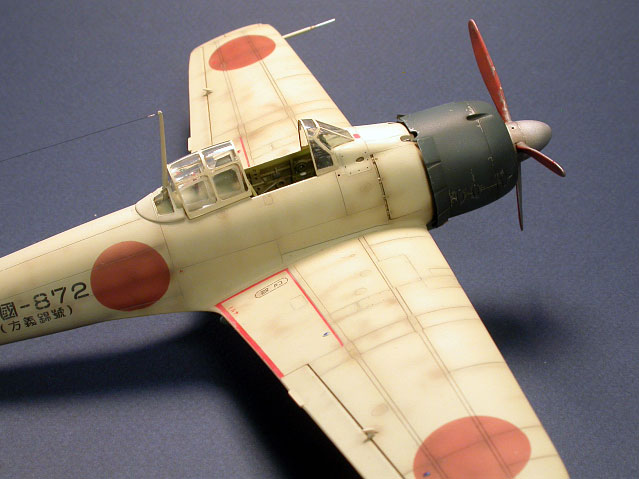
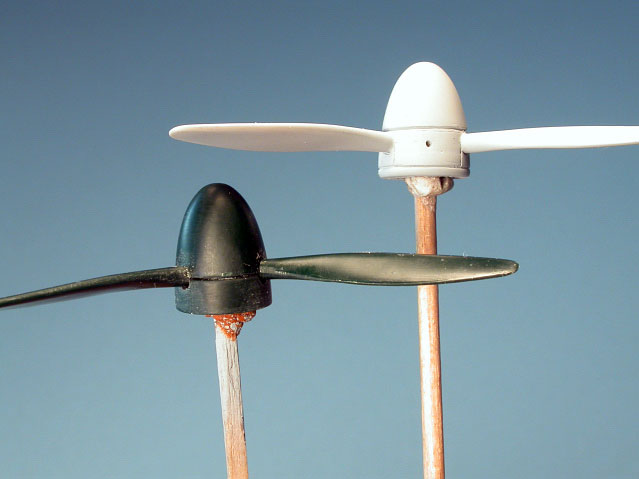
The one major panel line correction concerns the
spinner. There are two panel lines, one in front of the prop blades and
one at the base of the spinner (Tamiya splits the spinner at the
blades).
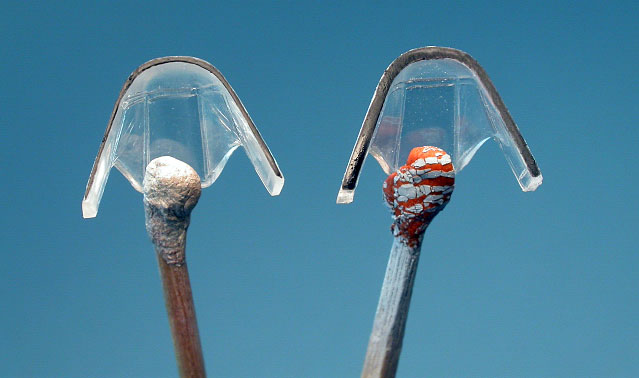
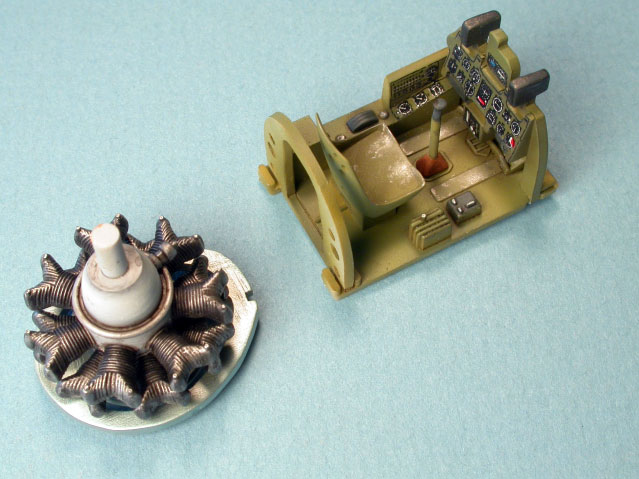
One of the real deficiencies of the Tamiya Zeros is the decal instrument
panel. It is well printed, but one dimensional. I tried to solve the
problem by first Appling the decal then flat coating it. I made two
sizes of embossing tools out of brass tubing by sharpening the ends with
a dremel bit. I used them to emboss circles around the printed
instruments, then I filled the circles with future to simulate glass.
The last modification was to ‘dent’ the drop tank by creating flat spots
with a sanding stick which I then sanded smooth.
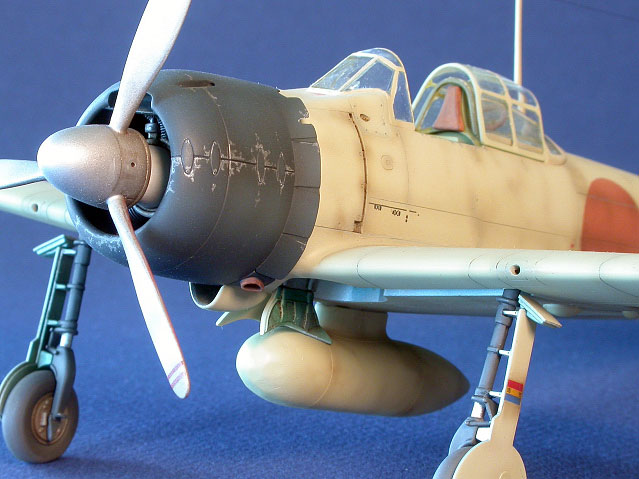
Because of time restrictions I choose the simplest paint scheme, IJN
Gray with a Black engine cowling. I used Mr. Color lacquer based paints
over preshaded Mr. Surfacer 1200. The IJN Gray is a custom mix of #127
Nakajima cockpit green, #128 Gray Green and #336 Hemp (bs4800/10821). A
mixture of Hemp and flat white was added to the mix to achieve the
weathered effect. The Cowling is #125 Cowling color with #305 FS36118
added to weather and shade it.
The Aotake is a mix of Tamiya clear blue and clear green over Alclad
dull aluminum.
Cockpit areas are #126 Mitsubishi cockpit color.
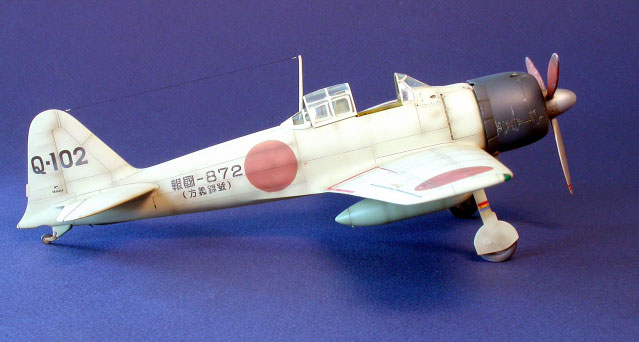
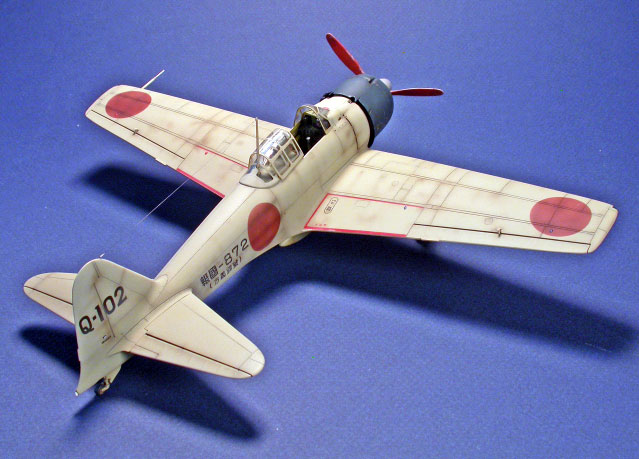
The Hinomarus are painted using a Andrea acrylics mix of Dark leather,
brown leather and wood.
Data are from the Dry Transfer set by HobbyDecal. The balance of the
markings are from the kit.
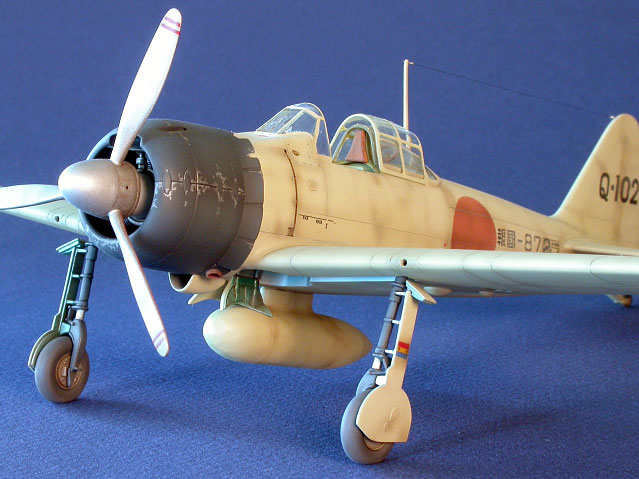
Weathering was achieved by post shading using a heavily thinned mix of
Tamiya Red-brown and Black sprayed through a Iwata Custom Micro b
airbrush. The markings were toned down using a mixture of Hemp and flat
white. The panel lines were accented with a wash of Vallejo #101
Green-Gray. Final finish is Humbrol Matt Cote. Paint chips on the
cowling are done with a Prismacolor silver colored pencil.
By any standard this was a very enjoyable and satisfying
build.

I was surprised just how much fun and challenging it was
to build “out-of-the-box” (and how much easier it is.), giving me a new
perspective on model building.
Click the
thumbnails below to view larger images:
Model,
Images & Text Copyright © 2006 by
Roger Fabrocini
Page Created 19 May, 2006
Last Updated
18 May, 2006
Back to
HyperScale Main Page |
 Home
| What's New |
Features |
Gallery |
Reviews |
Reference |
Forum |
Search
Home
| What's New |
Features |
Gallery |
Reviews |
Reference |
Forum |
Search