|
Fine Molds'
1/48 scale
A7M2 Reppu "Sam"
by
Jay Laverty
|
 |
|
Mitsubishi A7M2 Reppu
"Sam" |

HyperScale is proudly supported by Squadron.com
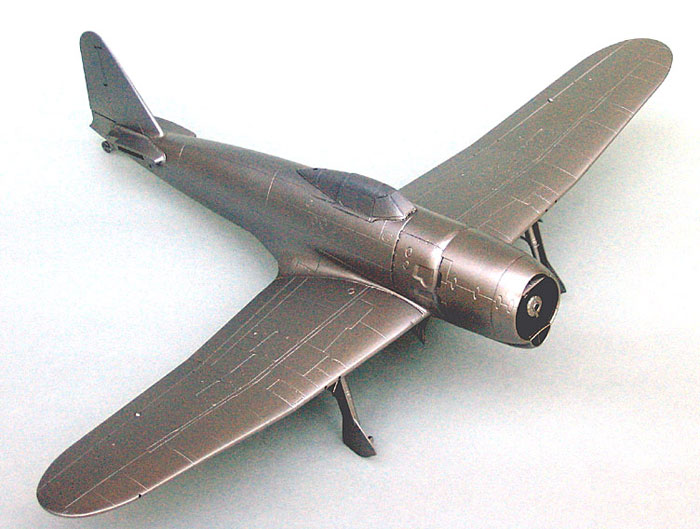
This is Fine Molds' 1/48 scale Mitsubishi A7M2 Reppu (Sam).
Inside the box are three sprues of light grey injection moulded
plastic, a clear sprue and a two part decal sheet that lives up to fine
molds high standards. There are about 55 pieces and the level of detail
is to be admired. A look through the instruction sheet reveals a
straightforward build that has been well thought out and only a couple
of deviations will be required in the interests of painting.
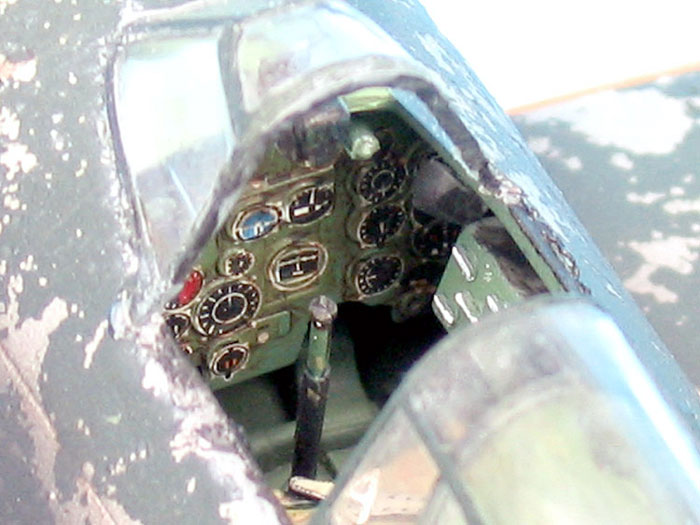
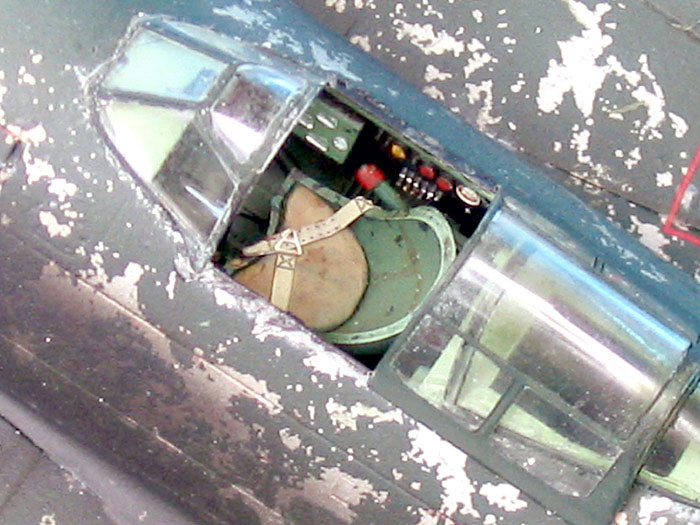
As usual construction starts with the cockpit and the interior walls
of the fuselage. The cockpit is well detailed, but also leaves room for
super detailing as I’m sure levers and wiring could be added. The fit in
here is impeccable and the cockpit is built and ready for spraying in
about 20 minutes!
A couple of greens will be needed in here, as the instructions call
for Nakajima IJN Green as well as Mitsubishi Interior Green. I’ve used
Tamiya XF-26 (Deep Green) as the Mitsubishi Green lightened with XF-71 (
IJN Cockpit Green) spayed on in thin coats. I then over spayed the
entire cockpit with a lightening shade of XF-71 to blend, weather and
lighten the detail. With the cockpit assembled and painted, I am going
to make the first of the construction modifications.
Step three requires the assembly of the nose of the fuselage and
securing the instrument panel to its interior. Rather than following
this step with step four I have chosen to jump to step six and build ,as
well as attach, the engine to the front of the fuselage nose. This, I
hope, will make painting a lot easier and speed up the construction
process. Not having a photograph of the actual engine to work from I
used some reference of the Zero’s as a guide to supplement the
instruction sheets recommendations. The engine was sprayed flat black
overall with the pistons then being dry-brushed gunmetal. The front of
the shaft housing was dry-brushed with model master chrome silver over
gunmetal and the tubing was painted with brass. This was all then given
a wash in peat brown ink.
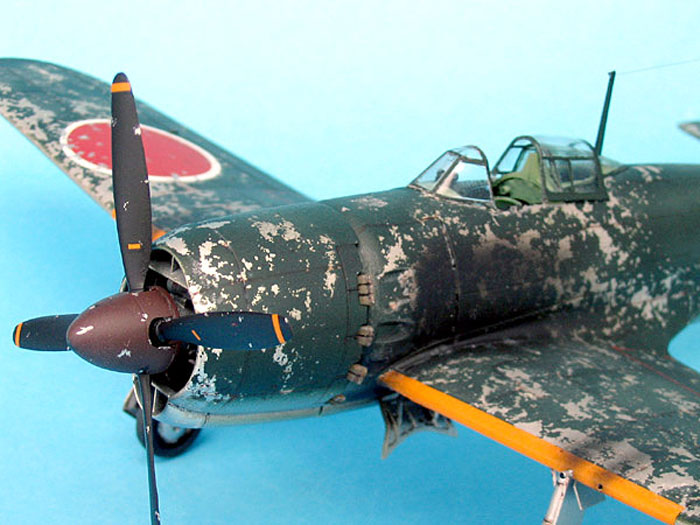
Step seven is the cowling assembly and here also I have made a slight
change of plan. Rather than attach the exhausts I have chosen to
assemble the cowling and attach them after the aircraft is painted. By
doing this will be able to use instant rust to weather them without
damaging the finish as they fit very tightly along the edge of the
cowling. This won’t pose any problems getting them in afterwards as the
cowling can be secured with PVA glue for painting and simply removed
afterward and the exhausts glued into place. This complete leaves only
the undercarriage as the sole major components left to be built.
With everything assembled save the rear stabilisers the Reppu is ready
to be painted.
Painting,
Markings and Weathering
|
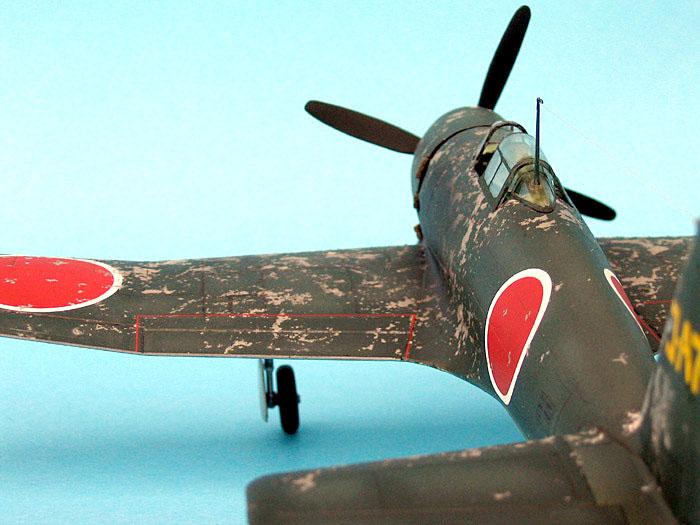
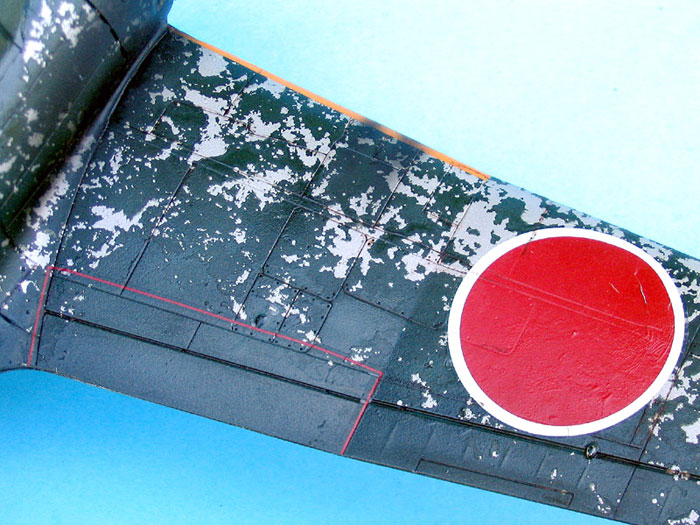
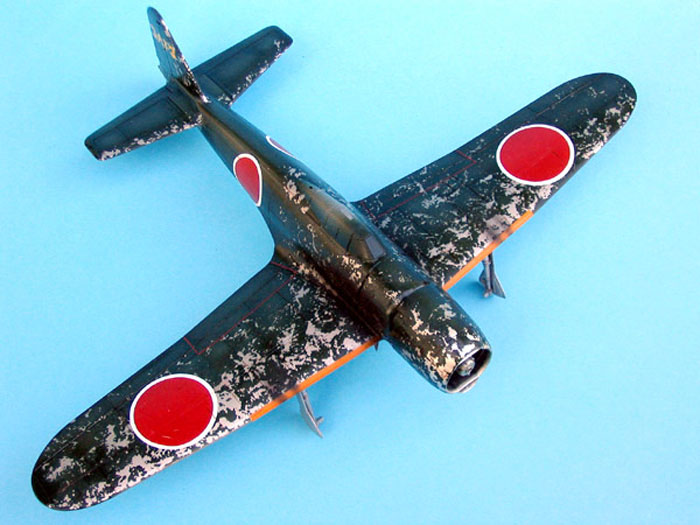
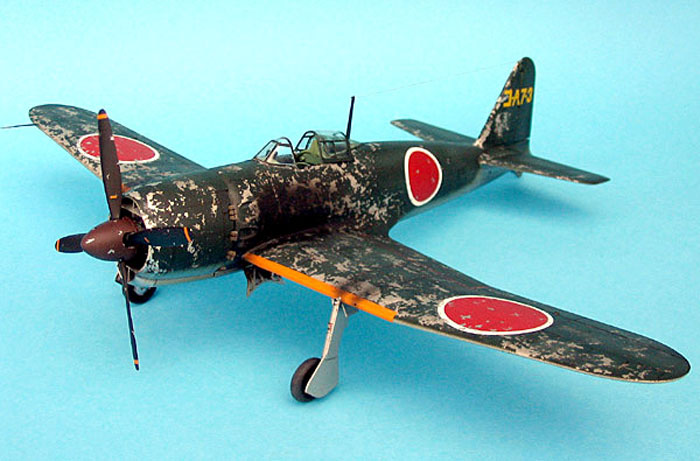
As I have chosen to go out on a limb and try out the salt weathering
technique on this model I have chosen to use Alclad to represent the
metal surfaces.
The surface is primed with Alclad's grey primer although to get a
gleaming polished finish it is recommended to use Alclad's gloss black
primer. I don’t want too reflective a surface as I want this plane to
look like it is in service and I can’t see these things getting TLC at
the front in 1945.
A few adjustments must be made when spraying Alclad, namely turning
the compressor down very low pressure otherwise you will end up with a
very unhealthy cloud quickly filling the room.
I really enjoy spraying with Alclad as it goes on the model with
great consistency and while it takes a while to build up a coat it
covers well and does not obscure any detail, and has the added bonus of
being usable straight from the bottle not needing to be diluted. As the
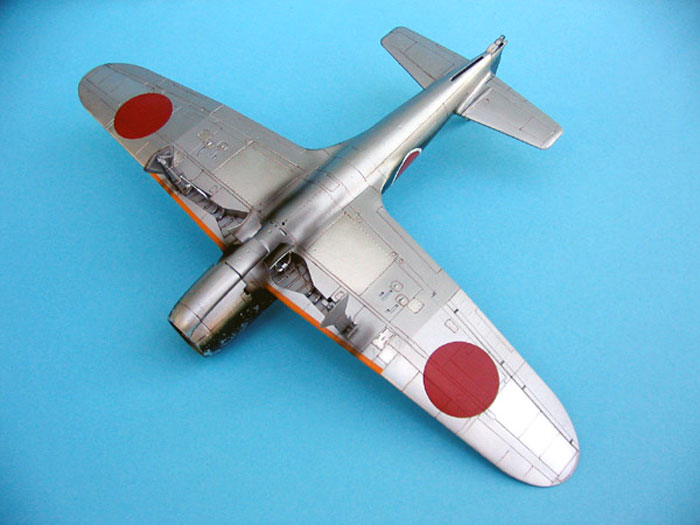
upper surfaces will be covered in IJN green they will receive only one
tone which will be polished aluminium, while the bottom will receive
polished aluminium as a base then some panels will be picked out with
Duraluminium and Chrome.
Once the Alclad has dried a coat of Gloss varnish is applied in order
to protect it from the salt.
Applying the salt is easier than you would think and to make it even
easier I’ll break it down into steps for you.
-
Mix a small amount (three tablespoons
will do this entire model) with an even smaller amount of water
until it reaches a slushy consistency. Basically there should only
be enough water to make the salt malleable.
-
Using a flat brush, dab the mixture
on to places you feel would suffer the most wear and tear and work
relatively quickly as there is not a lot of time before it dries.
-
Once you are satisfied spray the
final colour(s) over top on a low pressure otherwise you will simply
blow the salt off.
-
Once this has dried take a stiff
brush, or preferably a toothbrush, and with great patience "scrub"
the salt away.
It is that simple.
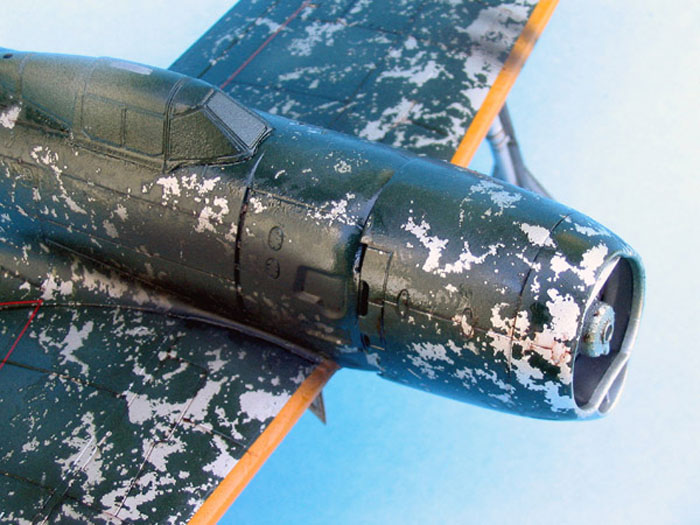
This technique will work on any model so don't be afraid to try it
and one other thing, don’t worry about the white stains that will appear
when varnish is applied over top as this will go away in a day. I
applied gloss varnish over the finished to protect it when the decals
are applied and the Brown peat ink is applied to the panel lines.
The next stage in weathering is to apply Xtracolor exhaust to the
fuselage just behind the exhausts and in thin streaks behind the machine
gun ports on the wings. With these tasks complete the upper surfaces
will be matted down using Poly-S matt varnish, while the underside can
be left gloss.
Now the completed undercarriage is added the canopy unmasked and the
radio wire added.
I hope you find this article informative and useful even though it's
not a groundbreaking new technique, although some of you may not have
seen it before.
I believe that it has applications in any field of modelling although
you will need to keep in mind the relativeness of scale and varying
effects of weathering on your chosen subject.
Click
the thumbnails below to view larger images:
Model, Images and Text Copyright ©
2004 by Jay Laverty
Page Created 01 October, 2004
Last Updated
02 October, 2004
Back to
HyperScale Main Page |
 Home
| What's New |
Features |
Gallery |
Reviews |
Reference |
Forum |
Search
Home
| What's New |
Features |
Gallery |
Reviews |
Reference |
Forum |
Search