|
Classic
Airframes' 1/48 scale
Avro Anson Mk.I
by
John Valo
|
 |
|
Avro Anson Mk.I |

Classic
Airframes' 1/48 scale Anson Mk.I is available online from Squadron.com
For a detailed examination of the kit
contents, see
Brett Green's in-box review here on HyperScale. You may also
view John's SAAF Anson by following this link.
At long last, one of my all-time favorite aircraft has been released
in 1/48 scale by Classic Airframes. The Anson Mk.I is the latest from
the CA stable, and it is a beautiful effort.
In typical CA style, the kit features injection-molded major parts, with
an exquisite resin interior and a small photoetch fret incorporating an
instrument panel, seatbelts and miscellaneous small exterior details.
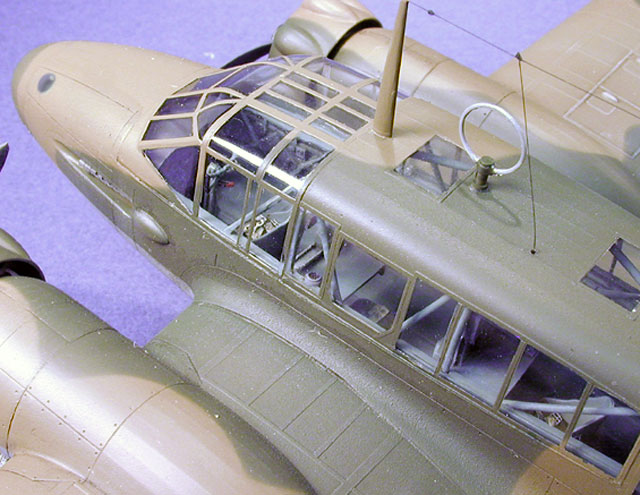
The kit is very well engineered and executed, especially the greenhouse
parts (two pieces) incorporating all the windows and upper fuselage.
Yes, it takes a while to mask, but the parts are crystal clear and very
thin.
Their fit to the assembled fuselage is excellent.
I took somewhat of a 'shotgun' approach to assembly, assembling the
wings and nacelles as units, then assembling the very convincing
fuselage interior cage while other stuff was drying. The interior is
very well done, and the photoetch belts and panel really add a lot to
the model, as everything is visible. The interior fits well into the
fuselage, with only a touch of filler necessary to blend in the turret
fairing.
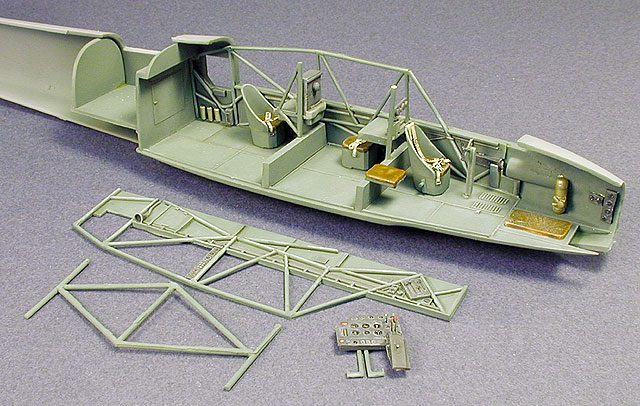
A nice option is a part is provided to make a turretless Anson if you
should desire.
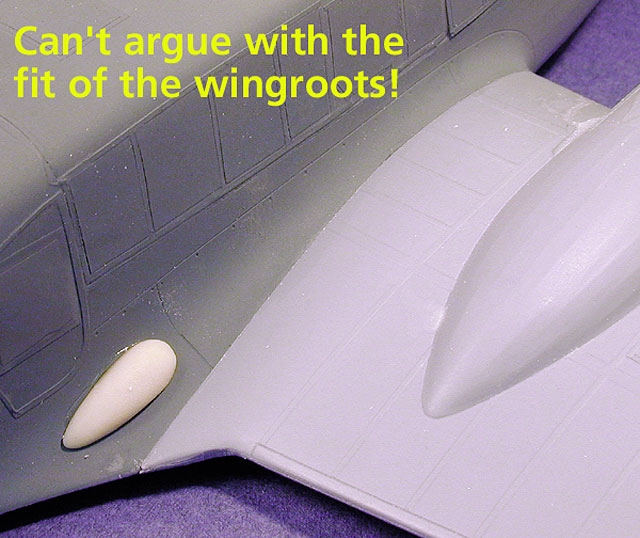
Wing root fit is exquisite. I glued the completed wings to the assembled
fuselage making sure the upper roots were as flawless as possible. A
slight squeeze to the bottom roots was all it took to achieve a good
fit.
I elected to mask and paint the clear upper fuselage parts before
assembly, and mercifully upon unmasking, I was relieved to have not left
any fingerprints on the inside! The stabilizer fit is also excellent.
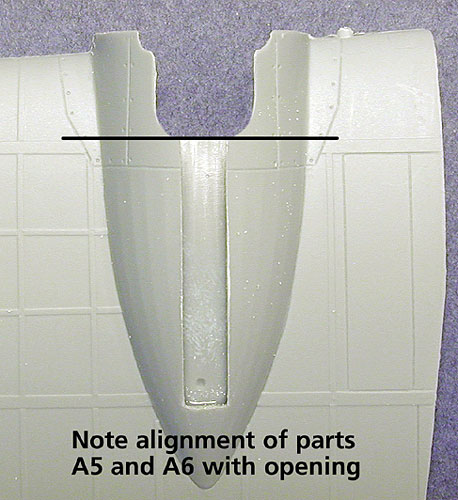
The only potential head-scratchers were the wheel wells, as I went back
and forth fitting the roof and bulkhead in various positions, then
comparing the gear leg position to photos. As shown in my photo, all you
need to do is install the wheelwell roofs (parts A5/A6) to fit the well,
then trim and attach the bulkheads A14/A15 to the front edge of the
roofs. I did need to sand them back a bit in diameter, but once fitted,
no problems. Be sure to dry-fit the gear legs in position; I needed to
slightly widen the wheelwell openings where the struts protrude.
Clear parts also include a number of options: two different noses, an
astrodome, navigation lights, wing-mounted landing lights and a number
of small circular windows which fit into flashed-over holes in the
fuselage halves. Ansons had many variations of these, so the provision
of the extra parts is welcome.
An interesting and enlightening feature of the kit is the provision
for extended ailerons. I had no idea this was a feature of very early
Ansons, but it's nice to be provided.
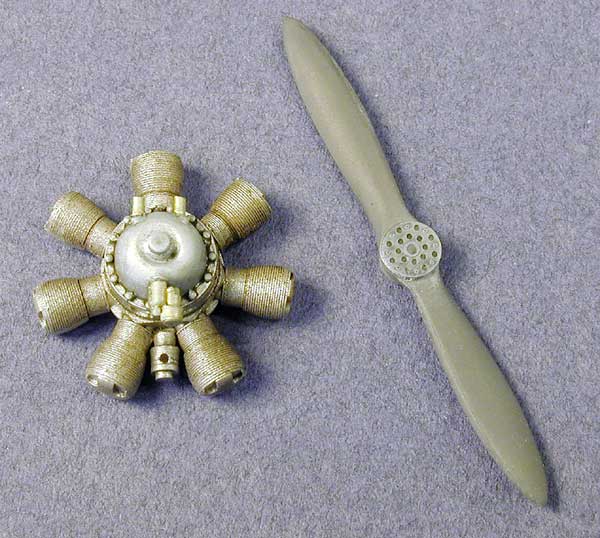
The engines are nicely detailed. The bulged cowlings need to be
carefully test-fitted when cleaning up the resin engines. If you
carefully sand only enough off the tops of the cylinder heads, the
cowlings will slip on and align perfectly.
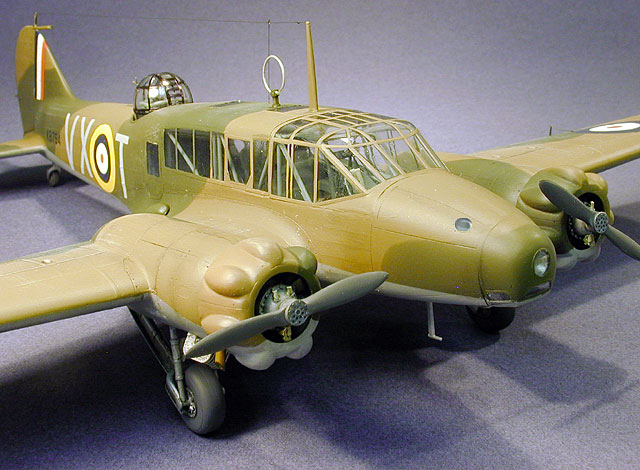
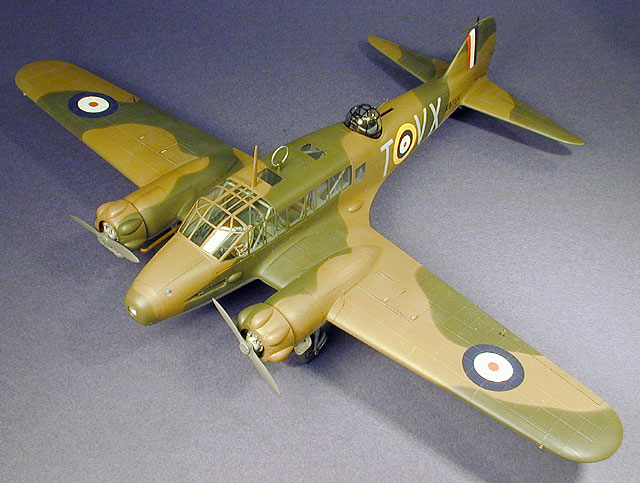
I finished my Anson with Polly Scale acrylics.
The usual Microscale-printed decals performed perfectly. I had some
concerns with applying the decals, as when I was building the kit, the
atmosphere was at about 120% humidity! No problems at all.
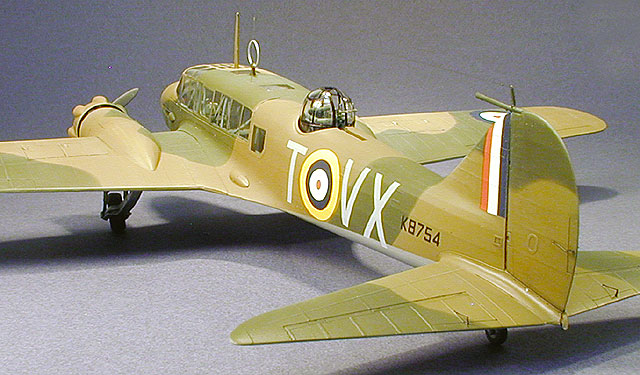
This is a great kit that really fills a long overdue gap in the
collection.
Highly recommended!
Click the thumbnails below to view larger images:
Model, Images and Text Copyright © 2006
by John Valo
Page Created 25 July, 2006
Last Updated
01 August, 2006
Back to
HyperScale Main Page
|
 Home
| What's New |
Features |
Gallery |
Reviews |
Reference |
Forum |
Search
Home
| What's New |
Features |
Gallery |
Reviews |
Reference |
Forum |
Search