|
1/48 scale Hasegawa
conversion
Arado Ar 234 V6
by Frank Mitchell
|
 |
|
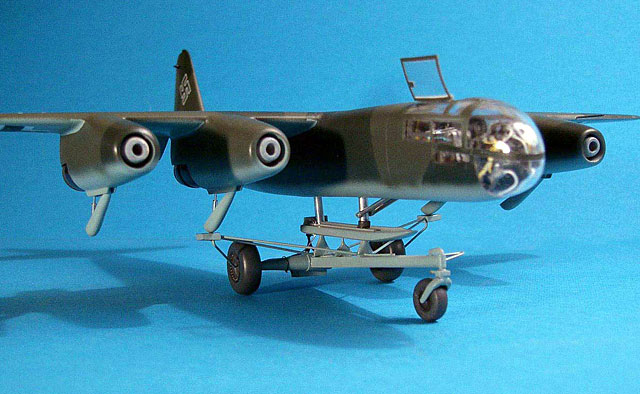
Arado Ar 234 V6 |

ProModeler's 1/48 scale Ar 234C
is available online from
Squadron
Another prototype; this time in 1/48 scale...
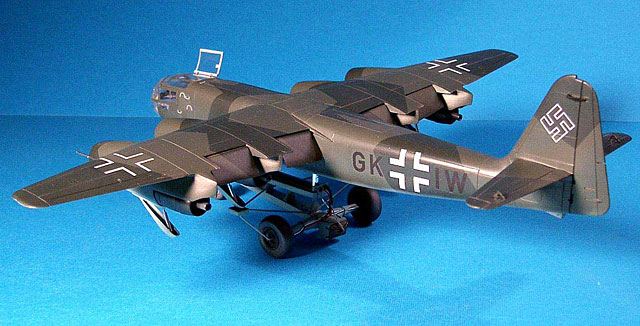
Of all the Arado 234 variants, I have always
thought the V6 prototype was the coolest looking. Something about the
four separate engines and the way it sat on the take-off trolley just
looked neat. I had had drawings for a 32nd version for a
number of years, but the nice 48th Hasegawa kit made me
decide to give it a shot in that scale. This is obviously a 2-stage
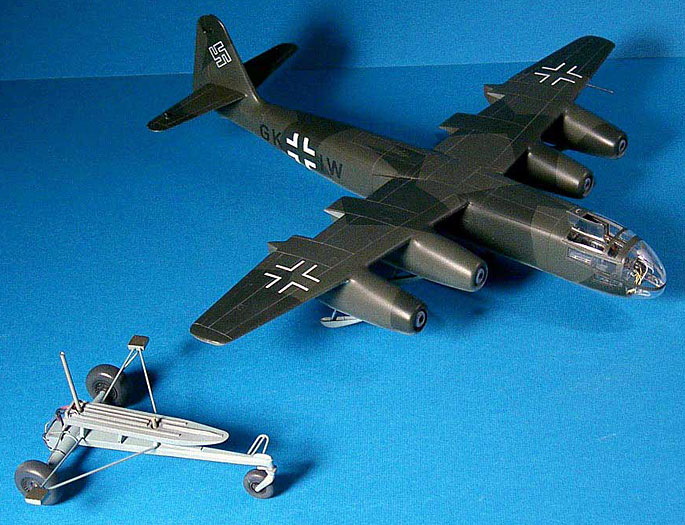
model; one the airframe, the other the trolley.
The Aircraft
It is always satisfying to find that respected references are wrong, and
I found a couple in the building of this model. For example, every
drawing I could find on the V6 showed the engine nacelles to be the same
as on the production version. Not true, as even a cursory look at the
pictures of this airplane will show. The nacelles are longer and
“leaner’ than on other versions. Of course, the reason for that is that
it was powered by BMW 003 engines, as opposed to the 004s of the other
versions.
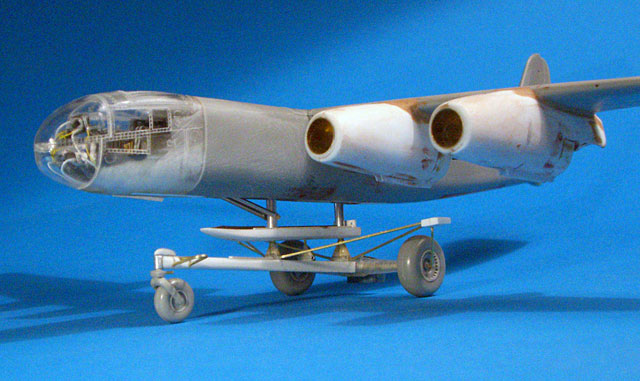
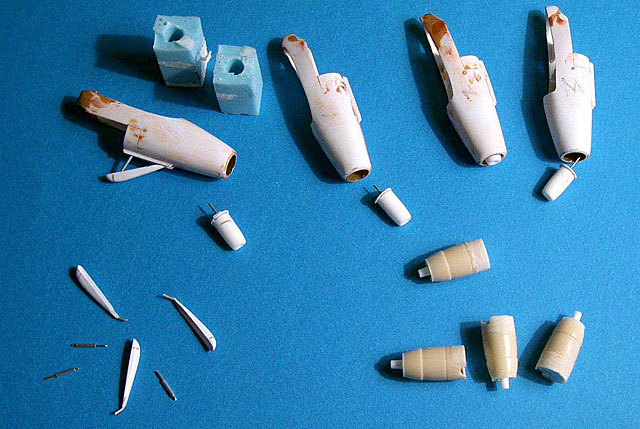
In any case, four new engines had to be made, so I used a kit engine as
a basis to make a master from which I made eight halves via
heat-and-smash. These were assembled and four aftermarket rear engine
nozzles were fitted. Two RTV molds had to be made for the unique intake
cones and the exhaust centerbodies, and four of each were molded from
resin.
Once finished, the engines were attached to the wing, which had been
assembled earlier. The wing, by the way, was assembled using a slightly
bent brass tubing spar. This was a trick I learned from a master many
years ago—if you have a wing with zero dihedral, always build in 1-2
degrees of dihedral and it will appear to be straight. If you don’t do
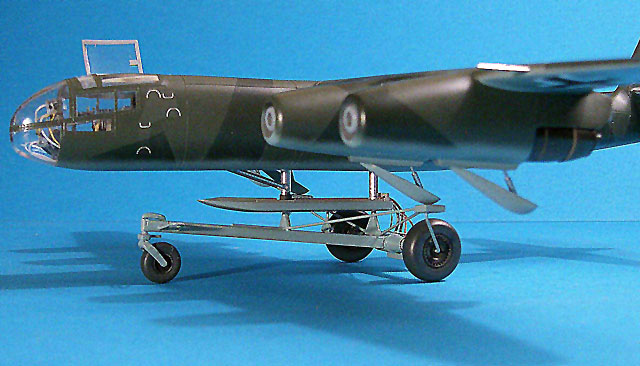
that, it can appear to have anhedral. The flaps were also lowered just
because I liked the look of them. The four skids under the engines were
vacuum-formed and the retracting struts made up from brass tubing.
The fuselage was assembled as per the kit, except that I used an
aftermarket interior and detailed it a bit—that nose is awfully open. I
had an aftermarket canopy set, but went with the kit parts.
All of the reconnaissance windows were covered over, as were the landing
gear doors and the periscope in the cockpit. A piece of styrene was used
to plug the stores hole in the bottom of the fuselage and a well cut to
match the skid.
The Trolley
Once construction was pretty well finished on the wings, work on the
trolley began. The construction is pretty obvious from the photos.
Although I had been dreading the trolley, but it turned out to be a lot
of fun. The only tricky parts were turning the rear axle (it has
noticeable taper) and soldering the main supports.
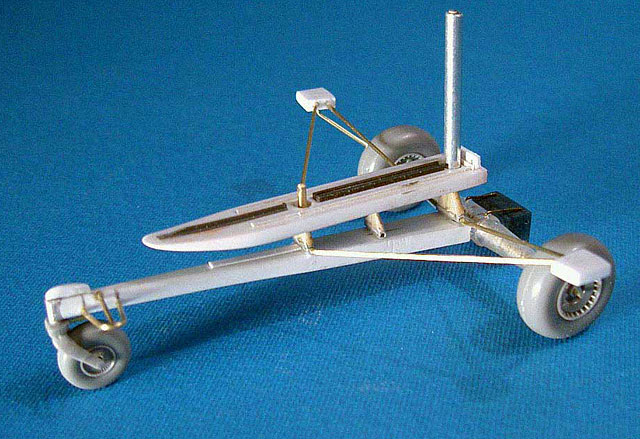
The kit wheels and nose gear strut were used and the axles were mounted
on a 1/8th inch styrene keel. From there it was just adding
one little piece at a time until it looked right.
Gunze paint was used, the airframe being the usual 70, 71, 65. I wasn’t
sure about that, but that was what the Monogram book said so I used it.
However, the same book also said that hard edges on the camouflage were
used throughout, but the pictures show that a pretty soft line separated
the blue from the greens.
Kit decals were used except for the code letters, which were done on the
computer.
I had no idea what color to use on the trolley but after staring at
pictures for a while I went with RLM 02.
Not much weathering was applied; after all, the thing only flew six
times, so how bad could it get?
In all, another fun build of a rare variant of a pioneering aircraft.
Click on the thumbnails
below to view larger images:
Model, Images and Text Copyright ©
2006 by Frank Mitchell
Page Created 22 February, 2006
Last Updated
21 February, 2007
Back to
HyperScale Main Page |
 Home
| What's New |
Features |
Gallery |
Reviews |
Reference |
Forum |
Search
Home
| What's New |
Features |
Gallery |
Reviews |
Reference |
Forum |
Search