|
Revell's new
1/32 scale
ASK 21 Glider
by
Jay Laverty
|
 |
|
ASK 21 Glider |

Revell's 1/32 scale ASK 21 Glider will
be available online from Squadron.com
Surely Not Me...
When Tony Cowell came into the office and showed me this test shot of a
forthcoming Revell civil glider I was very surprised.
A 32nd civil glider from Revell?! Surely it was a wind up.
|
Summary |
|
Catalogue Number &
Description |
RV4224 -
ASK 21 Glider |
|
Scale |
1/32 |
|
Contents and media |
Several white coloured sprues,
along with a single clear canopy sprue. |
|
Price |
£12.99 in the UK from
Hannants |
|
Review Type |
Build |
|
Advantages |
A superb model that builds
quickly |
|
Disadvantages |
Choices for painting are
white, white and at a stretch...white. |
|
Recommendation |
Highly recommended |
As I looked over the sprues in their innocuous clear plastic bag, it
began to dawn on me what a stroke of genius this release was. While
other companies are re-treading the same old airframes and others are
desperately seeking that obscure Axis fighter or bomber that somehow
hasn't been kitted yet, Revell go and do something that is so common it
is out of the ordinary. You will find an ASK 21 at pretty much every
Gliding Academy in Europe and the world for that matter, yet I had never
heard of it until I saw this test shot.
It began to dawn on me that I should build it.
You know that voice that compels so many of us to build subjects we
would never have dreamed of until we look in the box and that third eye
envisions what we can do to those sprues of lifeless plastic. So I asked
Tony that all to common question “ Are you going to build it?” half
knowing the answer and hoping it would be “no.”
Sure enough I was walking home with the test shot that night.
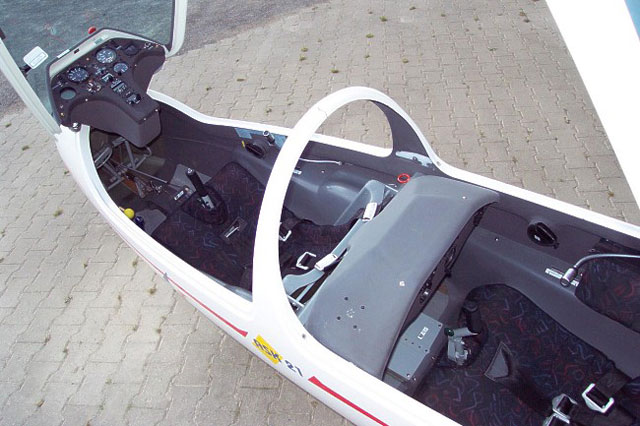
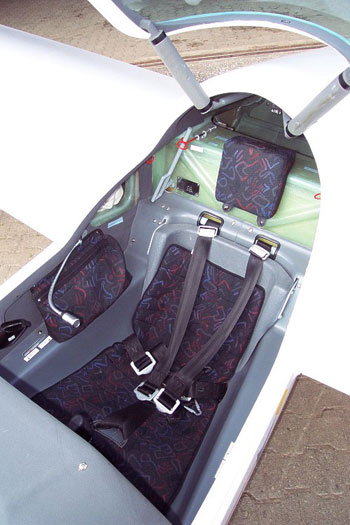
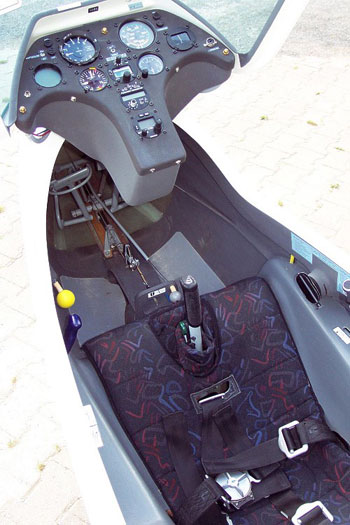
Reference Images:
Click
the thumbnails below to view larger images:
A Bit of a Laugh
I took the test shot up into my loft and scurried it away into a dark
corner so that none of my modelling buddies would see me with a civil
subject. Then I began to test fit it, and it was obvious right away this
wouldn't take long to build. ( In fact this article is probably going to
take longer towrite!)
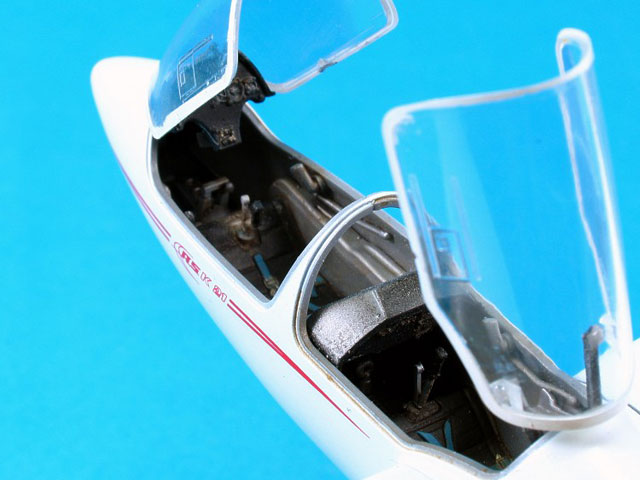
Before I realised what had happened the cockpit was ready for primer.
Fitting it to one side of the fuselage (having filled some rather
inconveniently located ejector pin marks with dissolved putty) I primed
it and had it painted and ready for washing in an evening.
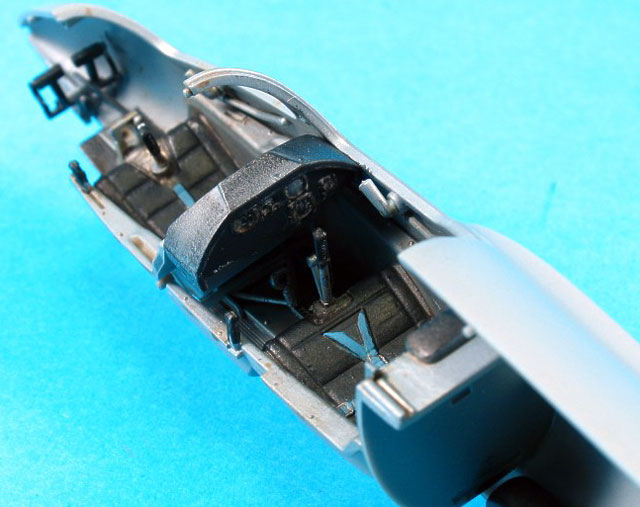
As the test shot was minus the decal sheet I had to make do the old
fashioned way and paint the instrumentation in myself. I did a fairly
average to below average job and I sorely wished I had the kit decals
from the beginning when I saw what Danny Coreman and Daco productions
had done for Revell with the decal sheet.
Once the cockpit had been washed and matted down, the fuselage halves
were joined ( after adding the wheels of course! ) And the model was
very near completion.
Canopy masked, the wings were added, and this is when the plane really
starts to impress. It just looks so cool with the massive wingspan and
shows some very graceful lines.
I then painted the entire model - wait for it - white.
Not a lot of finishing
And so the model sat, neglected and alone in the corner, waiting for me
to build up the courage to spray some markings on it. Fortunately this
never happened and the kit suddenly appeared in a delivery and I
scampered with a set of decals from a “damaged” box.
As I mentioned earlier, the decals have been designed by Daco and really
are superb. There is even an US Air Force option. But before you get
your hopes up that one is white.
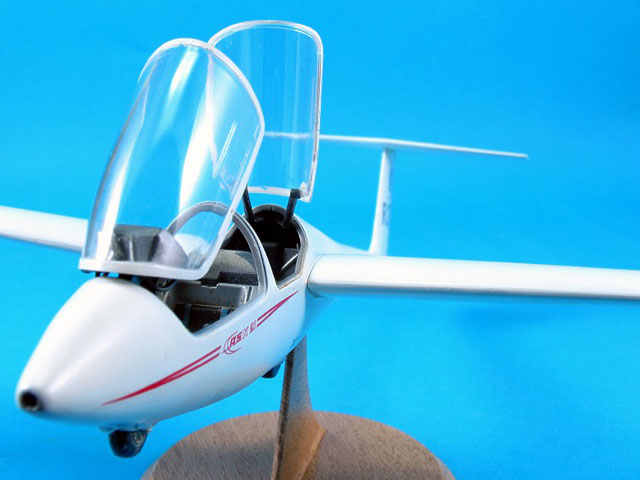
Being ever the patriot ( with indefinite leave to remain no less! ) I
chose to use the RAF Malton based “Team Condor” markings as they tickled
my fancy. Besides if you squint and look closely at the lo viz roundel
on the fuselage, it almost looks like a Vulcan.
I used a smattering of a wash to finish the model, mounted it on the
stand and took some pictures.
In case you hadn't figured it out by now, I heartily recommend this kit
for a change of scenery if nothing else. I enjoyed building it, and it
is definitely not a challenge so it will be a great kit for kids to
build, and can easily be built to a high standard in a weekend.
My thanks go to Tony Cowell at Hannants for the test shot, and I also
would like to thank Manfred Munch and the people at Schliecher for
providing me with assistance and resources for the print article which
will appear in SAMI soon.
Click
the thumbnails below to view larger images:
Model, Images and Text Copyright ©
2005 by Jay Laverty
Page Created 24 May, 2005
Last Updated
24 May, 2005
Back to
HyperScale Main Page |
 Home
| What's New |
Features |
Gallery |
Reviews |
Reference |
Forum |
Search
Home
| What's New |
Features |
Gallery |
Reviews |
Reference |
Forum |
Search