As one of
the oldest built models on my display shelves, this Harrier has
endured a lot of abuse including several moves to new homes and
the indignity of being dropped on the floor once (by me). If you
look closely at the photos, you may detect some of the damage.
Nonetheless, it has come through looking rather nice.
I built this model just after Monogram released it in
1987. At that time, it was one of the only full-production AV-8B
Harrier models on the market. Also at that time, the wrap-around
green/gray camouflage was a new thing. One of the reasons I
built this model was to do the wrap-around green/gray
camouflage.
Of late, the Monogram Harrier has been upstaged by the
vastly more expensive Hasegawa Harrier kits. The
differences between the kits make it a draw in my mind on
deciding which is better, though. Monogram is a
inexpensive, simple kit, but is very well detailed. Hasegawa
is a much more expensive and complex kit with many more details,
but it suffers in some respects due to its complexities. While I
have picked up some Hasegawa Harrier kits, I have yet to
unload the Monogram kits that I am sitting on in my
stash.
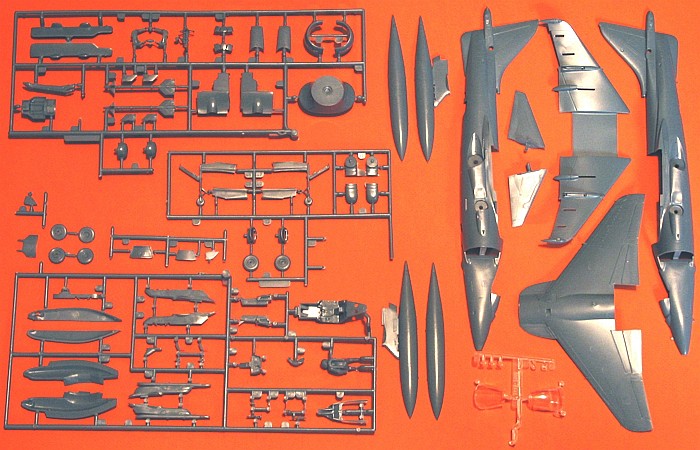
The Monogram kit is the basic run-of-the-mill offering
from Monogram. The detail is nice, the scribing is
raised, and the cockpit is fairly complete. There are weapons
provided in the kit as well as two 400-gallon drop tanks and a
choice of LIDs or 25mm gun pack for the belly. The image below
shows the unassembled kit.
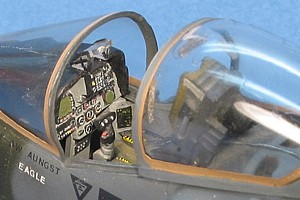
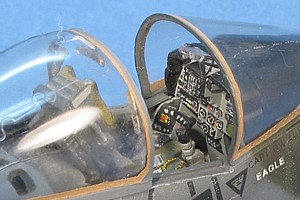
I started as usual in the cockpit. Nicely painted, the
cockpit is more than adequate at providing a representation of
the early AV-8B cockpit.
The lower part of the ejection seat is molded as part of the
cockpit tub. Only the upper seat is a separate piece. The upper
seat is molded in left and right pieces the have a significant
seam running down the middle of the rear cushion. Filling this
seam is the only real issue in the cockpit. I chose to fill the
seam by laminating a piece of 0.010" styrene sheeting over the
cushion. Using a small file, I engraved the cushion lines into
this sheet. While not as nice as I would have liked, this did
cover the seam.
Originally, I also added the full harnesses to the ejection
seat. Over the years on my display shelves and suffering from
"battle damage" when I dropped the kit, the upper harnesses have
been broken off and gotten lost. The lap belts on the ejection
seat have faired better and are still in the cockpit.
The kit provides tiny clear parts for the three rearview
mirrors inside the canopy. I was not happy with these as they
looked too bulky. I replaced these with etched metal mirrors
from Model Technologies. I drilled and installed pins
with 0.010" brass wire to hold the etched metal mirrors.
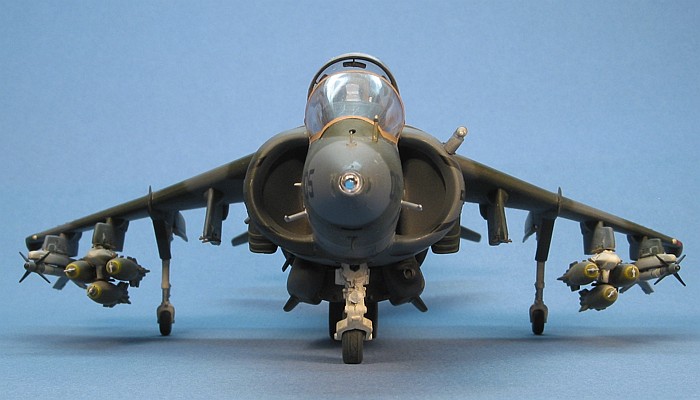
For the nose, the kit provides a clear piece to cover the
ARBS system. The trouble is that the nose tip is just an
un-detailed wall behind the clear tip. After some consideration,
I decided having nothing behind the nose glass was better than
this wall, so I drilled out the nose and painted the inner areas
in flat black. A small dot of medium blue paint on the inside of
the clear piece represents the ARBS camera lens.
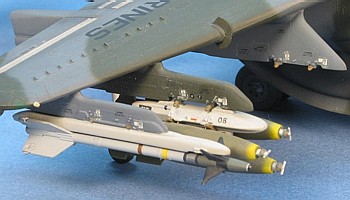
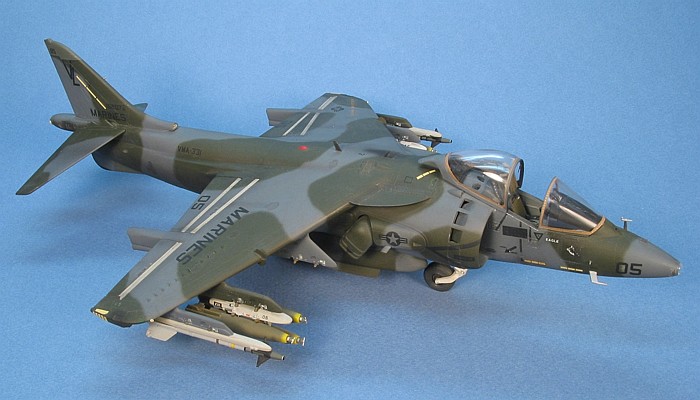
The kit provides external fuel tanks, molded in place on the
inboard weapons pylons. At the time I built the kit, it was not
common for Harriers to carry external fuel tanks, so I cut away
the kit-provided tanks and threw them in my spare parts bin. In
their place, I added sway bracing taken from the Hasegawa
weapons sets. I also added the sway braces to the other weapons
pylons. This greatly improved the look of the pylons.
I replaced the kit weapons with better-looking items from the
Hasegawa weapons sets.
- AIM-9L Sidewinder missiles
- Mk-82 500lb Snakeye bombs on triple ejector racks (TERs)
One big "gotcha" on the kit is the main landing gear. The
instructions are not very clear on how to attach the gear leg
into the fuselage. So, I did what seemed logical and found out
way too late that I had mounted the gear too high in the
fuselage. The model rested on the nose gear and wing outriggers
without the main gear touching the ground -- OUCH!
I solved this main gear problem by cutting off the main gear
flush with the fuselage and adding a spacer to make the gear leg
longer. If I ever build another Monogram Harrier, I will
not attach the main gear, leaving it loose in place until the
wings are attached. Then I can pull down on the gear to get it
to the correct position before I add glue.
The main gear issue was really more of an annoyance than
anything else. The minor updates I made to the kit made quite a
difference in the look of the completed model.
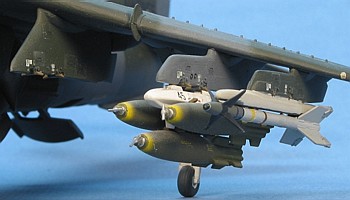
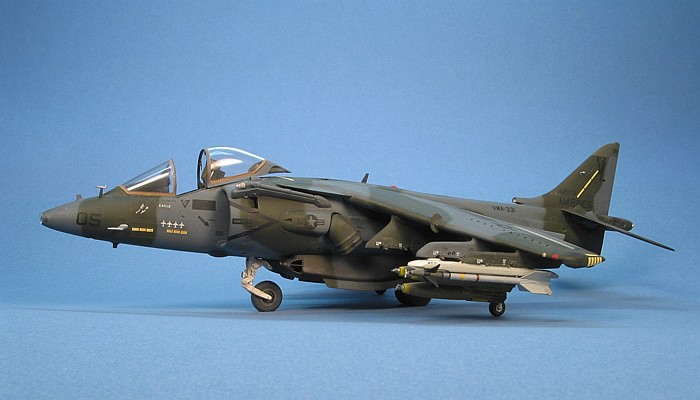
I like the heavy look of the Harrier when it is carrying the
25mm belly gun pack. The LIDs always had an anemic look to me.
Thus, I constructed and attached the gun pack to the belly. The
fit of this was quite good considering the complexity at
capturing the shapes and contours.
 I
used all Testors Model Master enamel paints.
I
used all Testors Model Master enamel paints.
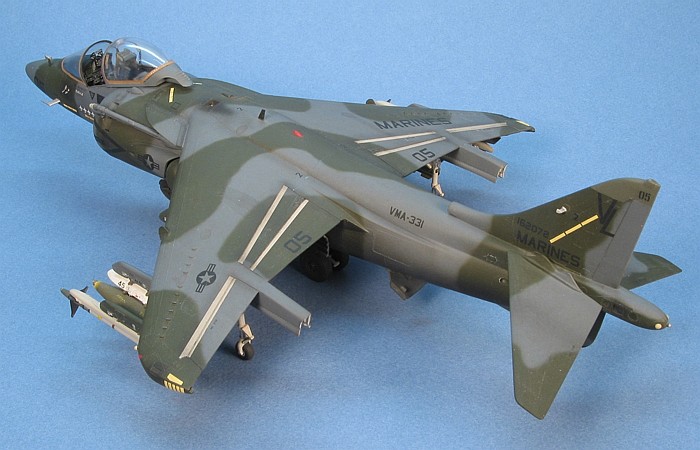
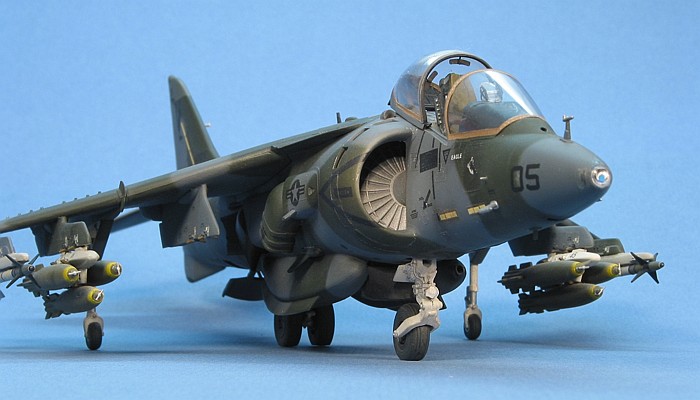
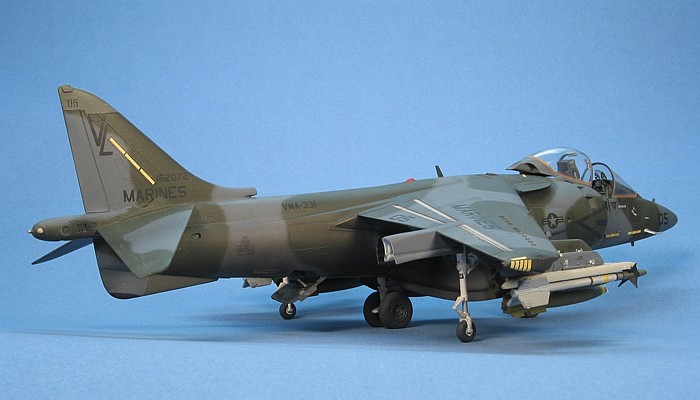
The aircraft is finished in the wrap-around scheme of Dark
Green (F.S.34096) and Dark Gray (F.S.36099). As these colors
were not available at the time I built the model, I substituted
Dark Green (F.S.34079) and Gunship Gray (F.S.36118).
They looked just as good to me.
I used the kit decals, which represent an aircraft from
VMA-311 "Killer Bees" based at MCAS Cherry Point, circa 1986.
Please do not refer to this unit as the "Bumble Bees". I found
this out the hard way one day when talking to someone who was an
ex-unit member. He corrected me in no uncertain terms.
At the time I built this model, I was big on personalizing my
models. Thus, I could not help myself from adding my own name
and call sign below the canopy. I did this using N-scale
railroad lettering -- one letter at a time. I also added a few
A-4 "kill marks" on the left side of the nose. The "kill marks"
are from a SuperScale AV-8A Harrier decal sheet.
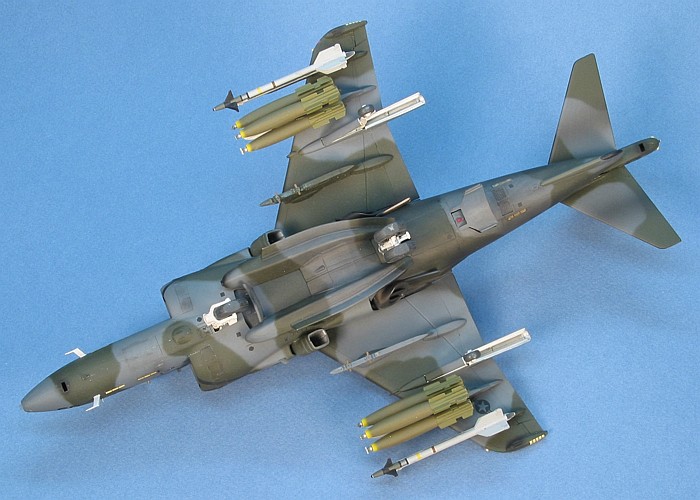
I like having lots of aircraft data and scoured my spare
decals stash to come up with anything that could improve the
looks of the model. I used some 1/72nd
scale weapons data markings to add data markings to the weapons
pylons. I liked the effect with all the extra markings detail on
the pylons.
I used a combination of thinned down enamel paint washes and
airbrush shading to weather the airframe. A final dry brushing
of silver to pop out the surface details completed this. For a
more complete discussion of what I do to weather my models, see
my posting on
"Weathering Aircraft".
This is a nice little kit that, in my mind, provides real
competition to the Hasegawa kit in spite of being over 15
years older. You can own three Monogram kits for the cost
of a single Hasegawa kit. The Monogram details are
not as fine as Hasegawa, and the scribing is raised
compared to Hasegawa's fine engraving, but I have read
some reviews that claim the overall shape of the completed
Monogram kit is better.
As I wrote at the top of this posting, I have picked up some
Hasegawa Harrier kits. But, considering the kit building
complexities, I have yet to unload any of the Monogram
kits that I am sitting on in my stash.
For me, the jury is still out on which kit I like better.
 Home
| What's New |
Features |
Gallery |
Reviews |
Reference |
Forum |
Search
Home
| What's New |
Features |
Gallery |
Reviews |
Reference |
Forum |
Search