|
Academy's 1/72 scale
B-17G Flying Fortress
by
Peter Kormos
|
 |
|
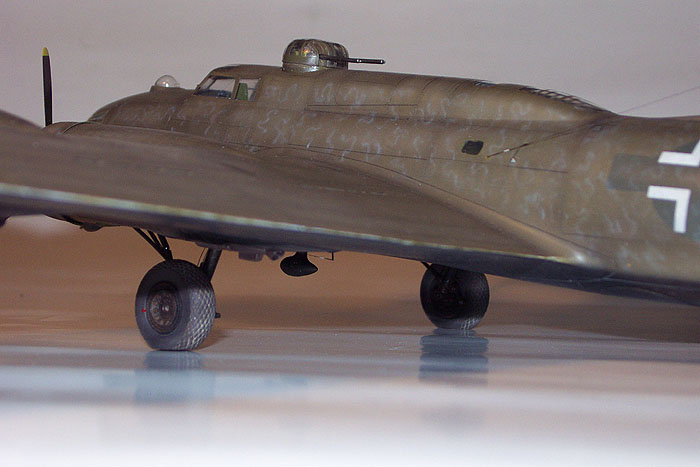
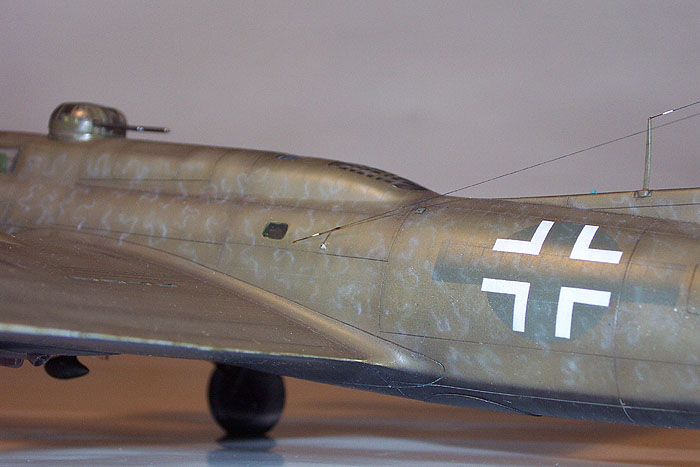
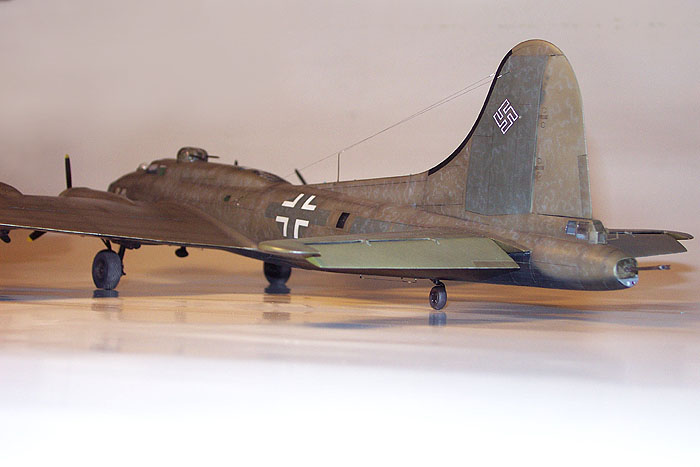
Boeing B-17G Flying Fortress
KG 200 |

Academy's
1/72 scale B-17G Flying Fortress is available online from
Squadron
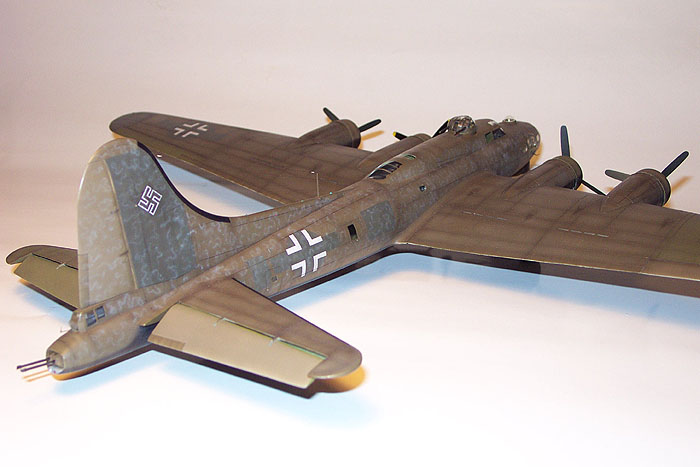
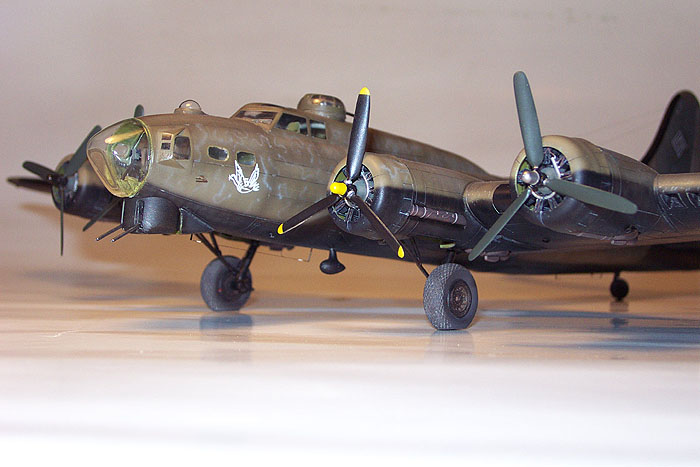
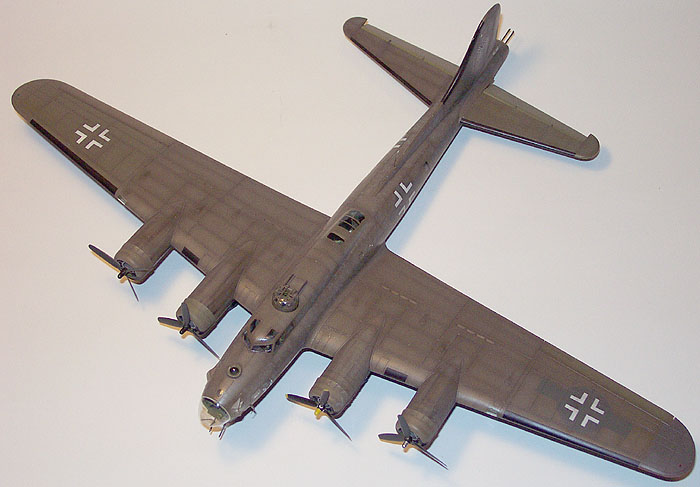
This is a 1/72 scale Boeing B-17G from Academy.
The subject I chose was a plane that served in Luftwaffe's secret unit,
KG200.
Among ordinary German aircraft, this unit operated many different
type of captured allied planes such as P-51 Mustangs, P-38 Lightnings,
P-47 T-Bolts, etc. and some B-17s as well.
These planes were used for observing allied bomber formations (sometimes
attacking wounded planes that fall behind the others), train and develop
new tactics against the bombers for German fighter pilots or to drop
agents behind enemy lines. The B-17 I selected might have the most
interesting camouflage scheme, but almost nothing is known about the
origin of the plane. I was lucky to find 2-3 archive photos, but no
serial number or US/German code letters were visible on these.
I bought this kit in spring of 2001, and started to work on it almost
immediately. After 5 months of work, I couldn't take it any more. As I
was progressing with the build, I was facing with more and more problems
with the original kit.
I don't remember all the details, but the most noticeable negative
points of the model are:
No detail in the gear bays. No firewall, no side walls, one could easily
see into the wing cavity.
All clear parts are thick, and distorting badly. To top it, the
molding blocks sometimes lean on the exposed areas, making an extra work
to sand and polish each.
Fit of the clear parts to the fuselage is really bad, and requires
lot of putty and sanding. In it's original form, the wing's dihedral
would be too high, and necessitates to insert a spacer between the upper
wing-to-fuselage joint.
Click
the thumbnails below to view larger images:
In the past 4 years, I kept trying to continue work on the model, but
I always suspended it after a few weeks because of the reasons described
above.
But about a half year ago, I decided to stop working on my current
project, and promised that I won't build anything else until the
Fortress is finished. I guess that was a good motivation, hah. :-)
Note: I did not take any in-progress photos until 6 months ago, so
unfortunately I cannot show you the work done before that.
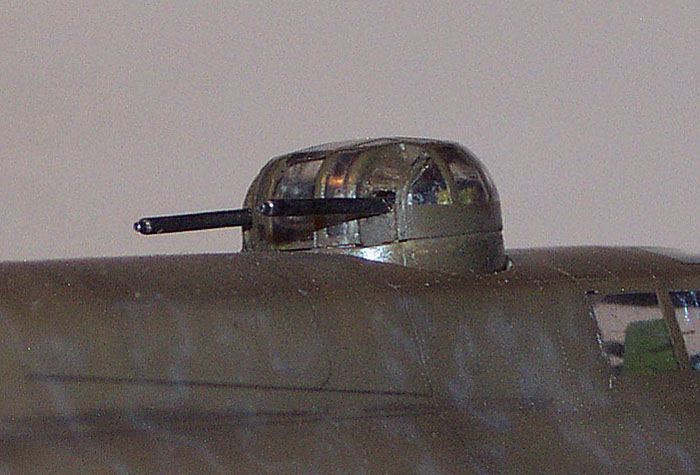
After examining the archive photos, I realized, that the original top
turret (and the kit provided Cheyenne tail) is wrong for the "early G"
version I selected, so I decided to buy another Academy kit, but this
time a B-17F version. So I could kitbash the two versions, although it
was no problem, except for the usual bad fit issues.
I liked the new tail section a lot, but unfortunately after gluing
the halves together, the seam line run right in the middle of the rear
view window.
So I had to cut out that window and replace it with clear sheet
styrene.
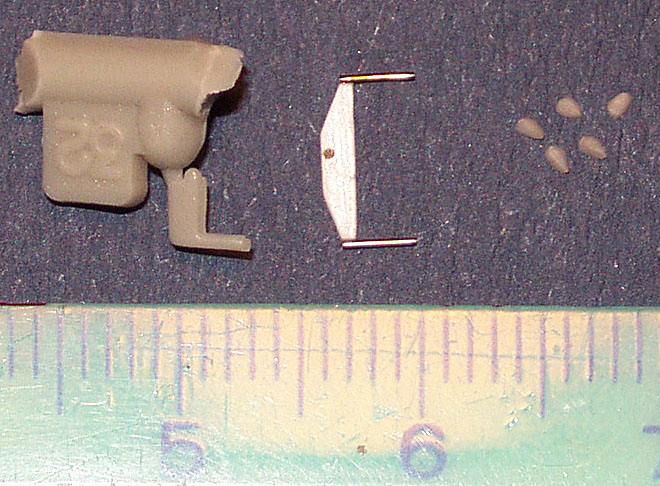
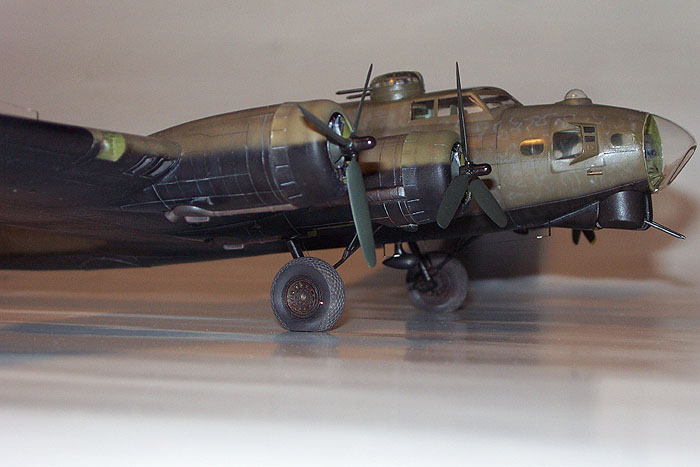
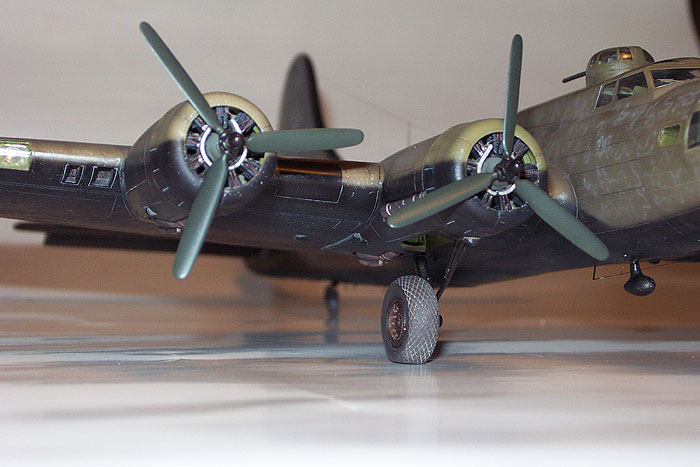
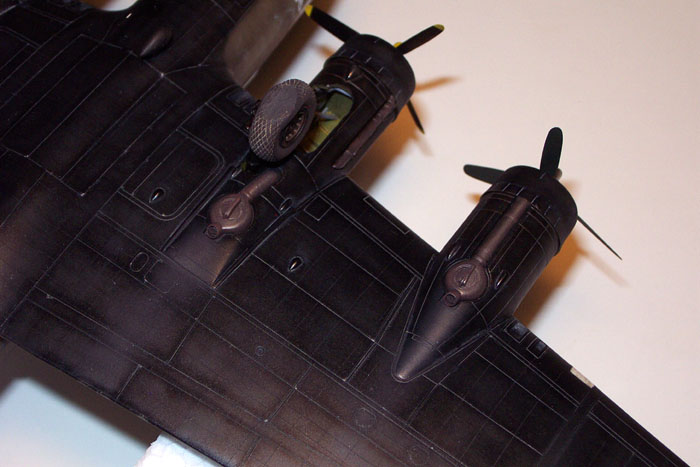
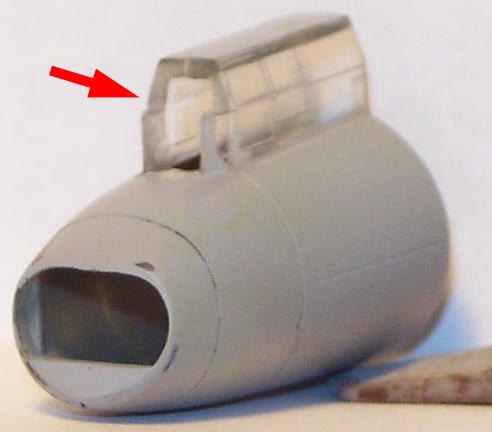
I also realized, that the kit provided, covered main wheels are wrong
for me, so I bought a True Details resin wheel set from Squadron. And
since I was ordering, I bought a Squadron Vacuum canopy set, too. I read
a lot of time, that TD wheels are molded too flat, but after some
careful sanding on the sides, I ended up with a pair of tires that
pleased my eyes better, and it didn't take more than a minute, or so.
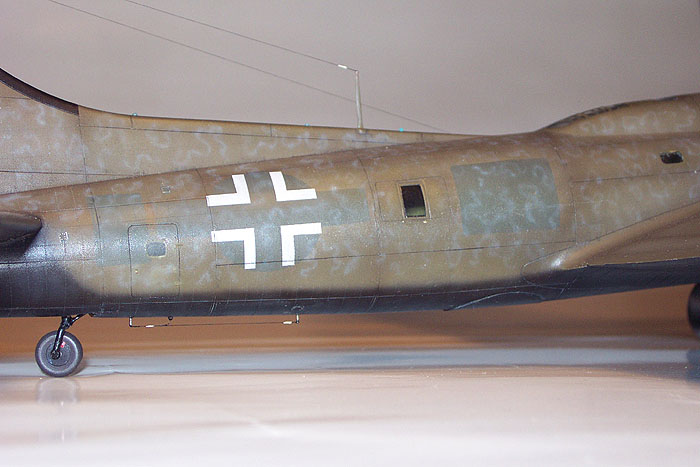
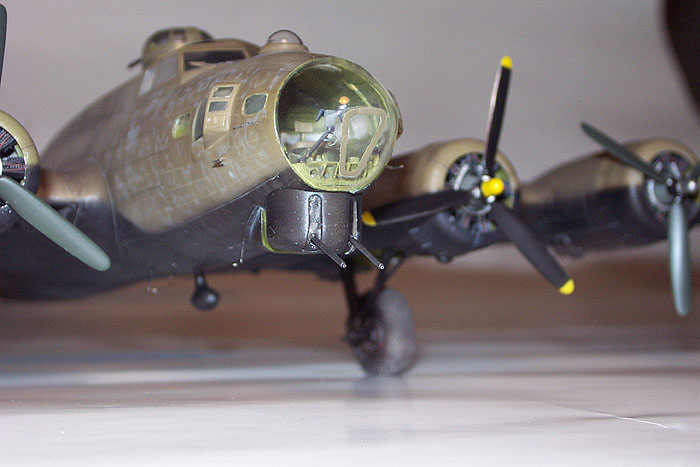
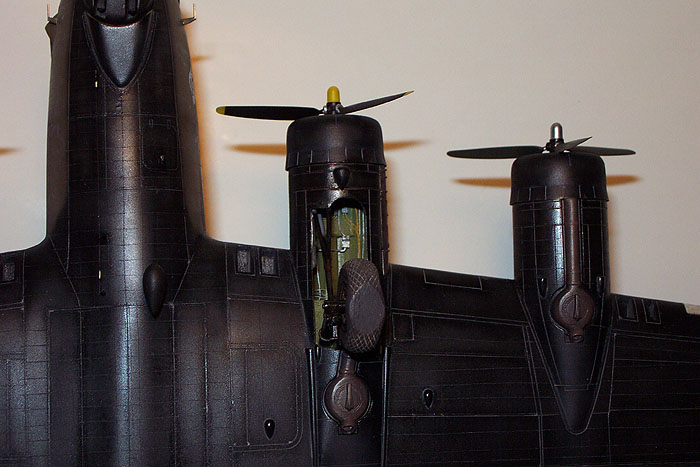
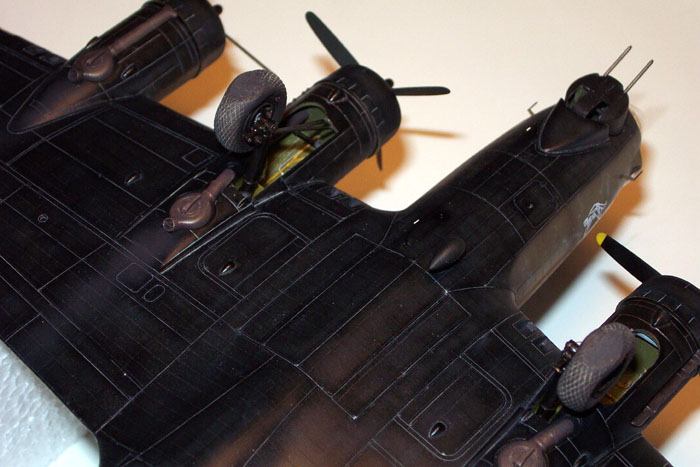
On the exterior, I replaced the navigation lights, made the openings for
the air intakes in the wings' leading edges, new gun barrels were
created from hypo needles, ignition harnesses were added to engines,
elevators cut from stabilizers and repositioned in dropped position,
dressed up the turbo superchargers, made new pitot tubes and even added
doorhandles to hatches and little patches to cover bullet holes.
Click
the thumbnails below to view larger images:
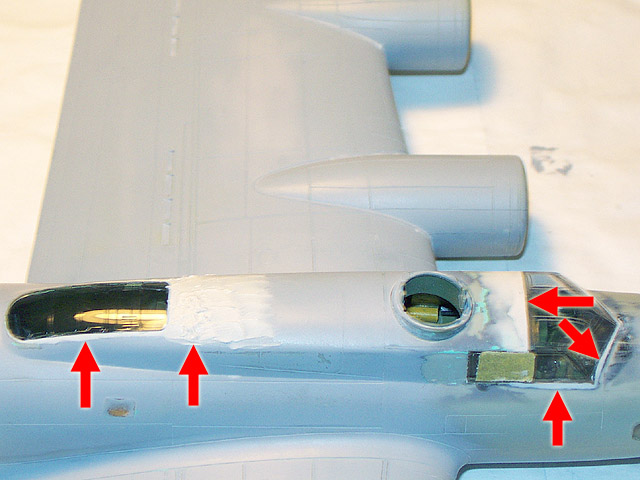
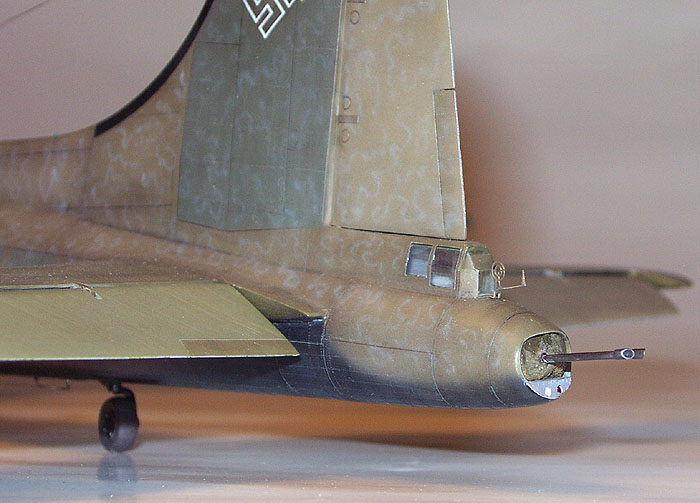
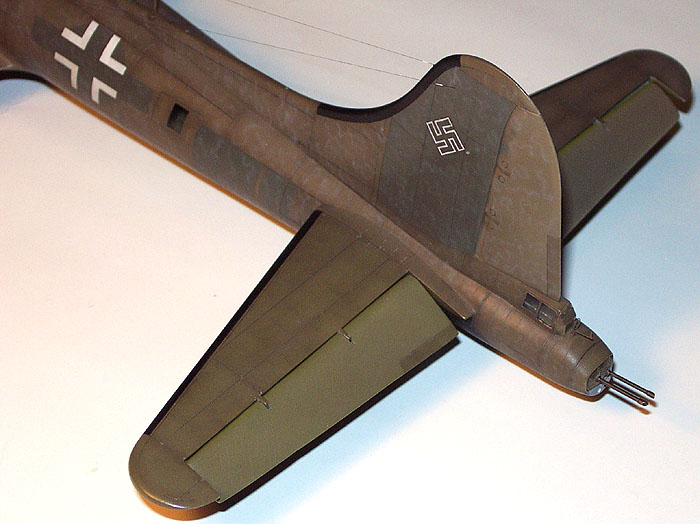
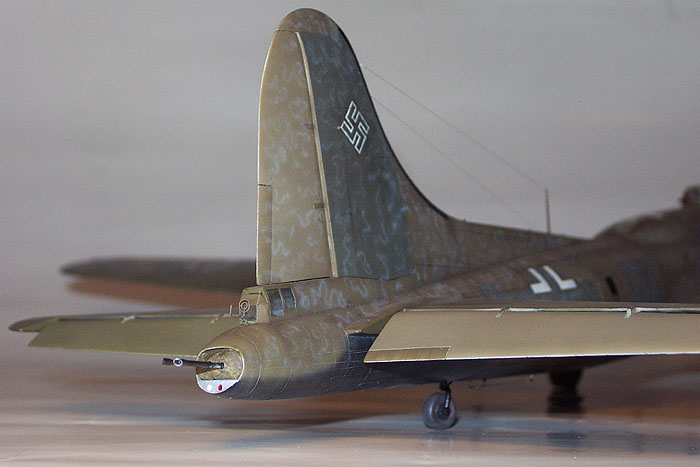
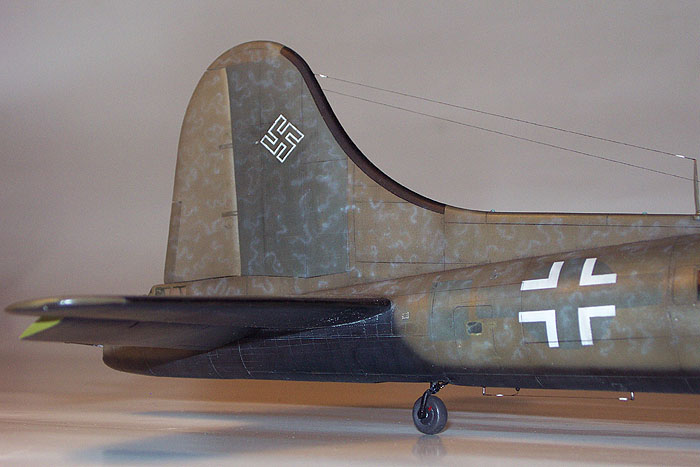
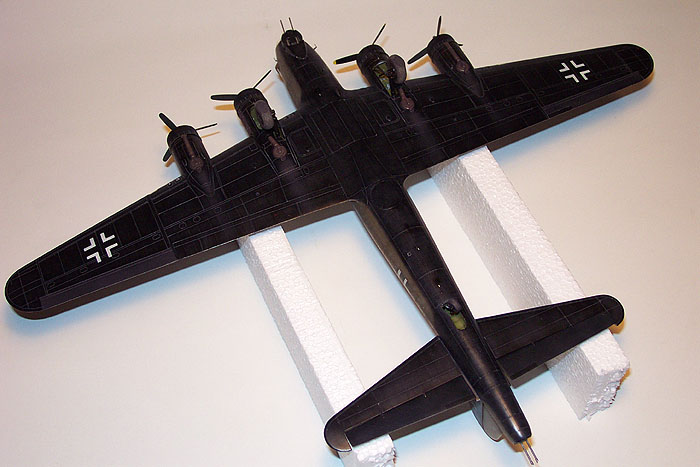
A noteworthy modification to this KG200 version was the deletion of
the ball turret. It was a pleasing thing not to use the original parts
and blank the big hole on the belly with beer can cut to size.
Over the years, I let myself shy away from vacuum canopies, after always
reading: "hard to work with", "easy to screw up, and there's only one"
kind of comments on the forum. But this time, I gave a try to the
Squardon canopies, and I was super amazed. I was always careful, and it
paid off. It was easy to remove the parts from the sheet, easy to sand
the excess, and after a dip in Future, I was definitely smiling... So
guys, if you think you're not a beginner, but haven't tried it, then
just buy one and use it. You won't regret that!
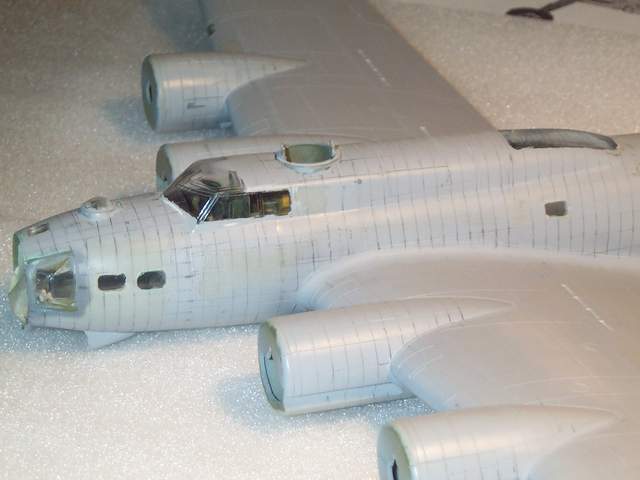
Somewhere in the early stages of construction, I bought an Eduard
interior detail set, but somehow I missed the PE set for the gear bays.
So I had to sratch build the details there based on my references. Now
the bays are quite busy, although some more bits could be added to get
closer to reality. I also added a lot of detail to the radio room, and
other internal areas, but those are lost forever after the fuselage
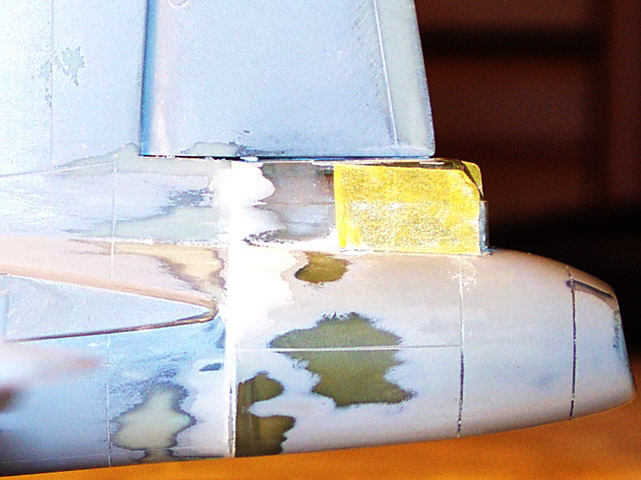
halves were glued together. After all the seams filled, sanded, covered
with Gunze Mr. Surfacer, and sanded, and puttied, and sanded, and
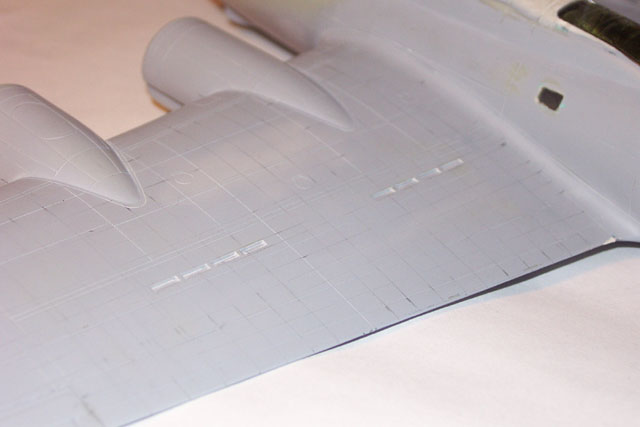
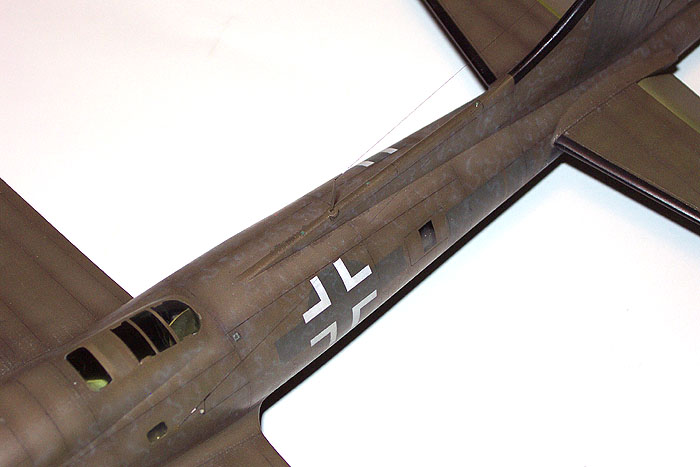
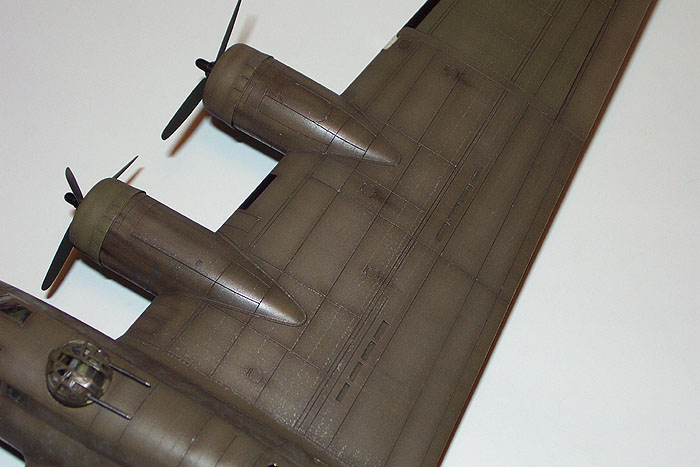
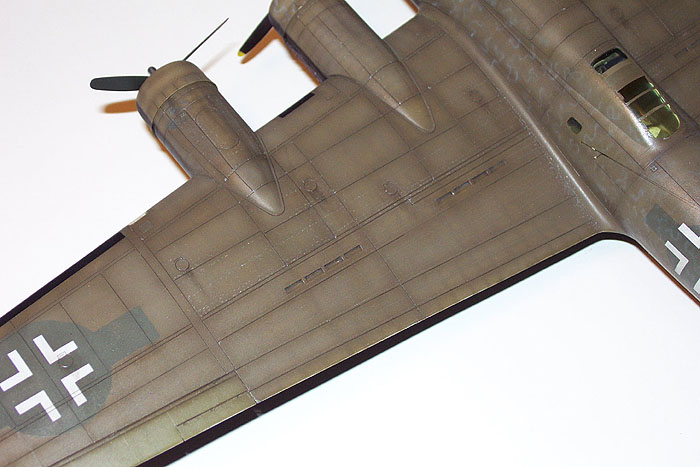
puttied, and sanded, I enhanced the exterior surfaces with rivet detail.
For that, I used the line drawings of the AJPress B-17 book, and a home
made rivet making tool, similar to commercial ones.
Click
the thumbnails below to view larger images:
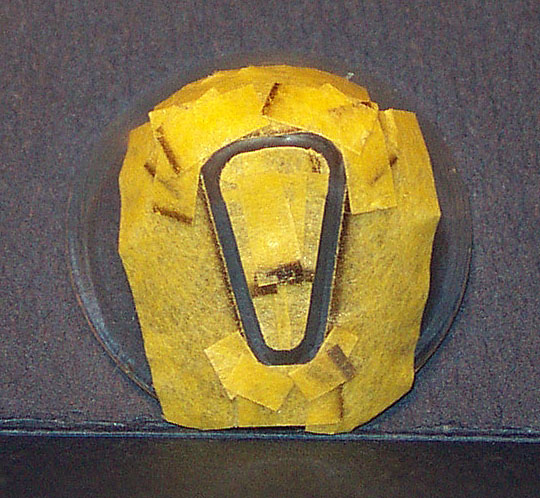
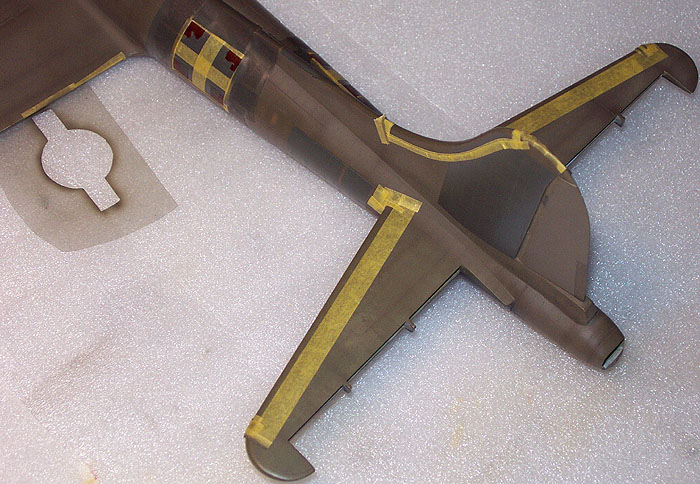
All colors I used for painting were Gunze acrylics, except for the
black that was a Tamiya acrylic color. Masking was achieved with a
combination of Tamiya tape, artists' masking foil and microscale masking
liquid.
Click
the thumbnails below to view larger images:
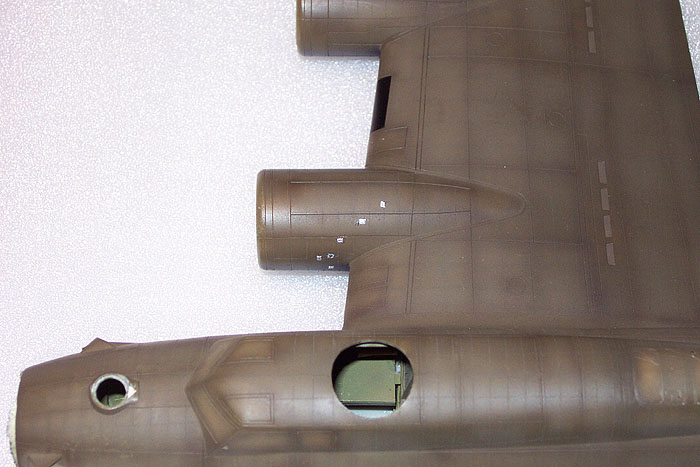
Upper surfaces were first painted in olive drab. Then some panels,
and bigger components were masked and painted in a mixture of US
interior green and olive drab. Then, I used RLM71 dark green to
overpaint the original US markings on the supposed locations. The
fuselage mottle was painted with RLM65 light blue, and then finally the
black was sprayed on to the lower surfaces.
One note about the mottle: After checking the reference photos, I
noted that except for the fuselage and part of #2 engine cowling, I
couldn't see the mottling on other engine gondolas. So I decided only to
apply the mottle to these areas, and not to the wing's upper surfaces as
other profiles state.
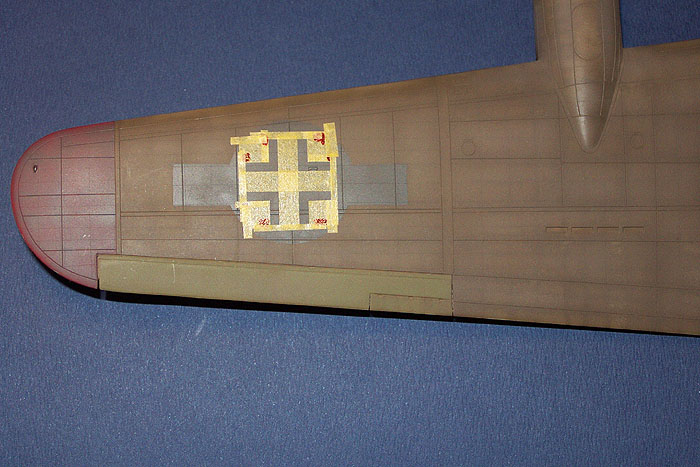
After a layer of clear varnish, the decals for the swastikas and nose
art were applied. All other German national markings were sprayed on
with the help of hand cut masks.
Acknowledgements
I'd like to thank Thomas M. Lore for the help about the model and
Sándor Fülöp for checking his copy of Hikoki book (check reference
section) for this plane.
Wow, after all those years, finally I finished another B-17 ... being
the 3rd Fort in my collection. It was a hard project, but as far as I
know, the Hasegawa offering is not any better alternative. I think the
biggest challenge about this kit is to detail and paint all 4 engines
one after the other. It can burn you out easier than to mask all those
little windows. But now I have another Academy kit waiting for to be
worked on. Oh my... what have I got into... :-) Anyway, I already know
how it would look like: a plane with much cooler camo than this one, but
that time in US markings...
-
Squadron/Signal: Strangers in a
strange land Vol. 2.
-
Squadron/Signal: B-17 Flying Fortress
in action
-
AJPress: B-17 Flying Fortress, ML 90
Note: Although I don't have it, as far as I know Hikoki Publications:
"KG200 The Luftwaffe's Most Secret Unit" book has the same photos of
this plane as Squadron/Signal: Strangers in a strange land Vol. 2.
Click on the thumbnails
below to view larger images:
Images and Text Copyright ©
2005 by Peter Kormos
Page Created 11 August, 2005
Last Updated
11 August, 2005
Back to
HyperScale Main Page |
 Home
| What's New |
Features |
Gallery |
Reviews |
Reference |
Forum |
Search
Home
| What's New |
Features |
Gallery |
Reviews |
Reference |
Forum |
Search