|
With regards to "Uncle
Jules"...
Kitbashing a
1/48 scale B-57G
by "Bondo" Phil Brandt
|
 |
|
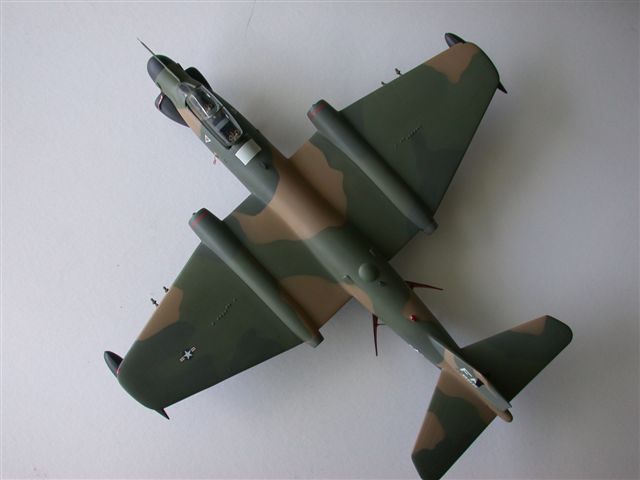
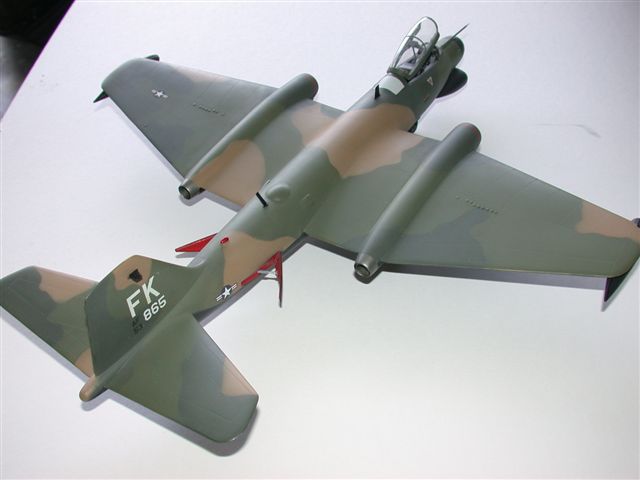
B-57G |

HyperScale is proudly sponsored by Squadron
Ever since 1971 when Boy WSO Bondo’s RF-4C squadron at Shaw had two
“Compass Site” B-57E realtime data relay birds attached, he’s never
forgotten their distinctive Hoover vacuum sound during ground
operations. One of these two airframes remains, now on display at Pima
County Air & Space Museum; good guys Bob Penny and Jerry Hughes bought
the farm in the other one while practicing simulated single engine
approaches in ‘71. But I digress.....
In a 1969 project called “Tropic Moon III” sixteen B-57Bs were withdrawn
from Phan Rang AB in RVN and sent to Martin in Baltimore for
modification to an unusual configuration to be known as the B-57G.
Eleven of the newly modified B-57Gs deployed, as the 13th bomb Squadron,
to Ubon, Thailand in 1970, remaining there until withdrawn in 1972, when
they were transferred to the Kansas Air Guard in Topeka. In 1974 they
were ferried to Davis Monthan AFB for eventual destruction. It’s
interesting to note that, of the five Gs that remained in the US for
aircrew training, one was lost (fatal) during single engine testing,
just as in the loss described above at Shaw AFB.
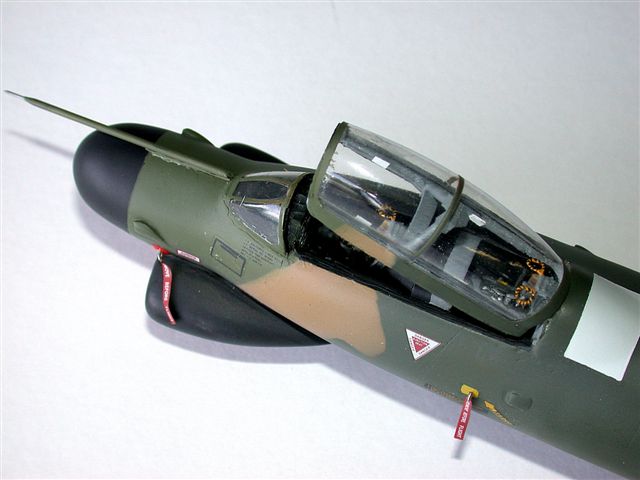
The ungainly appearance of the B-57G was more than offset by its
accurate bombing ability, courtesy of new IR, LLTV and laser systems
housed within the platypus-like nose fairing. It was the first aircraft
that accomplished its own laser designating for its own weapons; the G
carried two Mk 82 LGBs under each wing and four Mk 35/36 “Funny Bombs”
in the bomb bay.
The Plan...
Anyhow, there this
curmudgeon was, with slightly less than $200 invested in the typically
clunky, idiosyncratic Collect-Aire B-57B/B-57G all-resin kit. I had
originally considered modifying the not-bad Falcon vac kit, of which I
had two, into a G, but in the end figured there was more to be gained in
doing the labor-intensive Collect-Aire kit.
Then, “Uncle” Jules Bringuier struck, beating Airfix by a year in
releasing a quality 1/48 injected Canberra kit with nice resin details.
Now here was an exciting new possibility for kitbashing a G. Since
Jules’ Canberra offered details and engineering much superior to the
limitations of the Collect-Aire release, I decided that I would simply
graft the forward fuselage of the Collect-Aire kit onto the Canberra. I
picked up the razor saw and crossed the Rubicon...
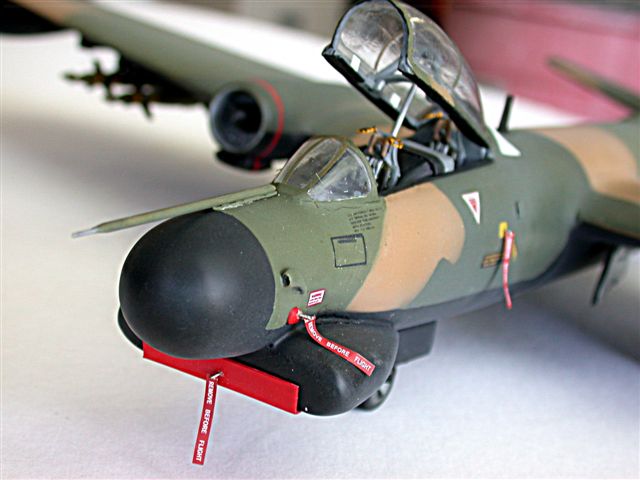
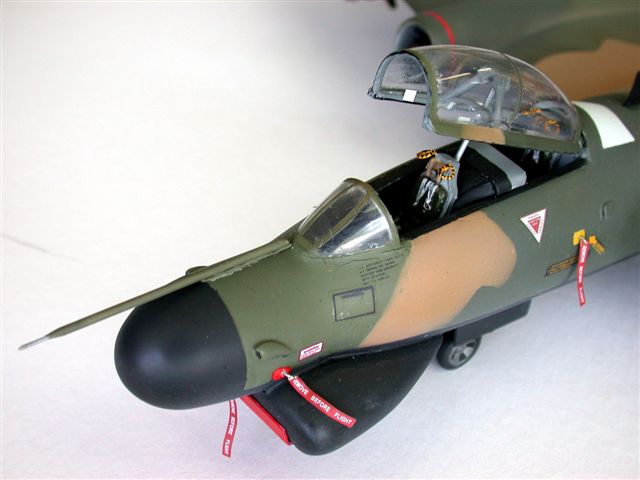
Cockpit
Joining the forward and aft fuselage
sections was a relative no-brainer, but first the large, two-seat G
cockpit and canopy structure had to be essentially scratchbuilt.
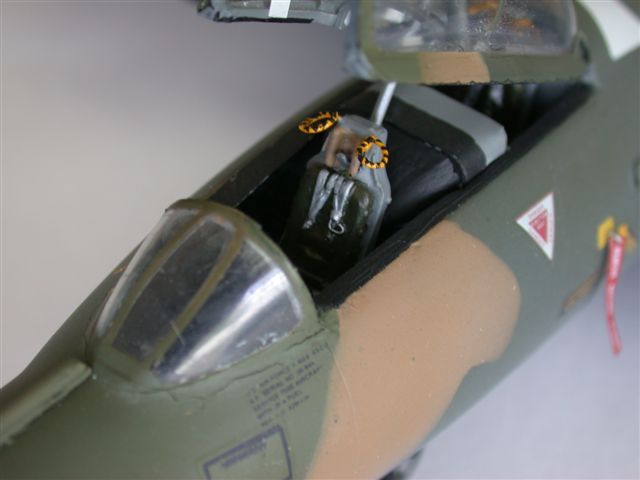
Since the Collect-Aire
cockpit was much too simplistic for such a large canopy area exposed to
view, I cloned the more accurate Falcon vac tub in resin, creating a
master by adding Black Box console panels and sidewalls from an F-14
set. BTW, industrial strength Dremelling of the Collect-Aire sidewalls
was necessary to fit the new tub; have I ever mentioned that the Dremel
is by far the most valuable tool in resin kit construction? :) My friend
and consummate modeler, Fotios Rouch, kindly created accurate masters
for both instrument panels, as the Collect-Aire parts for same were
useless. Escapac seats are from True Details, with upper ejection
handles created from copper wire. The Collect-Aire vac canopy was used,
but the resin canopy frame, air conditioning ducts and canopy raising
structure were all scratchbuilt.
Click on the thumbnails
below to view larger images:
Balance
A significant amount of
lead shot around the nosegear bay was necessary to balance the very tail
heavy airframe, even with the weighty resin forward fuselage. I even had
to drill out the G radar nosecone to add more lead. On top of this, the
Classic Airframes nosegear strut (used with the Classic Airframes resin
nosegear bay) was at least 3/16" too long, giving a weird looking,
nose-high look to the model, whereas most pix of B-57s show a
distinctive nose low attitude. The strut was shortened appropriately,
using a brass pin for strength.
Click on the thumbnails
below to view larger images:
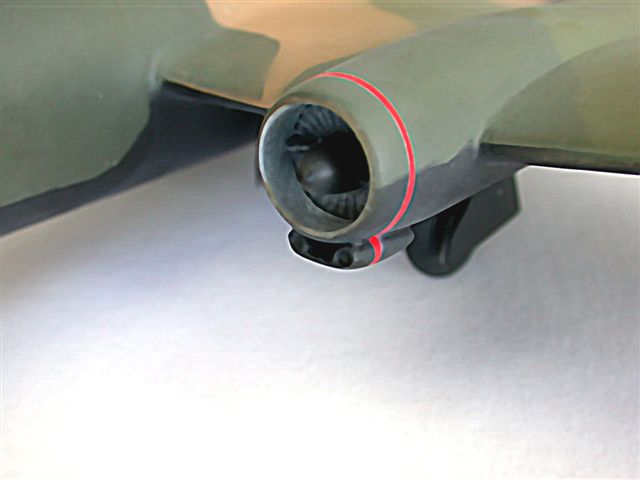
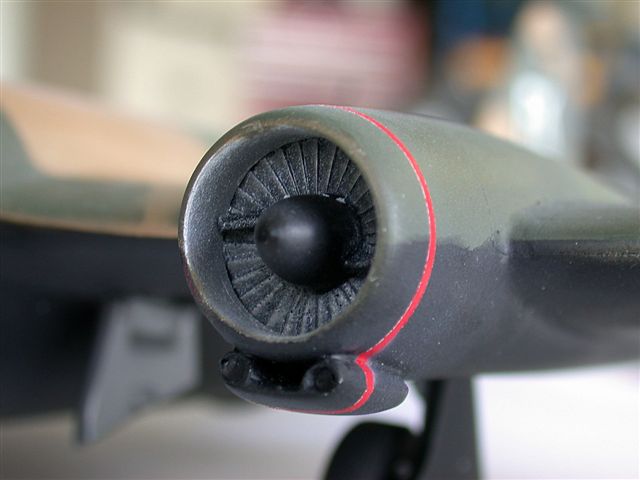
Engines
The Canberra engine intake diameters are too
small for the later, more powerful B-57 engines, so the larger resin
intakes from the Collect-Aire kit were grafted to the Classic nacelles.
The compressor faces were cut out from the Collect-Aire intakes, and
separate resin ones from the Falcon vac kit were adapted.
Click on the thumbnails
below to view larger images:
Details
.jpg)
Distinctive “rams horn” air intakes flanking the radar nosecone were
scratchbuilt as were two small air ducts on each side of the aft
fuselage and the long, offset pitot boom. The G, as in other later B-57
models, uses larger oil cooler fairings under the forward portion of the
engine nacelles. I scratchbuilt mine and cast ‘em in resin.
Click on the thumbnails
below to view larger images:
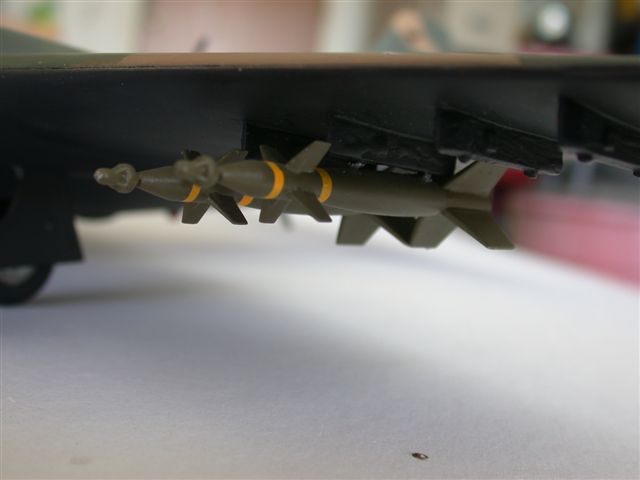
Resin underwing weapons
pylons were adapted from the Collect-Aire B-57, but the way oversize tip
tanks were not; the Classic Airframes ones are correct. Mk 82 LGBs are
from one of the Hasegawa weaons sets.
Click on the thumbnails
below to view larger images:
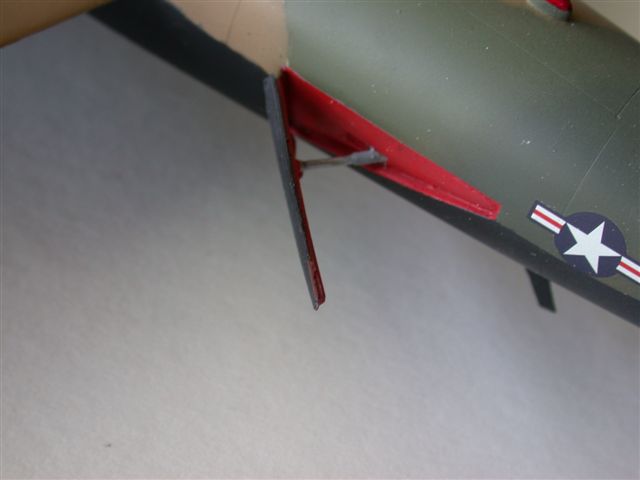
Another big
difference between Canberras and B-57s is the installation, in the B-57,
of speedbrakes. Accordingly, the Bondo Industries Weirdness Works
Division cut out and adapted those of the Collect-Aire kit to the
Classic Airframes injected empennage.
Circular “bumps” on the
empennage top and bottom were also cannibalized from the Collect-Aire
kit. Upper and lower rotating beacons were scratchbuilt, as were all the
various new antenna blades.
 Extensive
sanding eliminated many panel lines; they were rescribed. And, yeah,
yeah, Bondo knows that panel lines differ between the Canberra and
B-57s. Extensive
sanding eliminated many panel lines; they were rescribed. And, yeah,
yeah, Bondo knows that panel lines differ between the Canberra and
B-57s.
The three-tone SEA cammo,
plus black undersurfaces, render this discrepancy rather moot IMO; as we
used to say in USAF, “close enough for government work”!
.jpg)
Many iterations of the ol’ Blue Acryl...wet sand...lacquer primer
routine were accomplished until the airframe surface took on a dull
shine. The laborious SEA camo scheme was done in Polly Scale acrylic.
After initial basic patterns were airbrushed, each color area had to be
remasked and the edges of the tape slightly raised to gain the properly
delicate overspray pattern in a 1/48 model.
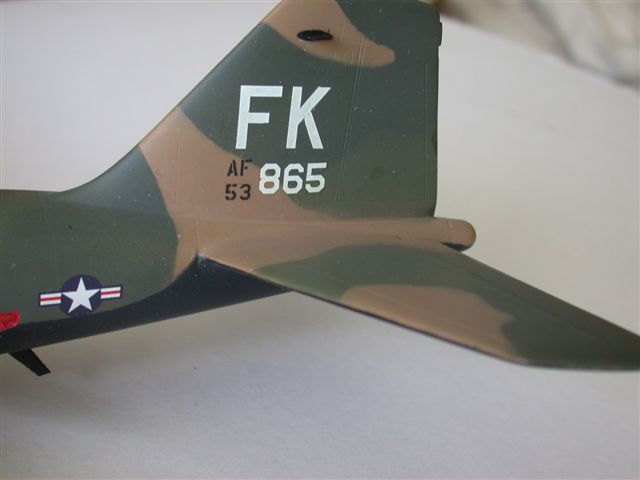
Squadron codes and
national insignia decals are from various Aeromaster sheets and
represent the aircraft in the beautiful two-page artist’s rendition of
an inflight G in the Bob Mikesh (Schiffer) B-57 book. A light coat of
greatly thinned Testor’s acrylic clear flat was dusted on to blend in
everything. I may do a panel line wash later, but was in a rush to ready
the model for the Kansas City Nats.
As so often happens when Bondo Industries does a major kitbash, an
injected version of said project appears as if by magic!
I welcome Jules’ B-57 kit
announcement and hope that he eventually releases a G.
Click on the thumbnails
below to view larger images:
Model, Images and Text Copyright ©
2006 by Phil Brandt
Page Created 11 September, 2006
Last Updated
21 February, 2007
Back to
HyperScale Main Page
|
 Home
| What's New |
Features |
Gallery |
Reviews |
Reference |
Forum |
Search
Home
| What's New |
Features |
Gallery |
Reviews |
Reference |
Forum |
Search.jpg)
.jpg)
.jpg)
.jpg)
.jpg)
.jpg)
.jpg)
.jpg)
.jpg)
.jpg)
.jpg)
.jpg)
.jpg)
.jpg)
.jpg)
.jpg)
.jpg)
.jpg)

.jpg)
.jpg)