|
Classic Airframes' 1/48
scale
Messerschmitt Bf 109
by Phil Hale
|
 |
|
Messerschmitt
Bf 109 V4 |

Classic
Airframes' 1/48 scale Messerschmitt Bf 109 A is available online from Squadron
Here I am again
doing more than one Classic Airframes kit at a time. I have built
most of the recent Classic Airframes releases and I must say that
each new kit seems to be better and better. The early Bf 109 kit is
without doubt the best so far.
I know that Jules from Classic Airframes put a lot of effort into
this kit, and it paid off in spades. The detail in the cockpit is
excellent as is the scribing. The modeler is provided with different
two cowlings, beautiful resin wheels, two seats, three propellers
and a nice photo-etch sheet complete with seat belts. I won’t go
into this further as Kevin and Brett both covered this area well.
I encountered
similar challenges to those that Brett discussed. I would suggest
grinding down the inside of the upper wing quite a bit. There is
plenty of room to do this, as the wings are fairly thick. It would
be better the do this than to weaken the top the gear well. This
will also give you some wiggle room when gluing the upper wing to
the lower. Take care in positioning the wheel wells as this can
cause problems trying to align the landing gear later.
I would also suggest thinning the backside of the cockpit sidewall
inserts. This will help when positioning the seat in the cockpit
floor.
My cowlings fit well but I did have to fair them in with a little
filler and re-scribe the lost lines.
The photo-etched radiator screen needs to be trimmed a little for a
good fit inside the radiator scoop.
I was able to clean up the resin “wooden prop” and it looks great.
The overall fit of the kit was exceptional. It would rival that of
the major Japanese companies. Even the fit of the canopy was great.
I have built many 109’s in my modeling career and the canopy has
been a problem area on some but not here.
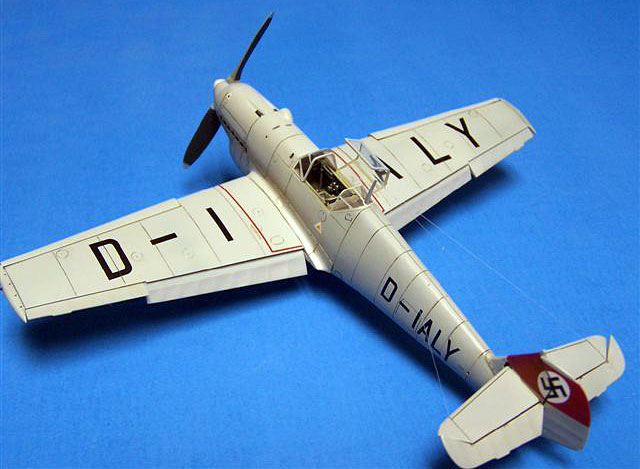
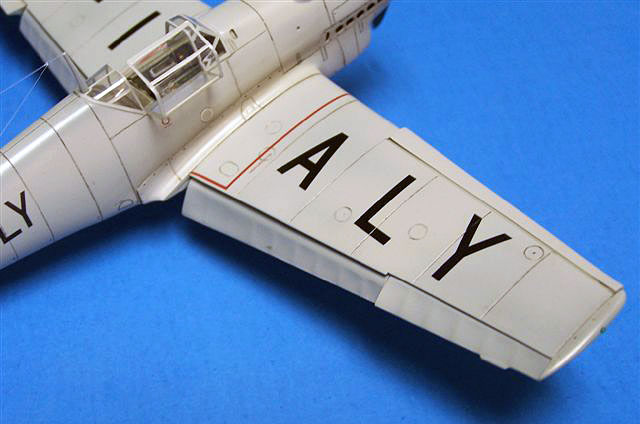
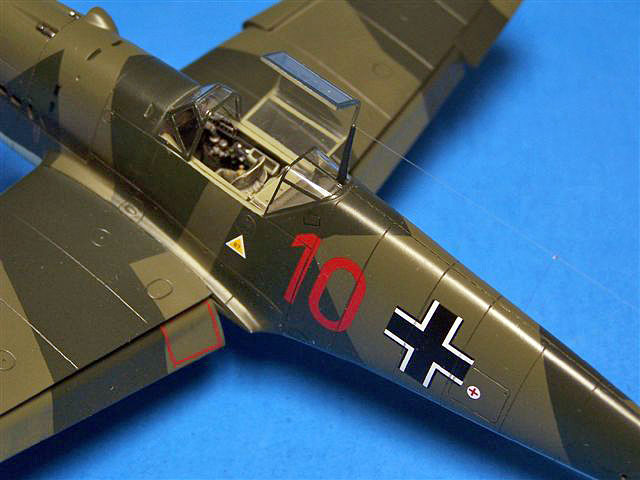
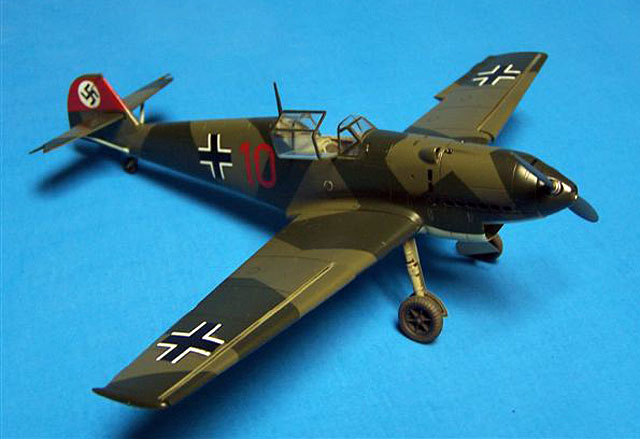
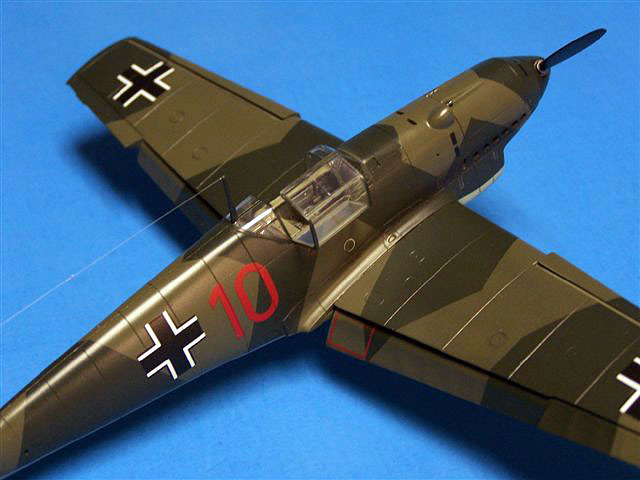
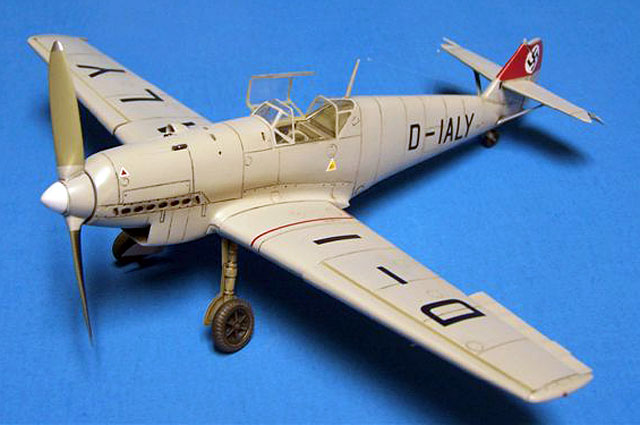
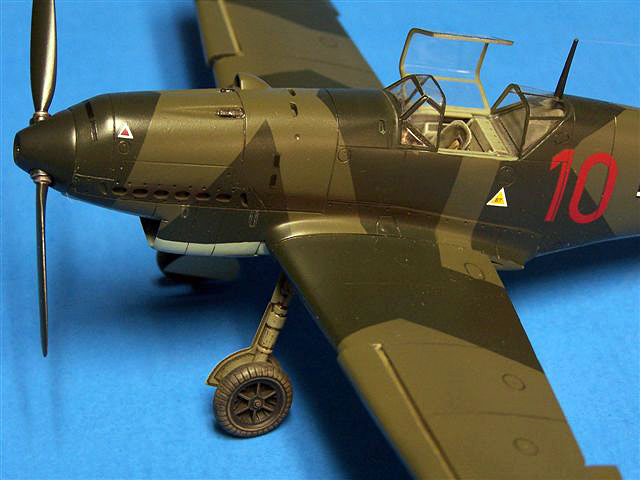
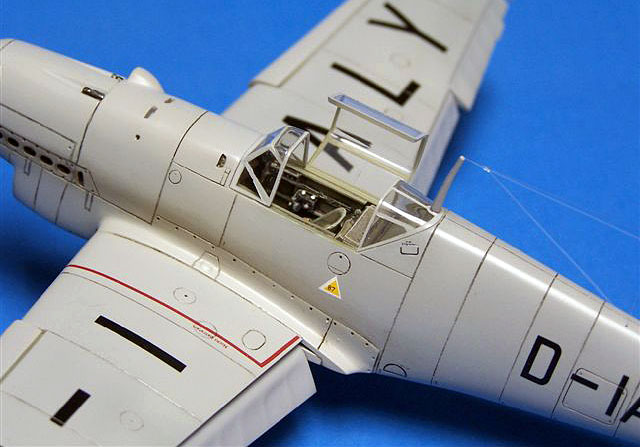
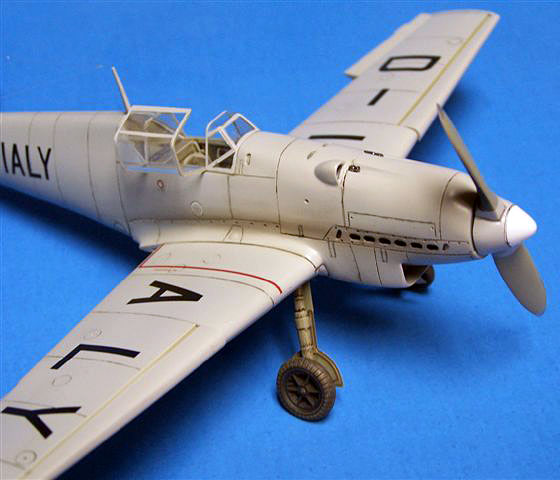
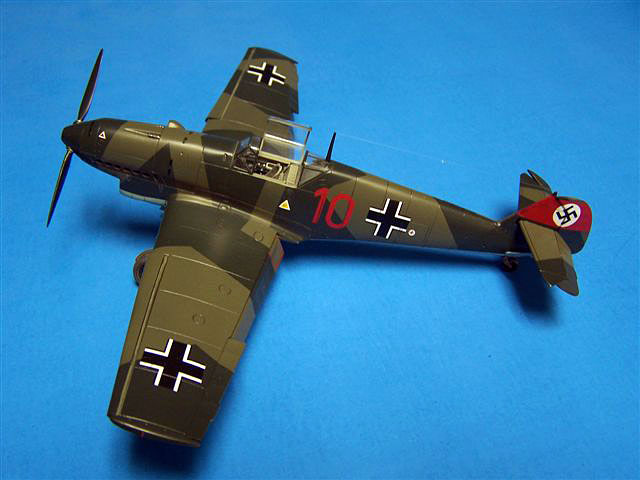
I chose the V4
prototype and “red 10” for color schemes.
I know that there
are those that will disagree with my choice of RLM 63 for the color
on the V4 but I had no photos showing this aircraft. Classic
provides the modeler the option to paint it this color. I think it
is very striking with the red band on the tail. I also realize that
there are two variations of RLM 63. I chose the gray color instead
of the grayish-green RLM 63. I won’t get into that debate because
this is the beauty of this hobby. I can build mine one way and you
can build yours another. I really enjoy seeing the different
interpretations of the same subject.
 I
chose ModelMaster RLM 63 for the prototype and that on Red 10 the
RLM 70 is Tamiya, RLM 71 Gunze and the RLM 65 is ModelMaster. I
chose ModelMaster RLM 63 for the prototype and that on Red 10 the
RLM 70 is Tamiya, RLM 71 Gunze and the RLM 65 is ModelMaster.
“Red 10” was
painted in the standard splinter scheme of 70/71/65. The red band
and red 10 add color to another wise drab scheme.
The decals are of
the quality that we’ve come to expect from Classic Airframes. It
took a little setting solution to get the tail band to lay down
well.
I can truthfully
say that I absolutely enjoyed building these models and can’t wait
to get into another one. I have learned to appreciate the sleek
lines of the early “Jumo” 109’s.
I would like to
express my thanks to Jules for his dedication to our hobby and for
always raising the bar on “limited run” kits.
Also, hats off to Kevin Martin, Lynn Ritger, and Brett Green for the
wonderful work on their 109’s. They were an inspiration to me.
Click
the thumbnails below to view larger images:
Model and Images Copyright © 2006
by Phil Hale
Page Created 03 February, 2006
Last Updated
21 February, 2007
Back to
HyperScale Main Page |
 Home
| What's New |
Features |
Gallery |
Reviews |
Reference |
Forum |
Search
Home
| What's New |
Features |
Gallery |
Reviews |
Reference |
Forum |
Search